

Alexander Grabovetskiy, woodcarver, School of Woodcarving · Published 2020
What does it mean to hit the high spots when you carve?
Quick answer: In part 11 of Venice Room workshop 67, I took number three, then said I like to work on a clean surface. In other lessons I said it beside a spoon and a long bent, then a rasp and a chisel, and a rubbing finger.
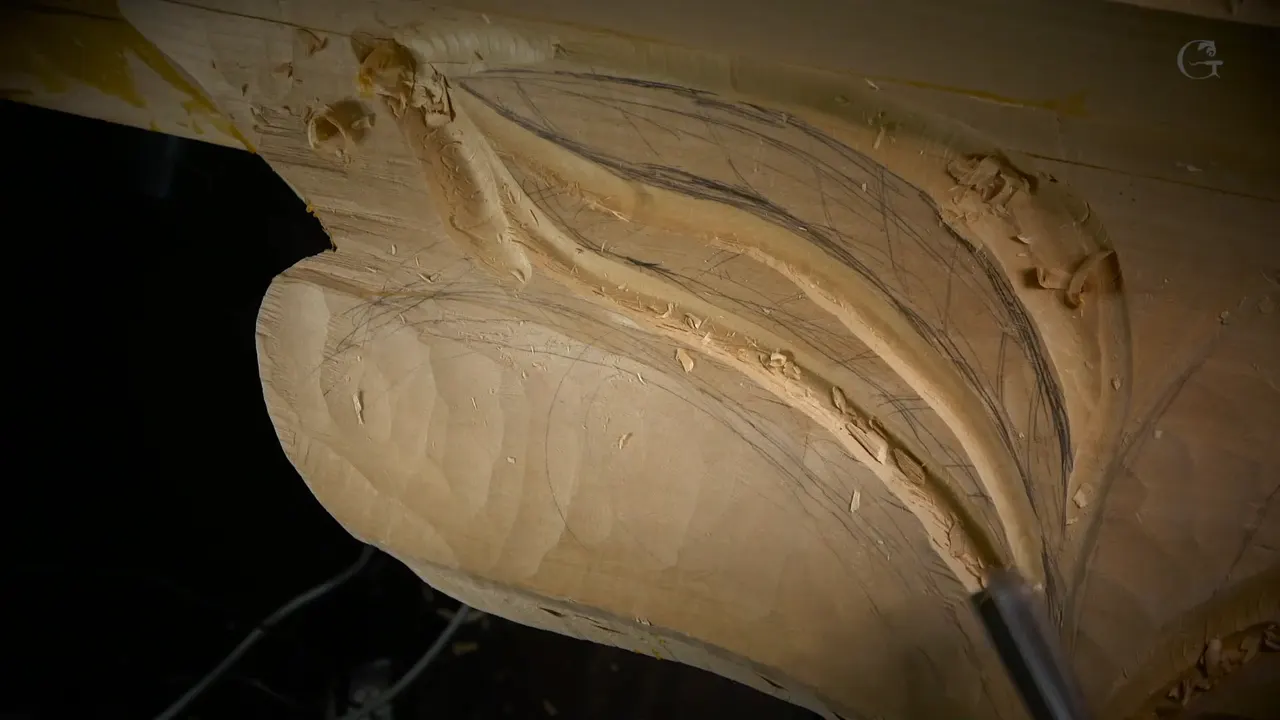

This page follows one phrase of mine, "high spots," from part 11 of Venice Room workshop 67 into the lessons where I said it again.
Part 11 comes first, since the phrase is in it. Then the page goes tool by tool, each lesson linked, and names what I ran over the wood, from a spoon and a long bent to a chisel and a rasp, and even my finger. Wikipedia has a short page on wood carving if you want the craft in general.
What was I doing in part 11?
The part opens with "Okay, so that is probably deep enough." My next line was "I can shave a little bit sides here. I need to attack that from opposite side." After that, "Not really convenient because my way, ceiling is on my way."

"Okay. Let me do on another side, and got to be mindful of the grain because I really can't attack that from opposite side." A plan followed. "Maybe I should use a smaller tool at first." The next thing was "a lot less problem, and then blend in."
Of the cut I said, "See, it's just along the grain. It's not safest. But it doesn't mean it's impossible, okay? Everything is possible. Just a little more challenging, but it's okay."
How did I check the line before I cleaned the surface?
"Okay, and now I need to make sure this is the line really fluent," I said. My plan was "to just lower down a little bit my tool and let it just hit some of the spots." Then "it's not flowing well from initial cut, and now it flows much better."

The stem came next. "Wonderful. So, I've got a pronounced stem." Of a tool, "What I could do, I could actually use a back bend, maybe about quarter inch or so" (6.35 mm), "six millimeters" (0.24 in), "and ride along at the top of this middle line."

Next the size: "Maybe this quarter inch is a little too big." And I said "Maybe I can just hit the side like that and gradually move that direction. And also that side."

Where do the high spots come in?
Then, "And that is wonderful. So next step would be just establish overall movements. Okay? But before I do that, I have to clean up little bit the surface. Okay? Because right now, it doesn't make appealing look."

The plan was "So, I need to clean up a little bit surface, create my clean canvas. Okay? Let me use number three and get rid of some sharp ridges."
About my hand: "Yes, I know I'm kind of covering with my hand, but what can I do?" Then "That's the only way I can do." Then came the words "Well, actually, not true. I could use something different. What I could do, I could take, let's see if number three is going to work out or not, and go that direction."

Next, "It will do the trick," and then "It actually does." Soon after: "Okay. I don't want to go too close to my middle line, but at least I was able to hit some high spots, which doesn't really create big of a difference, but I like to work on a clean surface. I like clean surface."
Last came the next tool. "Okay, going to clean it with 7 millimeters" (0.28 in), "number 11. Okay. And I'm going to just try to remove, just ride on top of those fibers, really without pressing."

In part 12, "I will just remove some of the ridges right here, too." Then "Nice and long cut." Later in it came "Again, just rising right on top of those fibers without pressing too much. Just really easy cut."
Can a small gouge touch them gently?
A number three shows up in Workshop 62, part 12. "It's not that easy, even if it looks simple." Then "I'm using just number three and create a better transition upward or more cleaning, I would say."

The pressure there was "Barely just arising on the hills," and "without creating too much pressure." Also "I need just a canvas. I need to clean up before I can draw."
Workshop 5, part 11, has another number three: "I could actually use the same number three" to "shave them nicely." And then "you can see I'm just hitting the high spots. So which means it's not really smooth." My wish was "I want to see it really smooth."

Number three comes up again in Workshop 16, part 7, with "the right position" for the attack and "kind of knock a little bit the side of it." Further on came "Now go both directions," then an order to knock them down, "which I don't really need."
A spoon turns up in Workshop 58, part 12. I named "a spoon number five." Its job was to get closer to the line. A little later: "See? It's becoming a molding."
A long bent comes in Workshop 63, part 5. About the transition: "I need a really smooth transition, and I have to ride right on the edge" and "feel it if it transitions nicely or not." Then "Sometimes long bent helps a lot to hit those high spots. Number four, that's what I'm using. Long bent." And "See, it's just really smoothly going up."

Over in Lily Box 11, part 13, about the lily flower, I said I could use some kind of gouge for them, maybe number eight back bend, "and shave it a little bit."
Does a bigger tool belong here?
Workshop 24, part 11, says it plainly. Of a big tool: "I can just ride pretty much, and control the height, how deep I go." And "if I ride really almost flat to the bevel", then I can catch them, "almost like a planing. Okay?"

I went on, "So I can get really nice cuts, really beautiful surfaces." And "it works just like a plane, or a planer I should say. Or hand plane." A hand plane has its own page on Wikipedia.
Over to workshop 31, part 11, a check by touch came first: "double-check how gradual it moves because sometimes it's impossible to see, but it's possible to feel it." Then "I can use the same tool just as a plane."
A chisel turns up at workshop 105, part 3, and I named it by its number and its width. "it's just number one chisel, but this one is three inches." Three inches is about 76 mm.

It was going to ride, and "I can actually gradually remove what I'm going to catch. Almost like planing, if you like woodworking planes." Also "you can see it leaves really, really nice and beautiful shavings." Its finish was not final: "Although it's not the final, final finish yet."
Workshop 131, part 1, has the big number 2. "I'll take care of it with the big number 2. And I just ride like this, see?" Afterward, "that way, I know my movement is really gradual."
Part 1 of workshop 141 is about a long pass. On a continuous cut I said what happens is that you catch them, "if you're holding that at the same angle, and you create even cut on the bottom." Then "Here was a low spot, so I need to change the angle."

What if a gouge is not the right tool?
Workshop 11, part 4, brings a rasp. "Now, I'm kind of happy with the overall feel, but I think I missed something right here." The tool: "I need to probably take a rasp" to find them, "because I kind of don't like how it feels right here."
Workshop 89, part 3: "And that is exactly what I said. So on the camera, you don't see that high spot, but I can feel it with the finger." The same part names "that rasp."

Workshop 82, part 6: "See? With those rifflers, or whatever you call it," I said I can take them out, and "create beautiful form." A moment later came "Although, I just damaged the edge, which I shouldn't."
Workshop 46, part 9, has a tool I called "a little too big, maybe." Then "About maybe half an inch, I would say" (12.7 mm). After it, "I can feel that with the finger. Just really nice."
Part 12 of Furniture Panel 21 says the same about touch. "I know by the eye you sometimes can't even catch the stuff like that, but you can feel it, okay, by finger." And "when you just rub your finger" you can feel them, high and low.

At Lily Box 8, part 5, "let me feel how that edge looks like." A flatter gouge was my probable pick, to "try to hit just the edge to see if there's any high spots I need to take care of." Then "Yep, it looks like there is one. There is another one."
Workshop 100, part 7, has "let me also use a number seven upside down" to look for them. "Both sides, of course." And in workshop 19, part 5: "I want to keep the edge nice and smooth, but I don't know if it's smooth or not yet." "If I'm using tool that way," I said I can probably hit them, "and see, and also feel it."
What movement was I after?
Workshop 16, part 8: "What I need is just semi-clean surface movement. That's what I'm after, okay? Just overall movement. But I really don't have to worry about how clean and nice in shape that is." The next line was about getting rid of them.
Workshop 36, part 4, has "All I worry about how gradual movement on this line is." Then "Just knock down" every one of them.
Workshop 6, part 8: "And I will check high spots. And yes, I do have high spots." I also said "I want to see a really gradual movement."
What about the ones I wanted to keep?
Furniture Panel 19, part 11, has "So, it's a good idea sometimes to just mark high spots and low spots." Then "Let's say I have to make the decision where is going to be my highest spots."

Lily Box 4, part 2, has "that's one of the reasons why I'm using markers to mark my high and low spots." Part 1 of that lesson has "a few spots we have to identify as high spots. We're not going to touch them now."
A router plane was my plan in Furniture Panel 16, part 1. About the spot, "some kind of island, like a spot." And "Later on, I can remove it, but I'm not going to touch it for now, for I can rest my router plane on" them.
Part 8 of Furniture Panel 15 is about the background. "Essentially, what we're doing, we're just creating all the background all around first, before we're going to create all the details, because important to keep those high spots for the router plane to travel on."
Hazelnuts 2, part 2: "I will keep those guys, the husk itself, untouchable."
How do these lessons line up with workshop 67?
The table puts workshop 67 first. The first column says where I was, the second what I took or touched, and the last gives a short line of mine from the same place. Measures in the table text follow my figure first, then millimeters or inches.
| Where I was | What I took or touched there | My words |
|---|---|---|
| Lesson 67, part 11 | Cleaning the surface before the movements, with number three | A clean surface |
| Lesson 62, part 12 | A better transition upward or more cleaning, with number three | On the hills |
| Lesson 5, part 11 | Shaving them nicely with the same number three | Not really smooth |
| Lesson 58, part 12 | A spoon, a number five, to get closer to the line | A molding |
| Lesson 63, part 5 | A long bent, number four, riding right on the edge | Smoothly going up |
| Lily Box 11, part 13 | Maybe number eight back bend, to shave it a little | A little bit |
| Lesson 24, part 11 | A big tool, used to control the height | How deep I go |
| Lesson 105, part 3 | The chisel, which I said is going to ride | Nice shavings |
| Lesson 131, part 1 | Number 2, the big one, ridden the way I showed | Really gradual |
| Lesson 11, part 4 | A rasp, because I did not like how it felt | Right here |
| Lesson 82, part 6 | Rifflers, or whatever you call them, for a beautiful form | Damaged the edge |
| Panel 21, part 12 | My rubbing finger, since the eye sometimes can't catch it | By finger |
| Panel 16, part 1 | A router plane, with an island I would not touch | For now |
Where can you watch the full videos?
Every lesson named above sits inside one of my courses. All of part 11 is in workshop 67, with workshop 66 before it and workshop 68 after it, and workshops 62 to 73 are in Part 6 of the Venice Room. The gouge, chisel, rasp, pencil, acanthus, olive, hazelnut and ceiling pages linked here are for reading. To watch the full videos, start here.
How it's done
- Say what the surface needs. Before the overall movements, I said I have to clean up the surface.
- Take number three. My plan was number three, to get rid of the sharp ridges.
- Stay off the middle line. I don't want to go too close to my middle line, I said.
- Work without pressing. Number 11 was next: I would try to go over the fibers, really without pressing.
Frequently asked questions
Which tool did I take in part 11?
Number three. Then I said, it actually does.
What was my plan after number three?
I planned a number 11 of 7 millimeters (0.28 in), and to just try to remove.
Which big tools did I name?
Workshop 24 has a big tool ridden really almost flat to the bevel, which I said can catch them. Workshop 105 has a number one chisel of three inches (about 76 mm).
How do you find one you do not see?
What to carve next
- Venice Room workshop 67 lesson
- Venice Room workshop 66 lesson
- Venice Room workshop 68 lesson
- Workshop 62 to 73 course
- Venice Room lesson 24
- Venice Room lesson 105
- Venice Room lesson 131
- Venice Room lesson 11
- Venice Room lesson 63
- Furniture Panel lesson 15
- Furniture Panel lesson 21
- Lily Box lesson 4
- Carving Hazelnuts lesson 2