

Alexander Grabovetskiy, woodcarver, School of Woodcarving · Published 2020
What does a wood carver mean by "reposition"?
Quick answer: In Venice Room workshop 67, part 10, I said I would measure with calipers, and that I could not show you because it would take me repositioning. In other lessons the word was for a camera, a table, clamps or a light.
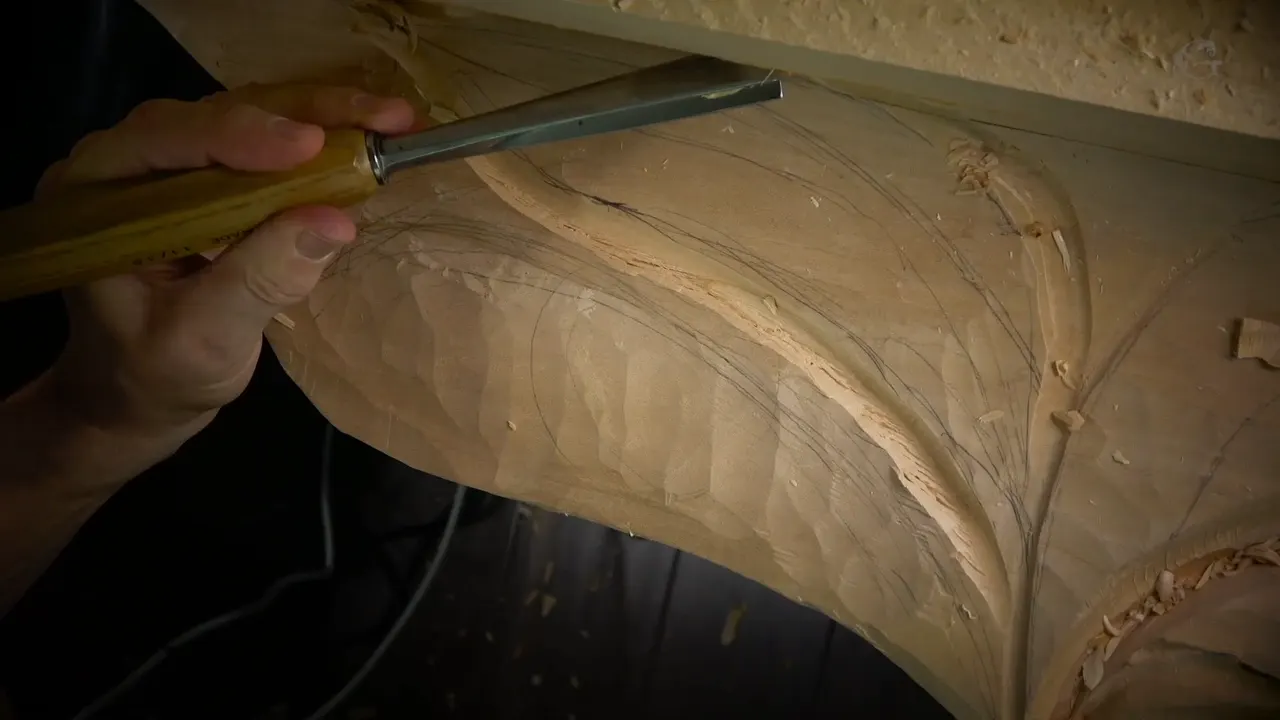

This page follows one word of mine, "reposition," from part 10 of Venice Room workshop 67 into the lessons where I said it again.
Part 10 comes first, since the word is in it. After that the page goes lesson by lesson, each with a link, and names what I was moving: the camera, my table, clamps or the lights. Wikipedia has a short page on wood carving if you want the craft in general.
What was I checking in workshop 67, part 10?
The part opens on a look at the whole. "Okay, so that is how it's going to look overall," I said, and then "it looks like it's deep enough." Later I planned to excavate a little deeper. For the moment, "it looks good." Another line was "Maybe just a little bit deeper right here."

Next came the opposite side. "I have absolutely no problem, so I have to just reference the opposite side," I said. About the space, "And I left the same space, actually, whatever I had on the opposite side to that point. Okay. So it would look equal."
A plan to draw followed. The question was my own, "how I want to develop this," and "that's the question." I named the subject too, "that's the movement, the middle line."
Where does "repositioning" come in?
The word comes in the next lines. "I kind of have to be equal to-- Well, not equal, but it still has to just kind of be readable by other side," I said, and the spot "is actually about the same point what I've got on the other side." Then: "But I'm going to measure, okay? I'm going to measure."

Here come the words this page is about. "I'm not going to be able to show to you because it is going to take me repositioning, but I'll just use calipers, okay? I'll just measure with the calipers and reference."
What I said right after was "And it looks like I actually got that right on the money, pretty much right there. So just by eyeballing it the first. Okay. So I'm actually safe." I also planned to fix this, put it "right there," and make it "my center line."
How did I handle the width of the middle line?
On the width, "it is not really wide," and "shrunk little bit this way." "Otherwise, it's not going to make sense," came next. Then "I have to chop a little bit of this."

The tool was "just maybe a bigger version," with "much quicker" to follow. "Number 11, 30 millimeters" (1.18 in) "gives me a fight. And tap it from opposite direction also." My verdict on that tool was "That's much better now."
A mallet remark came next. "Although I should use a heavier mallet. I used only 12 ounces" (about 340 grams), "but I should use 30 ounces" (about 850 grams). On the direction of the pass, "And yes, I am cutting against the grain." Then "That's the only way I can do right there."

Maybe I could "actually excavate a little deeper around here." Then "So now I'm ready to draw. And I'll use just a HB pencil." Of the pencil, "It's not about the pencil I use, okay?"
Next, "Well, actually, I even don't need to draw anything. I can probably just do by eye." As for the middle line, "it has to be pronounced, okay? Same like on the opposite side what I did."

Then the tool sizes. "I have to take number 11 and 10 millimeters" (0.39 in). "I could actually use bigger." "Let me try 18 millimeters" (0.71 in), "if that's going to work or not," was the next size. The middle line would be "around quarter inch" (about 6 mm). Then "And I could probably go deeper."
Part 11 opens with "Okay, so that is probably deep enough." Next is "Not really convenient," and later "got to be mindful of the grain because I really can't attack that from opposite side."
Why did I leave the camera where it was?
Workshop 42, part 9, has an apology. My sharpening was not on film, "because the camera position, I don't want to spend my time and reposition everything." Then "Please forgive me for that." That is in lesson 42 of the Venice Room.

Furniture Panel 18, part 4, has a longer one. "I am breaking some rules, which is not because I like to break the rules, but just because of the camera position, and I really don't want to reposition and waste my time." I added "But logically, if you can avoid breaking the rules that would be probably much better." And with "sharp enough tools," I said, "it should not be a problem."
Over in Hazelnuts 5, part 3, I said "I know I'm carving against the grain, but in this case, it's just because the positioning of the camera." I did not want to "waste the time repositioning everything." In the same stretch I gave a depth, "about three-quarters of an inch, about 19 millimeters all the way down."

In Acanthus over Moldings 2, part 3, I said "Don't use the tool like I do." The camera was my reason: "position of my camera, so I really don't like to reposition." I called it "Not too convenient, okay." My advice was to "rotate the piece" and change "the angle how you attack that."
The Tray of Blessing, lesson 7, part 3, has "It's better to attack from another side, but, you know, I don't wanna reposition it."

At Venice Room 57, part 8, "My apologies that I'm covering with my hands, but there is absolutely no other way." I did not want to spend time right now repositioning the camera, and "there is no reason."
Part 6 of workshop 66 has the camera as a choice. "I know you don't see it, and please understand," I said, and "I guess it possible to reposition the camera and show you that, but really you don't need to see it because it's a simple stuff." Of the work, "All I do, just a dig in."
When did I move the camera so you could see?
Lesson 84, part 8, puts the word inside a question about showing my work. "now, how am I going to show to you what am I going to do?" I needed to start developing concaves and convexes, and "I need to reposition somehow without make it problematic for me." Then, "the best position for now."

Part 11 of that workshop starts with "Now I'm happy." Then "let me reposition the camera just to try to show you from a different point." About the new position, "probably" and "a little better view." The tool after it was "5 millimeters, number 11" (0.2 in).
Part 3 of workshop 126 has a table in it, and "I want to make sure you see what I'm doing." Then "Maybe I have to turn my table." I wanted the camera "where you would see those concaves and convexes." After that, "I think it's much better for you to see."

Grape Onlay 1, part 3, has "Let me try to reposition" and "I don't wanna lose you," and I said "I'm still here." I had turned my table toward one of the cameras. "I wanna make sure you see that spot right there," I said.
In Grape Onlay 3, part 2, I said "just reposition this camera and you can see how it looks, uh, from the side." The elbow came up, "forgive me," because "right now it's kind of awkward position of the camera."

A different thought is in Grape Onlay 5, part 1. "You know what, I think I need to reposition my camera somehow, otherwise it's almost impossible for me to see what I'm doing. Or maybe it's all right."
Lesson 91, part 9, has it as a plan. I apologized if you could not see my work, "but later on you'll see it." Once I develop this side, "I have to reposition completely," and "That way you'll be able to see."
What else did I reposition besides the camera?
Part 12 of workshop 86 comes with a drilled spot. "Not too convenient. So I have to reposition the way it's going to be easier for me to work." I was at "still the same spot," and "that is the spot I drilled right here. Just looking from different point of view."

Later in that part I said I had repositioned, and hoped it would be easier. "I apologize again and again," I added, and "that's the way most convenient for me to reposition quickly."
Workshop 76, part 11, opens with a move of the piece. "Let me reposition it like this," I said, and "Again, see the advantage of it?" Then "I really love it. I love that it gives me ability to attack and work on that piece from any point." Later in that part, "reposition it back." This is in lesson 76.

A clamp comes up in Hashemi 17, part 1. "I need to take this clamp and reposition it. Maybe I'll adjust the clamp on this side because it's on my way." In Grape Onlay 9, part 1, I said "I think I'm gonna reposition this clamp right here," and "Gonna push it slightly just in case, you know, to make it little tighter."
Short lines turn up too. Workshop 82, part 2: "Maybe reposition slightly like this." Hashemi 36, part 2: "Reposition a little bit, and let's work on the flower."
What about repositioning a light?
Venice Room 61, part 6, has "I need to change the light because I can't see." It went on, "unless if I going to reposition that light somewhere else. Or attack from opposite side, and maybe that way you're going to see." That is in lesson 61.

Lily Box 2, part 13, has "And I repositioned my light. Okay. Done." "I placed that at the front of me and try to angle it this direction," I said. The point was "That way, I can see all the movements, especially on the darker wood." Another line was "I can see already some imperfections."
Part 1 of Greek Acanthus 8 has "just because I turned that, my light hits from different position, I can see much better where I have to clean it a little more." Later I planned to reposition my lights and see from different directions, and "all the marks and all the ridges I left" would show. "I encourage you to do the same."

Lesson 88 has it in parts 9 and 10. In part 9, "I'm actually looking from this position, and I want to make sure I'm getting the right line, okay?" I planned to reposition my lights. In part 10 the lights came up again, with "Maybe just turn this way a little bit."
Lesson 90, part 8, has "Let me move my light out. Reposition it little differently."

How do these lessons line up with workshop 67?
The table lists some of them with workshop 67 first. The first column says where I was, the second the work I was doing, and the last gives a short line of mine from the same place. Measures in the table text follow my figure first, then millimeters or inches.
| Lesson | Where I was in the work | My words |
|---|---|---|
| This part, workshop 67 | A middle line to check against the opposite side, with calipers in my plan | Just measure |
| Workshop 42, part 9 | A sharpening I did not film, with an apology for it | Forgive me |
| Furniture Panel 18, part 4 | Rough work, with some rules broken | Waste my time |
| Hazelnuts 5, part 3 | Carving near an intersection, with a depth of about three-quarters of an inch (19 mm) | Everything |
| Workshop 57, part 8 | A pre-established convex that I called almost like a pipe | No reason |
| Workshop 66, part 6 | A spot about an inch deep on the inside that you do not see | Please understand |
| Part 8 of lesson 84 | A question about how to show my next work | Problematic for me |
| Lesson 126, part 3 | Work on the main surface, with a table I might turn | Much better |
| Lesson 1 of the onlay, part 3 | An undercut for a grape, with my table turned toward a camera | Still here |
| Part 12 of lesson 86 | A spot I drilled, seen from a different point of view | Most convenient |
| Hashemi 17, part 1 | A clamp that was on my way | Take this clamp |
| Lily Box 2, part 13 | A light placed in front of me for the darker wood | Angle it |
| Greek Acanthus 8, part 1 | Marks and ridges I left, to be cleaned later | Different directions |
Where can you watch the full videos?
Every lesson named above sits inside one of my courses. All of part 10 is in workshop 67, with workshop 66 before it and workshop 68 after it, and workshops 62 to 73 are in Part 6 of the Venice Room. The gouge, mallet, calipers, acanthus, olive, hazelnut and grape pages linked here are for reading. To watch the full videos, start here.
How it's done
- Look at the whole. Deep enough, it looked, with a little more depth planned for later.
- Reference the other side. I left the same space as on the opposite side to that point, so it would look equal.
- Plan the measuring. A reference and calipers were my plan for the check.
- Mark the middle line. A middle line that is pronounced, same as on the opposite side.
Frequently asked questions
Where do calipers come in, in part 10?
Measuring was the plan, with calipers and a reference. Showing it to you was something I said I could not do.
What mallet weight did I name in workshop 67?
I used only 12 ounces (about 340 grams), but I should use 30 ounces (about 850 grams). That came after a number 11 at 30 millimeters (1.18 in).
What size was the middle line to be?
The middle line would be around quarter inch (about 6 mm). I named a number 11 at 10 millimeters (0.39 in) for it, and said I could use bigger, maybe even 18 millimeters (0.71 in).
Why did I not move the camera in the Hazelnuts lesson?
What to carve next
- Venice Room workshop 67 lesson
- Venice Room workshop 66 lesson
- Venice Room workshop 68 lesson
- Workshop 62 to 73 course
- Venice Room lesson 42
- Furniture Panel lesson 18
- Carving Hazelnuts lesson 5
- Acanthus over Moldings lesson 2
- Venice Room lesson 84
- Grape Onlay lesson 1
- Hashemi Flowers lesson 17
- Lily Box lesson 2
- Venice Room lesson 88