
September 6, 2024 · Updated August 16, 2026
By Alexander Grabovetskiy — Master Woodcarver · Founder, School of Wood Carving · 12 min read
Common wood carving mistakes beginners make
Common wood carving mistakes are the wrong board, a dull edge, no drawn line, work that nothing holds down, and going into the grain from the wrong side. They arrive in that order in a beginner's first year, each leaves a mark you can read in the wood, and each has a fix that takes an afternoon.

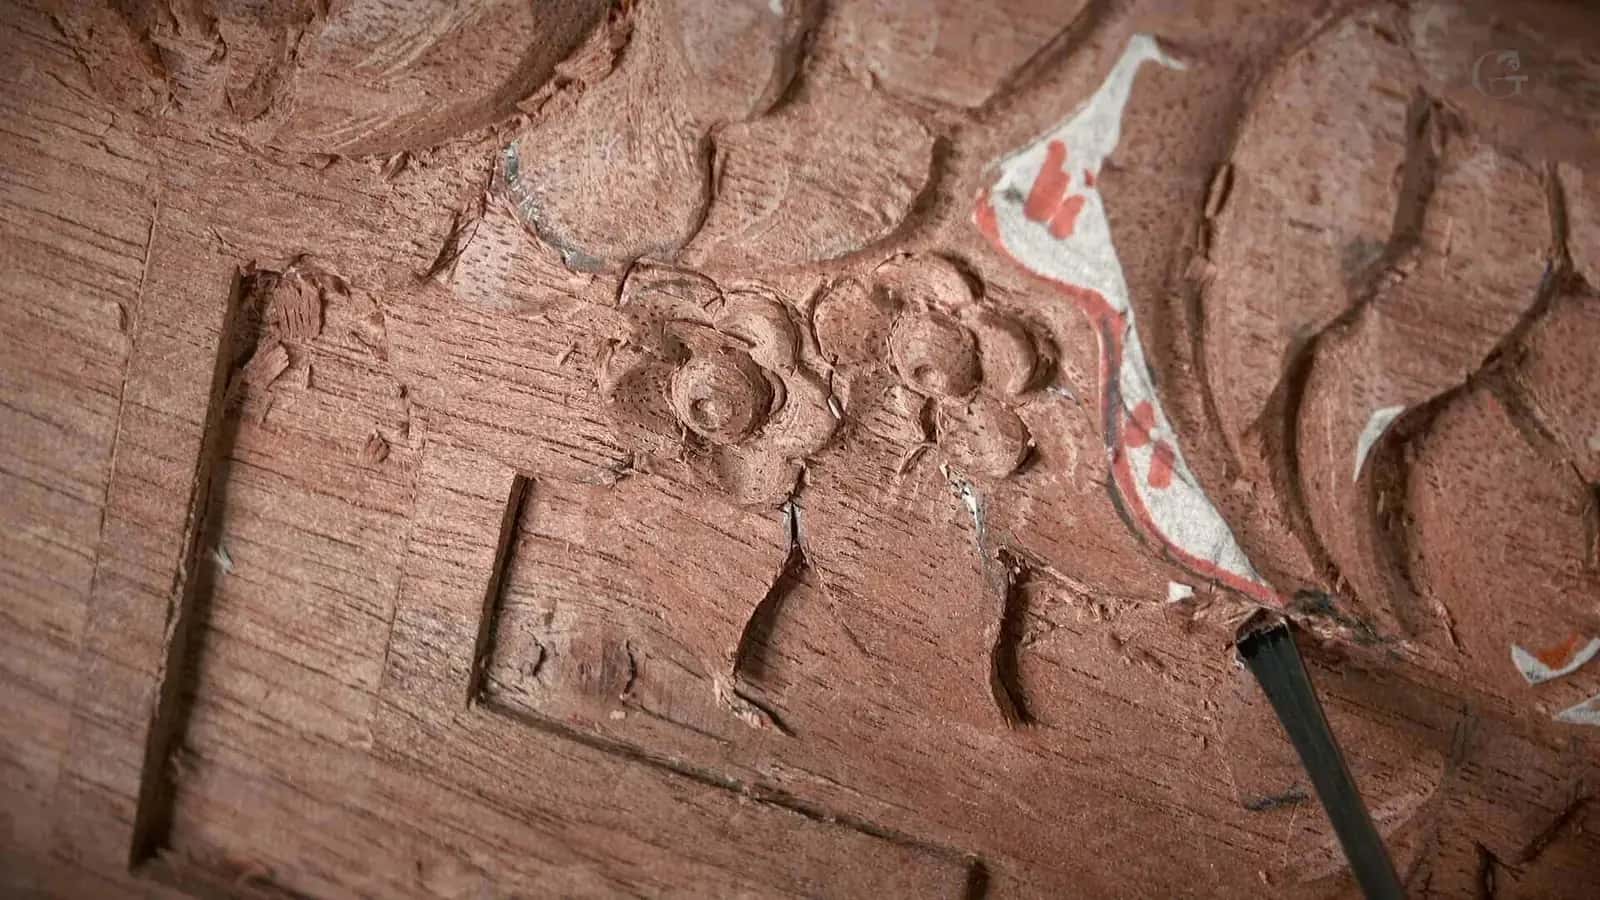
Somebody's second evening in the shop. Notches on the right came out cleaner than the ones on the left, which is the wood teaching faster than I ever could.
You carved something. It came out wrong, and you cannot tell which minute of that hour ruined it. Nobody asks me that out loud, and almost everybody wants to.
So here is my answer. I read the damage, then walk backwards to the pass that made it. Every fault leaves a signature, and a handful of them cover almost any beginner panel.
- The board you buy decides more than the tool you buy.
- A gouge that has gone dull crushes fibres, and the crush only surfaces under oil.
- Draw the whole design before the first pass. Never the other way round.
- Depth goes in stages. One greedy pass and the panel is finished.
- Detail carved before the big shape is right is detail carved twice.
Which wood carving mistake left that mark in the wood?
Every fault in a carving has one signature, and the wood keeps it for years. Find your own damage in the left column and the cause is sitting right beside it.
| What the wood is showing you now | The mistake behind it | When it starts | The one thing you change at your bench |
|---|---|---|---|
| One side tears while the other side slices cleanly | The grain read backwards | Second month, usually | Come at it from the outside edge and work inward |
| A grey shadow under the oil | Dull crushing edge | From week one | Strop every tool before each working hour |
| The background floor waves under a raking light | Depth taken by feel | Around month four | Scribe a depth line on the edge, then work |
| One thin point has snapped clean off | Forcing a stall | Month six onward | Stop, and put a fresh edge on |
| Small veins carved all over one big shapeless lump | The detail arrived early | Every single month | Lower the whole shape first, then add the veins |
| The blade skated across everything at once | Nothing holding the work | The first week | Clamp it, or glue on a backer |
If you only want the headline version, I keep a short list of mistakes to avoid on a page of its own. This one goes after the cause.
What is the first mistake, before you own a single tool?
Buying a board because it sat in the store, not because it carves. That happens weeks before anybody touches a gouge, which is exactly why nobody ever thinks to blame it.
Construction lumber is spruce or fir, grown fast, with hard bands and soft bands right next to each other. Steel skates over the hard band and dives into the soft one. Nothing about your hands is wrong. The board is wrong.
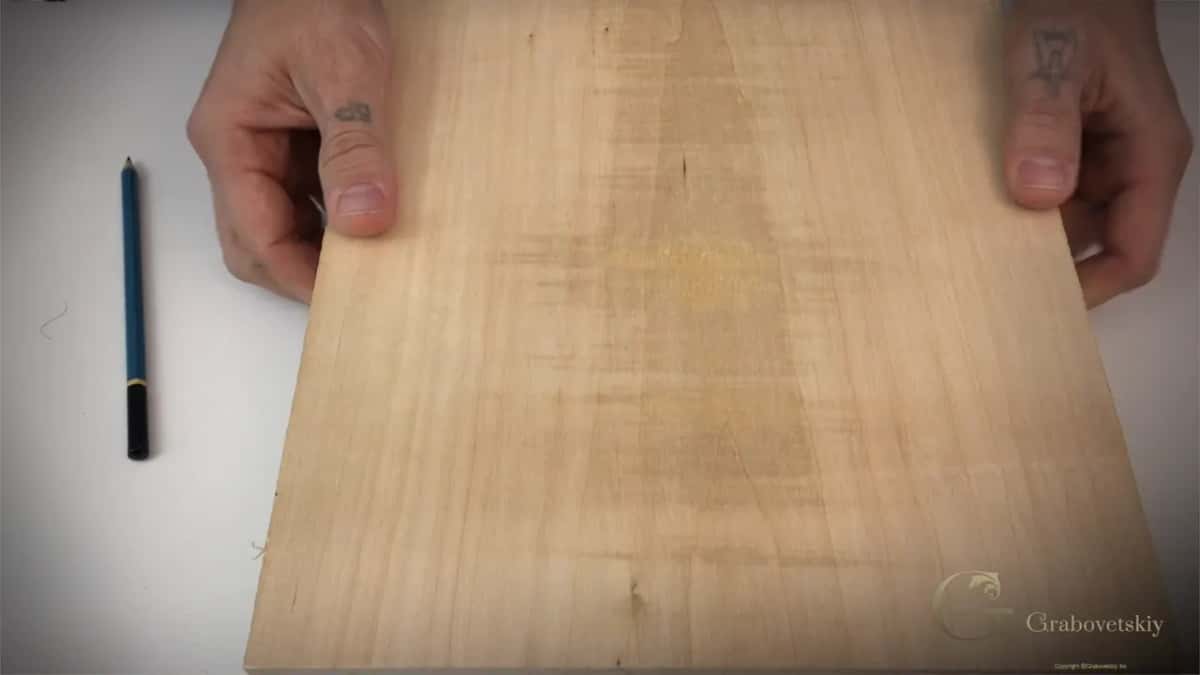
American basswood, Tilia americana, carries no figure and no hard streaks, which is why every teaching panel I own is made of it. Read the numbers on basswood at the Wood Database, see what the Janka hardness scale measures, then our own page on basswood in the wood guide.
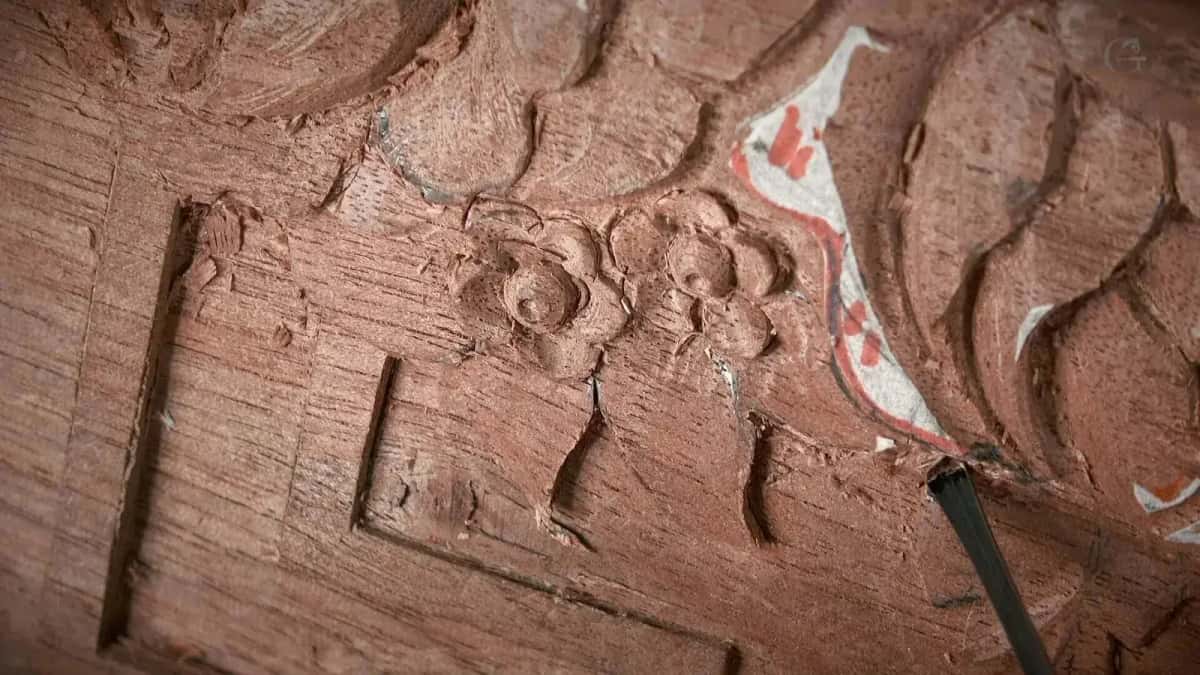
Wrong wood, worked by somebody doing everything else right. It crumbled anyway, and no technique on earth would have stopped that.
Then there is what you cannot see. During the Lily Box lessons I hold a board up and ask the camera how many voids and how many cracks are inside of the wood. Nobody knows. A board still giving up moisture will open new ones, which is why how wood moves with moisture is worth an evening. Our guide to which wood to use for carving sorts that by project.
Why does my gouge crush the wood instead of slicing it?
Your edge is dull, and you have probably never held a properly sharp one. Beginners fight me hardest on that second half, right up until the afternoon they feel the difference.
Sharp steel parts fibres. A dull one bends them over and drives them flat into the surface. The day you carve it, everything looks fine. Six weeks later oil goes on, a grey shadow rises where those crushed cells drink differently, and nothing can be done.
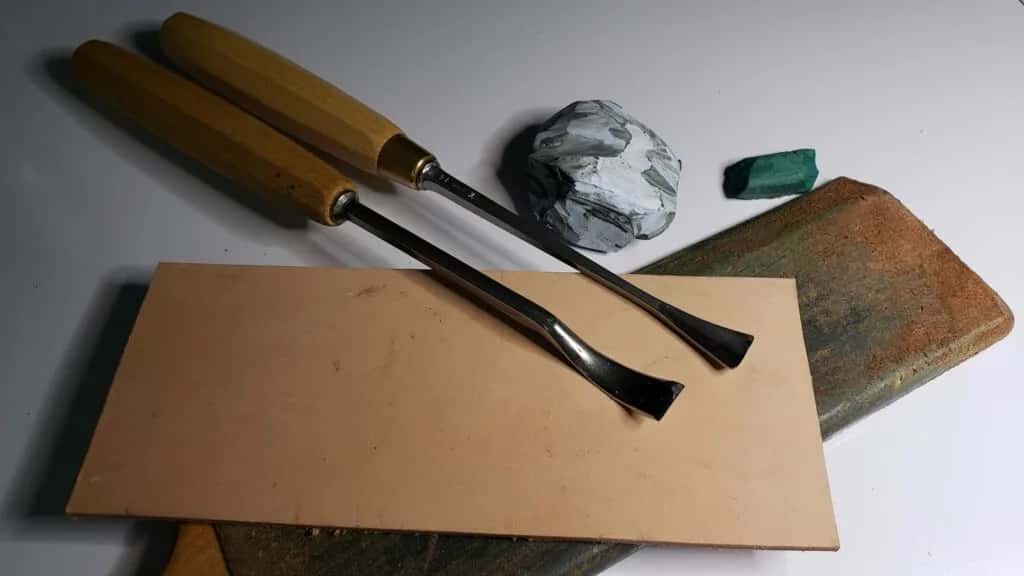
My words on the Lily Box lessons are blunt: you would not be able to remove any of the material with dull tools. Impossible. Then comes the part that stings, that some guys just think they are smarter and know better. The gouge in my hand there is a number seven, quarter inch, by Auriou.
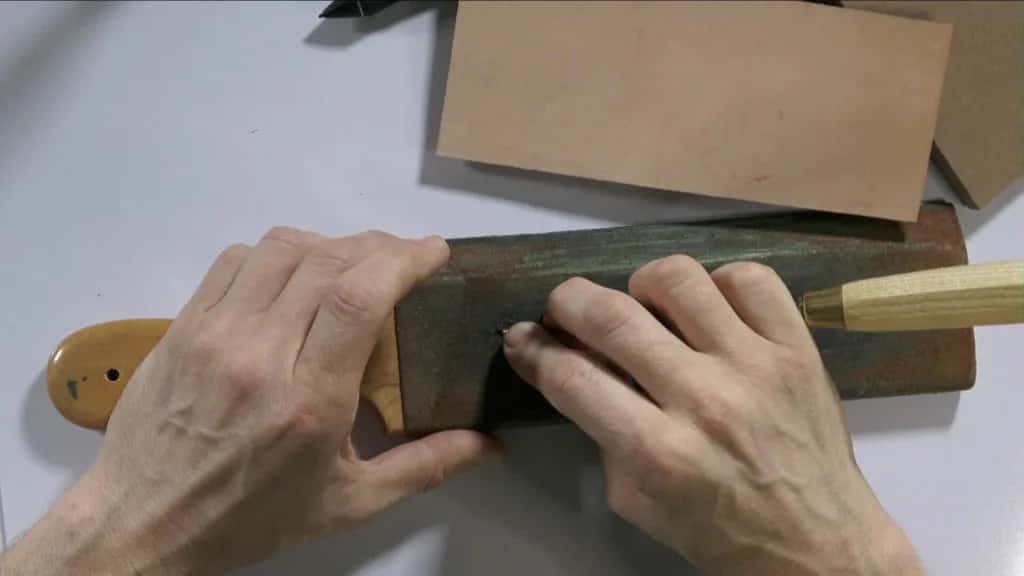
Bevel flat, no rocking. Twenty seconds per tool, several times an hour, and the edge never gets a chance to go.
Somebody asked me during an April 2020 livestream what actually stops people, and I said the biggest frustration I have seen is the sharpening. Getting there takes a while, which is what my tool sharpening course is for. Good steel helps, and Pfeil in Switzerland ships an edge you can feel on day one.
Do you have to draw the design before you carve?
Draw it. All of it. Then put the pencil down and start. A carving with no line on it is a carving being invented at speed by somebody holding a chisel.
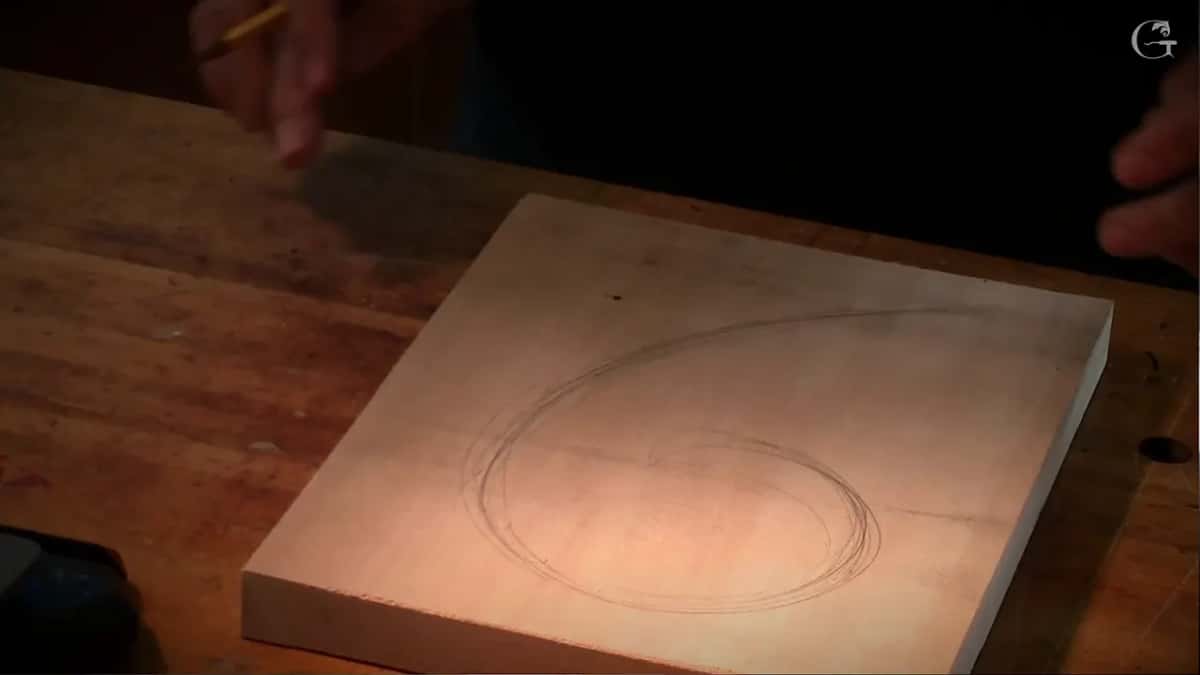

Watch me in the furniture panel design lessons and you will see me refuse to add much. I say out loud that I do not want to spend too much time putting too many details at the beginning of the stage, that I am just doing the drawings. One main swirl. Everything else grows off it later.
The reason is brutal. Pencil erases and wood does not, so a shape that reads badly on paper reads far worse in three dimensions. Our page on planning and sketching a carving design takes it further.
How does a beginner stop the piece sliding under the tool?
Give the job to a clamp, because your spare hand is doing it badly. A hand can hold a board or steer a gouge. Doing both at once is how thumbs get opened.
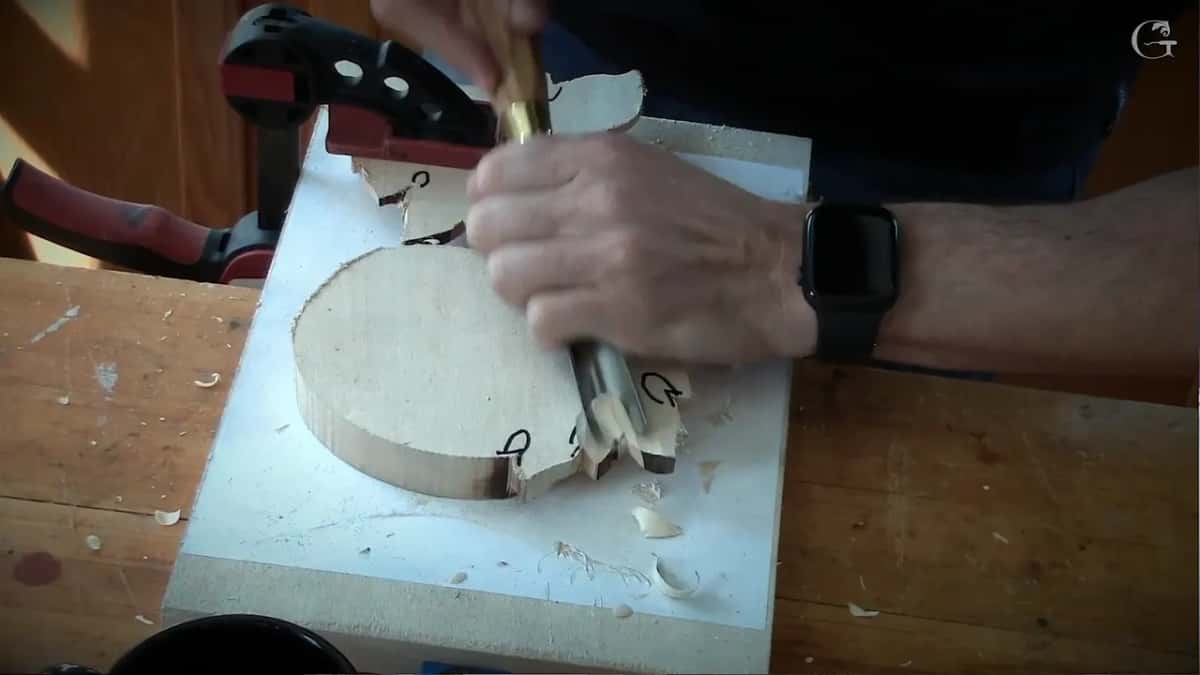
Holdfasts, a clamp, a swivel base, or paper and glue under the blank all work, and I use every one of them. What I never do is trap a carving under one thumb and lean into it. A skating piece sends the tool along a straight line, and your hand is usually in that line. Read the dangers a beginner runs into for the rest.
What makes the wood tear out on just one side of a leaf?
You went in against the grain, and the fibres lifted instead of parting. Half a leaf carves like butter. The other half crumbles, with the same tool in the same hand.
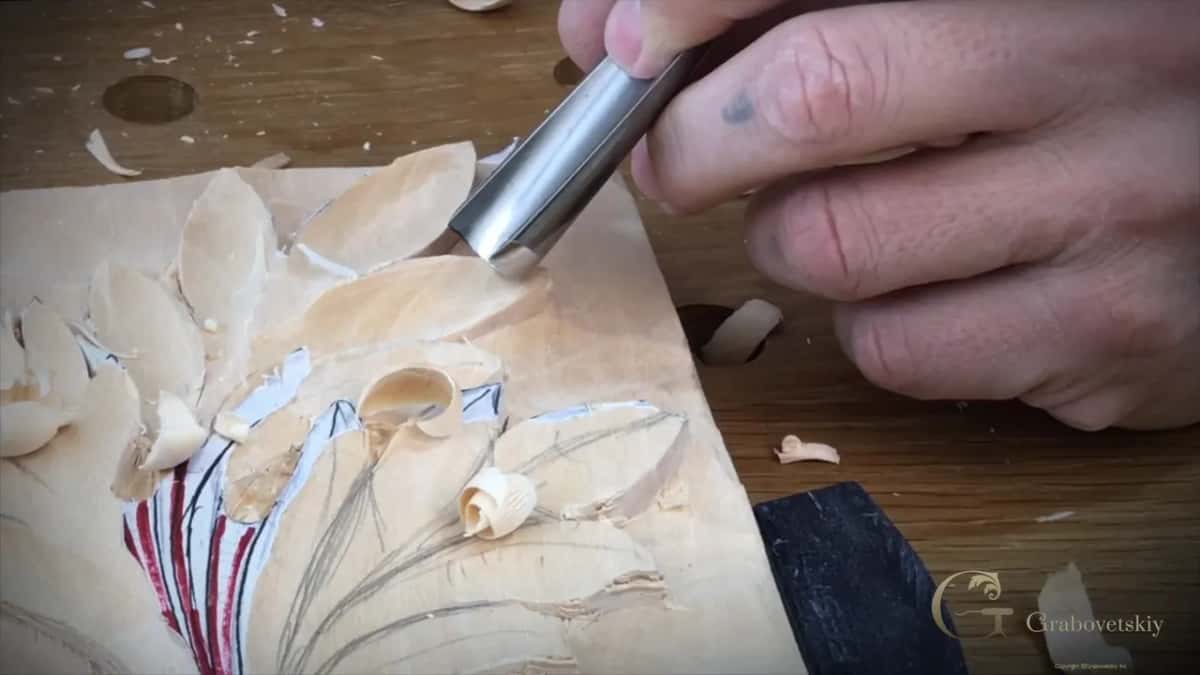
This is what correct feels like. When fibres part instead of lifting, the sound changes before the surface does.
Grain direction rotates around a curve, so a lobe that sweeps round has two right approaches and one wrong one. On the hazelnut board I say do not be tempted to attack along the grain like that, because you are going to catch the grain and you are going to split, and then I add that it is no bueno.
My answer is to come at everything from the outside edge inward. I take about three quarters of the material to the line, walk round, and attack from the opposite side, and the two passes meet with nothing torn. Go the other way and you can catch a micro crack and split the board. There is more on carving in the direction of the grain, and the whole hazelnut course rests on that habit.
How deep should a single pass go?
About two millimetres, then stop and read what happened. Depth is thirty small decisions, and beginners try to make all of them in one push.
During workshop 61 of the Venice Room I get tangled up and say the same thing twice inside ten seconds: do not go too deep with one cut. Do not go too deep in one cut. Clumsy, and correct. Going too deep creates weak spots, and a weak spot is where a piece breaks a month later.


Real numbers beat adjectives. The flower rosette I teach is three eighths of an inch thick, ten millimetres, and I drive the outline about a sixteenth deep on the first go round. My warning through that lesson is never to hit hard, because you can make a big mistake hitting that hard, and snap the whole thing. That blow lands the same from a palm as from a mallet, and whether you need a mallet is its own question.
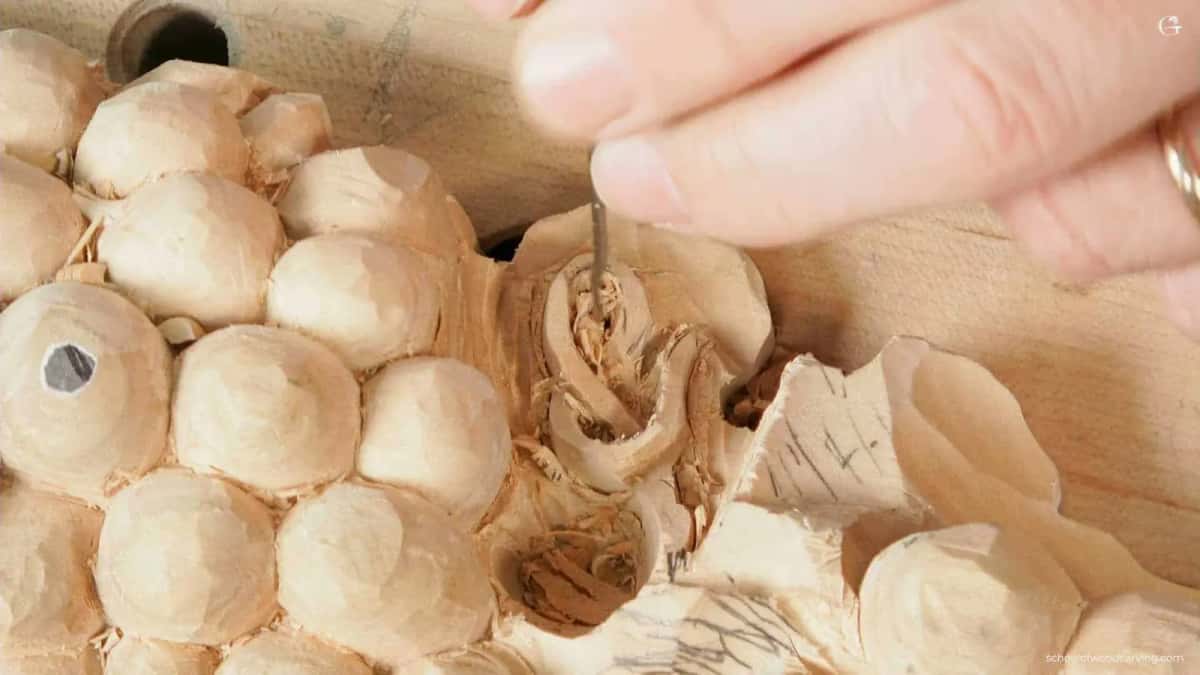
At this thickness one heavy pass takes the whole cluster off the panel. Hand pressure only, from here on.
A tool that stops going in is telling you the same story from the other end. On the cutting board lessons I say it mid pass: really important not to force it, otherwise you can just break. Put the gouge down and check the edge instead.
When do the small details go in?
Last, once the big shape already reads correctly from across the room. Squint at your piece from ten feet away. If nothing comes back at you, no vein you carve will rescue it.

Byzantine acanthus, early stage. A student looking at this usually thinks something has gone wrong, and nothing has.
My line in the opening Venice Room workshop is that I am not going to go to the details right away. Sounds lazy. Every vein carved into a lump you later have to lower is a vein carved twice, and the second one never has the crispness of a first pass.
Beginners find this the hardest rule to obey, because detail feels like progress and roughing feels like nothing. The same feeling sits behind why the work takes so long at the start. Grinling Gibbons worked in this order three hundred years ago, and his limewood at the V and A still shows the mass under the lace.
How many carving tools belong on the bench?
Between three and five, and the rest live on the shelf behind you. Nobody warns beginners about this one, and it slows more people down than any other habit here.
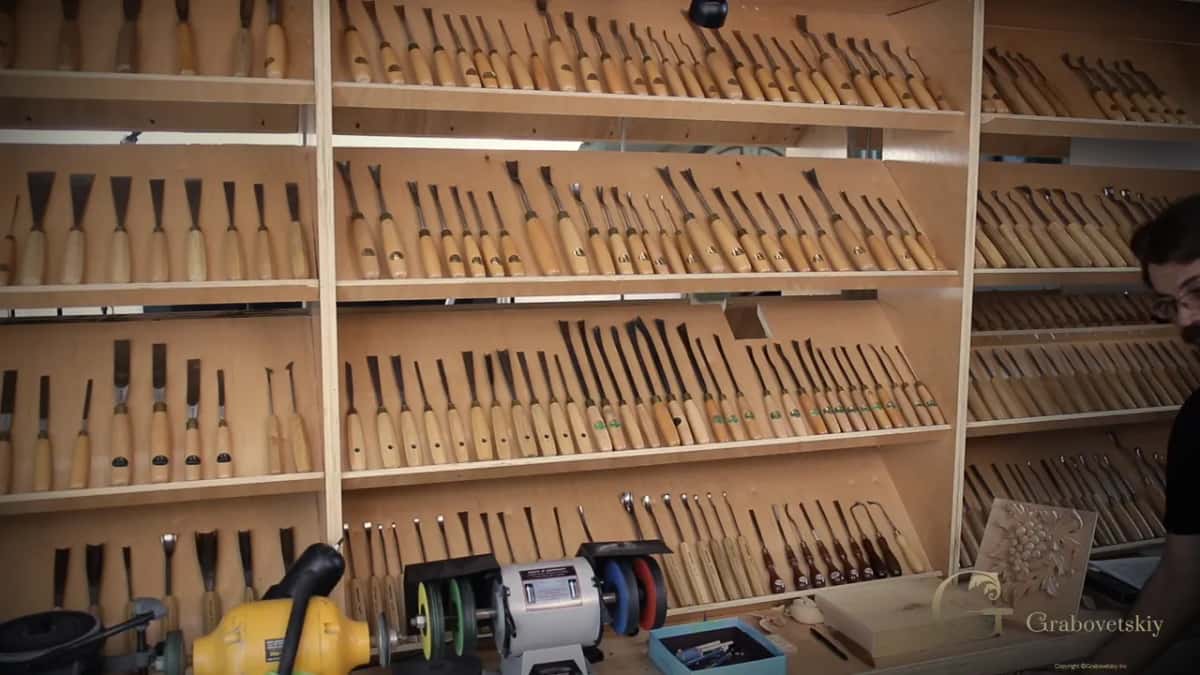
My storage wall. On any given afternoon almost none of these are anywhere near the piece I am working on.
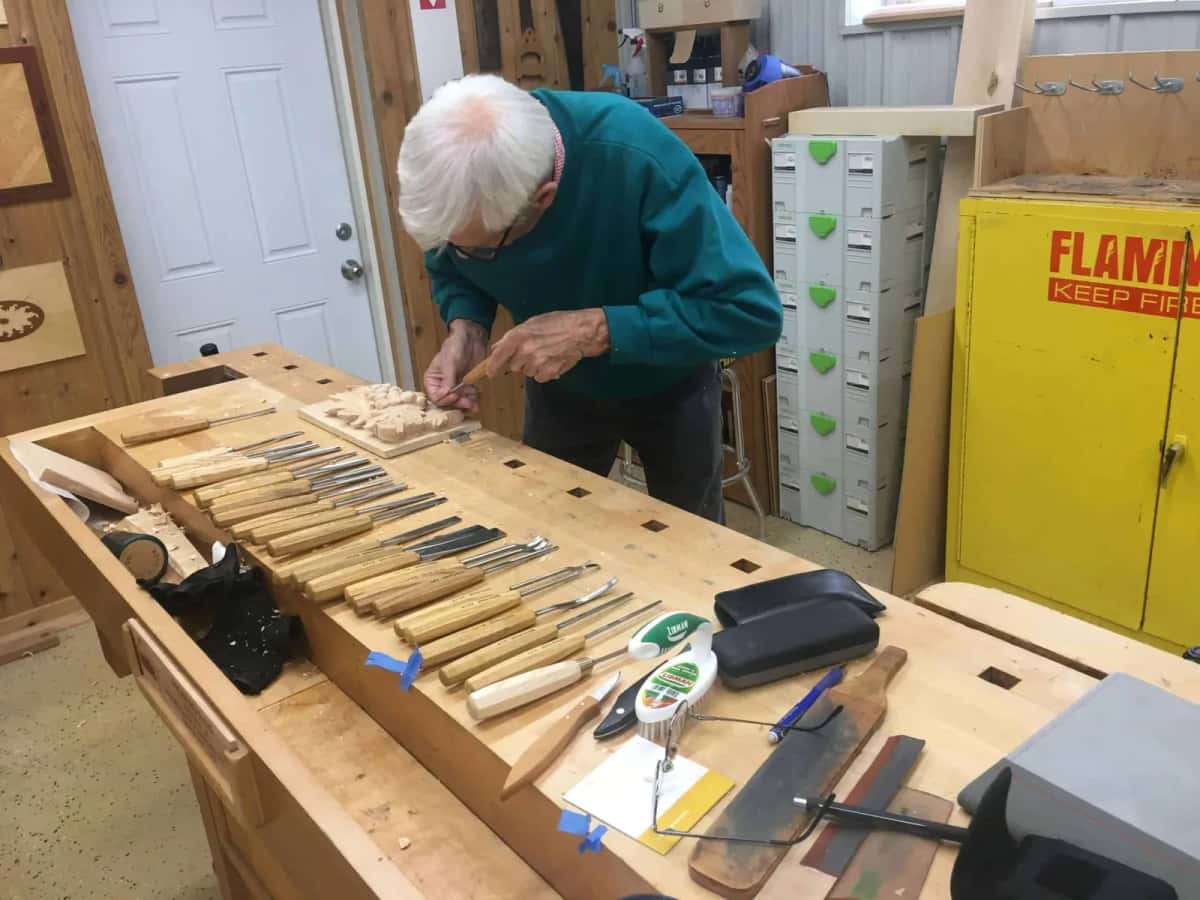
My bench organisation lesson carries a rule that surprises people: do not put too many tools at the front of you, do not put too many tools on a workbench. I own about half a thousand. Laying them all out would only get me lost, so I keep two, three, five at most within reach.
Buying is where the pile starts, and what to look for in a beginner tool set answers that properly. The course on tools for wood carving shows the racks and the spacing between handles.
Can you find the mistake in a carving you already ruined?
Work backwards from the damage. One question at a time, and four minutes of it beats another hour of carving.
Step 1, put the piece under a raking light
Light it low, from one side. Faults invisible under a ceiling lamp jump straight out at you, and a waving background floor shows up first.
Step 2, run a thumb across the damaged area
Fuzz means torn fibres and a grain problem. A slick compressed feel with no fuzz means the edge had gone dull. Your thumb is better at this than your eye.
Step 3, cover the detail with one finger
Now read what is left. If the remaining shape says nothing, small work was never going to save it.
Step 4, find the deepest point and measure it
Compare that against the depth you meant to reach. A ground varying by more than roughly a millimetre was taken by feel rather than off a scribed line.
Step 5, carve the same shape again on scrap
Same wood, same tools, one variable changed. This step turns a ruined panel into a skill, and almost everybody skips it.
Start at the top of my list and work down. Wood first, then the edge, then the drawing. Get those three right and the rest mostly stop on their own. Want a gentler on ramp? Our basics and beginner tips covers the first week, and the beginner carving course walks you through it with me at the bench. Behind all of it sits the USDA Wood Handbook, and Woodcarving Illustrated publishes small projects worth practising on.
Frequently asked questions
What is the single most common mistake in wood carving?
Working with a dull edge, and not knowing it. Almost every beginner I meet believes their tools are sharp because they arrived sharp in the box. A gouge loses that factory edge inside an hour of real work on basswood.
Can a beginner tell if a gouge is sharp without any gauges?
Push it into end grain on a scrap block. A sharp edge slices a clean crescent and leaves a shiny wall behind. Blunt steel tears, squeaks, or bounces, and the wall then looks furry in raking light.
Is it worth carving construction lumber to save money at the start?
Spruce and fir will cost you more than they ever save. Both tear between the growth rings and blunt an edge fast, so you learn bad habits and blame yourself. One decent basswood board costs less than the tools it protects.
How long before these beginner mistakes stop happening?
Grain and depth faults usually fade after six or eight solid projects. Impatience with detail takes longer, often a year. Sharpening keeps returning, because your standard for sharp climbs every time your carving improves.
Does a bad mistake mean the panel is finished for good?
Often not. A torn area can be lowered and reshaped, and a snapped point glued back with the grain matched. What cannot be rescued is a ground carved deeper than the design needed, since wood does not come back.
Should a beginner practise on scrap before every project?
On every new shape, yes. Ten minutes on an offcut tells you how that species tears, where the grain turns, and how deep a tool wants to go. I still do it before any commission in a wood I have not carved recently.
Filed under
- beginner’s guide to wood carving mistakes
- beginner wood carving mistakes
- beginner wood carving strategies
- common wood carving errors
- fixing wood carving mistakes
- how to avoid injuries in wood carving
- improving control in wood carving
- improving wood carving skills
- mistakes to avoid when carving wood
- new wood carvers tips
- proper techniques for wood carving
- safety tips for wood carvers
- the importance of tool sharpness in carving
- tools every wood carver needs
- using tools safely for wood carving
- why sharp tools matter in carving
- wood carving advice for beginners
- Wood Carving Basics
- wood carving controls explained
- wood carving safety for beginners
- wood carving tool tips