
August 29, 2024 · Updated August 16, 2026
By Alexander Grabovetskiy — Master Woodcarver · Founder, School of Wood Carving · 11 min read
How Do You Seal Wood After Carving?
The safest way to seal wood after carving indoors is a thin penetrating oil, wiped on and wiped straight back off. Oil feeds the fibers and leaves the cuts open. A film finish like lacquer pools in the deep spots and flattens the shadow you spent all those hours carving.
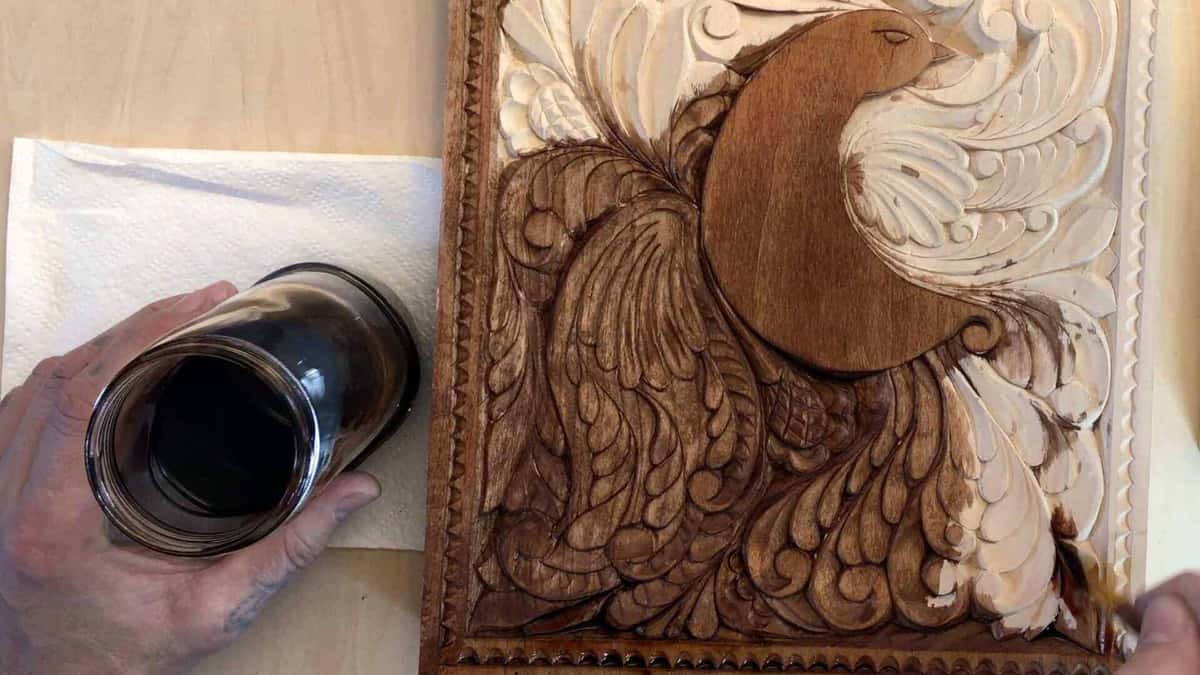
Same panel, same light, one hour apart, and the left half already has a coat on it.
You are standing over a piece you just carved. Chips are swept off the bench. And now somebody on a forum tells you to brush polyurethane on it.
Wait.
I have been carving for over forty years, and I will be honest with you about something most finishing advice skips. The can you reach for decides how that piece reads in five years, more than your last three passes with a gouge did. A relief carving lives on light and dark. Fill the hollows with a thick film and you hand yourself back a flat photograph of the thing you carved.
So let us talk about what really belongs on a carving that hangs in a warm, dry room.
- Oil soaks in and keeps every hollow dark. Indoors I reach for it.
- Shellac and lacquer sit on top as a film, so they fill fine detail.
- Wax over oil adds a low glow, and on its own it guards almost nothing, so it goes on last.
- Try a finish on an offcut of that plank first, not on the carving.
- A piece that lives outdoors is a different problem, and it gets a completely different answer.
Why does a finish change the way a carving looks?
A finish changes the look because it changes how light bounces out of the hollows you carved. Deep spots go darker, high spots go warmer, and the whole picture gains depth or loses it.
In my Venice Room workshops I say the same thing over and over while I am working: those excavations, they create darker spots. And it is all about the shadows. It is all about the light and the shadow. The deeper excavation you create, there is going to be a much darker spot.
Every choice I make at the finishing bench comes back to that. Oil goes down into a hollow, wets the fibers, and lets that hollow stay dark. A heavy film does the opposite. It bridges the narrow gaps, rounds the crisp arris where two cuts meet, and turns a sharp undercut into a soft dent. You paid for that undercut with an hour of careful work.

Those black lines under the scrolls are not paint. They are air.
Painters call this value. In relief carving we get value for free, as long as we do not glue it shut. Look at the Grinling Gibbons limewood pieces at the V and A and you will see undercuts that still read from six feet away after three hundred years.

Hold your finished piece under a lamp and turn it. Watch what the hollows do. Then hold a wet fingertip against one hollow, because that dark wet patch is roughly what an oil coat will give you. Lacquer hands you back something shinier and shallower than that.
What is the best finish to seal wood after carving indoors?
Thin penetrating oil is my first choice indoors, because it soaks into the fibers instead of bridging across them. Every other option below has a job, and every one has a cost.
| What you use | What it does to your shadow lines | Dry time | Where it belongs in my shop |
|---|---|---|---|
| Oil, wiped thin | Soaks in and leaves every hollow dark and open | Six to twelve hours | Almost every relief panel I carve |
| Shellac, brushed | Builds a thin film that starts to soften detail | About twenty minutes | Small boxes and museum repair work |
| Lacquer, sprayed or brushed | Pools in undercuts and flattens the deepest cuts fastest | One hour | Furniture parts needing a hard surface more than depth |
| Paste wax, buffed | Adds glow, holds no real protection alone | Ten minutes, then buff | Over oil, on a finished piece |
| Mineral oil | Feeds the wood, food safe, needs a fresh coat | An hour between the coats | Boards, spoons, bowls and anything that meets food |
Boiled linseed oil and tung oil both belong in the first row. They cure by pulling oxygen from the air rather than by drying, which is why an oily rag left in a heap can heat up on its own. Spread your rags flat outside. I lost a good bench once learning that lesson. Lacquer carries no such risk, and there is a longer roll call of options in our page on wood carving finishes and sealants.
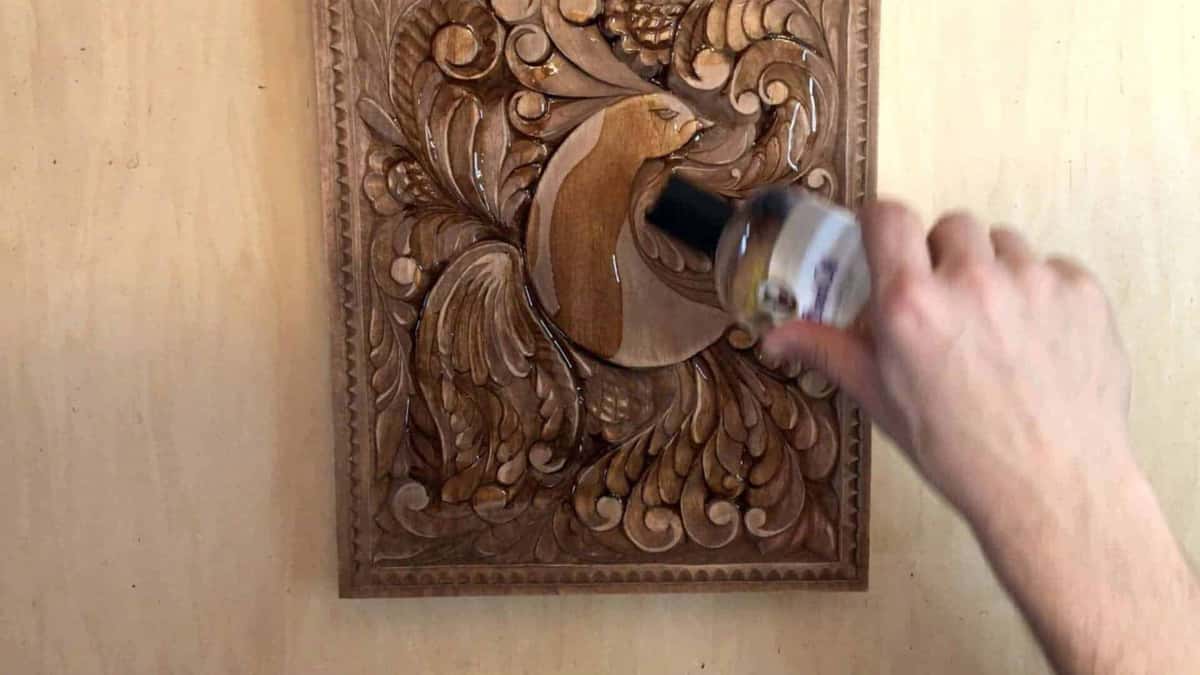
Poured on rather than wiped on, and every one of those bright puddles has to come back out.
Should you sand a carving before you seal it?
Most of my carvings never meet sandpaper at all, because the tool facets are the signature of the hand that made them. Abrasive dust also lodges in the fibers and dulls the finish later.
Filming the Carving Dining Table Apron course, I held the piece up to the camera and said it plainly. It leaves like a paint or brush marks, but it's the tool marks. That's why I don't use any sandpaper and I'm leaving just out of tool, because you can see that piece is unique. Sand that away and every panel starts looking like it came off a machine.

Same in the Flower Rosette workshop, where I clean the center with the same gouge and say I'm not planning to use any sandpaper on it. I don't think it needs it.

Steel instead of paper, because a broad gouge evens the facets out better.
Now, a flat ground or a broad convex surface can take 220 grit and be better for it. Sand those, blow the dust out with air, and wipe with a dry cloth before the first coat. Never take paper into a hollow. You will round the very edge that was casting your shadow.
How do you apply an oil finish to a carving?
Wipe oil on thin, let it sit fifteen minutes, then chase every drop back out of those hollows with a dry cloth. Two light coats beat one heavy coat every single time. Oil at the far end of the job is a separate question from oiling a blank before you carve it.
Step 1, raise the grain with a damp cloth
Wet the whole carving with a rag and plain water, then let it dry. Loose fibers stand up. Knock them down with one light pass of a very sharp gouge. On basswood I am not afraid to put water on it, because it does not raise a lot of grain, and once it is dry the piece is ready for a coat.
Step 2, test the finish on scrap first
Keep the drop from the same board. Brush your finish on that scrap and look at it dry, under the lamp you will actually hang the piece under. Walnut goes almost black under oil. Basswood goes honey.
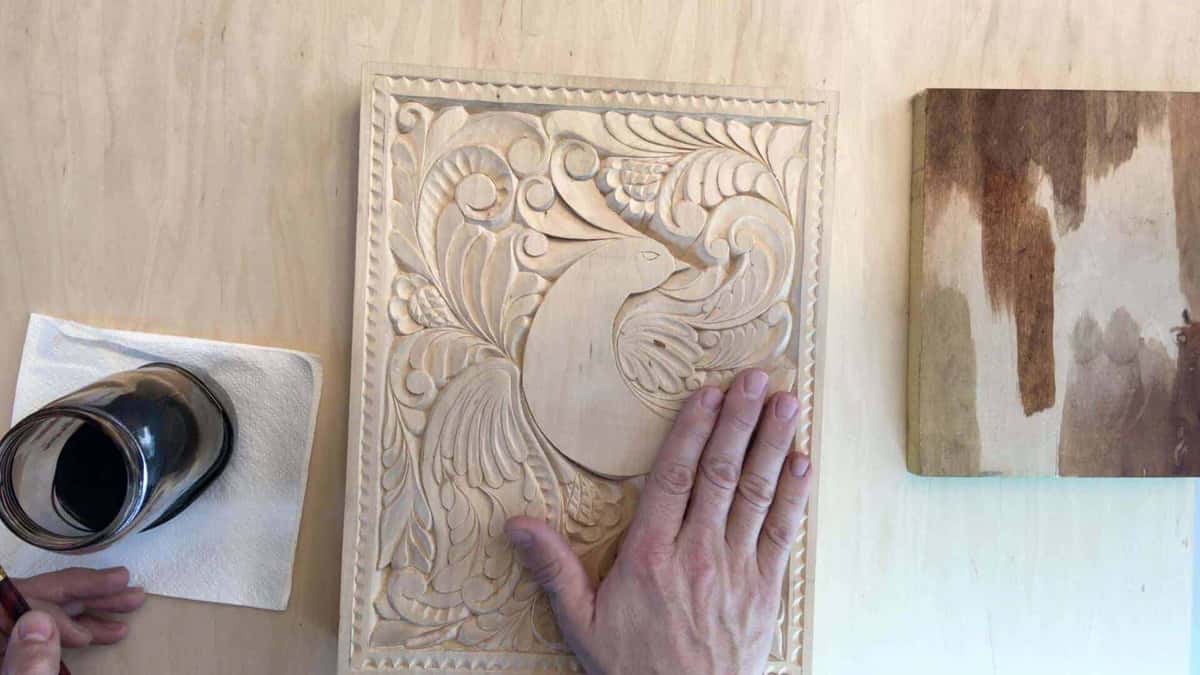
The board on the right is an offcut of that plank, carrying three test patches.
Step 3, flood the oil on and let it sit
Load a soft brush and work it into every crevice. A carved surface drinks unevenly, so end grain in the hollows takes far more than the flat ground does. Give it fifteen minutes to soak.
Step 4, pull the surplus back out of every hollow
This step is where beginners lose the piece. Oil left standing in a deep undercut turns to a sticky, shiny puddle that never fully hardens. Take a dry rag, then a stiff dry brush, and pull the surplus out of every corner until the surface looks dull.
Step 5, give it a second coat the next day
One coat seals. The second coat evens out the thirsty spots. In my beginner carving course I say it takes about three, four coats to penetrate that deep, and that is going to be enough.
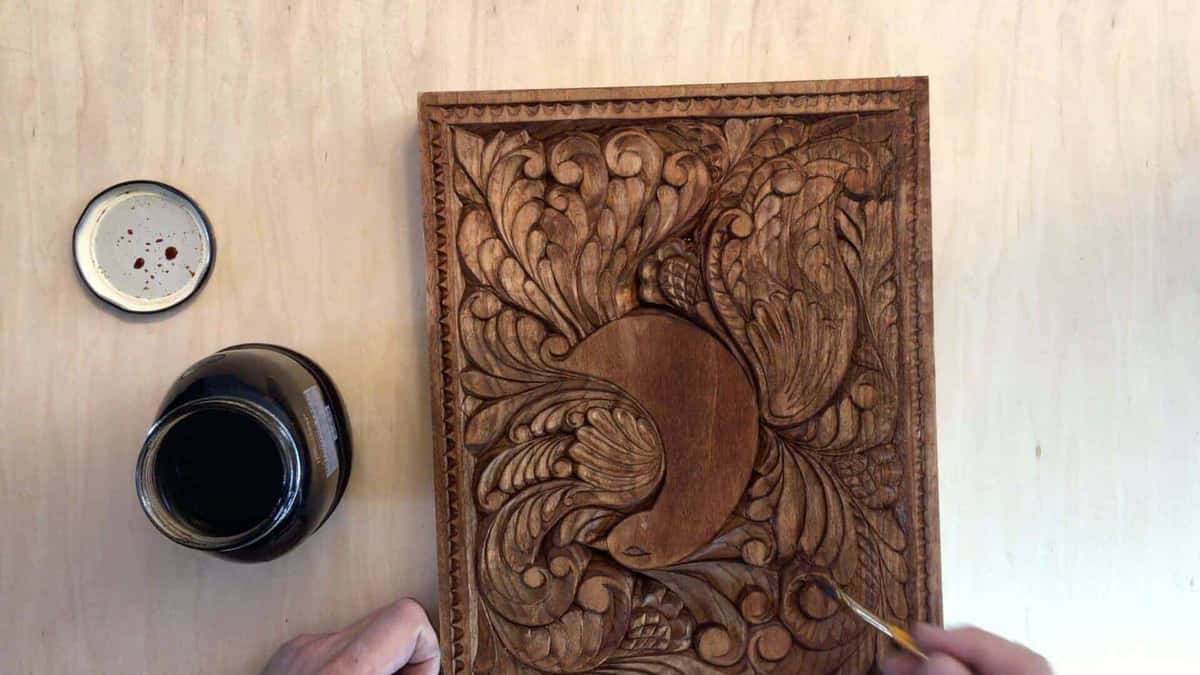
When should you reach for shellac or lacquer?
Shellac earns its place on small work, on repairs, and anywhere you need the finish hard by lunchtime. Lacquer belongs on furniture parts that get handled, not on deep ornament.
While carving a dark walnut panel I told the class exactly why this matters. On the dark wood sometimes it is almost impossible to see, especially if it is not finished. I am talking about you did not apply any type of finish like shellac or lacquer or wax. Once you apply the finish, you will see every cut. And it makes huge difference how it is going to play.
That works both ways. Any film sharpens what you did well, and it prints every mistake in bold too. Shellac is the gentler of the two, because a one pound cut goes on so thin. If you want the mechanics of the harder option, we cover them separately in how a lacquer finish works on wood carvings and in how many coats of lacquer a carving needs.

Shellac has one property nothing else matches. It dissolves in alcohol forever, so a shellac coat comes off again without a scraper anywhere near your carving. Restorers keep reaching for it on old church work, and I keep a jar of flakes on my own shelf.
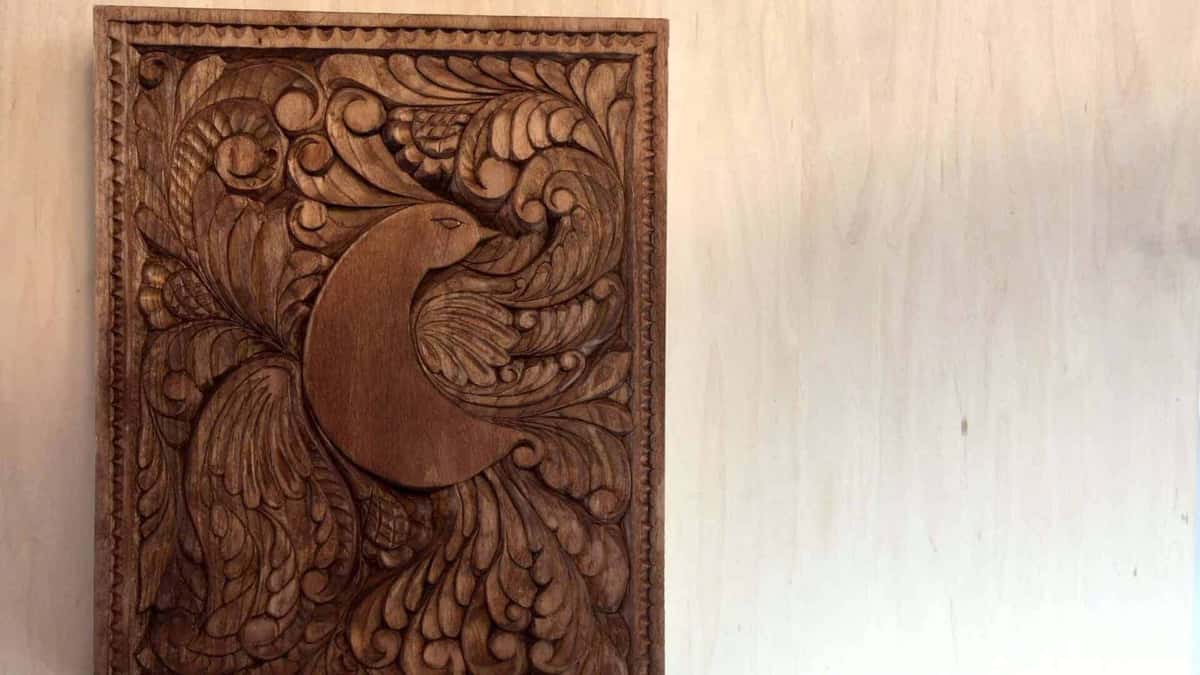
Three coats, wiped back hard each time, and the hollows still read black.
Does wax add protection, or only shine?
Wax adds a low, soft sheen and almost no protection of its own, so it goes over an oil coat rather than straight onto raw wood. Call it the last quarter inch of the job.
Ancient people used only two, well, it is what we know, only two different final coats. They would use a beeswax for the finishing, and also they used just the oil. I tell my beginners the same thing, and it holds up. Two materials carried a thousand years of European ornament, and they still work.
Buff wax with a shoe brush, never a cloth. A cloth skates over the tops and leaves white crumbs down in the cuts, which look like dust and stay there. See the wider history of wood finishing if you like the background.

Wax on this would sit in the cuts as white specks and stay there.
How do you look after a sealed carving indoors?
Dust it with a soft brush, keep it out of direct sun, and add a fresh coat of oil when the surface starts to look thirsty. Most indoor pieces need attention once a year at most.
Wood keeps moving with the room. The USDA Forest Products Laboratory wood handbook lays out the moisture behaviour in more detail than you will ever need, and the plain version is that no finish stops it. A finish only slows the exchange down. Steady heat and steady humidity do more for your carving than any can does, and the Wood Database note on wood and moisture puts numbers on that swing.

Bare, and it can stay bare a long time. Nothing is going to fall apart tomorrow.
A piece going outdoors is a different animal, and I will not pretend otherwise here. Read the practices for weatherproofing an outdoor carving instead. Species matters more out there too, which is covered in choosing the best wood for carving, and if you are curious why one board feels twice as heavy as another, see whether dense wood floats.

One more thing. Green stock behaves nothing like a dry board once finish touches it, so settle that question before you start rather than after, in whether you have to dry wood before carving.

Oil and wax only. This one has held its shadows through five centuries of candle smoke.
Frequently asked questions
Can you seal a carving with polyurethane?
You can, though I rarely do on ornament. Polyurethane builds a thick plastic film that bridges narrow gaps and rounds the crisp edges of an undercut. On a plain carved sign or a child toy that gets handled hard, it makes good sense.
How long does oil take to cure on a carving?
Touch dry comes in six to twelve hours on basswood. Full cure takes two to three weeks, because oil hardens by reacting with air rather than by evaporating. Leave the piece somewhere warm and airy, and do not wrap it during that period.
Will oil darken basswood too much?
Oil warms basswood to a light honey tone and deepens it a little more each year. Walnut and mahogany go far darker, sometimes almost black. Always wet a piece of that plank with the finish before you commit the carving.
Do you have to seal a carving at all?
An indoor piece survives bare for years, and plenty of antique church work was left raw. Bare wood does pick up hand grease and grime, which no cleaning removes. One coat of oil gives you a surface you can dust.
Can you put wax over an oil finish?
Wax over cured oil is the classic pairing, and it is what I use most often. Wait until the oil has hardened properly, usually two weeks. Rushing it traps soft oil under the wax and leaves a smeary surface you have to strip.
What finish is safe for a carved bowl or a board?
Food grade mineral oil is what I put on a carved kitchen board, and it costs about eight dollars a bottle. Three or four coats penetrate deep enough. It never fully cures, so plan on a fresh wipe every few months.
Filed under
- benefits of sealing wood carvings
- best sealants for wood carvings
- best wood for carving
- easy cleaning for wood carvings
- how to clean sealed wood carvings
- How to seal wood carvings
- improve wood carving appearance
- improve wood carving longevity
- moisture protection for wood carvings
- protect wood from pests
- sealing basswood carvings
- sealing techniques for carved wood
- sealing wood for better finish
- sealing wood for durability
- sealing wood for protection
- seal wood to prevent cracking
- types of wood for carving
- Understanding Wood for Carving
- wood carving blocks care
- wood carving maintenance tips
- wood carving project protection