

Alexander Grabovetskiy, woodcarver, School of Woodcarving · Published 2020
What does a wood carver mean by "touch up"?
Quick answer: Venice Room 64, part 2, has me saying I also needed to touch up, and that I could see one area where my cuts were not really smooth yet. Other lessons use the same words for pencil marks, rough edges, pipes, tools on a sharpening wheel and reed brushes.
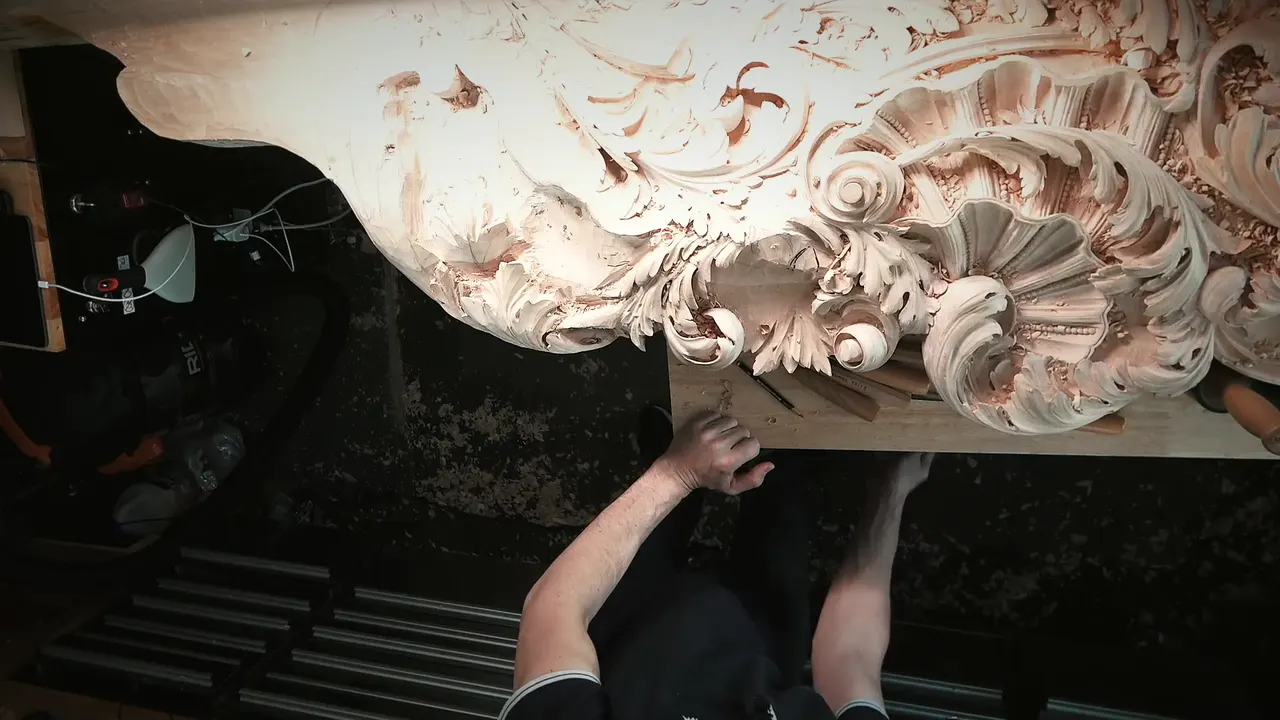

In Venice Room 64, I put it plainly: "I also need to touch up a little bit." I could see my cuts were "not really smooth yet in this area." Other lessons of mine use the same words for pencil marks, rough edges, pipes, tools on a wheel and reed brushes.
Have you ever looked at a spot that was almost done and found cuts that still felt rough? Part 2 shows the cut I pushed too hard and the holes I dug next. Later come the lessons where the words show up again, from other Venice Room workshops to sharpening, and you can match each one to a job on your own board.
How did part 2 bring up the touch-up?
The part starts with a plan: "I think it's time for me to finalize this section." Some sections will hold flowers, I told you ahead of time, and those will be all filled. So I did not have to worry about finishing nicely or making a lot of subdivisions on the inside of this one. Even so, "that section is really important," and I was getting there pretty quick.
The touch-up itself came with a tool I named. For the job I planned on a number I believed was marked eight, though it feels like a seven. I called that brand "right now my most favorite," made in Russia. A moment later: "Okay, wonderful. So that is good."

What happened in part 2 after that?
I wanted to develop this section, and its logic, I said, is wrapping. One part wraps on the inside and wraps beyond another piece, and a secondary wrap sits beside it. My first thought was to bring that second wrap along one way, but then I changed my mind. I did not have to get all the way far. I could probably stop somewhere right here, and that one would also wrap on the inside, "some kind of wrapping."
Same tools next: just the five millimeters (0.2 in), number 11. First an outline, "although I still have to create some concave on inside a little later." That outlining was only preliminary, I said.

Where did I push too hard?
The next job was to clear the surrounding area. Right there, a mistake: "I pushed too hard, and I removed some of that stuff, which I should not, but it's okay." Number five was the tool for that operation. I wanted to avoid a sharp transition, so my plan was to round it up with that tool again, pretty much.
Where did the deeper cuts begin?
Then I would get inside with the number 11. The side needed a much deeper excavation first, because it also has to wrap. That meant undercutting it, which I called kind of tricky.

A deep undercut was not my goal, since it would be visible only from the bottom. A smaller tool might give me a really nice shadow. But I could not go too deep right now, with a lot of material still to remove.
Which tools did the concave and the hole call for?
The section had to be concaved, and concaved nicely, so I said I would try number eight. It had to fill underneath. Then an idea arrived. Maybe a really deep shadow in this area was a good thing, "which I probably should do." I thought it was a great idea, and I asked myself why not.

A number nine in a quarter inch (about 6 mm) came next, and I hoped it would fit. It did. My note to myself was to start and create my plug cut, then remove. A full rotation was not needed. One side got half a rotation, and the other side got half a rotation too. Inside, I said, I could now excavate as much as I wished.

Did the other parts of workshop 64 have a touch-up?
Neither one says the words, but both hold the same kind of work. Part 1 had me thinking I might take care of a surface a little better with the back bend. That pass went in the wrong direction, no bueno, I said: "when you're doing it the wrong direction, sometimes that stuff happens." A side was getting damaged, which was absolutely okay, since a super sharp number nine could clean it. One small section showed up, and that was absolutely okay too.
I looked it over next. "That is good. Wonderful, and that makes me happy, and a couple more spots to clean up." Near the end of part 3 the mood was the same: "That is wonderful, and I'm going to leave it at that." Maybe just slightly clean, a little bit more, and maybe the upper part, which the back bend could clean.
What did the touch-up mean in part 9?
There it belonged to a tool. One side of a pipe was done, and I turned to the other. I needed a different tool, because this one would not work. The cut ran against the grain, so my tool needed to be super sharp. I grabbed number two, six millimeters (0.24 in), and said: "Maybe I just have to touch it up little bit, sharpen it."

First I said I stropped it a little bit. "Actually, I did not strop it. I did hone it on a 6,000-grit sandpaper." Rounding the edge was not what I wanted, so I needed it really super sharp. It worked really good, wonderful, I said.
Workshop 67, in the same course, has a line in its second video: "a little bit touch-up underneath." Another tricky area, I said, because of the grain and so on. The inside, I said, I could clean off camera with no problem.
Which earlier Venice Room workshops use the words?
Back in workshop 6, part 1, the words were "let me touch up the upper part." The next ones were about getting rid of a pencil mark. Curvature mattered too, I said, and about losing it: "Really don't want to lose it."
Workshop 9, part 5, has an edge that was kind of rough. My plan was a touch-up. I still disliked how that edge looked, and I thought I needed to sharpen this one, too. Then came a reminder, one I know I repeat sometimes too many times: sharp tools are a must, and dull tools will give you a lot of frustration.

Part 8 of the same workshop finds me happy "at least at this point," though not completely. The pipe could be fixed later on, I said. Still, I had to bring my concave closer to that direction, to give that movement the right direction.
Workshop 12, part 8, reads "Maybe just little bit touch-up. It should be good." The pencil mark was next to go. The tool I might take was a number 5 or 6, and I leaned toward the big number 5.
Part 8 of workshop 36 has a technique I was not sure about. A little slope for a spot was one idea, and for now I would leave it like it is. The sides could probably get a light pass. A skew chisel was my pick for cleaning the upper part.

Workshop 39, part 9, has an idea for the whole piece: a touch-up all around, for somewhat final shape. That way I would know exactly how it is supposed to look.
What about my other carving courses?
Hashemi Flowers 23, part 1, is about fragile work: "that is really fragile, and it's easy to break." One spot there could probably be fixed with a little touch-up. My advice for it: do not press with your hands, try to stay away, and hold them above the carving.
Part 3 of that lesson has a different mood. I do like my high volute, I said, and a touch-up there is definitely possible. Then: "let's work on those two parts."

Hashemi Flowers 41, part 2, used a number three, a small one, about 3 millimeters (0.12 in). The form looked established. Next I needed to clean it with number three and a quarter inch (about 6 mm). I called it touched up, a "little, small, tiny detail." Then I needed to probably undercut a little deeper on that side, with number 11 again, 1 millimeter (0.04 in).
Corinthian Acanthus Leaf 3, part 2, starts with my number seven, "my workhorse on the gouges." A guess about yesterday followed, and a touch-up it needed. I read the main movement of the acanthus next. The center line was going to be my high point, and from there it would go downhill both ways.
Lily Box 5, part 3, had me giving some of the sides a little 45-degree chamfer. I was not too happy yet about the overall shape. A touch-up was possible. The movement needed a better shape. Number six or even number seven could give it, and I would try six first, or maybe seven. In the end, "I think number seven will do better."
Can a tool get a touch-up too?
The sharpening lessons say so. In Sharpening Fingernail Gouge I looked at the result and said: "You can see it's mirror. I can see myself in it." The inside came next. Then the outside again, and then all the burr had to go.

Sharpening V-Tool, part 4, has me about to go over the heel a little more. The heel part is more like a gouge: a U-shape, not a straight V. Perfect, I said, and then "we're going to flip around" and take it to the 6,000 grit.
Sharpening a Spoon Gouge has the words "touch up" during final buffing by hand with the same blue paste. Then: "Now it's a true shiny. Like a mirror."

Flower Rosette 6, part 1, shows my stropper, with a side for the V tool, one for the gouges and a flat part. A little touch-up on the strop, with a green paste, came first. Then my knife went straight down on the line.
Greek Acroterion 2, part 1, is a lesson on soft wood with a cheap carving knife, and I was not afraid to use it. "Let me touch up little bit." Right after that I talked about placing it straight down and following my line.
Do a brush or sandpaper touch up a carving?
At times. In Furniture Panel 19, part 16, the authentic way was possible: a little pass with a reed brush. It makes it look like it sands it, but it's not, and it's going to look nice.

Part 14 of that lesson has the brush again, with just a slight touch. That way I would see if it is perfect or not perfect, and I could clean that with the same tools I used before. "It's a really small volute, but it's nice."
In workshop 83, part 2, sandpaper was an option, and I said it is not going to leave any abrasive.
Floral and Molding for the Panel 14, part 3, was about sanding, with a product that is "just a mesh based." It is not going to clog, and the dust goes right inside of the net. Even on the flowers a touch-up with it may be a good idea. My own view came next: "I'm not the biggest fan of the sanding of the process itself. I really like to leave all my work with the facets and so on." Making it really smooth, as a lot of furniture makers like to do, is okay and absolutely fine, I added.

One last use is about a finish. In Lily Box 13, part 10, I talked about a finish in a can. It is "made for just the fixing, like a touch-up product," so it comes pre-mixed, and I really like the sheen it gives.
Which lessons say touch up?
Here are some of them in one table, with the target and what came next.
| Lesson | Target | Next |
|---|---|---|
| Workshop 64, part 9 | A tool | Honed, for a really super sharp edge |
| Workshop 12, part 8 | Left like that, maybe just a little | The pencil mark gone, number 5 or 6 in mind |
| Workshop 36, part 8 | The sides | A skew chisel for the upper part |
| Hashemi 41, part 2 | A tiny detail | Undercut deeper with a number 11 |
| V-Tool sharpening 4 | The heel | On to the 6,000 grit |
Where can you watch every lesson?
Every lesson named above sits inside one of my courses. Workshop 64 is in Venice Room Part 6, and the first twelve workshops are in the first Venice Room course. Workshops 26 to 37 live in the third Venice Room course, 38 to 49 in the next one, and 62 to 73 beside workshop 64. Workshops 74 to 85 are in the seventh one. The wood carving lessons on flowers, acanthus and a furniture panel are in Carving Hashemi Flowers, Carving Corinthian Acanthus and Carving Furniture Panel. The tool lessons are in Carving Tool Sharpening. To watch the full videos, start here.

How it's done
- Look at the cuts. One area of part 2 still needed smoothing.
- Name the touch-up. Before developing this section I said a touch-up was needed.
- Pick the tool. A tool marked eight was the plan.
- Check the tool. Part 9 had a touch-up meaning sharpening the tool, and I honed it on a 6,000-grit sandpaper.
- Go on to the next section. The section with wrapping going on was the one I planned to develop.
Frequently asked questions
Which tool did I pick for part 2?
I said I would use a number I believed was marked eight. Of that brand I said it is my most favorite right now, and it is made in Russia.
Can touch up mean sharpening a tool?
In part 9 of workshop 64 the tool itself got the touch-up: I said I might just have to sharpen it. In the spoon gouge lesson the words came after final buffing by hand.
Do I use a reed brush for it?
Furniture Panel 19, part 16, has the authentic way: a little pass with a reed brush, to make it look like it sands it, but it's not.
Does sandpaper do the job?
What to carve next
- Venice Room 64 lesson
- Venice Room Part 6 course
- Venice Room 6
- Venice Room 9
- Venice Room 12
- Venice Room 36
- Venice Room 39
- Hashemi Flowers 23
- Hashemi Flowers 41
- Carving Corinthian Acanthus Leaf 3
- Lily Box 5
- Sharpening Fingernail Gouge
- Sharpening V-Tool
- Sharpening a Spoon Gouge
- Flower Rosette 6
- Carving Greek Acroterion 2
- Furniture Panel 19
- Venice Room 83