

Alexander Grabovetskiy, woodcarver, School of Woodcarving · Published 2020
What does a wood carver mean by "untouched"?
Quick answer: Workshop 80 has me saying I would lower the sections and leave one high spot as it was, with a slope on both sides. Other lessons use that word for a first layer and the middle line of a leaf, and once for a few fibers beside a relief cut.

In part 12 of workshop 80 I said I would keep the high spot untouched, but sloped. The wood around it had to come down. Other lessons of mine use the same word for layers, lines, edges, handles and a few fibers.
Have you ever stood over a block with one place you must save and a lot of wood to remove around it? Would you mark that place first, or trust your eye? Each spot below comes with my words and the lesson that holds them.
What did part 12 leave untouched?
I said, "Okay, I'm ready to lower down those sections." Then the model on my computer came in: "Just because I do have a 3D model on my computer, I know I have to be approximately a quarter inch from that surface to the end of this movement at that point." A quarter inch is about 6 mm (0.25 in).
My second figure came with "from this cavity": about five-eighths, 16 millimeters, something like that. Five-eighths of an inch is 16 mm, so the two are one distance in two units.
What had to happen was plain. "So which means all of that has to go down." Then my plan, in my own words: "So I have to just lower down, and I'll keep my high spot untouched, but it's going to be sloped." And: "This side and also the same on that side."
I also said, "everything going to be just like around it," and that I could safely take off material "really quickly."

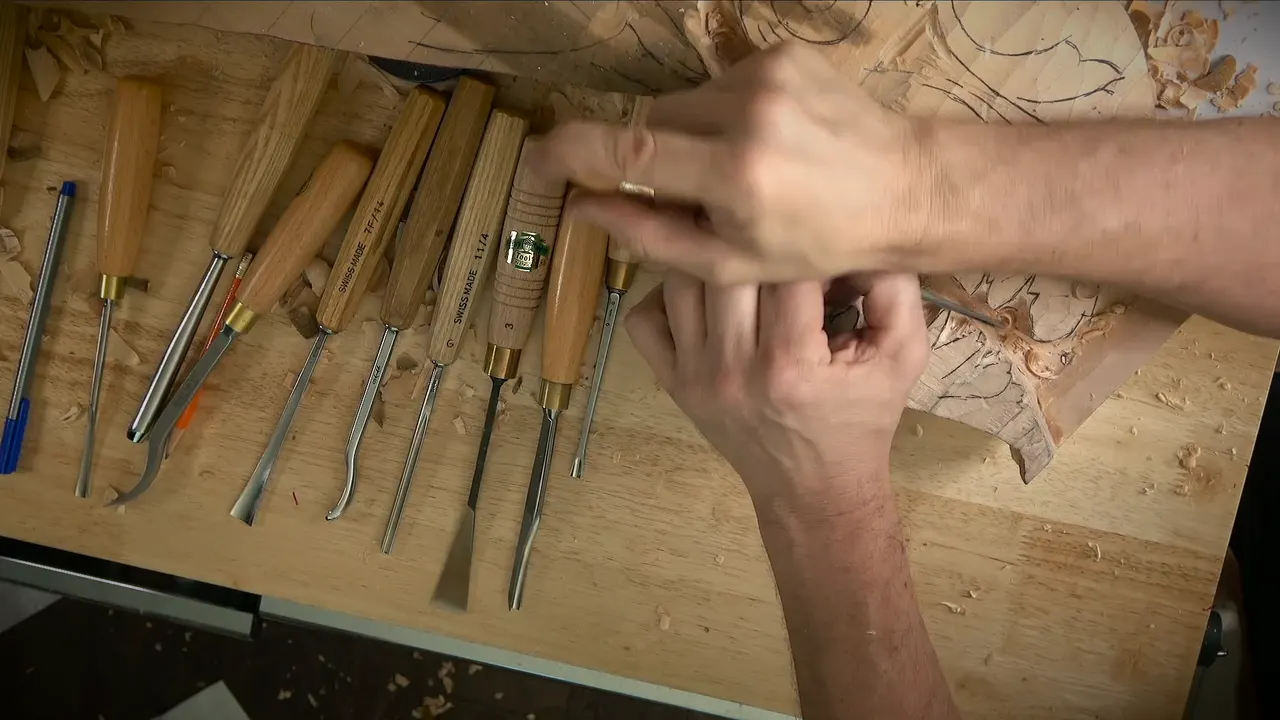
Frames from this video show my hands at the hollow with a small tool, while gouges lie in a row at the left of the bench.
How did parts 1 to 3 treat the same high spot?
In part 1, a number 11 of 4 mm (about 5/32 in) could go "almost to the depth," not completely. Then came my pencil plan: "I'm going to need that high spot, so I'm going to mark it with the pencil."
"It's better to mark it with the pencil or marker than not to mark it," I said, "because you can always see that later."

Part 3 names the spot itself: "Now I've got a high spot, which is the highest spot right there, and gradually it's supposed to go downhill." About the channel, my words were "I can really take a straight cut down channel between those, and go to that point, which I still have to be kind of careful."
More drill holes were an option, "but I don't think I need it." And: "at least I know for here I can take it down as much as I want to."

The wood around the drilled spot gets its plan in part 2: "just go straight and remove all of that section almost straight, and then just concave it to that point." After that: "I have a tiny spot," and "use just the small tools."
Which high points stay at their height?
Hashemi Flowers 12, part 2, has one inside a flower. I told you I was carving against the grain, because "I really can't attack that from this side because I do have that movement in my way." Another line: "And again, I can't go lower than this high point. I have to keep that high point untouched."
Then a bump: "this bump has to be flushed, so that is on my way." My tool was a #7 of 1 inch (25 mm), and the concave had to go on an angle "to repeat this movement." One more thought about the same tool: "maybe while I'm using this tool, I can right away establish my main movement on this part."

Furniture Panel 19, part 1, shows the idea on moldings. The plan was to lower them "approximately about 1/32 of an inch," about 0.8 mm, and I told you "there's no right or wrong way." One way would use a flatter gouge, "maybe even just number one," at 45 degrees. You "could create a heel effect," with "not touching the middle part" and gradual passes "toward your cut."

The other way uses a router plane: "adjust to 1/32 of an inch and shave it evenly, and leave those high spots untouched." A "quarter-inch blade" (6 mm) was probably my pick for it. I called that way "probably my preferred way."
In Furniture Panel 29, part 3, I looked at a result: "I've got all my high spots almost untouched." What I wanted was "a lot more shadow in this section."
The grape leaves vase has it too, in lesson 2, part 5. I would show it "on a big leaf," and "rest of them, I'll do exactly the same." About that leaf: "we need to keep those high spots almost untouched."

The mark was there to show you. On the rest I would not mark it, "because I really want to keep it as high as possible." Otherwise we lose the overall shape. The idea, I said, is a high spot on the middle line of every division.
How much of a layer stays for later?
In workshop 68, part 5, the word fits a layer. "I left approximately eighth of an inch to the first layer," I said, about 3 mm, and "I really need to keep that first layer untouched." A second thought followed: "Well, not necessarily completely untouched."

I still had to clean it and "make it ready for a future corbel," which would connect to it. My next step would be a "big 30 millimeters number 11" (1.2 in) for the main concaves and convexes.
Part 7 of workshop 71 puts it this way: "Later on, I'll be able to undercut it, but for now I don't have to until I establish my shell movement and so on. So I want to keep some of the material untouched yet." Earlier I had said, "I don't have too much thickness right here."

I could see "the main movement, what I've done," and what waited inside was "just the cleanup and so on."
Workshop 48, part 3, has a "big chunk" that I needed to develop "somehow the right way." It "has to go gradually downhill," and some of it is "going to grow above." Some material would stay "untouched yet," I said, and of one part, "I'm not going to touch yet."

The tool was to be 30 millimeters (1.2 in), a number 11, "for now." And I said, "There is no final decision on my end," about how it would look.
The lily box has it in workshop 8, part 3. My tool was to be "number nine and quarter inch, six millimeters" (0.24 in) to "chop out whatever the material I don't need." I did not want to "dig inside of the wood," and I meant "the first layer, because I don't want to deal with the marks it's going to leave."

"So when I'm chopping, I'm trying to leave some of the material untouched." There was more: "there is a glue because it's a wider area," and "in this case, it's actually helped me."
In Furniture Panel 38, part 2, I said, "Let me grab my router plane." Going too much inward was not what I wanted, so I still wanted to leave it, in my words, "untouched." And: "I wanna blend those two areas together and it feels like I've achieved that."

Then: "we have to take care of the blending spot," with "a spoon gouge, which is number three, but it's a small one that's about quarter inch or so" (6 mm). "You kind of have to feel how deep you have to go with the cut."
Can waste stay untouched on purpose?
Over in workshop 76, part 9, I planned "some kind of handle" in one section: "leave that handle, for I can clamp it easily." My waste would sit "right here," and I would "leave it untouched."
"Later on, I can always chop out that part," I said, but "this handle is really important to hold it in the vise." I also "left approximately, I would say, about quarter inch right here" (about 6 mm). That "would be a lot easier for me to remove with the gouges."
Which line or edge do I keep?
Corinthian Acanthus Leaf 4, part 2, has this: I said I needed "even smaller, number nine," and would take "about 10 millimeters" (0.39 in). Then: "just keep the center lines untouched." If you can handle it, make "just a single cut" as long as possible. It "gives a really nice movement to your piece."

Greek Acanthus Leaf 5, part 4, has the middle line. "I did just a straight down cut," I said, and next I would move my tool toward the right-hand side angle and "establish one side first carefully." Then: "Now I can rotate and work from this side. Just using my V tool as a chisel, but keeping the middle line still untouched."

The left-hand side was to get the same treatment. A Greek leaf has "absolutely no ridge, just a pure V cut" a lot of times, while on the Corinthian leaf "we left some higher ridge on the inside of the leaves."
Workshop 84, part 12, has me planning a separation and a second one. Then: "Or maybe not." After that: "Maybe I just going to keep just one of the sides untouched." I added, "I know it's hard to understand, but you'll see at the end."
The rosette course has it in workshop 5: "let me take around this section and move in. And you can see again, I'm leaving my edge untouched."
In workshop 163, part 2, I said, "I could start a division on that piece," and I would leave this one "untouched." Before that: "I want to wrap it somewhat lower, almost to the level of that future molding." On drawing, I really have to keep the final look in mind, and "the final look sometimes not the same."

Can fibers or a tool stay untouched too?
In Rosette workshop 3 I explained why I made relief cuts. A tool on solid wood "pushes wood both sides, both directions, and the fibers are just smooshing." With the relief cut, "my fiber is going this way, and those fibers staying almost untouched."

The bevel lesson in the tools course has a tool. One of two had a rounded heel, and my "hand is still kind of low" and "I don't have to raise elbow." Then I voiced a question: "why did I leave this one untouched."

My answer turned to the mallet. On hardwoods "you usually use really heavy mallets," mine "two pounds, 32 ounces" (about 0.9 kg). "You really have to hit the end of the tool," the handle. Its length: "about three and one-eighth, I would say, about 80 millimeters." That is why I "left some of my tools without creating long bevel," I said, "for mallet and the harder woods."
Curly Kitchen Cutting Board 18, part 1, has a piece of walnut. "I left it overnight and it's dry," I said, and for the sake of proving the point I would take "a piece of walnut I have left in my shop." I added, "I was practicing some crackle finish on that, but this side untouched." It was "really, really close to the color" of "that piece of lime wood or basswood, if you wish."
All the untouched spots side by side
| Lesson | What I left alone on purpose | My words |
|---|---|---|
| Venice 80, part 12 | One high spot, sloped on each side | my high spot |
| Hashemi lesson 12, part 2 | A high point I could not go lower than | that high point |
| Panel lesson 19, part 1 | High spots left while a router plane shaves | shave it evenly |
| Vase lesson 2, part 5 | High spots on a leaf of the vase | almost untouched |
| Room 68, part 5 | A first layer, to be cleaned later | first layer |
| Venice 76, part 9 | Waste planned as a handle for the vise | that handle |
| Corinthian leaf 4, part 2 | The center lines of a leaf | center lines |
| Greek leaf 5, part 4 | The middle line while I work one side | middle line |
| Room 163, part 2 | One piece, while a division could start on another | this one |
| Antique style rosette lesson 3 | Fibers beside a relief cut | those fibers |
| Cutting board 18, part 1 | One side of a walnut piece | this side |
Where do these lessons sit in the school?
The workshop 80 lesson holds this part and the three parts I used beside it, and it is where the first line of this page was said. Venice Room Part 7 holds workshops 74 to 85. The other places come from more Venice Room workshops and from the Furniture Panel, Hashemi, grape leaves, rosette, lily box and acanthus courses.
Wikipedia has short pages for wood carving, a chisel, the grain and a pencil, if one of those words is new to you.
Is there a spot on your block that has to stay at its height? Could you put a pencil mark on it before the first pass?
How it's done
- Name the spot to keep. Workshop 80 has me naming a high spot to leave alone.
- Put a pencil mark on it. Part 1 of that lesson says it is better to mark a high spot with a pencil or marker than not to mark it.
- Slope the wood around it. The plan was a slope on one side and the same on the other.
- Lower both sides in passes. One way on the furniture panel was a flatter gouge at 45 degrees, worked gradually toward 1/32 in (a little under 1 mm).
- Leave waste where it helps. A handle of waste to clamp the piece was my plan in workshop 76, and I said I could chop it out later.
Frequently asked questions
What did I leave alone in workshop 80, part 12?
The high spot, with the sections lowered around it, plus a slope on each side. I said I had to be approximately a quarter inch (6 mm) from one surface, and from the cavity it was about five-eighths, 16 mm, something like that.
Can a router plane leave a high spot alone?
The furniture panel lesson has it: adjust the plane to one thirty-second of an inch (a little under 1 mm), shave evenly and leave the high spots untouched. A quarter-inch blade (6 mm) was my plan, a way I called probably my preferred one.
Is untouched ever not completely untouched?
In Venice Room workshop 68 I said I needed to keep the first layer untouched, then added "not necessarily completely untouched." I still had to clean it and make it ready for a future corbel, and it would be connected to that corbel.
What to carve next