

Alexander Grabovetskiy, woodcarver, School of Woodcarving · Published 2020
What does a wood carver mean by "crown molding"?
Quick answer: Crown molding is the shape I compared a curve on my corbel to in part 3 of workshop 86, a cove with a concave base. Elsewhere in my lessons it sits at a ceiling, behind a carved piece, and somewhere above, where house carvers could leave some spots rough.
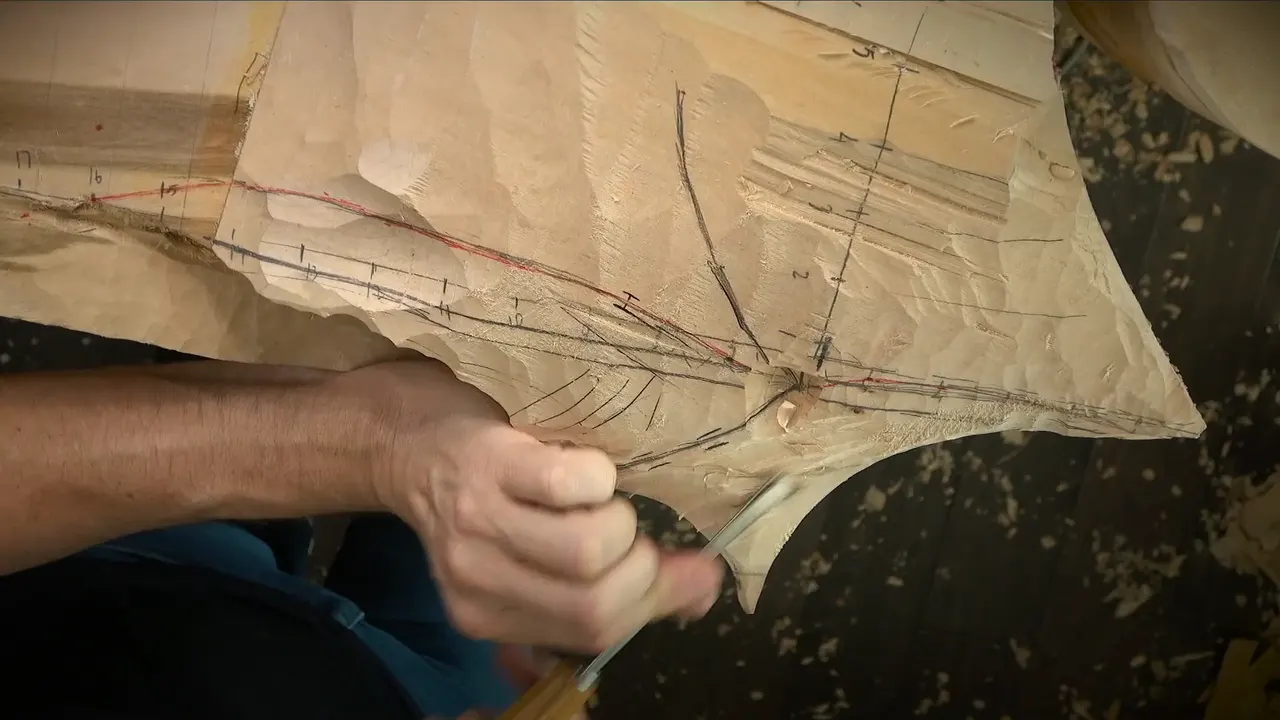

Crown molding is, to me, a big concave on the inside, pictured with a ceiling and a wall, and in Venice Room workshop 86, part 3, it is the word I put on a curve of my corbel. My other lessons place it up at the ceiling, behind a carved piece, and somewhere above in old house carving.
Have you ever looked up at the top of a wall and wondered how a curve like that gets made? Would you like to hear how I measured one from a flat print? Then come through workshop 86 with me. Next we'll visit the other lessons where crown molding turns up, each one linked.
Seven notes from this part
- A printed paper marked every inch, with calipers carrying the marks over.
- Depth by a second pair of calipers.
- A line left about 3 millimeters (about 1/8 in) off, on both sides, with the excavation and the blend still ahead.
- A concave base, a volute close by, a cove.
- A number seven for the excavation, with a larger gouge as an option, and tools that must be super sharp.
- Preliminary movement.
- Ceilings, a Shaker style and a profile behind feathers in other lessons.
What did I compare to a crown molding in part 3?
Part 3 opens with a plan: "Now, I'm going to concentrate on this section before I go a little farther." My drop was marked out, "my drop right here." The job needed "three-dimensional form." "It is a little challenging," and the reason was "I don't know the plane or curvature yet in 3D."
The words came as I described the movement. "So that is going to be really interesting movement right here, just like a crown molding." Then "Almost like shaker style. It's not the shaker style, but cove, okay, if you know what I mean." The base will be "concave." The crown has "some details on inside." A volute was due "somewhere close to this area," with "some movement also" inside.
Later the word returned. Staying about three millimeters, "about eighth of an inch from both sides," was my plan before the excavation, with a try at blending it "nicely." One more line "also goes to the same point," and it becomes the "section of our crown molding." Next: "I know right now it does not make any sense, but it will."
How did I mark the curve before the crown?
The marks came first. "I printed out the paper and marked every one, every inch," and "just the normal calipers, whatever calipers you have," did the measuring on the paper. I "translated that," and "connected that." An inch is 25.4 millimeters, if you think in metric. As for the method, "it's actually the same way I've done everything before."

Depth had its own tool. "I also got that depth correctly right now," and "I also used calipers, but little different calipers." Those are the kind "which most of the time used by woodturners." Then comes "couple spots right here, one, and right there, one," and "that is the spot which is translated on a piece of wood right here." After that, "I just referenced from the backside, and I got my depth."

Another piece goes "on the right-hand side of the main design," and "I have to do another one, exactly the same thing on the other side." One spot set a limit: "this spot is exact spot, so I cannot go farther than that." Extra material was left, "maybe about half an inch or so" (about 13 mm). Next comes a plan to "go really close to the line."
Lines ran down the side too, and "I placed that mark," with "that goes all around, which you don't see." Whether you can see them was open, with "I'm not sure" as my words.

Which cove jobs came up in part 3?
A plane came up: "I have to just create that plane, just go like that." Concave work was due on two sides, "this side" and "that side." Later, "I'll get to the sharp line," and then "that sharp line could change. I need to change and make it really smooth transition."
The tool talk is short. "Of course, I could use big tools, but I really don't need to." The best tool for the operation "would be just probably number seven, I would say," and "I could use probably bigger. It could make it a little quicker." Attack from both directions was possible, and "maybe it's a good idea to make it little more stable."

Care shows up in the lines, starting with "Have to be careful how I attack it." Tools "absolutely must be super sharp." In a "really, really deep concave," the way in was "attack this way." And "it does have to be a really smooth transition, so I don't want to force it too much."
The part ends plain. "I am creating only preliminary movement," because "I do have a detail" that goes "right on the side," and "I want to make sure I'm not destroying that detail." The last words are "See, that is like a concave."

Which words did part 4 add?
Part 4 stays on the same shape, and a miter comes into it. At the intersection comes "a miter point from two sides," and the other side gets "a concave going in just like this." Then "So this part is actually true architectural part." And "if you're interested in architectural carving, that's pretty much the way it's done."
Of the old days, "they did a lot of twisted moldings, crown moldings, cornices, if you wish to call that way." Then "in the United States, that part called crown." For the outside word, cornices and miter point have their own pages.
Tool sizes show up in part 4 too. "I think I could use a big gouge, like three inches." Then "No, just 3 1/8, 80 millimeters." The gap sits "approximately eighth of an inch, about three millimeters or so, from my red line, because it's not the final depth yet."
Number seven has a reason in part 4. "If you would ask me why I'm using number seven, in this case, I can't overdo it." It "gives me just enough ability to manipulate the shape, just chip by chip." And "that is one of the favorite tools, actually, when I'm working with figure."

Where else did I name a crown molding?
Venice Room 58, part 7, has a picture of it. "It's almost like a crown molding. If you're in United States, you will understand what I mean, on inside." Then "Like a Shaker crown molding, I would say. It's not Shaker crown molding, but you get the point." The Shaker kind "looks like this," and "if you install that, there is a ceiling, there is a wall, and the big concave on inside."

Details were a choice there. "I'm not going to add any small details like beads, like we did everywhere else. This is supposed to be continuous." A deep spot was a risk: "the challenge is I don't want to get too deep right here." Then, "Hope it makes sense, and I'm not confusing nobody."

Workshop 87, part 7, has "a crown, which is a cove, concave." The slope will run "downhill." For that, "I need to take this line somehow nicer, just to slope it and clean it." Near the end, my plan was a movement from the opposite side that would "lay right on top of that crown molding."

Up at a ceiling, workshop 124, part 1, has crown molding connected to both sides. Flowers would come last, and "it's going to go on the ceiling," with "crown molding connected to the both sides." Before that came a plan to "jump on this side and take care of overall movement." The clamp had its reason too: "Want to make sure it's stable."

Glue-ups come up in workshop 147, part 4. "I still have to make some glue-ups in this area, and I'm going to do that off-camera, this section, because there's going to be a crown molding butting against that." And "I need to figure out what's the best way to do that yet."

A small crown shows up in workshop 148, part 1. "I've got three feathers, which is going to go all the way to the ceiling, and the crown molding," which is "not that big, actually." It is "a kind of small crown molding." There is also "a profile I have to make," and it will go "right behind."
My mind changed there. "I didn't want to see any gap between that section and the crown molding." Then came the idea of "much better" looks, with the profile "right behind." The reason was the wood: "wood is wood," and it will "expand" and "shrink" with "the moisture in the air and the humidity."

"If I'm not going to make it solid connected to the crown molding, it would be a lot easier for the wood movement," I said. "So I'm okay if it's going to move slightly."
The Venetian flowers rosette course, lesson 1, part 1, has the crown molding "right behind that," and it runs to the ceiling. The piece "just has a curvature, really nice curvature." It was "a paint grade."

My April 2020 livestream on plastic as a carving tool shows a piece in progress, and the molding talk is short. "I've got a molding movement," a "crown molding almost movement." Then "I had to do that to be authentic to Venetian style," I said. My design "goes all the way to the ceiling," with "a curvature," and for some of you, the challenge was "how you transfer on a curved surface."

Who carved the crown molding long ago?
Venice Room 55, part 5, lists the levels. "Then a third higher level of wood carvers, they would call them home carvers. It would be equal to architectural carving." These carvers "would do a lot of egg-and-darts. They would do a lot of moldings with some acanthus movements." Later: "see all the moldings applied, the crown moldings, and all the base moldings, all the chair rails, and all other moldings, they about the same."
In that part there's also "not much artistic going on in architectural wood carving because there's not too many details, honestly." Such a carver would "carve one detail day after day." For the outside words, egg-and-dart, chair rails and base moldings have pages of their own. Those carvers "develop really good skills. So they can carve with closed eyes with no problem."
The dining table apron course, workshop 17, gives four kinds: "boat or ship carvers," "coach or vehicle carvers," "house or architectural wood carvers," and "furniture carvers." For house carvers "a lot of stuff people don't see close to the eyes. It's somewhere above, like crown molding, with some architectural details." Then "So they could make some mistakes. They could leave some spots rough."
Furniture is different. Of furniture carvers: "That is exactly what we're doing in this piece." And "furniture is really close to your eyes."
My April 2020 livestream on the first million dollars walks through the trades. A finish carpenter "can put the base molding together. He can put the crown together." For master carvers, "they able to install the doors, get the crown together." Level three means "architectural carvers who would just work inside of the houses, inside of the palaces." Boat and vehicle carvers "would never carve egg and darts, or even on the crown molding acanthus. So those would be architectural wood carvers. It's a different level."
The clay modeling livestream has a friend's line. "There's a lot of people who can install crown molding, base molding, doors, windows," he told me, "But not too many people who are able to actually carve wood." That was "like pushing me."
Which saw came up for a crown molding?
The V-tool sharpening lesson 3 has a saw example, in a talk about machines. "You can use a coping saw for make a cope for the crown molding, or you can use a jigsaw and still have the same results." With the coping saw, "you're going to spend about five minutes," and with the jigsaw "just a few seconds, half a minute maybe, maybe a minute." Then "saving five times of your time, and time we know is money."
Which of my lines came from which lesson?
| Where I said it | What came with it |
|---|---|
| Corbel curve, Venice Room 86, part 3 | concave base |
| Intersection, Venice Room 86, part 4 | a miter point |
| Shaker style, Venice Room 58, part 7 | a ceiling and a wall |
| A slope, Venice Room 87, part 7, with its downhill line | a cove |
| Flowers on a panel, Venice Room 124, part 1 | last, for the ceiling |
| Glue-ups, Venice Room 147, part 4 | butting against that |
| Feathers and a profile, Venice Room 148, part 1 | small, right behind |
| A finished piece, Venetian flowers rosette, part 1 | right behind that |
| A piece in progress, April 2020 plastic livestream | authentic to Venetian |
| House carvers, dining table apron, workshop 17 | somewhere above |
| Old carvers, Venice Room 55, part 5 | a lot of moldings |
| A friend's list, April 2020 clay livestream | install crown molding |
| Coping saw, V-tool sharpening, lesson 3 | a cope |
Is there a curve in your own work that calls for a crown? Would you like to watch me carry one off a flat print and onto the wood, using a number seven plus a few marks from calipers? You'll find workshop 86 inside one tuition plan, with the rest of Part 8 of the Venice Room.
How it's done
- Marks from a printed paper. Every inch got a mark on the printout, and calipers carried each mark across.
- Calipers for depth. For depth I used a different pair, the kind woodturners use, and referenced off the backside.
- A gap beside the line. My plan was to stay about 3 millimeters (about 1/8 in) from the line on both sides before the excavation.
- A number seven, with a bigger option. The best tool for the operation would be just probably number seven, and a bigger one could make it a little quicker.
- A movement still to be finished. The movement is preliminary, because a side detail has to stay whole.
Frequently asked questions
Which curve did part 3 compare to a crown molding?
The movement I described while thinking of a crown molding, almost like Shaker style but a cove, with a concave base and some details on inside. A volute would sit somewhere close to it.
What measuring came before the carving?
Every inch got a mark on the printed paper, and normal calipers carried the marks over. For depth I used little different calipers, the kind woodturners use, referenced off the backside.
Which gouge sizes came up for the concave?
Part 3 names a number seven, with a bigger gouge as a quicker option. In part 4 I said I'm using just number seven, and that a big gouge, like three inches, was a possibility, then "just 3 1/8, 80 millimeters."
What to carve next