

Alexander Grabovetskiy, woodcarver, School of Woodcarving · Published 2020
What does a wood carver mean by "too close"?
Quick answer: Workshop 86, part 7, gives a spot beside a volute a check, a plan to stay off it, and a wider pass to follow. Other lessons give a distance, such as five millimeters, six millimeters, about quarter inch, or two to three millimeters.
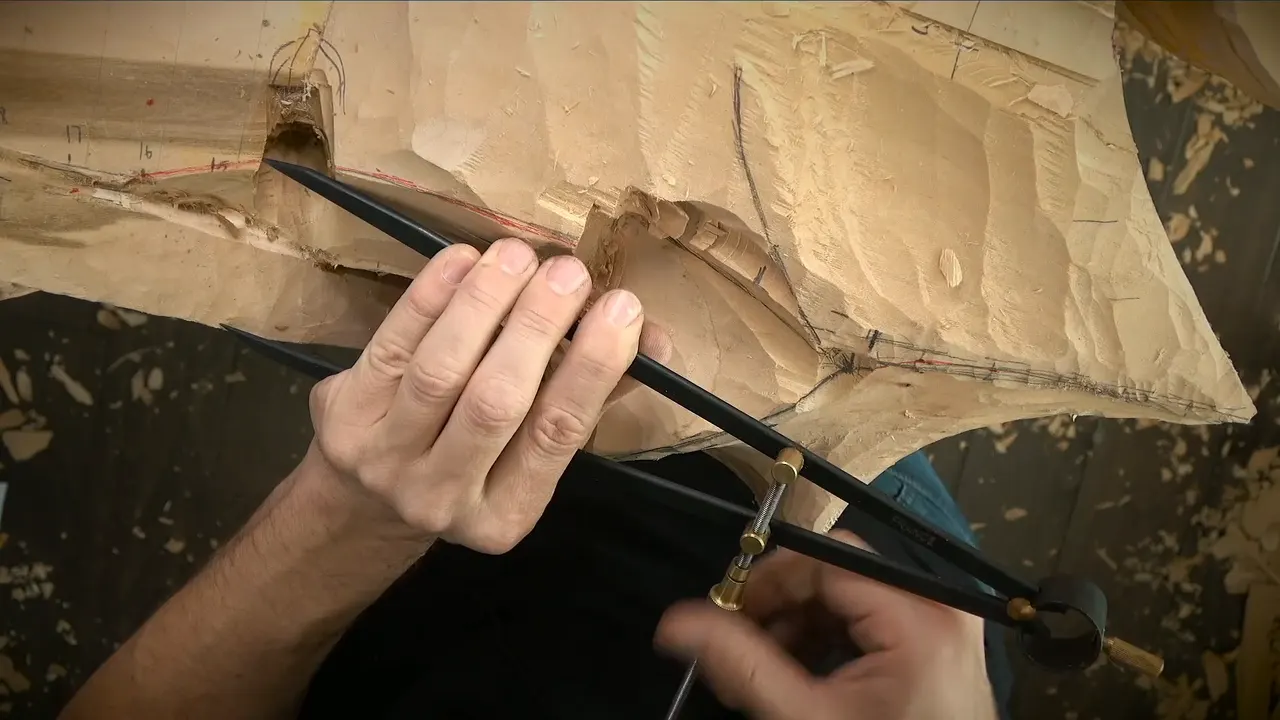

In part 7 of workshop 86, I say "close, but not too close yet," with a volute still ahead. In my other lessons the words come with a distance, a grain or a reason: a sixteenth of an inch, an eighth, five millimeters.
Have you ever stopped short of a line and wondered how short is short enough? Would you like to hear my own numbers for it, lesson by lesson? Then come through workshop 86 with me. Each borrowed line names its lesson, and those lessons are linked.
A short list for part 7
- Higher by a little, with the slope still in view.
- Number nine, and a quarter inch (6 millimeters) above the original picture.
- A 3D model on the computer.
- Ahead sits a volute, so the work stays a little way off it.
- A smaller tool next, with a smaller nine after it, of about 10 mm (0.39 inch).
- Some six or seven millimeters (0.24 or 0.28 in) left on the wood.
- calipers for the next spot.
How does part 7 of workshop 86 begin?
The part opens on height, with this corbel in view. "I could make it a little higher because I still want to see that slope." The other side: this is going to slope down a little bit too.

A spot and a tool come next: "let me work on this spot right here," then "I'll take number nine." After that, "I need to measure it anyway."
My plan for the height is approximately a quarter inch, six millimeters, higher than the original picture. My words on it: "I think it's going to be better." And a way back: if I don't like it, I could always make it lower.

A reference sits in the computer, my 3D model, "and that way I know exactly what is going on." The 3D model is one check. A double-check is another, with a mistake the thing to avoid. Then: "It looks fine."
Where does the volute change my distance?
The volute changes how far I go. "I don't want to go too far because there's going to be a volute," and I'm afraid I already got a little too far.

So: "I have to stay a little bit away from volute. A little bit away from volute." After those lines come "this way first" and, in my words, "my boundary."
A check follows: "Let me check." Then: "And close, but not too close yet. So I'll widen that anyway."

For the tool I need something smaller, maybe 5/8 of an inch or half an inch (about 16 mm or 13 mm), to remove some of this.
What does part 7 leave on the wood?
"I think that is probably enough." Then: "I'm pretty close, so it's a quarter inch, six millimeters."

A plan comes next: maybe an even smaller number nine, about 10 millimeters (0.39 in), to get to the final spot. And then the count of what is left: "maybe six millimeters, maybe seven millimeters is what I left." Those come to 0.24 in and 0.28 in. My verdict on all of that: "So that's plenty for me."
How do I reach the next spot?
The next stretch begins "So the same idea," with a thought: I actually could just create the spot and then connect it with no problem.

I need different calipers, then "Let me get that point." About that point, "approximately," because it changes the plane, but I should be okay. And I can always refine later on.
The plane has a plan. I have to connect, just remove that plane right here, with a lot of material first, then the channel, then the same removal as on this side. That leaves "a lot less room for mistake."

Again number nine, and "So right away, pretty much attack this side." At the end I have a spot and I have another spot, so maybe it is safe to remove all the way.
What do parts 6 and 8 say about distance?
A gap sits in part 6: approximately 10 millimeters (0.39 in) above my original line, and "I can live with 10 millimeters, no problem." It also holds a plan to excavate beside the line, so the line is not lost, and to lower it only later.

A size of 20 millimeters (0.79 in), "what I'm using," opens part 8, "Three quarter of an inch." A line follows: "So now I'm still safe."
A chunk of wood is in my way there, and it is a little too early to remove it, with the volute work still to come. Later: "I am safely, safely, safely able to remove that chunk."
For the volute position I plan to measure from the corner, not from a line, and to try to "shoot pretty close" toward the edge.
Where else do I stay off an edge?
In Venice Room 16, part 1, the edge is the reason, and "that mushy thing" is what I do not want to see.

In Venice Room 22, part 4, the distance sits on a separation, "farther a little bit." Number three and a quarter inch (about 6 mm) follows.
A face that will be visible is the worry in workshop 63, part 6. It is "really close to a face," so it has to be 100% beautifully done.

In Furniture Panel 17, part 5, "Going to get a little closer." Then comes "Let me get again number 23," or, with the same idea, "I can take number 11 and clean it."

The Byzantine Acanthus course, lesson 9, part 2, gives numbers. Get as close as possible to the edge, with a limit, and "maybe about five millimeters, six millimeters, about quarter inch." That puts five millimeters at 0.20 in.

We refine it later in case of a mistake, so you have some meat. Then remove, but careful, and "Don't hit that first layer."
Over in workshop 92, part 3, one point gets "about maybe six millimeters right here at that point because it's too close to the edge." A quarter inch follows, and "I'm just eyeballing it, okay?"

From workshop 44, part 7: a division goes "a little farther, because we don't want to get too close."
The same quarter inch shows in workshop 61, part 8, which I call "kind of big." A careful approach comes with it, little by little, off the edges.
Which lines give a distance?
The Roman Acanthus course, lesson 2, part 1, gives a gap. Leave about maybe a one-eighth of an inch, "two, three millimeters," away from the final design, and not yet go to the rough background line. An eighth is 3.2 mm.

Hashemi Flowers 1, part 3, makes it a choice. I am really close, near the line, and I feel comfortable. If you don't, you can step away about a 16th of an inch (1.6 mm), or about an eighth. It's "safer, definitely."

Workshop 58, part 8, stays off a line "yet," with a plan to excavate inside and then pass with a clean pass. The gaps in my plan are a couple of millimeters, maybe one and a half (0.06 in). Maybe three millimeters (0.12 in) in some spots.

Part 10 of that workshop leaves about one millimeter (0.04 in) yet, because I don't know how consistent this line is. So I'm going to hit it probably with another tool before I get to the line.

In workshop 151, part 3, I plan to stay off my acanthus movement. I could probably go closer in some spots, "but I want to be safe." The line to stay above is my one-inch line (25 mm). Again, about maybe three millimeters.
At workshop 148, part 3, the words are "A little closer," and then a plan to hold back. So cleaning it will be much easier for me.
The Lily Box course, lesson 11, part 4, leaves approximately one sixteenth of an inch, a little under 2 mm, on a backside. And: "I didn't want to go too close to the surface."
Furniture Panel 39, part 3, has a line about how near to come to the design: "I'm not getting too close." Then: "You can obviously see there's a lines still left." A probable pick comes next, number two at 10 millimeters, "three eight of an inch."
Venice Room 23, part 6, has the big tool as the worry, and the line that follows is "Maybe I should use the smaller one right now."
Why stay off the line?
The grain gives one answer in Furniture Panel 18, part 8. Right up to the edge, but no closer, is my plan. I am working along the grain, which is not always straight, and it can move either direction.
If I get near, I can split it by the molding detail, and I would avoid that. That is why I stay a small gap away as of now.

Thinness comes from workshop 56, part 3. I have to be careful not to crowd the edge, otherwise it gets too fragile, so I leave approximately three millimeters (0.12 in) of thickness.
The Tray of Blessing course, lesson 3, part 1, says it is becoming fragile. Get near the upper part and it's easy to break. "Don't overdo it, please."
Lesson 8 of that course, part 4, puts it on a grape. Do not dig near the grape itself. If you damage the side of the grape, it's gonna be hard to clean. And later: "keep some material."

In Modern Acanthus 1, part 2, the tool is the reason. It has a curvature, and a pass that gets near the line creates undercut which you don't need. "So that is a big mistake."

The Antique Style Rosette course, workshop 1, I find that with a mallet I have a lot more control. For example, I keep off my line, because I do not want any damage on the edge of my line.
Over in Furniture Panel 15, part 6, I add a reason of its own. I stay off my final design "because I can always clean it." A line in part 3 of that lesson says I can always get closer with the gouge or with the smaller blade if I need to.
An edge worked too near turns "really fragile" in Roman Acanthus 11, part 5. There is a way to make it more stable, and I usually do not use that technique, but you could dilute some glue.
Lesson 16 of that course, part 3, looks both ways. Careful about the design, but I could probably remove a little more in one area with the gouge, which is a little too much for the router plane. The messy look is better as of now in part 6: "You can always clean it."
Floral and Molding 2, part 2, applies it to depth. I keep off my final depth, because taking too much "can create a problem."
When did I crowd a line?
In workshop 124, part 2: "I got little too close in this case." Then comes "Let me take seven millimeters again, number 11," which is just over a quarter inch. Next: "I'm going to dig out little more." After that: "Now I've got my line."
The Butterflies plate course, lesson 2, part 3, has a depth near a border. Getting to the quarter inch is "kind of tough" in one place, and the spot crowds the line, so you cannot go all the way to the quarter. The quarter lands somewhere in the center.

In the Lily Box course, lesson 9, part 2, I stop there. "I think that is enough." More would be really near the crack and inside, if I go more than that.
For workshop 42, part 1: I will undercut, but I stay off the line, because once I undercut and round that, I can face the danger of losing feel.
And workshop 47, part 9: I can probably just stop right there, short of digging near this. Then "I can undercut pretty much right away underneath."
Where did each line come from?
| Where I say it, by lesson and part | What goes with it |
|---|---|
| The corbel in workshop 86, part 7 | ahead of the volute |
| Venice Room 16, part 1 | mushy thing |
| Byzantine Acanthus, lesson 9 | about five millimeters, or a quarter inch |
| Roman Acanthus 2, part 1 | an eighth of an inch, and two or three millimeters |
| Hashemi Flowers 1, part 3 | step away about a 16th, or an eighth |
| Workshop 58, part 8 | then a clean pass, with two to three millimeters |
| Part 10 of workshop 58 | one millimeter |
| Furniture Panel 18, part 8, where the grain runs | the grain can split the molding detail beside it |
| Modern Acanthus 1, part 2 | undercut |
| The Tray of Blessing course, lesson 8, part 4 | the grape is hard to clean |
| Acanthus, workshop 151 | a one-inch line |
Is there a line on your own board that you want to stay off? Would you like to hear how far I go from mine, lesson by lesson? You will find workshop 86 inside one tuition plan, with the rest of Part 8 of the Venice Room.
How it's done
- Height. A little more height was an option, with the slope still in view.
- The tool. Number nine was named for the spot.
- A quarter inch up. The plan was about a quarter inch (6 mm) up from the original picture, with a way back.
- Check twice. A 3D model on the computer, and "let me double-check."
- Stay a little way off. A volute is ahead, so the line keeps a small gap from it.
- A wider pass. The check on the spot ends with a wider pass planned.
- A smaller tool. A tool of 5/8 inch or half an inch (16 or 13 mm) was named, with a smaller number nine possible.
- Leave plenty. Close to a quarter inch stayed on the wood, and that was plenty.
Frequently asked questions
Which lines in part 7 cover the volute?
The work in part 7 has a volute ahead. I'm afraid I already got a little too far, and I have to keep a little distance from the volute. A check follows, and a wider pass is planned after it.
How much wood is left in part 7?
About six or seven millimeters stayed on the wood, and my words on that were "So that's plenty for me." Six millimeters is just under a quarter inch, and seven is just over. Before that comes a plan to use a smaller tool to reach the final spot.
What distance do other lessons give?
Roman Acanthus lesson 2 has two, three millimeters away from the final design, with a rough background line still ahead. Hashemi lesson 1 has a step away of a 16th or an eighth. Byzantine lesson 9 gives a quarter inch, with a limit set by the edge.
What to carve next