

Alexander Grabovetskiy, woodcarver, School of Woodcarving · Published 2020
How does a wood carver use calipers?
Quick answer: Calipers turn up in workshop 86, part 5, beside reference points on my corbel. In other lessons of mine they come up for a center, a molding width and a depth, while paper or my eye takes some of those jobs.
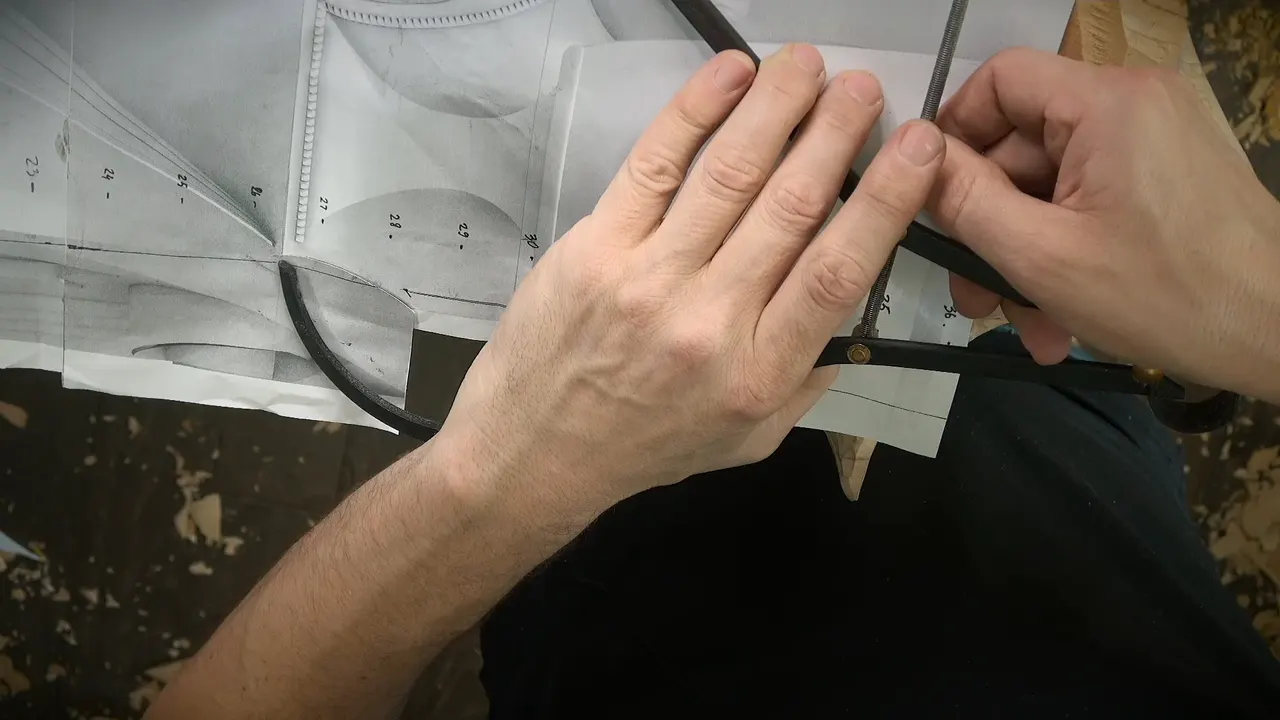

Calipers come up in part 5 of Venice Room workshop 86 as "just those calipers." In other lessons of mine the calipers find a center, check a molding width and check a depth, and paper or my eye takes the job in some of them.
Have you ever held a drawing of an ornament and wondered how a line on paper turns into depth in wood? Would you like to watch the measuring done one reference point at a time? Then come through workshop 86 with me. Each borrowed line names its lesson, and most of those lessons are linked.
Short notes on part 5
- A plan for the number 11, at 10 millimeters (about 3/8 inch).
- A cloth drop that has to lie on top.
- The number seven at 14 mm, like half an inch, as a plan.
- The height of the line.
- Those calipers, plus a few reference points beside them.
- A double-check.
- A lot of material to remove, and a plan for the mallet across the grain.
- A slope I like, and a final line.
Where do calipers come in during part 5 of workshop 86?
The part opens with a gouge plan on this corbel. "So let me clean that little bit, this area with the number 11." The size comes with it: "And any number 11 will work, but I'll take 10 millimeters."

A limit comes with the area. "It cannot be too deep in this section because it has to be like that piece of material, like a cloth drop has to lie right on top of it, okay?"
Gouge talk comes before any measuring. One plan reads "get with the number seven and 14 millimeters, like half an inch, and remove some more this way." And "let me get the big one again," plus "get right to the line." And another plan: "Maybe I can clean little bit this direction with the big one."

"So that is good. But now I need to find the height. I need to find the height of this line." And "I have to find right now the true height," with a plan to "reference that from the backside."

About a picture: "let me find the right picture and figure this out." And "the line I'm after, it's this line right here," plus "so that's what I want to see."

What do the calipers measure in part 5?
Before the calipers are named: "Now, I do not want to make mistake, and it does look like I have to be much lower somewhere right here, okay?" The plan reads "reference from the numbers and measure, place a mark."
The calipers are named: "And again, I'm going to use just those calipers. I've got a couple reference points which I can use." A side gets named: "Pretty much this side is actually a really good reference point right here."

The check comes with it: "double-check. I don't want to make mistake. But yes, that was the position, and here you go."

What does the part say after the marks are in?
A lot of wood has to come off, and "I have to remove a lot of material. A lots of material, and I'm not sure if I like that or not, but it's the design, right? It's the design."
The tool gets named: "I'll just take probably number nine. I could take number 11." For removing it: "I'll just attack it across the grain with the mallet." A gouge and a mallet each have a page of their own.

About the plane: "I have to make sure it's actually on the right plane, and remove it whatever the depth I need."
Movement comes up: "Yeah, unfortunately, I am kind of losing that movement a lot, which I don't want to lose too much because I kind of like it." And: "Maybe I have to change. But on the other hand, I really need to make sure that right here is the movement also really nice, okay?"
The distance still to go is "quite a bit yet, so I have to go a lot more, and yes, going to go a little deeper." About the design: "I really like the slope, and I do not want to lose it, but looks like I have to go way deeper."

The last lines of the part read "remove this side a little bit" and "slope down from that point downhill." And "I'm staying away a little bit from that final line."
What did the neighbors in workshop 86 do with calipers?
In part 3 of this workshop: "I printed out the paper and marked every one, every inch, and then I just used the calipers, just the normal calipers, whatever calipers you have, measured that on the paper." Then "I translated that" and "then I connected that."
Same part, another kind: "little different calipers. That type of calipers, which most of the time used by woodturners." The woodturners page covers that craft.
Part 6 has a measure "from the end with the different calipers." A mark is planned "approximately where the caliper's going to go. And that way, I know this spot, I will know that spot, and I will know this spot, and it's going to be easy for me to connect."

That part looks ahead too. "The second one has to be opposite direction, and then it's going to be for me, a lot easier, actually, to measure." The plan is to "work from a real model." On a gap: "I'm approximately 10 millimeters above my original line, and I can live with 10 millimeters, no problem." That is close to 3/8 in.
One line in part 7 reads "I need different calipers." In part 8: "get the reference."

Over in part 11: "I've got the calipers, and let me see how far." A depth shows too: "about quarter inch down," about 6 mm. Then a snag: "it is a little hard for me to get the calipers over that part."

Which calipers do I reach for?
The Venetian Flowers Rosette course spends a stretch on them in lesson 5. "Absolutely no problem to use different calipers. Like this one is screw-based, and you can just open up and just screw it and measure it and just use it."
On a set with a quick release: "I really like those because of the quick release mechanism. So you can see I can just really quickly release it and quickly just set and refine my measurement. Every second counts."

On sharpening: "Although I've got multiple sets of calipers, the first thing what I do, I sharpen, okay? I sharpen my points." The Butterflies plate course brings a quick release again, in lesson 1: "some of the calipers they do have a quick release which I do have it. I really like it." That lesson also says "A really good tool to have is just a calipers. Okay, just normal calipers."
A choice between curved and straight calipers comes in workshop 154, part 3. "I could use different calipers. I don't have to use this, okay? So I can just use straight, not curved ones, but the straight calipers." And "probably more accurate, I would say."
A big caliper comes up in Venice Room lesson 1: "I don't have that big caliper, I guess. Got only 12 inches." That is about 305 mm.
How do I find a center with calipers?
The Chamomile and Bow Rosette course takes it up in lesson 4. "The easiest way to find the center, you could use probably just calipers. It's always good idea if you do have a calipers." And "just get the reference point and just try to find as close as possible and then put the line right between. Okay? Four reference points."

Back in the Venetian Flowers Rosette course: "You could just take pretty much any calipers and approximately eyeball it." And on how it came out, "looks like I'm right on the money. All right? So calipers worked."
Elsewhere in that course: "Again, the old method, just calipers." Over in lesson 6: "it looks like this caliper, just approximately at the middle." A ruler gets named: "some kind of straight edge or ruler."

"So exactly one inch" comes from lesson 1 of that course, and one inch is 25.4 mm. A digital readout shows on the tool in the frame above. A pencil lies in the other hand.
The center comes up in lesson 2 of the Butterflies plate course. "And to find the center, I'm going to use a calipers again." And: "Again, that's gonna be approximate."
How do I use calipers for a molding or a panel?
The flower panel course, in lesson 2, has this on the width of a molding. "establish how wide my molding," and "Absolutely, there's different ways to do that, but what I like to use, I'll use calipers. Calipers is always probably one of my favorite measuring tools. Probably the most accurate, I'd say."
"And yes, I'll just take pretty much this piece, the old piece, and let me measure it." Lesson 8 of that course has "I need to measure the middle part." The same part has "That's it. Don't need any more calipers."
In lesson 4 of the flowers rosette set: "now, with the calipers, you can actually replicate pretty much any picture." And "I can always measure if I wanted to."

Lily Box lesson 4 speaks to big projects: "There are many different ways to measure it." And "I'm using, actually, calipers a lot when I'm working on big projects, like three-dimensional big projects."
Right after: "Because without the calipers, it's almost impossible sometimes to do, especially if I have to do a couple, almost the same things, like duplicate. So without the calipers, it's impossible." See the Lily Box course for more.
A depth turns up in the furniture panel course, lesson 39: "let me actually measure it. Going to get my calipers and let me check what I've got. It's little less than a quarter of an inch." About 6 mm.

High spots: workshop 79. "It's much easier to measure with the calipers and so on the high spots." And "check my depth." And "Even with calipers like that, it's easy for me just to find the spot, whatever, and then just go in and figure out if I'm really accurate or not."
A check on depth sits in workshop 101, part 10: "good idea to check if I've got the right depth, and I'll take calipers and just check the depths on this side, approximately just the level, the eyeballing." And "I'll take calipers again, the big calipers."
Part 1 of workshop 154 has a check on a position. "What I can do, I can double-check with my calipers, and my caliper's actually falling right on the line. You see that? So it's just a perfect position."
When do I leave the calipers on the bench?
Chamomile course, lesson 4: "If you don't have calipers, you can use just a piece of paper. What I'm holding, it is drywall paper." The drywall page names the material.

And: "Sometimes paper is actually better than any calipers because you could get underneath whatever, like a undercut I've got underneath of this flower." And "With some of the calipers, you could."
Paper shows up in workshop 153: "The easiest way to use calipers" and "I drew that molding on." Workshop 159, part 1, has "I can measure whatever the distance is. Small calipers." And "You don't really have to use a calipers."

An eye can take the job too. Back in that part of 154: "sometimes my eyes working much better than any of those calipers. I'm talking about just eyeballing it."
Lesson 6 of that set skips them: "I'll just eyeball it between those two." A size can decide it too. In workshop 141, part 1: "they got too big. It's not going to work, so I have to just eyeball it."
Which of my lines came from which lesson?
| Where calipers came up | What came with them |
|---|---|
| Number 11 and number seven on the corbel in part 5 | those calipers |
| Printed drawing marked every inch, part 3 of the same workshop | every inch |
| The second one, opposite direction, part 6 of that workshop | a real model |
| Center of a rosette in the Chamomile course | reference points |
| Molding width, flower panel course, lesson 2, favorite tools | most accurate |
| Big three-dimensional projects in the Lily Box course | almost impossible |
| High spots in workshop 79, part 9, and a depth | check my depth |
| Straight or curved calipers, workshop 154 | more accurate |
| Paper instead of calipers, workshop 159, part 1 | if you wanted to |
| Points on multiple sets, rosette course, lesson 5 | I sharpen |
Is there a drawing on your bench that has to become depth? Would you like to hear how a reference point and a pair of calipers carry it over? You'll find workshop 86 inside one tuition plan, with the rest of Part 8 of the Venice Room.
How it's done
- Number 11 for this area. Number 11, at 10 mm (near 3/8 in), was the plan for cleaning this area.
- Depth in this section. This section had a limit on depth, with a cloth drop to lie on top.
- Number seven. Number seven at 14 mm (0.55 in) was planned, to remove some more.
- The height of this line. The true height was needed, with a plan to reference it from behind.
- Calipers and reference points. Measuring from the numbers and placing a mark was planned, with a couple of reference points.
- Double-check. A double-check was on the plan.
- Number nine. Probably number nine, with the mallet, was meant for removing the material.
- A final line to stay away from. The work stays a little away from that final line.
Frequently asked questions
Which reference did I plan to measure from in part 5?
A side of the piece was named, and the height itself was to be referenced from the back. Calipers came in with those marks.
Why do I use calipers on big projects?
Lily Box lesson 4 gives my reason: a couple of almost the same things, like duplicate, are almost impossible sometimes without them.
Can paper stand in for calipers?
The Chamomile course has "you can use just a piece of paper" for a bench without calipers. Workshop 159 adds "if you wanted to."
Does my eye ever beat calipers?
What to carve next