

Alexander Grabovetskiy, woodcarver, School of Woodcarving · Published 2020
What does a wood carver mean by "the second one"?
Quick answer: Workshop 86, part 6, has a first one where "I can allow some mistakes" and a second one that gets "a real model" to work from. My other lessons give the second one "the same idea," "much smaller," or "the opposite side of the line."
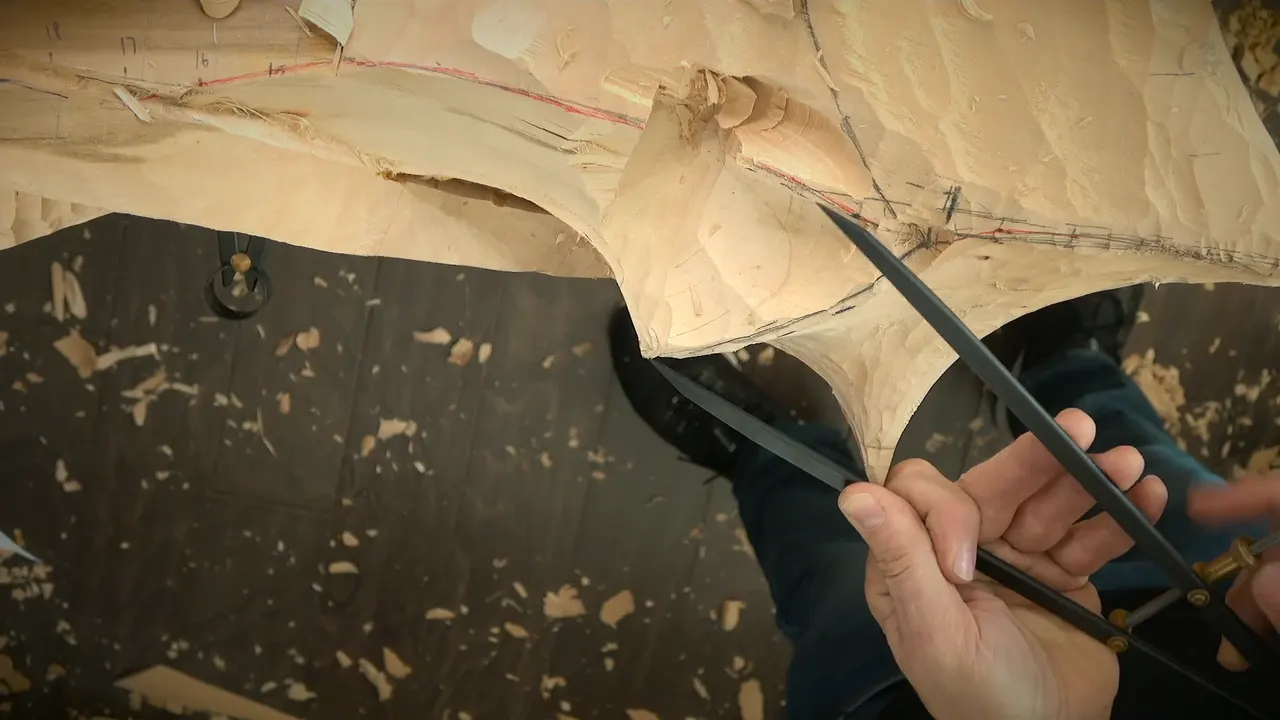

In part 6 of workshop 86, I say "this is the first one," then "the second one has to be opposite direction." In my other lessons the second one comes with its own word: mirror, the same, opposite, smaller, easier, or "the second cut."
Have you ever carved one side of a pair and wondered what the other side should do? Would you like to hear my own lines about the second one, lesson by lesson? Then come through workshop 86 with me. Each borrowed line names its lesson, and those lessons are linked.
Short notes on part 6
- The big number seven to open.
- Checking the slope of this concave, with the idea kept.
- A high spot, so a little more depth.
- About 10 millimeters (0.39 inch) above my original line, and a gap I can live with.
- Excavating next to the line.
- A mark and a measure, with calipers, before any lowering.
- Mistakes allowed on the first piece.
- A real model, for measuring everything on the next piece.
How does part 6 of workshop 86 open?
The first words are a tool pick for this corbel: "Let me take number seven, the big one again."

Next comes a plan to check whether the concave will "slope enough or not." And: "I'm talking about this concave, okay? Because I really don't want to lose that idea." After it, a need: "I need to go a little deeper because this is a high spot and still has to go down."
There is a line about all of the movements too: "you should understand all of the movements, they have to be really smooth and nice flowing movements."

Then a number: "I'm approximately 10 millimeters above my original line, and I can live with 10 millimeters, no problem." Ten millimeters is 0.39 in. And about the slope: "So I do like that slope." Then "just gradual movement downhill."
For the heights: "that is higher, that is lower, and then we're going to lower down completely."
What does part 6 say about measuring?
The plan puts excavating before lowering. "I want to excavate on the side of this line because I don't want to lose that line. And only later am I going to lower that down."

The lowering waits, in my own words: "Now I can lower that down, but I'm going to measure first." The tool is named, "measure that from the end with the different calipers," and a mark: "let me put the mark approximately where the caliper's going to go."

About the marks: "I know this spot, I will know that spot, and I will know this spot," and "easy for me to connect."
Next the tool pick: "let me get the number 7 at 14 millimeters, and I can go ahead and remove it. And make it really nice and smooth." That number 7 gouge, at 14 mm, comes to 0.55 in.
Which lines in part 6 name the first one?
"Right now, this is the first one, and I can allow some mistakes on the first one, and changes of the design and so on."

The next sentence turns to the other piece: "But the second one has to be opposite direction, and then it's going to be for me, a lot easier, actually, to measure."
My reason, in my own words: "much quicker process because I'm not working from 2D. I'm going to work from a real model, and it's going to be easier for me to measure everything and so on."

Also in the part: "That is for a little later." Another check, on a line: "check what is going to look much better. Although it looks really good like that."
How does the part end?
The part turns to a second point: "Let me measure the second point."
Of that spot: "if you see that line, it goes to the same spot, pretty much. Almost to the same spot." Then: "I do have a little bit higher spot right here. You don't see it, but it goes like that." And: "this spot is almost flat."

What do the neighbor parts of workshop 86 say about it?
Part 5 has "I have to remove a lot of material. A lots of material, and I'm not sure if I like that or not, but it's the design, right? It's the design."
Part 7 has a figure, "approximately quarter inch, six millimeters higher than original picture," and then "if I don't like it, I could always make it lower."
A model is named there: "I also do have a reference in the computer, my 3D model, and that way I know exactly what is going on." The 3D model sits on the computer.
Part 7 has "I'm afraid I already got a little too far," then "I have to stay a little bit away from volute." And: "maybe six millimeters, maybe seven millimeters is what I left. So that's plenty for me." Those are 0.24 in and 0.28 in.
Part 7 also has "So the same idea," and a plan: "what I've done on this side," and "a lot less room for mistake."
Where is the second one like the first?
The Floral and Molding course, lesson 8: "That flower completely done." Then: "I started to work on the second one." Then a line on it: "idea is the same, really the same. I've got concave, I've got concave, and I've got convex."
Lesson 11 of that course is short: "The second one exactly the same, but that's easier on that side."

The Lily Box course ties it to a rule, in lesson 6: "So let's work on a second one." Next: "We have to repeat. So it's actually one of the laws of the design, law of repetition. Okay? So we have to repeat the same process."
Same part, a high point: "The highest point is this point right here."

A plan from the grape leaves vase, lesson 2: "all the way to this point." And: "we need to keep those high spots almost untouched."
Both pieces get a line in workshop 79, part 9: "I'm getting the same line on both of them." The block plane follows right after: "I also could use a block plane just at the edge and get that absolutely straight line."

The beginner course has it in workshop 1: "So that's your first carving cut." Then "now we're going to flip that" and "on the opposite side of the line."
Which lesson measures the second one?
Chamomile and Bow Rosette, lesson 1: "I measured this side because I measured that side," and "put the mark right on the side."
Then: "Let me measure the second one, which is about the same, I'd say. Yep, it is. So then I can just transfer that on the other side."
A figure follows: "that is the highest spot, and looks like about 10 millimeters, about three-eighths of an inch." Those 10 mm come to 0.39 in.
That course has a first one that changes: "I also made a change in the first one. I made the first one wider." And: "That's why I just did some up and some down."
The grape leaves vase, lesson 1, says "maybe I can do a smaller one," then "the second one with the larger opening with the 62%."
Who gets a mirror or a variation?
Lesson 1 of the flower panel course: "I've done one, and now, on the second one, I have to just mirror it. So it's not the same."
Then: "Although it looks like it's symmetrical, but it is not. It is not symmetrical."
Lesson 10 has a plan: "If I've done on one just going downhill, the second one is going to go on top." And: "It's what I like to do sometimes when I worked on lion heads, on the lion corbels, I did that idea with the tongue."
On the tongue: "One line, the tongue goes above the lower teeth, just goes like that downhill, and another one that just goes uphill. And it looks almost the same, but it's not. That way, people will know it is not machine done."
Furniture Panel, lesson 37: "the second one is actually the same, but it's gonna go in opposition." Nearby lines give "golden ratio proportions," then "but for me it is a big deal," and "the 60 40 rule or 62%, 38% rule."

Lesson 14 of the flower panel course: "my flute right now, it's about 3:00." Then: "And the second one," followed by "now my flute is about 1:00. 1:00 or 2:00, something like that."
Where is the second one smaller or closer?
The Butterflies plate course, lesson 10, has "on a smaller scale." And: "much smaller on the second one." Part 1 of that lesson starts with "the second butterfly."
On the tools: "use the bigger one and the smaller one." Next: "I want to create the same effect, the bigger cut and a smaller cut."

Lesson 8 of that course: "the second one right away here. So this one is gonna be the same idea."
The Acanthus over Moldings course, lesson 9: "let me attack the second one." Next: "It's still closer than this one." Also: "a little smaller again."

The Grinling Gibbons class, lesson 8: "Okay, that's a step number one. And since I'm here I can do probably the second one the same way. Okay. I can just excavate my plug."

Which lessons carry a hedge or a doubt?
Workshop 103, part 4, has this: "one on the camera, and the second one, I'll do off-camera." Right after: "I'll just create a few straight-down cuts, follow those lines."

Venice Room workshop 26, part 2: "let me figure out where's the second one." Also: "I can go with the same tool around."
From workshop 114, part 3: "let me give the second one somewhere right here. And just blend that."
A line in workshop 121 reads "let me start the second one." Then: "take a smaller number 11, maybe about three millimeters." That is close to 0.12 in.
The Hazelnuts course, lesson 3: "going to jump on a second one. Same idea."
Over in workshop 21, part 5: "the second one, same thing. Preliminary, of course. It's not the final."
Workshop 25, part 5, has "Preliminary plug" right before "And the second one right away, pretty much." After it: "I need to double-check what I want to do."
Corinthian acanthus, lesson 1: "divide that in three main movements," and "The first one is this one."
From workshop 45, part 6: "That's one, and that would be the second one. I'm using just a micro tool."
In workshop 73, part 8: "which means I could actually do the second one this way. But again, I kind of don't really like what I see."
Workshop 100, part 7: "do on a side second one."
Hashemi flowers, lesson 41, part 3: "Maybe I should do the second one also," and "almost underneath of the flower."
The Venetian Flowers Rosette course, lesson 4: "the second one," plus "have a twist right here." Then: "But for me, what is important is to get the middle line at the right position."

Over in workshop 118, part 2: "let me do concave on the second one." Tool: "big one, 15 millimeters, number 11." In inches, 0.59.
The acroterion course, Greek Acroterion, lesson 2: "I'll keep this gouge right here because I like how it works. So let's work on the second one."

In workshop 124, part 2: "I need to go with a smaller tool now. And the second one, again, I just stayed away approximately eighth of an inch, about three millimeters. I'm talking about the second cut, okay, just in case if you don't understand what I'm saying."
Which of my lines came from which lesson?
| Where I say the second one, by lesson | What goes with it |
|---|---|
| The corbel, workshop 86, part 6 | opposite direction |
| Flower panel, lesson 1, part 1 | have to mirror |
| Panel flowers, lesson 10, part 1 | go on top |
| Floral panel, lesson 11, part 3 | that side |
| Lily Box, lesson 6, part 6, second layer | law of repetition |
| Butterflies, lesson 10, part 3 | much smaller |
| Furniture panel, lesson 37, part 2 | go in opposition |
| Workshop 79 of the Venice Room, part 9 | both of them |
| Part 4 of workshop 103, Venice Room | off-camera |
| Venice Room, workshop 124, part 2 | "second cut" |
Is there a pair on your bench where the first one may carry mistakes? Would you like to hear how a real model and a reference point make the second one easier? You will find workshop 86 inside one tuition plan, with the rest of Part 8 of the Venice Room.
How it's done
- A tool pick. Number seven, the big one, opens the part.
- Slope enough or not. A check on whether this concave slopes enough, with the idea kept.
- A little deeper. A little more depth was needed, since a high spot still had to go down.
- Next to the line. Excavating beside the line, with lowering left for later.
- Measure first. Measuring from the end with the different calipers, and a mark.
- The 14 mm pick. Number 7 at 14 mm (0.55 in) was named for removing it.
- The first one. Mistakes can be allowed on the first one, plus design changes.
- The other piece. An opposite direction was planned for the second one, and a real model to measure from.
Frequently asked questions
What can I allow on the first one in part 6?
In part 6 the first one may have "some mistakes" and "changes of the design." For the other piece the line is "opposite direction," with measuring that is "a lot easier, actually."
Why is the second one easier to measure in part 6?
My reason is "I'm not working from 2D." A real model is named in the next line, and part 7 names my 3D model on the computer.
Does the second one copy the first in other courses?
Lesson 1 has "just mirror it." Lesson 11 has the second one "exactly the same," with "easier on that side."
What do I say about a smaller second one?
What to carve next