

Alexander Grabovetskiy, woodcarver, School of Woodcarving · Published 2020
What does a wood carver mean by "too high"?
Quick answer: Part 9 of workshop 86 has my words after the true height I got on the opposite side. Other lessons use the words "too high" about berries, shells, petals, leaves and a router plane, with a gouge size or a figure beside them.
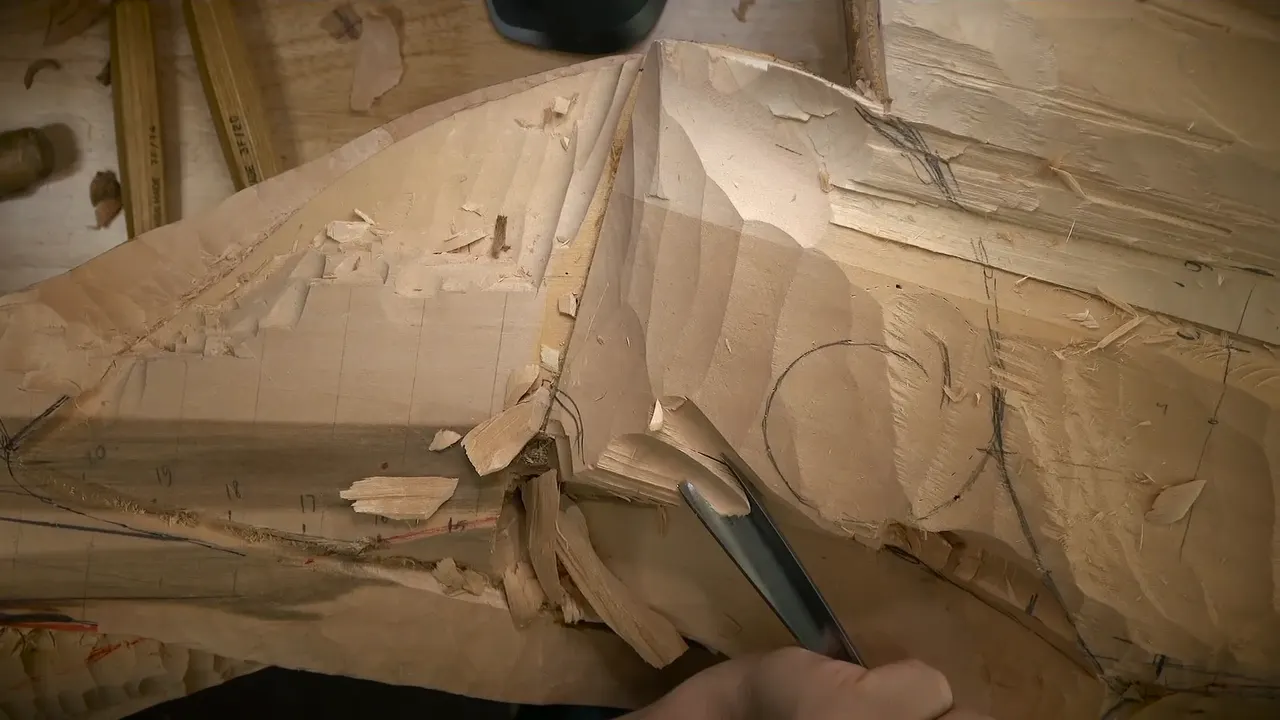

In part 9 of workshop 86, my words were: "So now it's way too high." Elsewhere I use "too high" beside berries, shells, petals and a router plane.
Have you ever stepped back from a carving and found one spot standing above the rest? Would you like to hear what I say and do next, lesson by lesson? Then come through workshop 86 with me. Every lesson I borrow from is named and linked.
A short list for part 9
- A check on my computer.
- A number nine, three-quarter of an inch (19 mm), for the outline.
- A shape first.
- Number seven at three inches (76 mm) as a probable pick.
- One more line, with a preliminary height.
- The opposite side, where wood goes.
- A true height.
How does part 9 start, and what does it check?
Part 9 begins with a check. "Let me double-check. I have to just check with my computer, reference it." The result is "yes, it does go all the way like this."

Next a point gets named, and "that is the high spot," with a plan to look from two sides as well and to double-check before I carve.
Then comes the check again: "Okay, I checked that again. Double-check, three times check, multiple times check." My verdict is "it looks like I am in the right position." After that comes the plan for the wood: "So now I can just outline it and then blend everything, all that section."
Which tools does part 9 name?
For the outline, "I can probably use the same number nine. Number nine and three-quarter of an inch." In metric, that comes to about 19 mm (19.05 mm exactly).

Measuring waits for later: "I will measure to the highest spot what is supposed to be this point. Okay? But now I'm just going to create the shape first, and we'll see." One line sets the limit for the blending: "if you remember, I worked on that line, and that is actually perfect position of this line. So everything has to be blended to that line."

A big gouge is only a maybe. "And right here, I could probably use big number three-- I'm sorry, number seven, and three inches." Three inches is 76 mm (76.2). After it: "And yes, I will need to check opposite side little later. As all will be lower."
What is a preliminary height?
Partway through, one line gets its verdict: "this line is not at the right height yet. So we'll also have to measure it and make it look really nice. So that is just a preliminary height."

A look at the wood follows. "I know it looks a little scary, but nothing to be afraid. So I'm safe." Later, "And work around."
How did part 9 get to the true height?
The opposite side has a line of its own: "Let me go around, and I'll just attack it from the opposite side. I'm not sure if my head is going to be in the way or not. Let me see. I should be okay."

Wood has to leave there, and my words are "So there's going to be a lot of material removed."
Last comes the height itself: "by the way, I got the true height on the opposite side, so I know exactly the height of this one in future. Okay?" Right after that, my line is "So now it's way too high."

What do parts 8 and 10 say about height?
Part 8 is where a slope gets its look: "I look if the slope is really nice, and it does look really nice. And I've got pretty close." Part 8 also plans calipers on the volute position: "just to measure from outside with the calipers and get the reference."
Bulk opens part 10, with "a lot less than what you see right now" to follow.

Next comes a figure: "I'm about maybe 3/16 of an inch higher right here on this spot." The metric figure is about 4.8 mm.
On the slope the choice is mine: "I'd rather see a sloping motion like this, and this side going to go this direction, because I really don't want to lose the feel that this part is actually really like a cloth drop."
And the tool angle: "I want to keep my tool a little upward. I know it's hard to see on a camera, but I'm actually attacking from the bottom up, from lower to the higher."

Which berry or shell is too high?
Hashemi Flowers 24, part 3, opens on "those three berries right here." They get a verdict: "Again, they look too high for me, so I have to lower them down. They just don't look right. Too high."

A warning comes after it. "Carefully. Because it's really fragile, and this area is a kind of weak area." The next advice is "The smaller tool is safer." And the tool: "number five, quarter inch," about 6 mm.
A spoon gets its own advice in Floral and Molding for the Panel 10, part 3: "when you're using a spoon, be careful." A shell part then gets "too high" with a "little" in front, and the plan is "maybe actually excavate just like that."

Over in lesson 14 of the same course, part 1, a slope is planned. The verdict is "too high, I would say," and next comes "Let me get number seven." The size is "14 millimeters" (0.55 in).

Next: "I could use probably smaller, but I'll try to use 14 millimeters and lower down the whole thing right here," with "a slope right away" beside it. My reason for a slope on both sides is "I have to undercut on the opposite side as well. But I still need some connecting point underneath."
What do I do with a part that stands too high?
Venetian Flowers Rosette 3, part 3, has what I want to keep: "that raised part right in the middle of the petal, because it creates a somewhat beautiful motion."

Here is the turn: that raised part is "too high to the end, and it's not too good, so I'm going to get rid of it. I'll create a little different way." A few lines later, "So pretty much I got rid of the whole thing." And I say I will need "some kind of spoon gouge or so."
Part 4 of that lesson has "a really nice ridge." Later comes "this part is kind of too high. If you look from the side, you can obviously see I've got too much area right there." I need to "remove some of that stuff out, and it's going to blend nicer there too." For that, I may use "back bend again."

Modern Acanthus 2, part 1, has "that piece right on the way," and "I have to really introduce my tool from that side." I ask how you solve that problem, and my answer is "You just be careful."

After that, "I'm just going like on a 45 degrees." One spot gets "too high right here so I can probably take this out." And "we want to see the 3D movement, you know, so and I can take this side little more down."
The vase with grape leaves, lesson 1, part 4, has this line: "Maybe this one" is too high, "so I might have to move it downhill like that. I don't want to go too high that direction, okay?"

Which gouge goes with a high spot?
Furniture Panel 21, part 13, has the line "too high spot right here, so I need to use a flatter gouge." My plan is "number three again, same number three and a quarter inch," about 6 mm.

Even so, "I'm still slicing. Okay? I'm still trying to not push." What stays on the wood is "one millimeter only" (0.04 in).
Part 12 of that lesson is about a number seven: "Any gouge will work. It just happened to be on my bench."

Of the spot itself: "this part bugs me." And "too high yet" follows, then "so I need to take care of this side." And a target for the highest point: "just about maybe one millimeter right here."
In Grape Onlay 7, part 1, the tool is "Number seven, gouge 14 millimeters," which is 0.55 in. On the excess, "There's no reason to keep some of the spots too high and still gonna look full 3D."

Part 11 of workshop 82 has the verdict "too high yet" first, then "I need to lower that down all the way to the quarter inch, even this section." Then the figure: "To about six millimeters above the surface," or 0.24 inch.

What numbers sit beside too high?
Each figure is small. In workshop 85, part 9, "there's still about 1/16 of an inch too high," or 1.6 mm. Earlier in that part: "for me to get that 90 degrees is somewhat really important." A little later: "I'm really high at this spot."

Part 10 of that workshop has a smaller figure: "I'm really close now. I'm really close, actually. Just about 1/32 of an inch or so," that is 0.8 mm. Earlier in that part: "I don't really have to worry about it."

One more figure is for taking wood off. In Chamomile and Bow Rosette 2, part 2: "for my taste, it's a little too high. The highest spot should be right in the middle. So I want to knock that down approximately six millimeters or so." Equal to 0.24 in. Then: "I can safely do that, about a quarter inch."

What does "too high" mean with a router plane?
Furniture Panel 17, part 3, has the router plane: "Let me use my router plane, and I'm going to raise it higher." Later in the part comes "too high," followed by "I can probably lower a little more."
Lesson 18 of that course, part 4, has "Maybe a little too aggressive. Make it higher a little bit. And even higher." Then "too high," followed by "maybe I should use a smaller blade."
Lesson 16, part 12, has "I can probably fit my router plane and get most of the final depth. Okay, let me double-check. I am pretty close." Then comes "too high," with "I left a lot of material" after it.
Part 4 of lesson 17 names a blade size: "maybe I should change my blade and use a one-sixteenth of an inch blade, but let me check if three millimeter or one-eighth of an inch will go in." The metric figures are 1.6 millimeters, then 3 millimeters (0.12 in) or 3.2.
Can a high spot stay?
In lesson 6 of the panel course, part 2, the middle that is too high gets "which is absolutely okay. I have no problem with that."

Workshop 85, part 10, also has "I can reference from the backside later on, and that's not the final cut yet."
Part 2 of workshop 163 has a choice: "I'm not sure if I want to lower this down or maybe just get another division. Or maybe just lower that down because it's just a little too high."

Part 3 of that workshop gives a result for a spot that was too high: "Right now, it just blends much better."
Workshop 161, part 3, gives "too high spot right here," and my next words are "So I've got too much space below," followed by "So I have to just work more 3D."

Where did each line come from?
| Where I say it, by lesson and part | What goes with too high |
|---|---|
| Venice Room 86.9, in my own part, right after the true height | true height |
| Venice Room 86.10, in the next part, next to a slope | 3/16 inch higher |
| Hashemi Flowers 24.3, on three berries, with a smaller tool as advice | Too high. |
| Floral and Molding 10.3, on a shell part, with advice about a spoon | maybe actually excavate |
| Panel course 14.1, on a slope, with number seven as the plan | 14 millimeters |
| Lesson 6.2 of the panel set, in the middle | absolutely okay |
| Rosette 3.3, on the raised part in the middle of a petal | get rid of it |
| Rosette 3.4, on a part near a really nice ridge | kind of too high |
| Modern Acanthus 2.1, with a piece right on the way | take this out |
| Grape vase 1.4, on one I might have to move | move it downhill |
| Lesson 21.12 of the furniture panel, on a spot that bugs me | one millimeter |
| Part 13 of lesson 21, on a spot, with number three as the plan | flatter gouge |
| Grape Onlay 7.1, on excess wood, with number seven named | no reason to keep |
| Workshop 82.11, on a section I want lowered | six millimeters |
| Workshop 85.9, with 90 degrees really important | 1/16 inch |
| Part 10 of workshop 85, beside a gouge that got dull | 1/32 inch |
| Venice 161.3, over a canvas with space below | work more 3D |
| Venice 163.3, beside a plan to roll and blend | blends much better |
| Chamomile 2.2, on a leaf, for my taste | six millimeters |
| Lesson 18.4 of the furniture panel, with a router plane named | smaller blade |
Is there a spot on your own carving that stands above the rest? Would you like to hear what I do about it, one lesson at a time? You will find workshop 86 inside one tuition plan, with the rest of the Venice Room, Part 8.
How it's done
- Check the line. Check against a computer, and from more than one side.
- Outline the shape. I plan to outline it, and then blend that whole section.
- Name the tool. My probable tool for the outline is number nine.
- Blend to the set line. Blending goes up to the line I worked on earlier.
- Call a height preliminary. One line is just a preliminary height, and measuring comes later.
- Go around to the opposite side. Another line waits there, and wood must leave.
- Say what you see. With the true height known, my next words are about a spot standing too high.
Frequently asked questions
What true height do I get in part 9?
I say I got the true height on the opposite side, so I know exactly the height of this one in future. My verdict follows at once. Before it, I say wood will be removed there.
Which gouge do I name in part 9?
My probable pick for the outline is the same number nine, at 3/4 inch (19 mm). For the spot right there I could probably use a big number seven, at three inches (76 mm), after I start to say number three and say sorry.
How much stands high in my other lessons?
Three of my figures say how much stands high. One is about 1/16 in (1.6 mm), one is about 3/16 in (4.8 mm), and Chamomile 2 has approximately six millimeters (0.24 in) to knock down.
What to carve next