

Alexander Grabovetskiy, woodcarver, School of Woodcarving · Published 2020
What does a wood carver mean by "twist"?
Quick answer: Part 8 of workshop 86 gives the word to a slope that is off the paper's level, and my positioning gets less accurate. I plan to start the next measure at the corner, with calipers. Other lessons use twist for a leaf, a volute and an undercut.
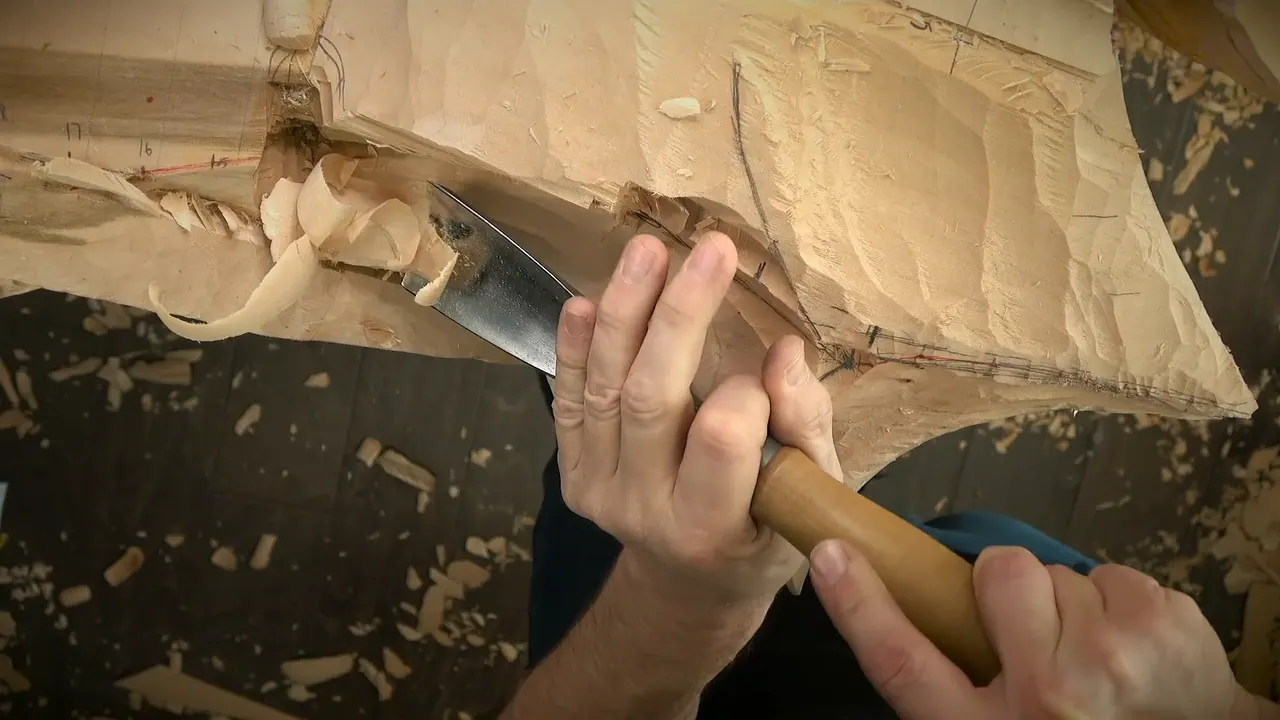

My words in part 8 of workshop 86 are that the corbel "has a little twist," and that my positioning "is not going to be as accurate." The same word sits on a leaf, a volute and a crown molding in my other lessons.
Have you ever set a drawing beside a block and found the wood would not agree with it? Would you like to hear what I do when a shape turns? Then come through workshop 86 with me. Each borrowed line names its lesson, and those lessons are linked.
A short list for part 8
- The size in use, said at the very start.
- A dot joined to a dot.
- A check of the movement, even in 3D.
- A chunk left in place.
- A removal that is safe, safe, safe.
- A volute with no position yet, and calipers to find it.
- A slope that does not match the paper, so a little twist.
How does part 8 begin?
It begins with a size, right at the start of the part: "20 millimeters, by the way. That's what I'm using." Then the line reads "Three quarter of an inch," which is about 19 mm, while the 20 millimeters is 0.79 in.

A plan follows: "I'm going to connect that dot and that dot." Another check follows. "I also have to check from this point of view and make sure it's actually really nice and flow in movement, even in 3D world."
A verdict sits right after: "So now I'm still safe." My next line: "So I can do some of the removal with this tool and even bigger tool." In the same stretch I add, "Well, maybe I have to use a mallet."

A look from the side follows, and I say "I look if the slope is really nice, and it does look really nice."
"I've got pretty close. Really close." After that: "Now I can just connect my line, and I will have chance to refine that line."
Why is a chunk left in my way?
The chunk is kind of in your way, and it will be gone once I get ready to work on the volute. For now, "it's a little too early for me to remove it."

A tool is named: "So now let me use number three and 20 millimeters and clean a little bit." Then: "that is actually a really good movement. I like it."
Next is "already revealing," with more details inside, and then comes the order of work. "First I have to establish the main movement, and then we're going to work on details."

Then the chunk gets a verdict. "Okay, wonderful. So now I am safely, safely, safely able to remove that chunk." And a plan for the camera: "Let me readjust the camera, and I can start working on that."
In my words I can see exactly where everything will sit, and a job is ahead: "I have to connect pretty much this point with the other line, which is barely visible here."
Where does the volute sit on a twisting corbel?
The volute is the next job. I plan to jump to this side, where a volute will sit, after the spot we worked just a second ago.

The volute position, in my words, will be somewhere right here, around that spot. A question follows in my own voice: "But how do I approach it?"
My answer is a method. "The way to approach it, just to measure from outside with the calipers and get the reference." Once everything is lower, we will know exactly where it sits.
What does a little twist do to my measuring?
Here it is, in full. "Now, it is little bit hard to understand. And when we measure, you have to understand the slope, just because it's not the same level as we have on the paper, so it has a little twist."

The cost sits in the next lines. "So which means my positioning is not going to be as accurate. But at least I can actually get at least some of the spots."
The part before this one has a note in different words: "that's approximately because it changes the plane, but I should be okay."
In part 4 of this workshop, my words are "Back then, they did a lot of twisted moldings, crown moldings, cornices, if you wish to call that way." The United States word, in my line, is crown.
Which spot do I measure from?
One spot has an easy reference. It will be really close to this spot, and "I can measure from this line that way. Which for me, it's easy."

A new start for the measure follows. "And calipers again. And let me actually measure not from that line, but from all the way from the corner. From this corner right there."
A target follows: "And I'll try to shoot pretty close to the edge." Then: "So that is the spot."

The part ends with a plan: "I guess I can do this part just to draw my volute off camera, and I'll see you later."
Where else do I say twist?
Small leaves carry the word, and Hashemi Flowers 46 has it in part 4, with a plan: "Maybe I can actually excavate a twist, I call it twist, right here."

Over in Hashemi Flowers 5, part 5, a line reads "And make a little twist on this one." A V tool is next, for a separation cut. And in the same part: "I really like the twist like this, and it just keeps moving."

The Hashemi Flowers 45 lesson, part 7, has a plan to "create that even deeper concave at this point," and then "maybe even make a even deeper twist."
The Venetian Flowers Rosette, lesson 4, part 1, keeps it plain. "Nothing complicated. It's a simple couple leaves." One twist goes down on this side and another goes up on that side.

In Chamomile and Bow Rosette 2, part 3, the words are "that's pretty much what I've done." Then: "in some cases I've got little twist going little bit. I didn't do that everywhere, but in a couple spots. On this side, I've got a twist upward, I've got another twist upward. But rest of them is just the simple leaves."

The Byzantine Acanthus course gives the plainest line. In lesson 1, part 1: "it's still a leaf, just a normal leaf. It just twists." The path is "go that direction, then go up, up, up, up, up, and go backwards." In my words, full 3D.

In lesson 7 of that course, part 3, once you understand the idea of a boat shape or leaf shape, "you can twist it as many times as you wish."
And: "As long as you got the middle line, as long as you establish the boat, and then just do whatever you want."

On the Principles of Design course, in lesson 4, part 1: "Usually, I like to call it like a boat shape or leaf shape." The next line: this is like a Fisher's Boat, "but twisted one."
Which tools fit a twist?
Floral and Molding for the Panel 3, part 1, puts a volute in the frame. "It has a really interesting twist. It just goes like that, almost flat, then rotates and goes that direction."

The tool in part 2 of that lesson is "number 11 and maybe three millimeters" (0.12 in). Then: "without creating a lot of force, I'll try to remove little by little."
The reason sits in my own words. "Just because it has a twist, it's just not like a straightforward, just really easy cut and so on. So got to make sure I'm not creating a wrong cut."

A leaf in Lily Box 3, part 4, has a middle line I want to keep. "I don't want to lose my middle line of this leaf." That middle line will go right underneath of this twist.
Further on in that part, my plan is to undercut underneath of this twist really carefully, with "the one millimeter and number 11" (0.04 in for the millimeter).

In Lily Box 11, part 13, I look at a real-life flower, where "there is some kind of concave going on." Then: "I want to try to create some concave cuts right in the middle." And: "That's going to give me a little twisting look."
A depth goes with it in workshop 41, part 1: "in this case, I could go deeper because I'm going to have a twist."
Then: "to do that twist, I have to somehow create a good excavation. Really good excavation."

Am I even saying the word right?
I stop on the word itself in Furniture Panel 20, part 3: "And let me bring that cut all the way to that twist. I'm not sure if I'm even correctly saying it, twist. But that is exactly what it is, just creates a little twist."

A twist is planned in Furniture Panel 12, part 3: "What I could do, I could actually make a really nice twist just like that and go underneath and go back to the flower."
And then: "But I need to repeat that twist somewhere right here. Let me just follow the line."

A volute is on my mind in lesson 14, part 5: maybe I can twist it a little more, and I think it will be better.

The overall movement gets a line in Furniture Panel 21, part 10: "I can draw overall movement, and that's going to have a twist like that." Then a small one: "also, a small twist."

Where does a twist sit on the Venice Room panel?
A detail gets a plan in workshop 63, part 10: "we're going to give a little twist outward to that detail right here." Right after it: "I need to actually work on the pipe on this one."

The movements and middle lines in workshop 53, part 8, come with these words: "all the movements, all the middle lines, and in this case, it's twisted a little bit." Later in the part, the shape is "like a long triangle, if you wish. Twisted triangle."

A concave sits in the wrong place in workshop 55, part 12: "That concave is little wrong position." The reason to bring it over is in my words, "because it has to twist."
A bigger tool is a maybe: "18 millimeters" (0.71 in), "three-quarter of an inch almost" (19 mm).

A direction comes with the plan in workshop 94, part 4. "Maybe, in this case, I am going to just twist downhill like this." Then: "less curvature, I should say."

The workshop 42 lesson, part 11, has a middle line I do not see: "So that is really nice, but I don't see the middle line." And: "somehow I need to probably go out like that and just twist my middle line this way. Otherwise, it just doesn't look too good visually altogether."
One line sits in workshop 47, part 2: "That's a beautiful twist." In the same stretch, I say "that is not the right tool for the job. I have to use probably number six or so."

The word can sit on the camera too. My words in workshop 60, part 3, are "my camera positioned a little away from me and twisted the way you would see it, it's like I'm looking at it."
Where did each line come from?
| Where I say it, by lesson and part | What goes with the twist |
|---|---|
| The corbel in workshop 86, part 8, where the slope is not the paper's level | a little twist |
| Hashemi 46, part 4 | my plan to excavate a twist, and I call it twist |
| Hashemi 45, part 7 | an even deeper twist |
| Beside a V tool in Hashemi 5, part 5 | make a little twist |
| Part 1 of Venetian Rosette 4 | twist down on one side, twist up on the other |
| Chamomile 2, part 3, on my own work | twist upward |
| Byzantine 1, part 1 | just a normal leaf that twists, goes up, and goes backwards |
| Byzantine 7, part 3, with a boat shape and a middle line | all kind of twists |
| Floral and Molding 3, part 1, on a volute | almost flat, then rotating |
| The same lesson, part 2, with a small number 11 | without a lot of force |
| Lily Box 3, part 4, beside a leaf's middle line | an undercut underneath it, really carefully |
| Lily Box 11, part 13, on a flower with a hollow in the middle | give me a little twisting look |
| Furniture Panel 20, part 3, where I doubt my own word | doubting the word |
| Furniture Panel 12, part 3, beside a flower | a nice twist to repeat |
| Part 5 of Furniture Panel 14, around a volute | twist it a little more |
| Venice 41, part 1, on a small detail | a deeper pass, and an excavation for a twist |
| Venice Room 42, part 11 | the middle line, twisted this way |
| Venice Room 53, part 8, with a middle line and a long triangle | twisted a little bit |
| Workshop 55, part 12, where a concave sits wrong | it has to twist |
| Venice 63, part 10, on a detail | give a little twist outward |
| Workshop 94, part 4, on a plan for a downhill direction | twisting downhill, with less curvature |
Is there a shape on your own block that turns, so a measure from the paper will not hold? Would you like to hear what I do with it, lesson by lesson? You will find workshop 86 inside one tuition plan, with the rest of the Venice Room, Part 8.
How it's done
- Name the size. 20 millimeters (0.79 in) is said right away as the size in use.
- Join the dots. Plan to join one dot to the next, and check the movement in 3D.
- Look at the slope. From one side I look at the slope and find it really nice.
- Keep the chunk. The chunk stays in place for now, because it is early to take it off.
- Set the main movement. The main movement comes before the details.
- Find the volute. A reference for the volute comes from outside the block, with calipers.
- Allow for the twist. A slope off the paper's level means less accuracy, so I get some spots.
- Start at the corner. The next measure begins from the corner, and I aim near the edge.
Frequently asked questions
Where do I start a measure on a twisting block?
On one spot I plan to begin on the corner and aim near the edge, with calipers again. Another spot is easier, because a line sits close to it and I can start there. Either way, I still get some spots.
Why leave a chunk in place in part 8?
Removing it now is too soon for me, since the chunk only stands in your way until the volute work starts. After a cleanup with a number three, I say I am able to take it off safely. Then I plan to readjust the camera.
Which tool do I name for a twist in other lessons?
The floral lesson, part 2, names a number 11 of three millimeters (0.12 in), used with little force. The Lily Box lesson, part 4, names a number 11 of one millimeter (0.04 in) for an undercut beneath the twist. Both plans sit beside a twist.
What to carve next