

Alexander Grabovetskiy, woodcarver, School of Woodcarving · Published 2021
What does a wood carver mean by "the side of the tool"?
Quick answer: A gouge laid over so one flank works the wood, instead of the middle of the edge, is what I mean. In its third part, Venice Room 108 plans it on a 20 mm tool (0.79 in). My other lessons lay a number 11 over and use it like a number 3.
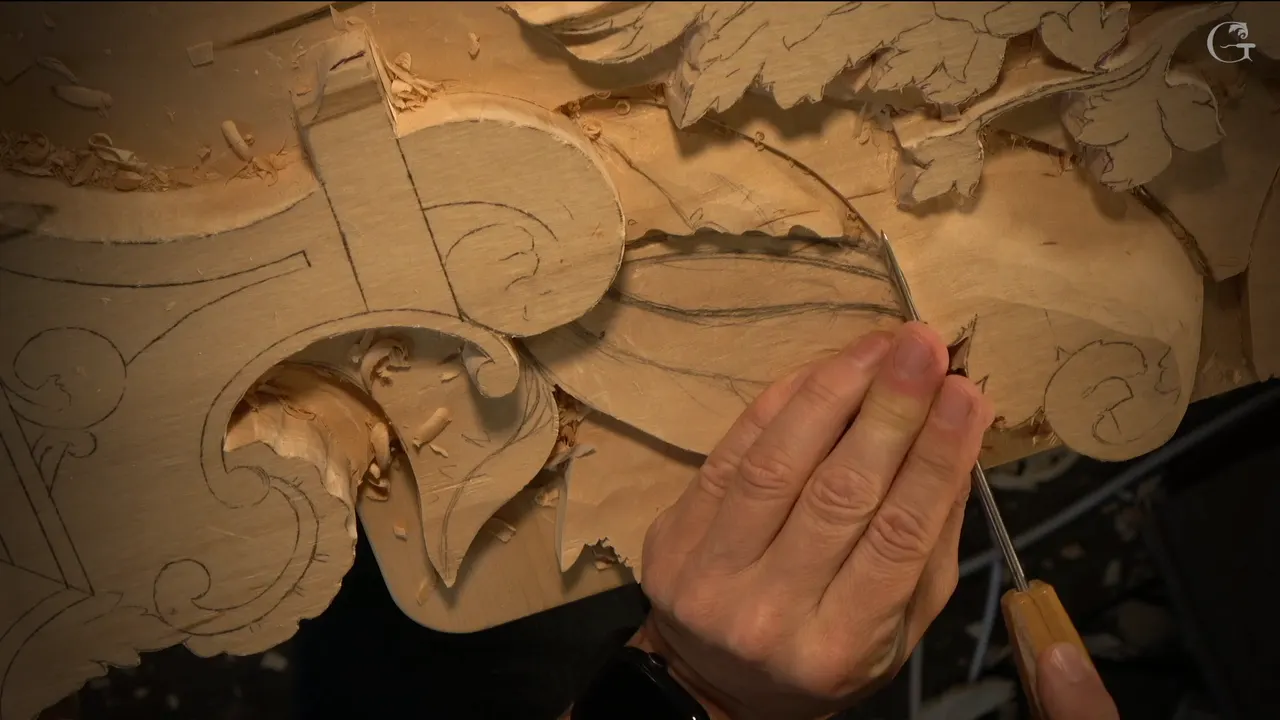

One flank of a gouge, laid over so it touches the wood in place of the middle of the edge, is what I mean by the right side. In part 3 of workshop 108 I said I would use it on a 20 mm (0.79 in) tool to "land that baby."
Ever tipped a gouge or a chisel over and felt it behave like a flatter tool? Ever wondered which of its two flanks to trust on the wood? This page starts in the Venice Room, in workshop 108 of my Part 9 course, where the relief work is a Venetian-style piece with long rays on it. After that it walks through nineteen other lessons where I lay a tool over, from the Venice Room and from my other courses on furniture panels, lily boxes, acanthus, a tray and rosettes. My own figure comes first in millimeters and inches.
What does using "the right side" mean in part 3 of workshop 108?
The line sits in the middle of a part full of small decisions about shadow. I open with "But I still need shadow." You "already see it casts a really sharp and beautiful shadow," I say, though I also see "some waviness, which I am not biggest fan." One line is "not really flowing." My plan for that is to fix "whatever I think needs to be fixed" in small steps.

Maybe a bigger gouge would help, I say, "and see." A moment later I change course: "Or you know what? I'll just do it by hand." When that is done I say "So that is much better." One part still has work coming, so I tell you "don't pay attention about this curvature."
My next move can be an undercut, a little one underneath, and it will "give me an idea how beautiful that shadow going to be." The tool is "exactly the same," a number 11, using "just the 4 millimeters" (0.16 in). I leave "approximately a quarter-inch wall" (about 6 mm), "because I still have to establish my concaves and convexes."

I say the initial cut goes "right here on this line" and I can take 10 millimeters (0.39 in). I tell you I will "get rid of this a little later. I'll take care of it." Here is the line you came for: "And get 20 millimeters," I say, "and I'll just use the right side" and then "kind of land that baby." Then I say "Okay, that's good." Nothing in the part names the sweep of that 20 mm tool.
I explain a choice before you ask: "if you would ask me why I did this part lower than that one, because this one has a flip. So this part is going to go underneath." Next I take the same tool and start removing "this part," since "it's better to attack it from this position."

For the next stretch I reach for a pencil: "let me get pencil, and I will outline it again" and "this is going to be the part of the ray." Next I want a smaller number 11, then stumble on its size: "I'm sorry. It's 4 millimeters, number 11," a little smaller than 3/16 of an inch.
The last tool I name is "number 11 and 7 millimeters" (0.28 in), for an undercut on a line that will go underneath. Then come the words "I am working against the grain. It is not the best way, but it's okay." A few seconds later I say it again: "Not the best way, but it's okay." The part ends on a plan for the round shapes, with a thought tacked on: "by the way, maybe I actually do this first."

Why do I lay a number 11 over on its side?
The clearest one is workshop 50, part 2. I take a number 11 of 18 millimeters (0.71 in), go a little deeper, and a ridge is left that I do not need to see. The same tool will blend it, I say, "just using the side." The number 11 is "not half round, it's like a U-shape, like a letter U" and its sides are "just equal to number three tool." So I use that flank "as a number three gouge" and "I don't need to switch to another tool."

Over in workshop 51, part 3, I clean around a piece with a 4 millimeter (0.157 in) number 11, remarking that I am "using a lot of number 11s at least in this project." Number 9 could do the same, I say, "except number 11, I can lay on the side of my tool and just use it as a flatter gouge like number 3." After that I plan an undercut and an outline.

One tool could set all the movements, I say in Furniture Panel 22, part 11, "if I need to. I don't have to, but I could." Then I show it, using that flank like a number three gouge "and gradually blend everything in."
Next comes workshop 38, part 8, where you probably cannot see what I do, and I say so: "I'm just creating the idea of the pipe." I plan "a flatter side" closer to the concave and a deeper one toward the pipe, and I blend it "to almost nothing." My words for the detail: "You almost don't see it, but I think this detail makes sense." I also plan a bigger number 11 to blend it "little better."

Which spots does the flank of a gouge actually clean up in my lessons?
A short one comes in workshop 66, part 4. After "something like that," I say I am using "just the side" to clean this up, and I say it a second time, "just the side." The next order to myself is "Chop this out."

One more from the Venice Room, workshop 63, part 10, has "a good movement" and I plan the same one "on another side" of the pipe. I use the flank alone for it, "pretty much." A little later I need to give "a little bit roundness" and I say "I apologize, people. I know you don't see it. Maybe I should do it off-camera."

I pick the same 4 millimeter (5/32 in) tool again in workshop 12, part 10, and say "just use the side of it." I will keep creating that concave with "use only side" and it will be "almost invisible." Then: "It is visible, but it's almost undetectable." Number 5 is for cleaning that notch.

Which flank goes first, the left or the right one?
My lessons give no single answer. The left flank does the work in workshop 128, part 1, where I have a number 11 of 4 millimeters (0.16 in), "using left side" for a concave, which is "not too convenient." We still try to indicate a pipe, and I plan to follow with 2 millimeters (0.08 in). I don't have to do that pipe, I say, "but I think extra shadow, extra light and shadow play will help me."

The other way round is workshop 23, part 5. With 7 millimeters (0.28 in) in a number 11, I start a concave and plan to "lean a little bit on the right" because "I really want to see movement to the edge." I wonder about 10 millimeters (0.39 in) and about running "all the way to the second separation," so that I can establish "a micro pipe right between."

Lily Box 8, part 12 says to start "from far and carefully," going "almost from nothing." The move itself: "I start straight, then I lean toward the left." I also "try to undercut a little bit." The undercut will be a small one, and "it's still going to cast a shadow," I say.

In Furniture Panel 27 (part 2), I clean one spot with a 3 millimeter (0.12 in) number 11, saying "I'm using side of my tool in this case," the left one. I skip the poking cut straight down on purpose, because "I don't wanna damage the background," since "they're gonna undercut later." Damaging it "would be a big mistake for me." I close with "number 11 is always safer."

Why does one flank cut cleaner than its neighbor on the same gouge?
In workshop 4, part 11 I attack from the opposite side, and I say why. In that case one flank of the gouge "cuts with the grain," while the other flank cuts the other way, against it. So "sometimes it's a good idea to start, you cut on one side and then flip and just continue that cut from another side." The payoff is "a really clean cut on both sides."

Floral and Molding 13, part 2 names two ways to a line. One is a straight-down cut, "but be careful." The other is a number 11 laid over, "pretty much the left side in my case, like a left wing," carefully "with the grain until you hit the line." I call it "a legit way," "actually safer somewhat," because "you don't push anything." A straight-down cut brings "some kind of stress" and this way "you don't really stress anything." I work the material a little at a time.

A different habit shows in Modern Acanthus 1, part 2: "I'm not pushing my tool" and "that is a big mistake when people push. It's not carving." I make a slicing cut. "I start on one side" and "I end on another," which in my case means the left flank first. My way is "not the safest way," I add. "It's always better to do across the grain."

The Tray of Blessing 1, part 2 repeats the left start and adds a note: "It could be both. It depends how you feel and what angle you attack." I could begin on the other flank and go the opposite direction, which is "also legit," but "don't start with the flute up. Don't push it like that."
Byzantine Acanthus 3, part 3 asks for the right flank only. I blend a transition, take a ridge out slightly, and say "make sure you just stay" there. If that feels odd upside down, I tell you "use the normal way." The goal is "to make it feel like it's overlapping."

Slicing comes back in Furniture Panel 37, part 2: "a slicing motion," this time with "only right hand side." I do not want to push, and I say "there is absolutely no reason." My warning is plain: "I have to be careful because I'm doing against the grain. And if the tool is sharp, you should be okay."

Can a spoon or a thin tool work on its flank too?
Venetian Flowers Rosette 4, part 2 has me on a straight tool, "but I could use, and it's probably more logical, a spoon just laying on the side" to excavate around. "Like I said, it's just preliminary, but the operation is the same, however extreme you want to go." A deep spot gets the same treatment: "you just attack that from the side," starting at 2 millimeters (0.08 in). Then "switch to one millimeter" (0.04 in), and "you can go half a millimeter" (0.02 in). "It's up to you."

The last one, workshop 95, part 5, puts a number 11 at "approximately one o'clock" on its flank. I name it "Veiner #11" and think a bigger one might suit that section, which is "supposed to twist," although I carve "wrong direction" and "have to attack from the side." Then comes a doubt: "Oh, not really. So I guess it's still better from this side."

All the lessons side by side
| Lesson and part | What the flank of the tool did |
|---|---|
| Workshop 108, part 3 | Landed with the right flank, 20 millimeters (0.787 in) |
| Workshop 50, part 2 | Blends a ridge with an 18 mm (0.71 in) tool, no swap |
| Venice Room 51, part 3 | Laid over as a flatter gouge, 4 mm (0.1575 in) |
| Venice Room 38, part 8 | The flatter flank beside a concave, blended to almost nothing |
| Part 4 of workshop 66 | Cleans up |
| Part 10 of workshop 63 | Plans a movement on another side of a pipe |
| Venice workshop 12, part 10 | An almost invisible concave, 4 mm (0.157 in) |
| Venice workshop 128, part 1 | Left flank for a concave, then a 2 mm (0.079 in) tool |
| Lesson 23, part 5 | A planned lean to the right with 7 mm (0.276 in), toward the edge |
| Lesson 4, part 11 | The flanks cut differently, so I flip and finish from the other |
| In workshop 95, part 5 | A number 11 at one o'clock, and a doubt about the side |
| Furniture Panel 22, part 11 | One tool for the movements, then a gradual blend |
| Furniture Panel 27, part 2 | Clean-up with a 3 mm (0.12 in) tool, no poking cut near the background |
| Panel 37, from the furniture course, part 2 | Only the right-hand flank, with a sharp tool |
| Lily Box 8, part 12 | Starts straight, then leans to the left for a small undercut |
| Floral and Molding 13, part 2 | The left flank, called a left wing, carefully to the line |
| Modern Acanthus 1 and Tray of Blessing 1, both part 2 | Slicing, left flank first, without a push |
| Byzantine Acanthus 3, part 3 | Stay on the right flank for a transition that overlaps |
| Rosette 4, part 2 | Spoon laid on its flank, down to half a millimeter |
Which tool in your own kit could you tip over tomorrow? Everything in these lessons sits inside one tuition plan, and workshop 109 follows workshop 108 in the same course. For more wood carving of this kind, try Modern Acanthus, Byzantine Acanthus or the rosette course.
How it's done
- Keep the tool you have. Workshop 50 blends a ridge with the same number 11, and I say I don't need to switch to another tool.
- Lay it over. A 4 millimeter number 11 (5/32 in) goes on its flank in workshop 51, and I use it like a flatter gouge, a number 3.
- Pick a flank. Workshop 23 leans right so the movement reaches the edge. Workshop 128 works left for a concave.
- Go carefully or flip. Floral lesson 13 goes carefully until I hit the line. Workshop 4 flips and finishes with the second flank.
- Do not push. My Modern Acanthus lesson calls pushing a big mistake, so I make a slicing cut instead.
Frequently asked questions
What did I say about the right side in workshop 108?
Part 3 has one line. With 20 millimeters (0.787 in) in hand I say I will use the right side to land it, then "Okay, that's good." Nothing in the part names the sweep. The same part leaves approximately a quarter-inch wall (6 mm).
Can a number 11 stand in for a number 3?
Workshop 50 says the sides of a number 11 are just equal to a number 3, so a side does that job and I do not switch tools. Workshop 51 lays a 4 millimeter (0.157 inch) one on its flank and calls it a flatter gouge.
Which flank do I start on?
My lessons vary. I lean right in workshop 23 because I want the movement to reach the edge, and I work left in workshop 128, in a Lily Box lesson and in a furniture panel one. In my slicing cut I start left and end right, and I say it could be both.
What to carve next