

Alexander Grabovetskiy, woodcarver, School of Woodcarving · Published 2025
How do you know how deep you can carve before you ruin the piece?
Quick answer: A depth limit in carving is whatever sits under the spot you are digging. My tray had the ridge of the bowl running invisible beneath a leaf, and I called its height my danger zone. I stayed above it and took only part of the leaf down, one small bite at a time.
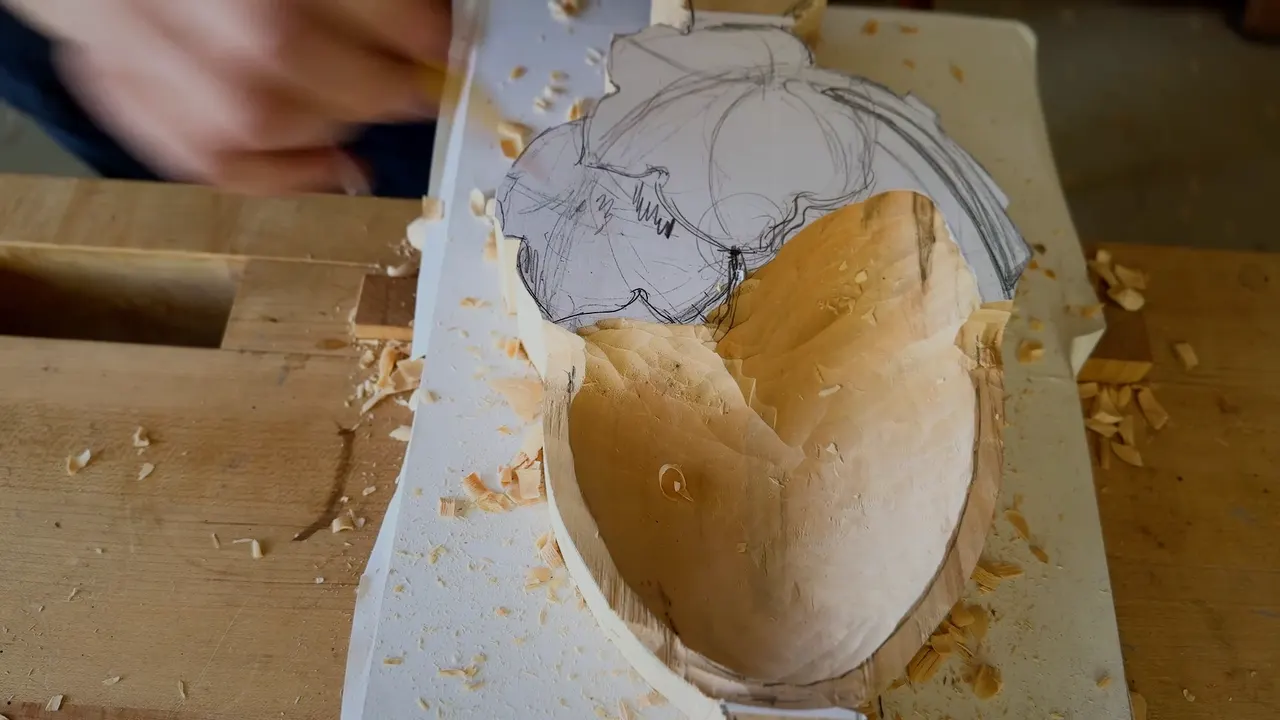
A depth limit is the thing beneath the spot you are digging. On my Tray of Blessing that was the ridge of the bowl, running on invisible beneath a leaf, and I called its height my danger zone. This page gathers the limits I named on the tray and in eight other courses.

Have you ever sent a gouge into a spot and felt the wood get thinner than you planned? Did you see the trouble only after the chip was gone? Something under that spot was telling you where to stop. I said so out loud, every time it showed up on my bench.
What stopped me on the tray?
In this video I started with the golden ratio points on the drawing and said that section of the leaf would be the main point, probably the highest spot. One part had to sit lower than the next, I said, and we would use the whole body of the material instead of leaving it flat. I asked the class to picture the leaf lying right on top of the ridge, with the second part falling slightly and curving up slightly. Dropping it all the way was out, because "otherwise it's not gonna look nice." I put the reminder like this: "Now I have to keep in mind there's gonna be my invisible ridge of this part."

Further on, I pointed at the height of that ridge and said I could not go deeper than that. "That is my no-no spot. So no touching, okay, not allowed." The name "danger zone" came back later in the same video: "I don't want to get, get lower than the ridge itself."
The limits I named out loud
- My ridge ran under a leaf on the tray.
- A floral panel had a molding right beside my carving.
- Two Venice Room workshops had a main body, and a thin side behind my gouge.
- On a Hashemi flower the worry was a hole inside.
- A furniture panel had a line that dies under another piece.
- One rosette had a background already set.
How far down did I go, and how?
My plan was to drop about 3/4 inch (19 mm) from the surface. "Not everything," I said twice. Only part of it, and bite by bite. Next video, I named the tool, a number 9 at 20 millimeters, which I put at 3/4 in.
We are painting with the shadows and the light, I told the class, and it depends how the light is going to hit. This piece was not going on a wall, so I had to excavate somewhat deeper, "extreme excavation" in my words, because the light would hit it from the side, from a window if it sits in your dining room. A piece on a wall with the light above can get by with a shallower carve. The lesson page has the whole talk.

To get there I brought in what I call a back stepping cut. "I'm gonna adjust the cut, step back, cut, step back." A molding plane works the same way, I told them, and "You never start at the beginning. You start with the end." Each step was approximately half an inch (13 mm), and each one was a slicing motion.
Losing the picture did not worry me. As long as I stayed pretty close to that line, I said, I could replicate it later on this side.

Which direction keeps the wood from escaping?
Along the grain I was pretty much safe. If I attacked and the tool escaped, I said, I would not catch the next detail. One way was to come in from this side. I wanted to be safer, so I went from the outside in, and my verdict was short: "across the grain, in my opinion, is always safer."
Next I tried the other way near the ridge, taking some wood off carefully from one side. "See what happened. So that is why it's kind of dangerous." The grain came back in the next video. Once one side was relieved, the wood flew out easily, and a really solid block still stood on the left side of my tool.

How much wood stays while the shape is open?
A lot. The leaf could curl up, curl down or stay flat, and I said that depended on how we did it. No shape yet, I said, only a preliminary one, since a curl needs space. Do it right away, approximately, I said, and you do not lose it.
Same number 9, but at 10 millimeters (3/8 inch). Every pass I made was still a slicing cut. I wanted to keep enough material before the ridge, since I could drop the ridge later, and to keep as much as possible.

Then a number 2 started the first curl, "just gonna curl on its own," and a smaller tool came next. This was only blocking in the main idea, I said. Details would come later with an even smaller tool than any I had used, and I would undercut really deeply, so the leaf curls on its own and still lays on that ridge.
The limits side by side
Seven limits sit in the table. The first is the tray, and the other six come from courses I link below, each one named in its own section.
| Where | What stopped me | Tool | Then |
|---|---|---|---|
| Tray lesson 2 | A ridge ran invisible beneath the leaf | Number nine | Stayed above it, took only part |
| Floral panel 11 | My carving ran right beside a molding | Spoon gouge | I took really, really small bites |
| Venice Room 84 | The outline of the main body below | Number three | Upside down, went a little deeper |
| Venice Room 82 | The side behind the carving could break | Number nine | Probably aimed a little different direction |
| Hashemi lesson 49 | The inside movement could open a hole | Number eleven | Attacked from one side and another |
| Furniture panel 20 | A line was supposed to die underneath | Number eight | Shallow background first, before anything deeper |
| Flower rosette 2 | I could not pass 1/32 right now | Number six | Refined the corner a little later |

The molding beside the carving
Lesson 11 of my Floral and Molding panel had me start a pass beside a molding. "I have to be really, really mindful," I said. The molding was going to be rounded, so going much deeper was out, but a small preliminary cut was fine, taken in "really small bites."

Later in that lesson I reached a spot about level with the opposite side, found that was as deep as it went, and picked up a number 5 spoon gouge to clean it. Nothing was forced, I said, because I could take the material out with different tools. In another spot the shell was at risk, and I took care. Lesson 10 put me a millimeter off, then maybe half a millimeter (about 1/50 inch), and I called it no big deal. "But I can't go lower than that. That would be a big mistake." That spot did not look too good, so I attacked it again with a small gouge, maybe a number 3 or a number 6, and said it did not have to be a 6, a 3 or a 5.

The Venice Room had a molding too, in workshop 161. Logically I had no room below a convex, because of where the molding would be, though I could lower the other section. I had planned to keep one part higher, then had a second thought. Lowering that part and going down, up and down again looked nicer to me.
A movement that has to stay alive
Workshop 84 finds me unsure. "I cannot go deeper than my outline of the main body. Logically, you're not going to be able to see, but still feel it." And then: "You're going to feel that there's something wrong." Going a little deeper was fine, because I wanted to raise that part going up, and I held a number 3 upside down to do it.
Workshop 81 says much the same about a part that lies on a movement. The area was kind of dense, so I picked a smaller tool for more control, and I said you can even hear the way it carves. Destroying the movement was the worry, I said, since it still had to feel like it was laying right on top of the movement beneath.

The side behind the carving
I skipped the drill in workshop 82. I took the old way, a number 9 at 6 mm (1/4 in). Too deep would damage the side behind it, and I would probably aim in a different direction. A little roll on that side would look really good, I said, since it would show from the bottom.

A Hashemi flower showed the same worry from the inside. With a 5 millimeter gouge (about 3/16 inch) I went as deep as I could and hooked the waste out with a number 11. "Sometimes you have to attack from two sides," I said, one side and then another, so you can go really deep. Keep an eye on it, though, because the movement of the inside goes on inside. A hole would be okay, I said, and "Even on this flower, I do have a couple holes." Still, try not to do it, I said, if it is possible. That is in Hashemi lesson 49.

High spots and sections I keep
In Hashemi lesson 12 A high point there had to stay untouched, and lower was out of the question. A bump in the way of the design had to be flushed, and I took it carefully with the grain. The Greek acroterion did it with paper in lesson 3. I left the ridge with my paper on it, because it was my high spot and I did not want to go lower than that. I shaped it carefully, and said a gouge would come a little later for the concave cuts.
I did the same on the tray in the third video, keeping some of the paper on so I would know where my high spot was. And in Byzantine acanthus lesson 2 I told the class to leave one section alone. "This section is no-no. No bueno. I mean, it is bueno, but not touchable."

A background I already set
At workshop 2 of my antique style rosette Depth had a limit, I said, because I needed to be consistent with my background, which was an eighth of an inch (3 mm). In flower rosette lesson 2 a number 6 at a quarter inch (6 mm) worked fine, and 1/32 (about 0.8 mm) was my limit right now. Another line: I could refine the corner and make a deeper channel.
On the furniture panel the limit was a line. In lesson 20 I figured a sixteenth of an inch (1.6 mm) was the floor, maybe less, because that line was supposed to die somewhere underneath another element. Excavating too much was not the plan, so a shallow background came first, with a number 8 at an eighth of an inch (3 mm).

Knowing when to stop
Furniture panel lesson 22 had a number 11 at half a millimeter (about 1/50 inch) reach a part that stood only that much above the background. "That's probably as much as I can go there." Next came a number 1 at one and a half millimeters (1/16 inch), and I saw it was already a deep, good shadow. "I really have to stop and not do extreme."
On the tray I hit a roadblock in the third video. "At some point you're gonna hit the roadblock, like I've, I've done right now. So it, uh, the time for me to stop probably." A number 2 at 10 mm (3/8 in) set the outline, and I wanted a full block before any undercut, "otherwise it's gonna be too squished."

The tools set a limit, too. I dropped one part lower in the second video so I would not need a deep undercut. "I can be crazy with the design, but how we gonna undercut it?" At the flip I set about 20 millimeters (about 3/4 inch), and the same depth down on the other side would be more pleasing, "a full barrel." From that point downhill I was safe to excavate the same depth, staying slightly away from the line, "because I can always cut on the line later."
Where the leaf stands when the video ends
Rough, on purpose. At the end I said we were just "blocking in, in the main idea," and not working on details. I stayed above the ridge, and a preliminary curl was in.

If you want the drawing side of this, the Principles of Design in Wood Carving course covers the golden ratio points I pointed at in the first seconds. For the whole tray, start at the course page.
Want to watch the ridge hold under a real leaf? Access opens every lesson of this course and the rest of the school.
How it's done
- Find what lies under the spot you plan to dig. My leaf had the bowl's ridge beneath it. Look for a molding, a high spot, an outline or a background that lies beside your carving.
- Name the no-no spot. Point at the height of the limit and call it off limits for your tool. Some paper stayed on the high spot to mark it.
- Go down in small steps. Take about a half inch (13 mm) at a time with a slicing motion, stepping back after each pass, the way you would run a molding plane.
- Pick the safer direction. Work outside in, as I did, since I think that is safer near a limit.
- Keep material for the curl. Leave space before the limit and make a preliminary pass. I used a 10 millimeter (about 3/8 inch) number 9 here, then a number 2 for the first curl.
- Stop at the roadblock. When the pass fought me, I said it was probably time to stop, and I switched tools to start the outline.
Frequently asked questions
How far down did the leaf go on the tray?
About three quarters of an inch (19 mm) below the surface, and on part of the leaf only. Most of the digging came from the 20 mm number 9. Each slice was followed by a step back, which is what I call a back stepping cut.
What did I mean by a no-no spot?
The height of the bowl's ridge, which ran beneath the leaf out of sight. I pointed at it and called it a spot with no touching allowed. The ridge itself could still come down later, I said, so nothing was lost by waiting.
Is carving across the grain safer?
In my opinion, yes. Near the ridge I tried another direction once and said, see what happened, and that this is why it is kind of dangerous. Once one side was relieved, the wood flew out easily, so I came in from the outside instead.
What to carve next