
September 15, 2024 · Updated August 17, 2026
By Alexander Grabovetskiy — Master Woodcarver · Founder, School of Wood Carving · 15 min read
Why is wood carving difficult, and which skill is the real wall
Wood carving is difficult in a place beginners almost never look. People ask why is wood carving difficult and expect an answer about steady hands. The real walls are a dull edge that crushes fiber, grain that reverses under a curve, and depth you cannot put back once it is gone.
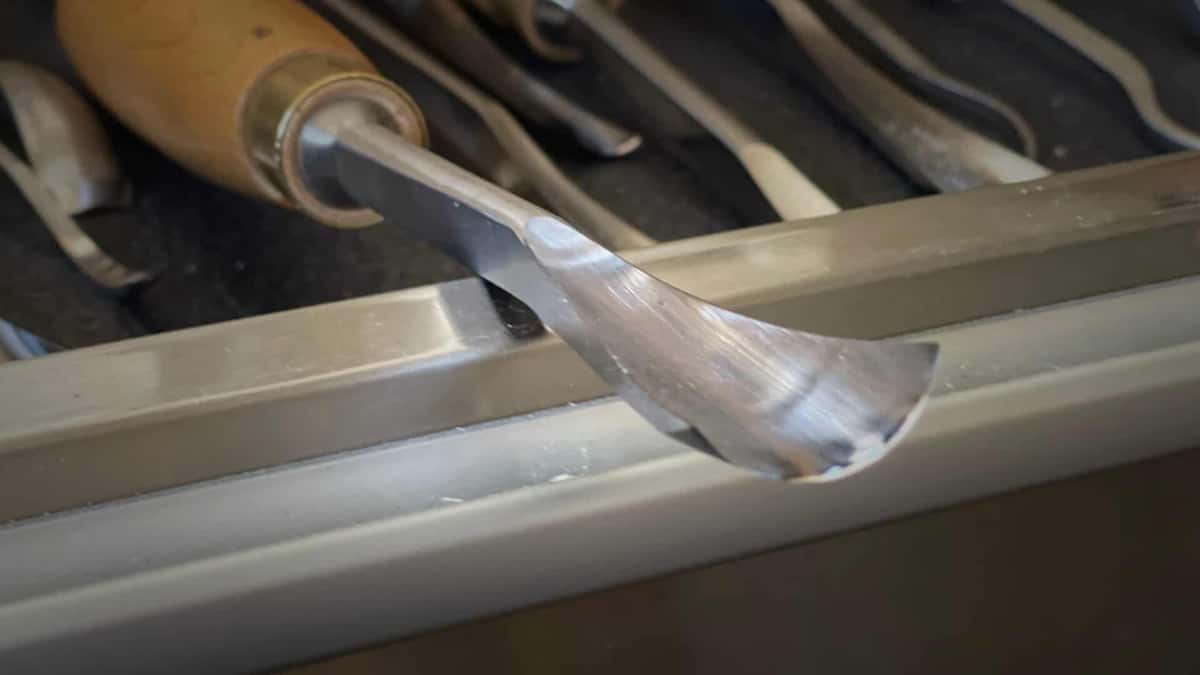
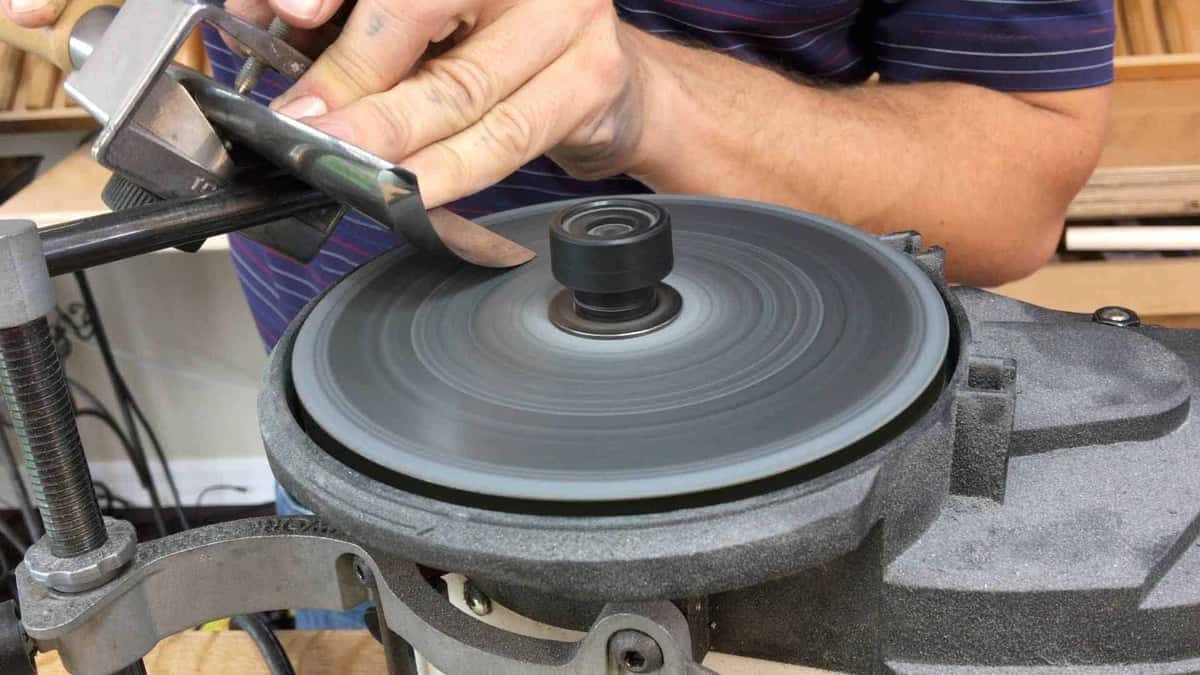
Ground by hand, never bought this way. Every tool behind it came home needing the same work.
I have been carving for over forty years, and on basswood I still walk to my sharpening station again and again in a working morning. Students watch that and think it is a quirk of an old man. The walking is the job itself, hiding in plain sight.
You bought good tools and a block of basswood. You sat down, the wood fought you, and a voice in the back of your head said you are not built for this. I want to take that voice apart in order.
- A blunt edge does not slice fiber. It squashes the fiber ahead of itself and leaves a torn, chalky surface no hand skill can rescue.
- Every brand ships tools whose bevel is too short and too steep for carving. Regrinding happens before your first shaving.
- Grain reverses inside a curve. The pass that worked an inch ago tears out on the same leaf, and the board did nothing wrong.
- Depth is a one way street. Wood comes off and never goes back on, so the shape has to exist in your head before the mallet moves.
- Hand movement, the thing beginners fear most, is the quickest of the three to get comfortable with.
Why is wood carving difficult when the video makes it look easy?
Video shows you the pass and hides everything that paid for it, so the work looks like hand skill when most of it is edge preparation and planning.
A man on screen lays a #7 gouge into basswood, rated 410 lbf on the Janka scale, and the shaving lifts off in one long curl. You buy the same gouge. You lay it in the same way, and the surface goes fuzzy and grey.
Then you blame your hands.
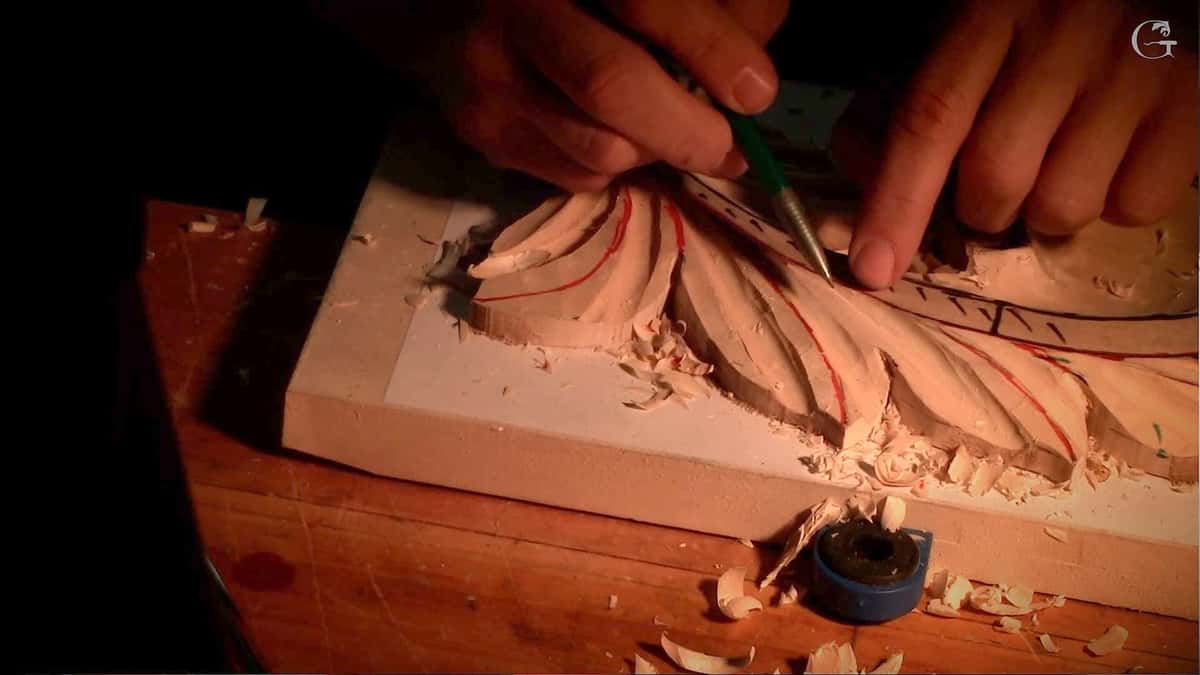
About a week and a half before I filmed a lesson in my Hashemi Flowers course, someone called me. They had found my custom work online, and asked how I sharpen. I told them I run a school, and that I teach sharpening as well as carving. The answer came back that they did not need anybody to teach them how to carve. They were already carving. They just did not know how to sharpen tools.
I did not know what to say. Digging a chisel in the wood, or poking wood with the chisel, does not mean that person carves. I said as much in the lesson afterwards, and I meant it kindly. That was not laziness. Somebody had handed over the third skill and called it the whole craft.
Is sharpening the hardest part of wood carving?
Sharpening is the wall most beginners hit first, usually about a month in, and it is the one that sends them away believing they have no talent.
In an April 2020 livestream a student typed that sharpening is very difficult. I said I do not agree, and then I spent the next two minutes proving that student half right.
Here is what I said that night. You can have a talent, you are able to design something and even carve, and the biggest frustration I saw, it is the sharpening. It is easy when you know what you do. Then it is easy.

Eighty grit takes the shape. The discs after it take the scratches out, and leather takes the last of the steel off the back.
A lot of people buy wood carving tools, they carve for a month, and then the tool becomes dull, and they get really frustrated. They blame the wood. The wood is bad. Or they turn it inward and decide they are not good. That is why one of the first lessons in my school is the way I sharpen.
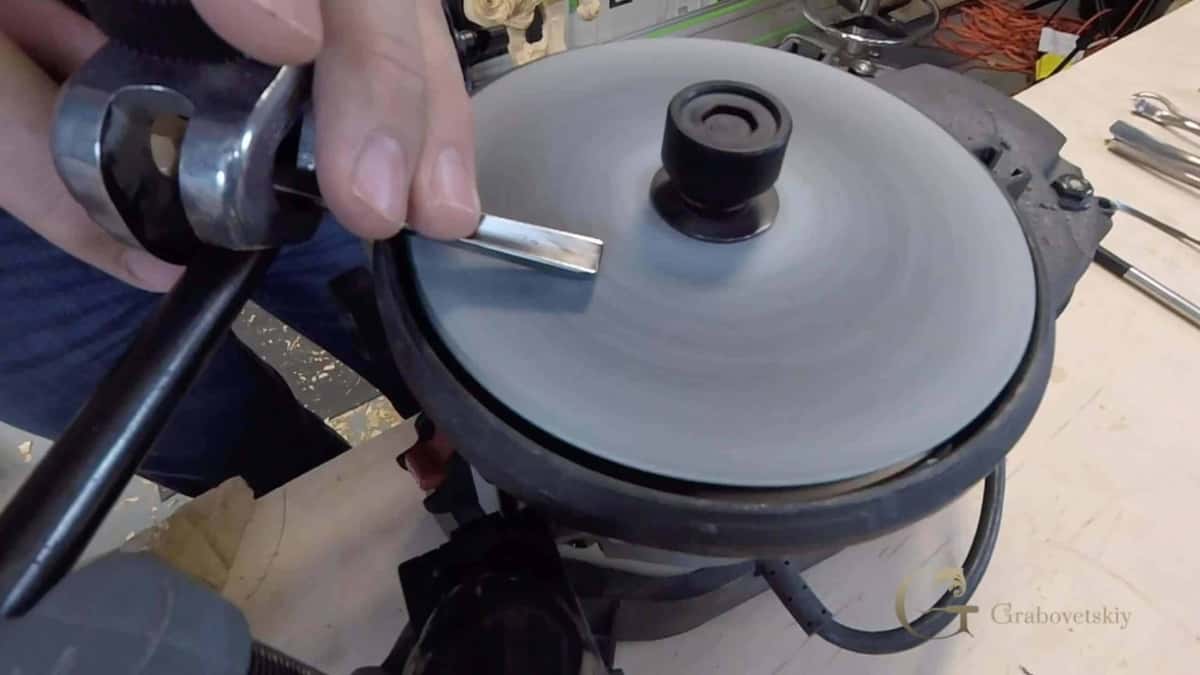
Another viewer in that same chat wrote that it took several years to sharpen just a knife correctly. Several years, for one blade. I would not put it that high for most people, and I am not going to argue with anyone about their own bench. They are still carving, which is what counts.
What a dull gouge actually does to basswood
A dull edge stops slicing and starts pushing, so it compresses the fiber ahead of the tool and tears it loose instead of severing it cleanly.
The color gives it away. Run a super sharp tool across end grain, then run one that needs sharpening over the same spot, and the two surfaces do not come up the same shade.

The danger runs the other way from what people expect. It is a lot more dangerous with dull tools, because you create a lot more force. A tool that will not carve basswood will still open your hand, since skin is nothing like a bundle of wood fibers under an edge.
Sandpaper is the other quiet killer. It leaves abrasive grit buried in the fibers, so the next tool through that surface goes dull almost at once.
How do I know when my gouge is actually sharp?
Four quick checks tell you the truth in under a minute, and none of them need a microscope. Run them in order, and the moment one fails, go to the stones.
Step 1, turn the edge toward a window
A properly sharp edge has no width, so it reflects nothing at all. Tip the tool slowly under the light. Any bright line running along the edge is a flat spot, and a flat spot is a dull tool wearing a disguise.
Step 2, feel the back of the edge with a fingernail
Draw a nail gently away from the edge along the inside of the flute. If it catches, you have a burr, the fine wire of steel left on a freshly sharpened tool. It has to come off before the tool will behave.
Step 3, take one pass across end grain in a corner nobody sees
End grain tells the truth. Long grain forgives a mediocre edge. Look at the shade of the corner you just carved, and if it does not read bright and slick to you, treat the tool as tired.
Step 4, strop before the tool asks
Ten seconds on leather charged with compound resets an edge that has only just begun to roll. A strop with a polishing compound on it removes a tiny amount of steel and brings the surface to a mirror. Once you sharpen a blade and hone it until it looks like a mirror, you should not have any problem.
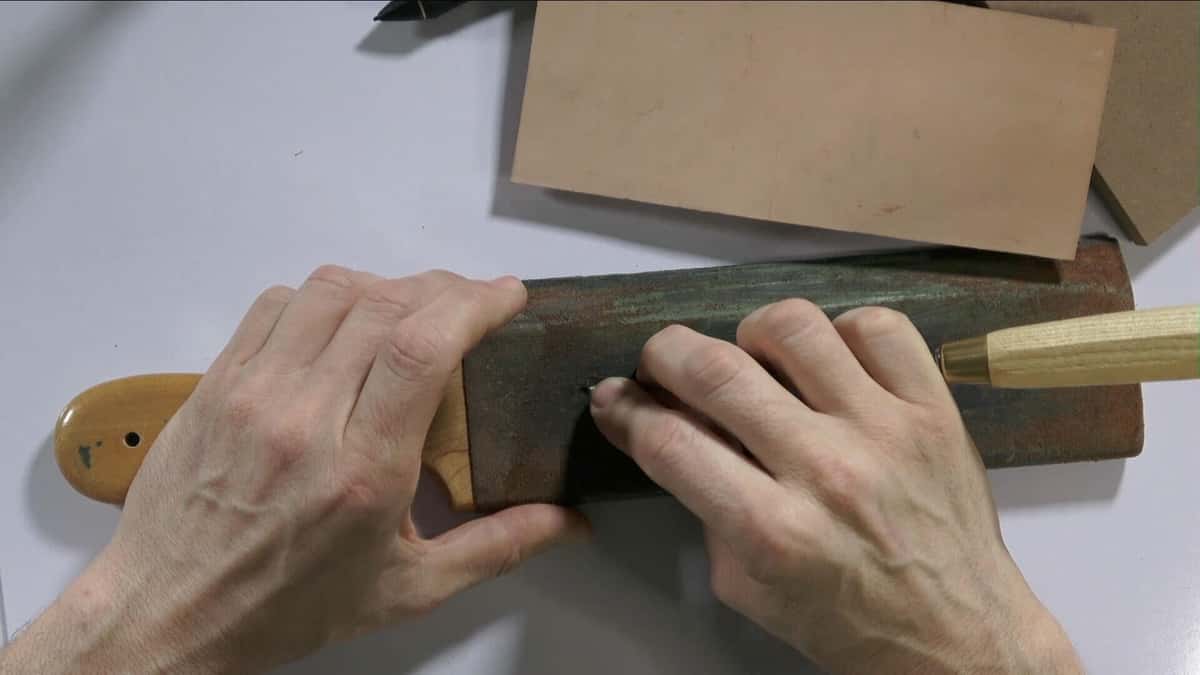
That block is MDF, not leather. Ten seconds here saves a trip back to the grinder.
My grandfather stropped a straight razor on plain leather every morning that he shaved, and I watched him do it long before I understood any of it. He did not exactly hand me my first chisel when I was six. I took it, and I took it to a brick, carved a face in the brick, and destroyed the tool completely.
Why does the grain tear out on the same curve every time?
Grain reverses direction as it wraps around a curve, so the stroke that sliced cleanly on one side of a leaf lifts and tears on the other side of the same leaf.
Nothing changed about your hands. The wood changed halfway through the shape, which is a completely different problem to solve.
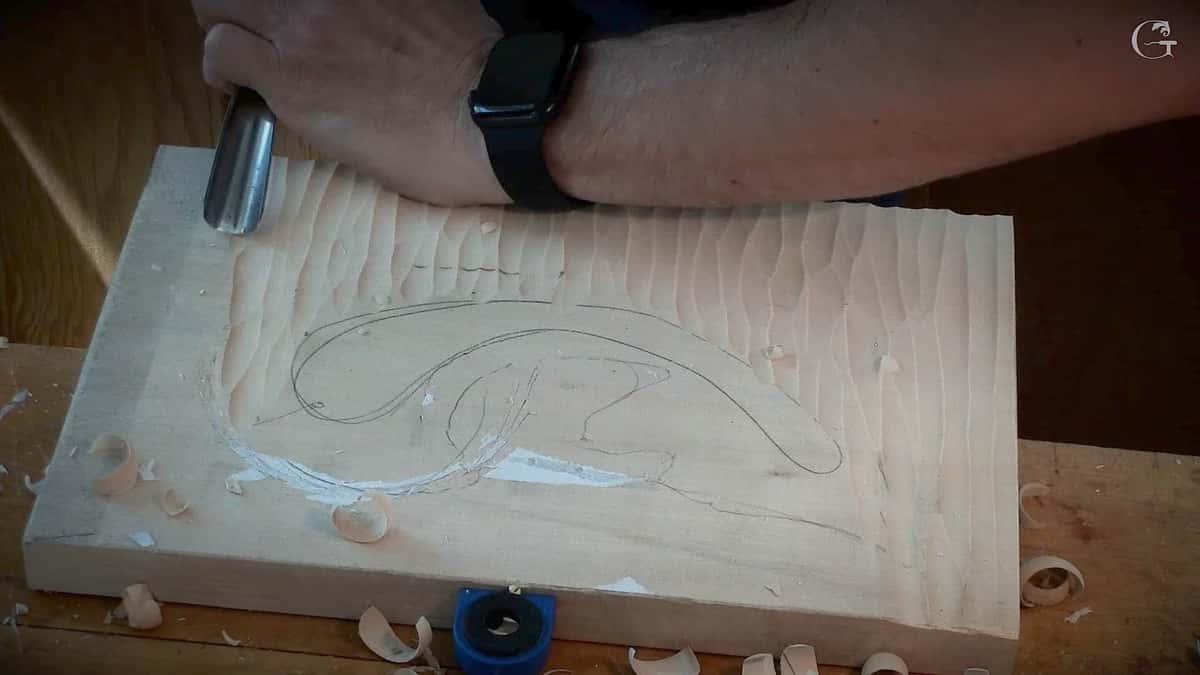
Fibers run like a bundle of drinking straws. Carve downhill along them and they part. Carve uphill and the tool gets under a fiber and levers a chunk out below your line, and on a piece you have already put hours of work into, that is the worst sound in the shop.
The repair is never a stronger hand. Rotate the work, approach from the other side, or take a lighter pass. On a difficult board I am often carving against the grain on purpose and it still behaves, because the edge is polished. If your tools are really sharp, you should not have a problem. It sounds like showing off until you feel it yourself.
Reading direction on a compound curve is a skill in itself, and I have written about handling different grain directions in a carving separately. Species matters too, which is another question about the best wood for carving.
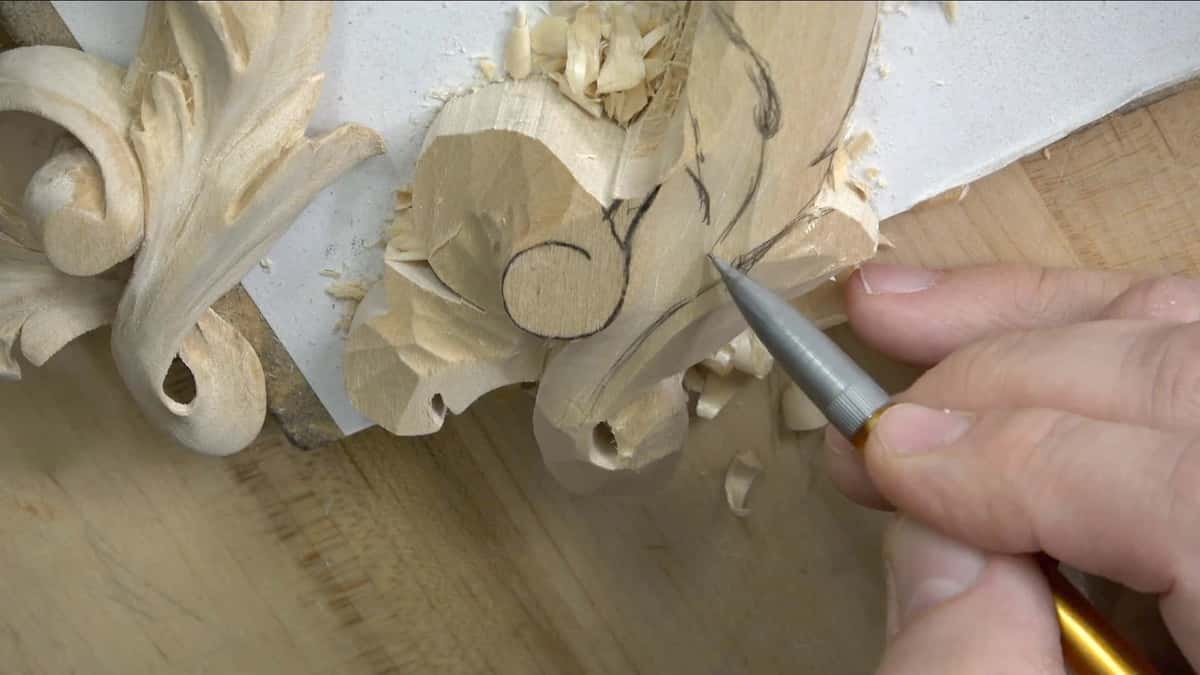
The fibers under there change direction more than once inside one lobe.
Why can a carving mistake never be undone?
Wood only comes off, so every pass is a permanent decision about depth, and the shape has to be finished in your head before the first shaving hits the floor.
A painter covers a bad patch. A potter squashes the clay and starts again. You get one board.
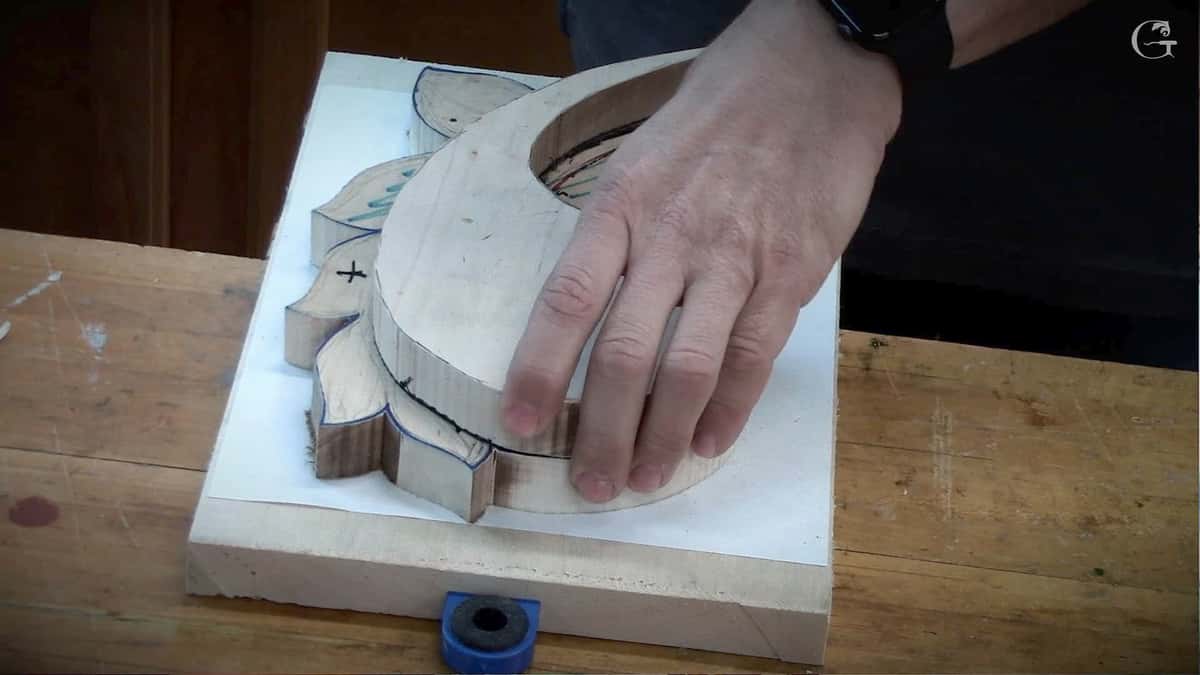
Some of the mistakes you really cannot fix. I say that constantly and it still surprises people. I would rather work slower than make a mistake I cannot repair, so on delicate work I drop to smaller tools even though it makes the work a great deal slower.
Depth planning is why relief carving is harder than it looks in photographs. Every element sits at a level, and those levels have to be decided as a set. Ground the background too low at the start, and the leaf that was supposed to roll over the top of another leaf has nowhere left to go.

Board stiffness decides how thin you dare go at the edges, so learn what the elastic modulus of wood means before undercutting anything to a knife edge. Basswood sits near 1,460,000 lbf per square inch, generous for its weight. The USDA Wood Handbook holds the same figures for every commercial species, and moisture moves all of them, as the Wood Database explains in its piece on how wood and water behave together. Hardness is a separate number again, measured the way the Janka test measures it.
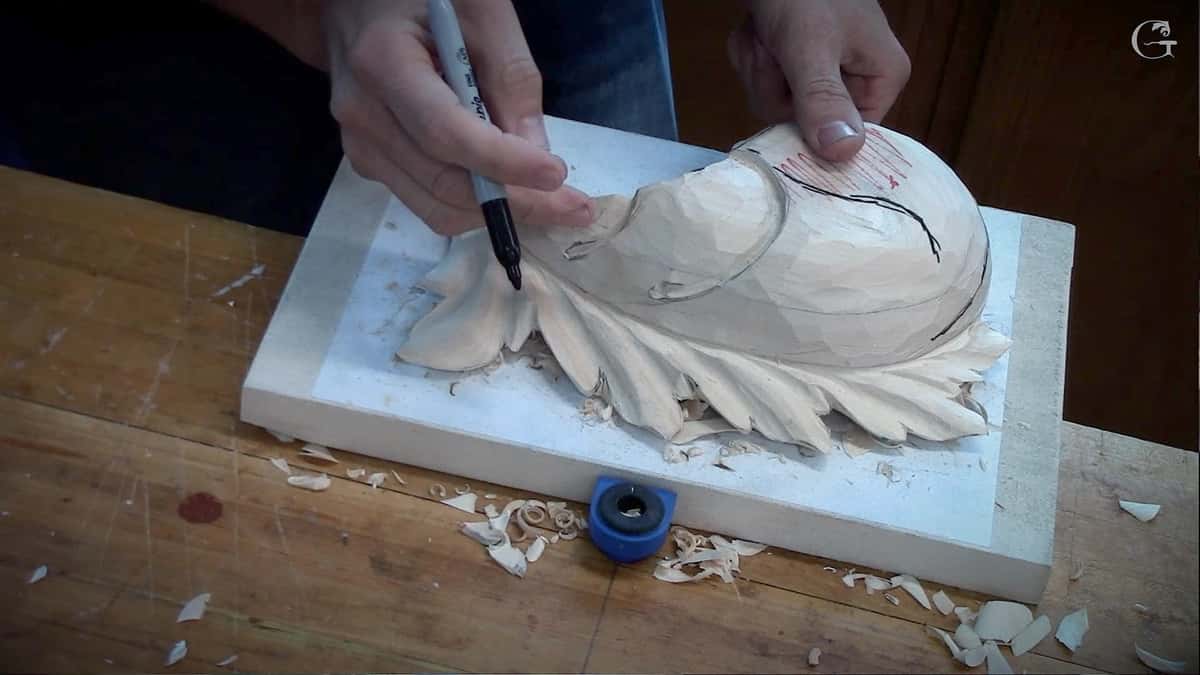
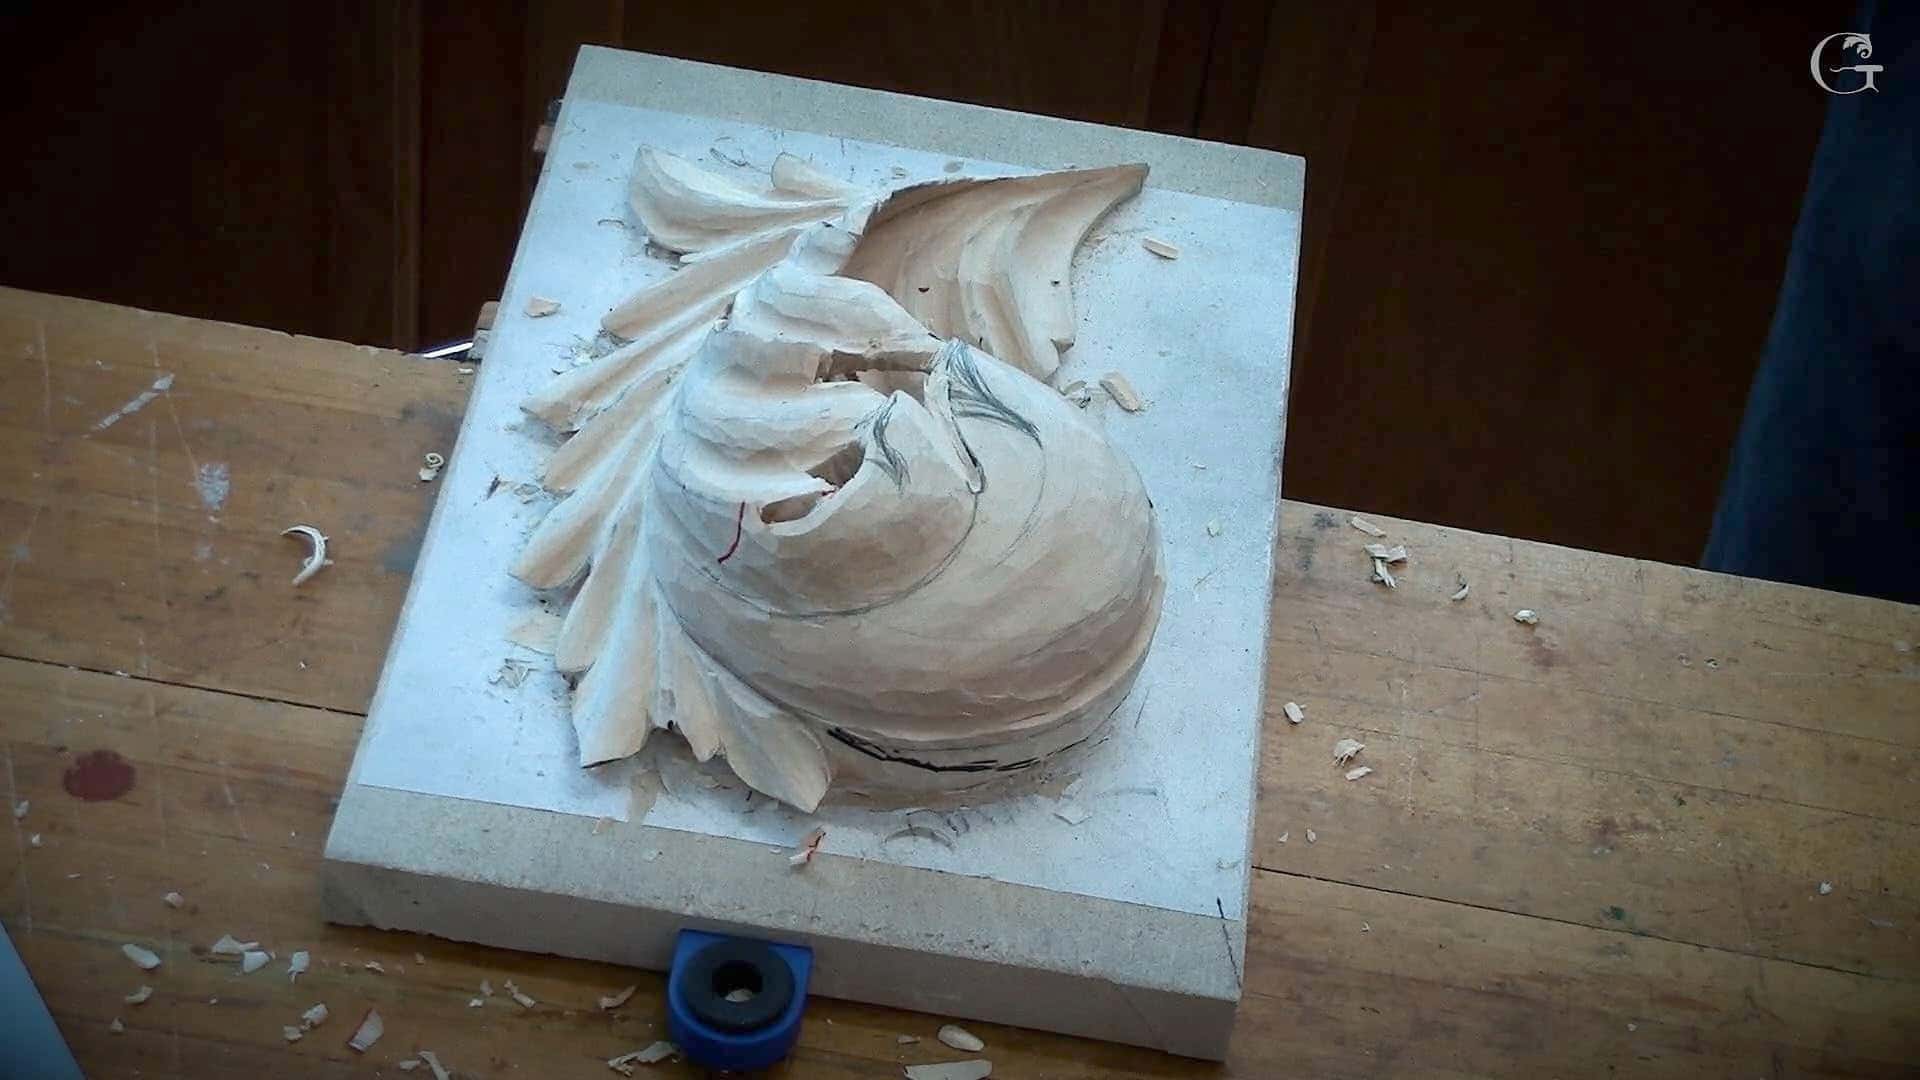
Once that lobe is undercut there is no version of this leaf that sits any higher.
Which is harder to learn, sharpening or design?
Sharpening frustrates you sooner, design defeats you longer, and the hand movements people worry about turn out to be the shortest climb of the three. I put them in that order in every class.
| Where you stall | What a beginner usually blames for it instead | Feels like | What genuinely moves it forward |
|---|---|---|---|
| The dull edge | Cheap tools, or bad wood, or no real talent | Month one | Learn one grinding jig, then strop every hour |
| Grain running the wrong way | Clumsy hands and a shaky wrist | Months two onward | Rotate the work, take lighter passes |
| Planned depth | Impatience, a poor drawing, or the wrong board | Most of year one | Draw the section view first, ground the background last |
| Design in three dimensions | A belief that artists are born | Several years | Study the golden points, rhythm and repetition |
| Hand movement itself | Everything, because it is the only part a beginner sees | A few weeks | Sit behind the tool, let the bevel steer |
Notice where hand movement sits. Forty years of watching people at a bench put it at the bottom, and it is the opposite of what almost every beginner expects. If the yes or no version of this question is what you came for, I answer it plainly over on is wood carving hard to learn, and the timeline lives in how long it takes to learn to carve wood.
Why design turns out to be the longest wall
Design is the skill I rank number one, because you have to train your brain in the three dimensional world before your tools can make anything worth keeping.
The idea is to learn to carve and design, but the design goes before carving. That order is not negotiable at my bench.
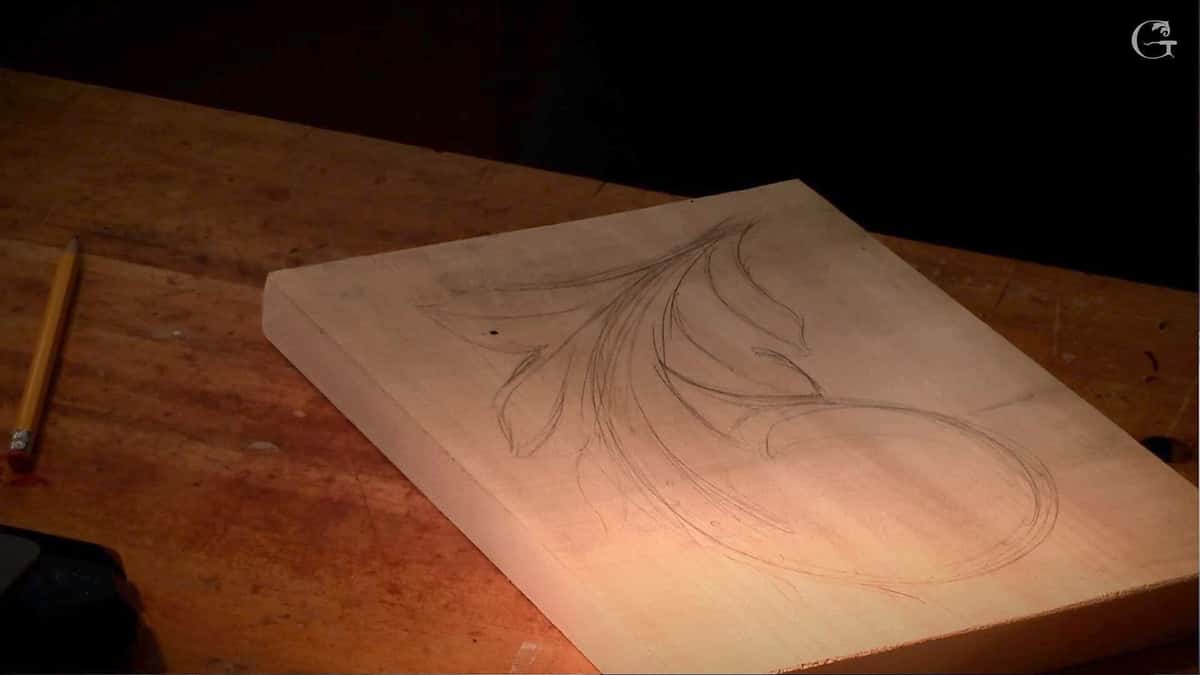
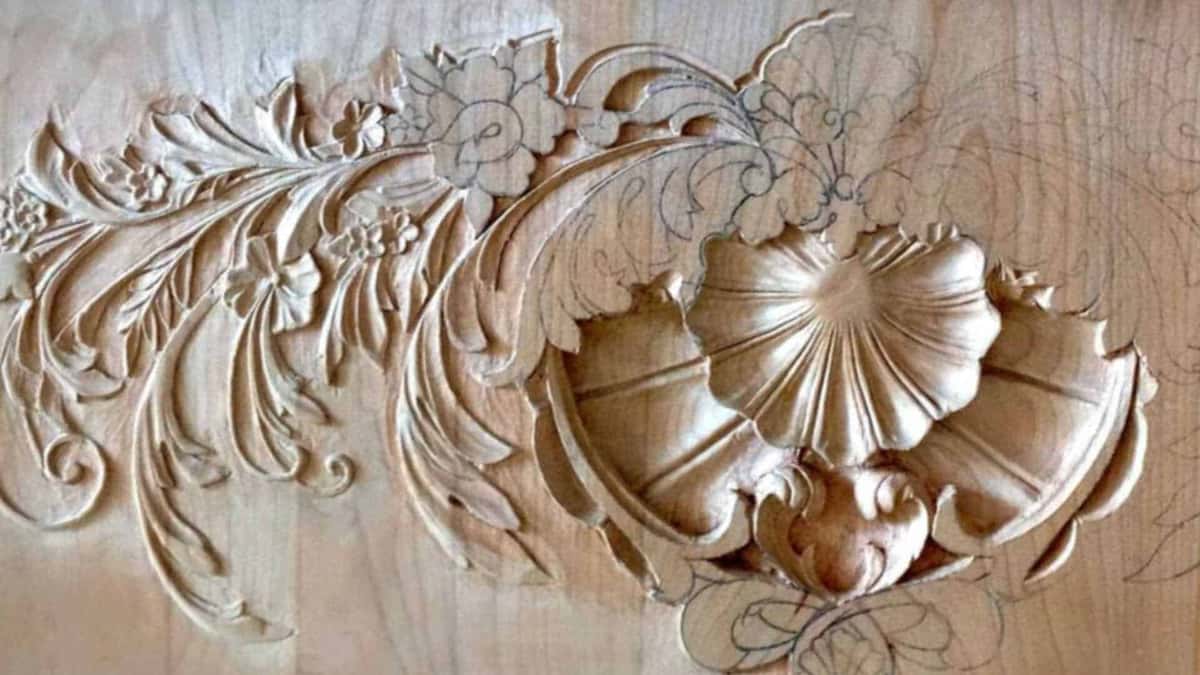
Every level you see here was settled before a single shaving came off.
Design here does not mean drawing prettily on paper. My own master taught me it is the laws of space, rhythm and repetition, and he taught me to think like a tool. A carved acanthus ornament works because the eye is led around a set of golden points.

Split an ornament down the middle and the eye stops caring about it.
Some of these laws are countable. Sixty against forty rather than fifty against fifty. Four golden points on a rectangle rather than one dead center. Whether one form grows while its neighbor falls. None of that is taste, and all of it can be taught, which is what my design principles course exists to do. If you are at the paper stage, start with planning and sketching a carving design.

What part of carving is easier than people expect?
Holding the tool and driving it is the part you will be comfortable with soonest, long before the edge or the grain stop fighting you. Angle, movement, where your hands sit. That is the third of my three skills and the smallest of them.
The tool list is short too. You do not need eighty gouges to start, and I have set out exactly what is needed to carve wood elsewhere, along with what the hobby actually costs. Before you spend anything, read what to know about wood carving before starting and learn how to tell whether a board is good to carve.

Why does a brand new gouge not carve out of the box?
A new gouge arrives ground for the catalog photograph, and it will not carve properly until you take that bevel back yourself.
It does not matter what brand you buy, you still have to sharpen those tools, even if they come out the box sharp and ready to go. Whatever I buy, high end or not, I still reshape, resharpen and re-strop it. The same goes for a Swiss made Pfeil and for the BeaverCraft set from Ukraine that surprised me for the money.
Pull one from the box and look at it from the side. The bevel is short and steep. To make it touch the wood at all you have to lift the handle four inches off the bench, then five, and you are still not grabbing material. Taking that bevel back to somewhere between 10 and 25 millimeters, depending on the tool, is stage one, and the geometry behind it is a trade in itself.

About one inch on the top profile. The middle sketch is the short factory grind, where the trouble starts.
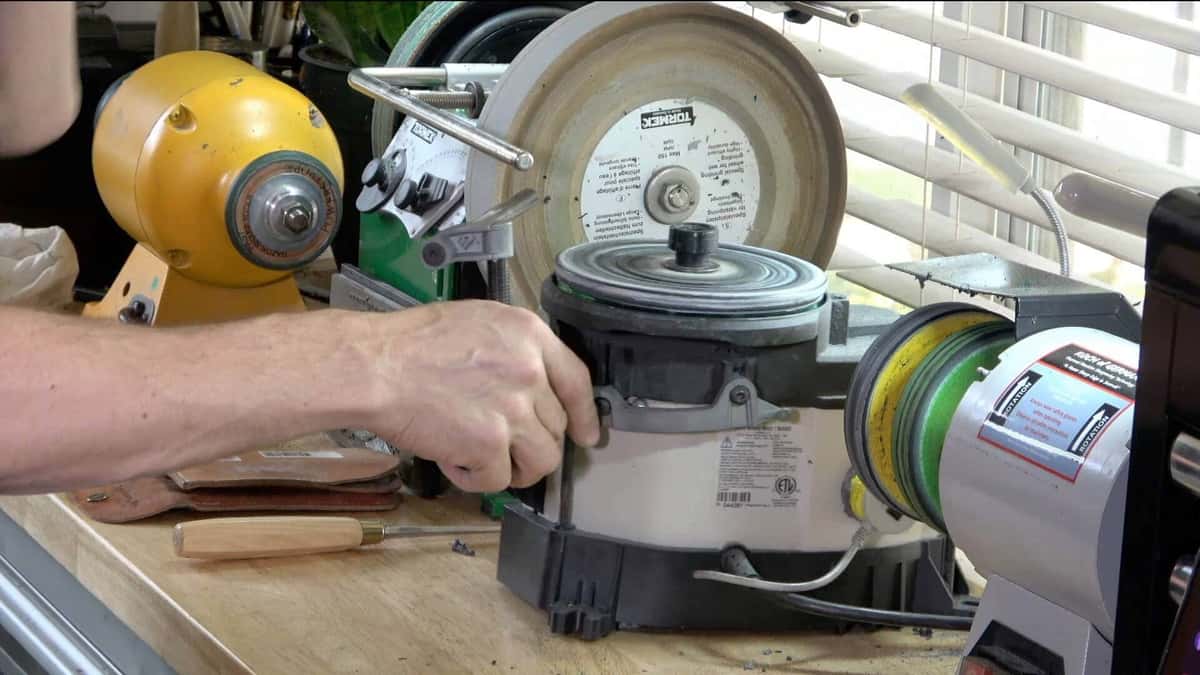
I grind on a Work Sharp with Tormek jigs, and I keep two leather wheels, one about 10 millimeters thick and one about 20. A back bent gouge runs 80 grit, then finer discs, then 3,600 and 6,000, then leather, then the buffing wheel. I walk that in my carving tool sharpening course, shape by shape, because a flat chisel, a V tool and a spoon gouge behave nothing alike on the wheel. Knives differ again, which is why I gave them their own long answer about carving knives.
Difficult is not the same as impossible. The effort simply has to land in the right place, and for most people it lands on their hands, which was never really the problem. The rest of the beginner traps are collected in the mistakes beginners make most often.
Frequently asked questions
Is carving hard for someone with no art background?
Drawing ability helps, but it is not the gate people think it is. The design laws that matter here are countable rules about space and rhythm, and any patient person can be taught them. Sharpening will punish you long before your drawing does.
Why do my carving tools go dull so fast?
Three usual causes. The factory grind was never corrected, so you force the tool through the wood. Or you sanded earlier and buried abrasive grit in the fibers. Or the board is abrasive in patches, which happens even in good basswood near a knot.
Does buying expensive gouges make carving easier?
Better steel holds an edge longer, so your work gets interrupted less often. It removes none of the sharpening skill, because every brand arrives ground for a catalog photograph. A cheap tool you can sharpen beats a costly one you cannot.
How much of carving difficulty is physical strength?
Almost none of it, and people are always relieved to hear that. A sharp tool asks for control rather than force, and the moment you push hard the edge has already gone. Strength shows up mainly as stamina during long roughing sessions with a mallet.
Is relief carving harder than carving in the round?
Relief is harder to plan and easier to hold. You are compressing real depth into a shallow board, so the levels must be worked out in advance and lit correctly to read at all. Carving in the round forgives depth and punishes bad proportion.
Can I learn sharpening from watching videos alone?
You can learn the sequence that way, and plenty of people have. What video struggles to give you is the feel of a burr under a fingernail and the sound a polished edge makes entering end grain. Those two arrive at your own bench, after a few ruined bevels.
Filed under
- best tools for wood carving beginners
- best wood for carving
- can wood condition affect carving
- common beginner wood carving mistakes
- difficulties in wood carving
- effects of wood quality on carving
- how to improve wood carving skills
- learning wood carving techniques
- overcoming wood carving frustrations
- patience in wood carving
- practice makes perfect in wood carving
- sharp tools for wood carving
- types of wood that are hard to carve
- understanding wood grain for beginners
- why is wood carving hard for beginners
- why wood carving takes time
- Wood Carving Basics
- wood carving challenges
- wood carving tips for new carvers
- wood grain direction in carving