
September 9, 2024 · Updated August 16, 2026
By Alexander Grabovetskiy — Master Woodcarver · Founder, School of Wood Carving · 17 min read
What is needed to carve wood?
What is needed to carve wood is a shorter list than most beginners expect. One sharp gouge, a mallet, a way to clamp the board down, a soft plank of basswood, and a leather strop. Add a lamp you can move. That kit carves a real panel.

Three finished rosettes and the working row of tools that made them. Not one came out of a boxed set.
When I came from Russia I had one gouge and one knife. My teacher gave me the gouge. The knife I made myself. That was the whole kit, and what to buy next turned out to be the first real decision I had to make in America.
So when somebody writes to me with a shopping cart open, twelve tools in it, two knives and a sanding kit, I ask one question back. How are you going to hold the board still? Nine times out of ten there is no answer, because nobody sells that part in a box.
- Three or four gouges teach you more than twelve, because you learn what each one leaves behind.
- The clamp is the item beginners skip, and skipping it wrecks the first year.
- A 12 ounce mallet suits ornament. Save the heavy one for splitting out a log.
- Leather plus a bar of compound keeps an edge alive. Machines can come later.
- Basswood under a lamp you can swing gives you the shadow you are carving toward.
What is the smallest kit that really carves wood?
Three gouges, a V tool, a mallet, one clamp, a strip of leather and a flat basswood board. Call that the honest floor. Add a knife for the fine work if you like, and what a carving knife is actually for is worth reading before you buy one, but the six items above will carve a panel from pencil line to finish.
I want to be blunt about the order, because people get it backwards. Tools first, wood second, holding third is the wrong order. Holding comes first. A board that walks across the bench under a mallet blow is not a tool problem. The setup is the problem, and no gouge you buy will fix it.

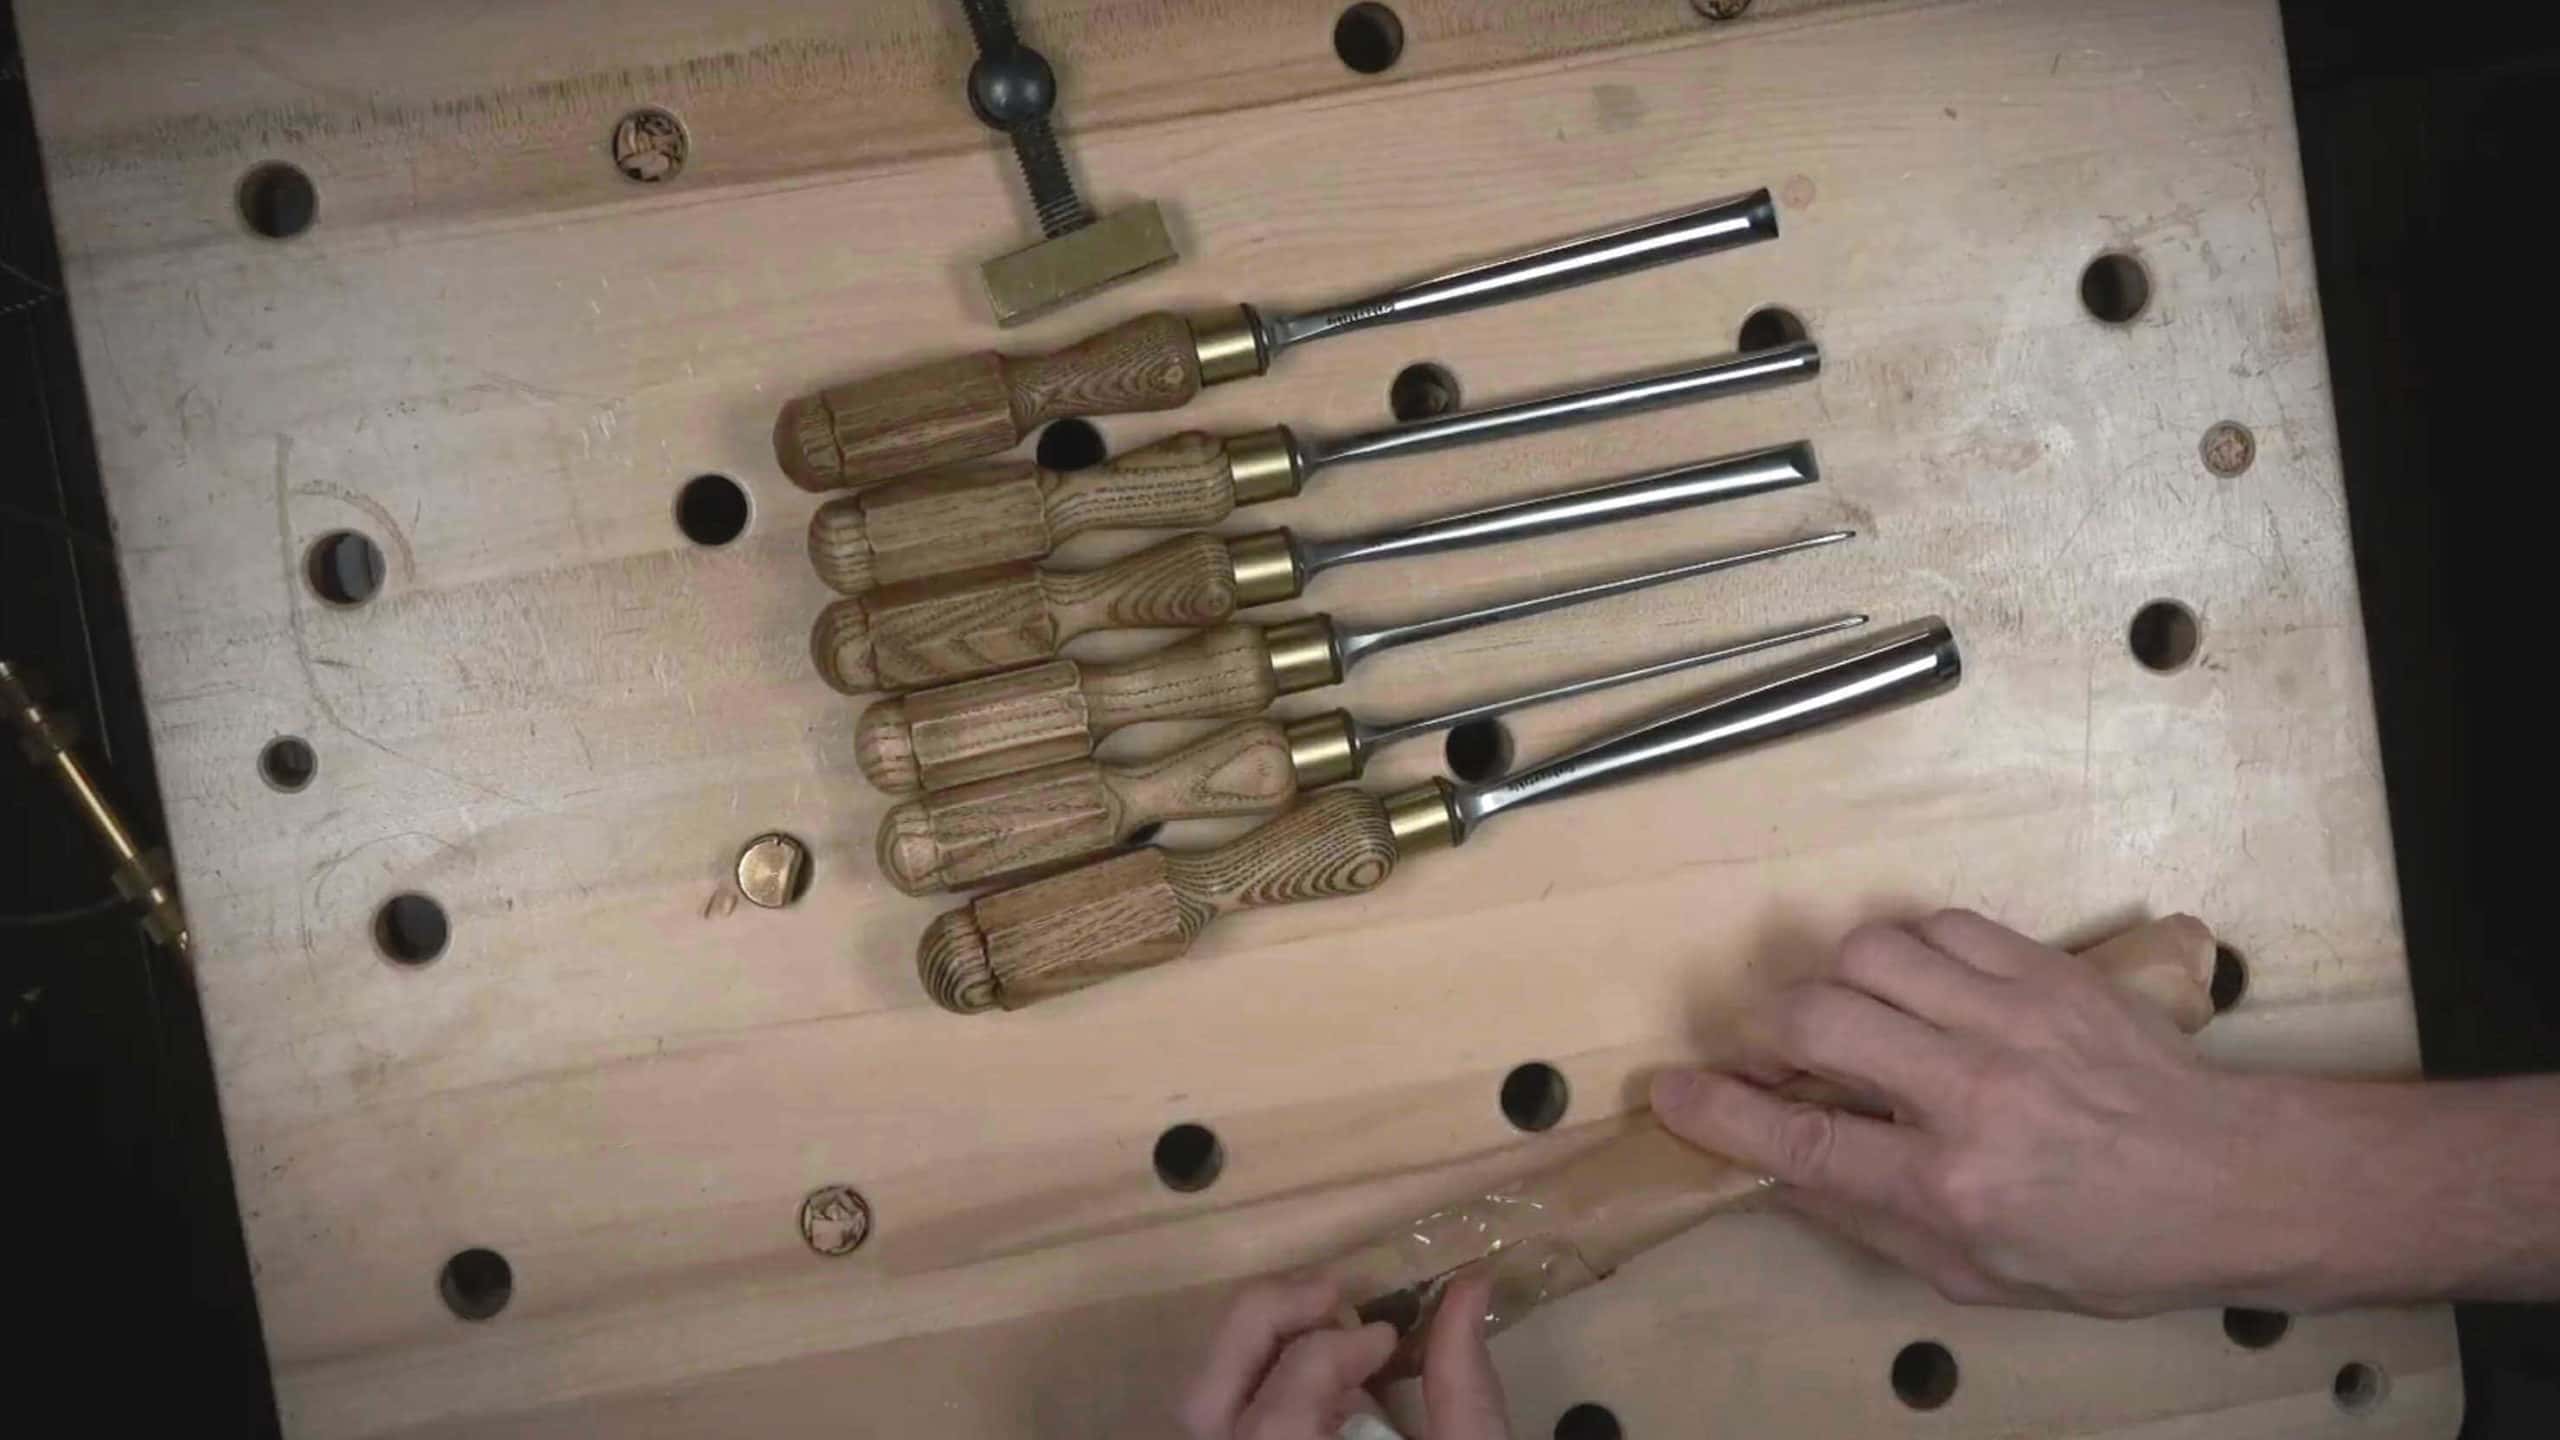
Left to right, a wider straight gouge, a narrow one, and a fishtail that reaches into a corner the others cannot.
Which gouge sweeps and widths do the most work?
A #3, a #7, a #9 and one V tool cover almost all ornament, and the useful widths run from about 3 mm to 20 mm. The sweep number is the curve of the edge, and the number after the slash is the width in millimetres. A #7/14 is a fairly deep curve fourteen millimetres wide. A #3/8 is almost flat.

The stamp on the handle reads 11 slash 0.5. Sweep first, width second, and every Swiss made handle in my racks is marked that way.
The part that saves money comes next. A sweep is not a lock. In my acanthus over moldings lessons I say it out loud while I am carving. You do not really have to have a number 17. Do not get me wrong. It is not one more tool you have to buy. You can use a number 11, you can use any other V tool, and it is still going to give you the same result.
Reach for the big tool first. A wide #7 takes the waste off in a few passes where a narrow one grinds away at it, and the wide one leaves a cleaner surface behind. Small tools are for the last hour, not the first.

Two hands on one tool. The blade is what you are buying, because a handle can be turned again in an afternoon.
Steel matters less than the catalogs suggest, because the working range is narrow. Gouges and chisels for carving sit roughly between 58 and 62 on the Rockwell scale, near as I can tell from forty years of sharpening them. Pfeil, forging in Langenthal since 1902, sits in that band. So do Ashley Iles and Flexcut. A ranking of the brands against each other is its own long argument, and I made it in how the sold tool sets compare.

Second hand tools from three different centuries. The handles tell you more about the last owner than the steel ever will.
Do you need a mallet, and how heavy should it be?
Twelve ounces is the weight I reach for on ornament, and I say so on camera in that same molding course. I will use a small mallet, like 12 ounces. Heavier heads exist for roughing out a log or a sculpture blank, and they have their place, but on a relief panel weight buys you nothing and costs you control.
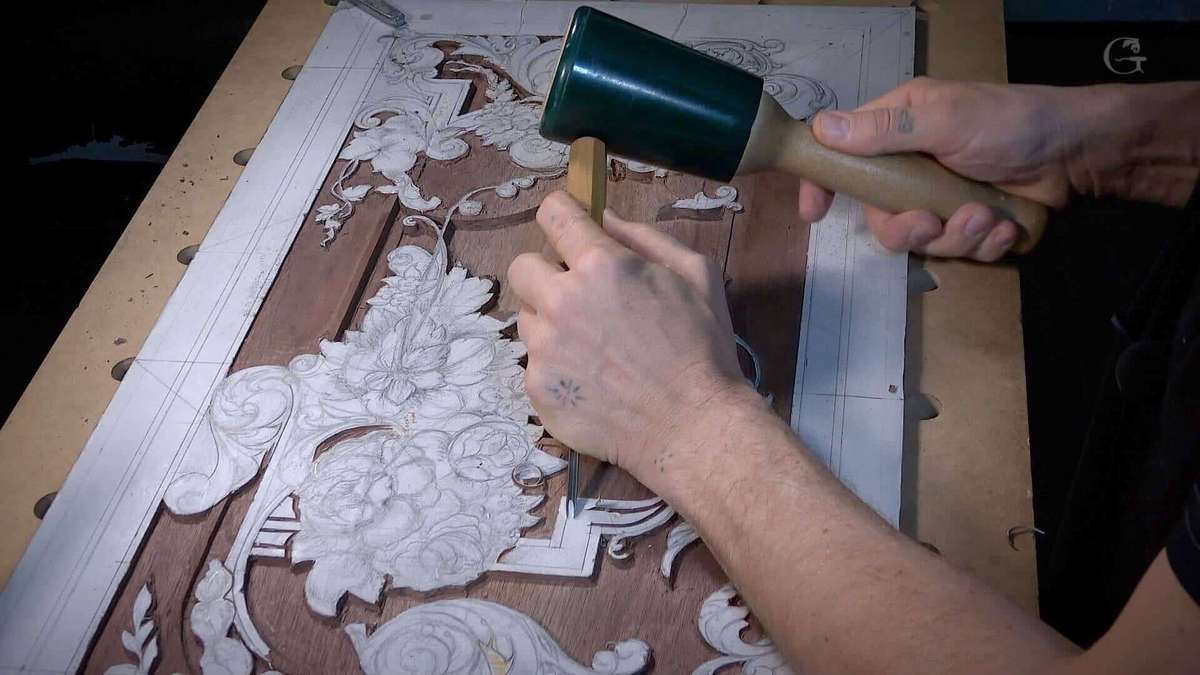
Both hands are working. One drives the mallet, the other steers the gouge and rests against the panel.
Bronze, brass, urethane, turned hardwood. They all drive a gouge. Bronze is compact for its weight, which is why a small one feels heavy in the palm. A turned wood mallet is kinder to a handle over a long day. With the very small tools I hold the mallet by the head instead of the handle, so the blow is short and I can feel the wood give.
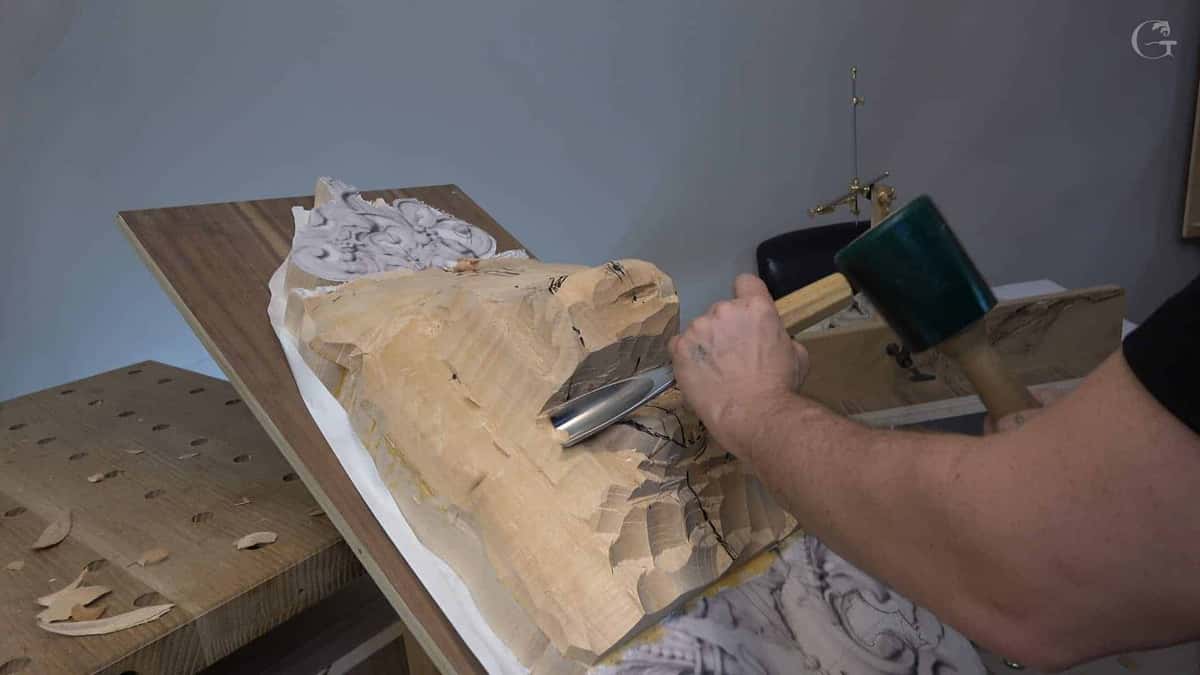
Roughing out a lion head. The blank is propped on a slope so the blow lands straight down the tool.
Whether you need one at all depends on what you carve. Chip work goes fine with hand pressure alone. Anything deep, and anything in oak or walnut, wants a mallet. I have set out whether a mallet belongs in your hand at all in more detail.
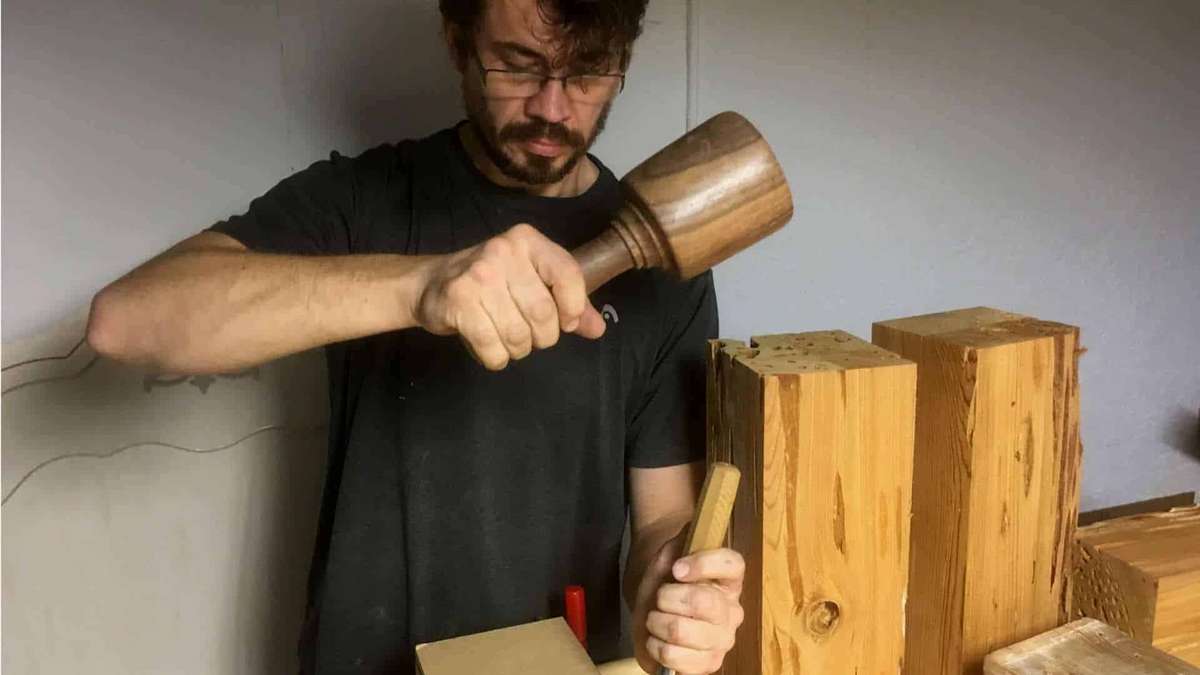
A big turned head like this one is for splitting and roughing blocks, not for a finished leaf.
How do you hold the work down while you carve?
Pin the board to the bench before the first pass, using a clamp, bench dogs, a carver screw or a glued block. A shifting board takes the accuracy out of every pass, and then the student blames the tool, or the wood, or himself.

The shaft drops through any one of those holes and the head pulls the work flat against the top.
In my Grinling Gibbons class in Maine I said it plainly. You do not raise both hands in the air. At least one of the hands is supposed to be placed right on the board.
A bar clamp and a scrap batten pin a panel flat to any bench. Round bench dogs in a grid of holes hold a piece from four sides and let you spin it. A carver screw comes up through the bench into the back of the blank, which is the only way to hold something in the round, and tool houses like Lee Valley stock the hardware. And a vise with a swivel head lets you tilt the work to the tool.
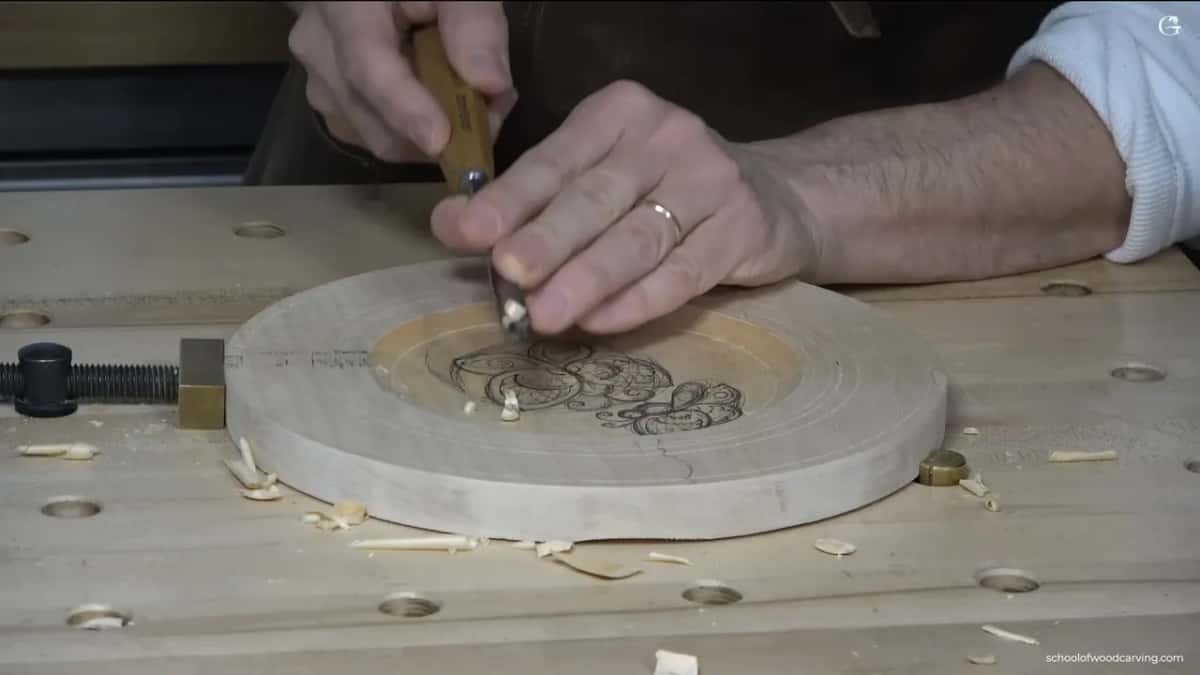
A round blank trapped between a bench screw and a brass stop. It cannot spin, and it cannot creep.
For small pieces I glue the blank to a sacrificial board with a sheet of paper in the joint, then clamp the sacrificial board. When the carving is done a thin knife in the paper line pops it off. Screws through the front face are the one method I avoid, because a screw hole in a finished surface never goes away and every visitor will find it.

The clamp at the right edge is the whole setup here, and the chips have gone everywhere except onto the panel itself.
There is a simpler way when the shape allows it. Leave a leg of waste wood on the blank and clamp that instead of the carving.

A grounding tool cleans the inside corner by hand. The spiral volute and the palmette beside it are already carved.
A slipping board sends a sharp edge somewhere you did not plan, and the ways a beginner gets hurt nearly all start with work that was not held.
What should you buy first, and what can wait a year?
Buy the gouges, the mallet, the clamp, the strop and the board. Anything with a motor in it can wait. Here is the split I would give my own student on their first afternoon.
| Part of kit | What to get on the first day | Can wait | What it does at the bench |
|---|---|---|---|
| Gouges and chisels | Three sweeps plus a V tool, nothing more | The rest | Each sweep carves a shape the next one cannot |
| A carving mallet | A 12 ounce head, round, wood or bronze | Heavier one | Control beats raw force on small ornament |
| Holding the work down | One bar clamp, a scrap batten and four screws | Carver vise | A board that shifts under load will ruin every single pass |
| Sharpening gear | Leather glued to plywood, one bar of compound | Grinding wheels | A dull edge crushes fibers instead of slicing them |
| The wood itself | Kiln dried basswood, flat, knot free, 25 mm thick | Exotic hardwood species | Soft even grain forgives the mistakes you will make |
| The light | One lamp on a movable arm | Nothing else | Raking light shows the shadow you carve |
The money question is a separate one, and I am not going to pretend I answered it here. What this hobby costs over a year has its own page.
What sharpening gear belongs on the bench from day one?
A strip of leather glued to a flat board and a single bar of honing compound will carry an edge through a whole panel. I keep machines too, but the leather is what actually lives beside the work.
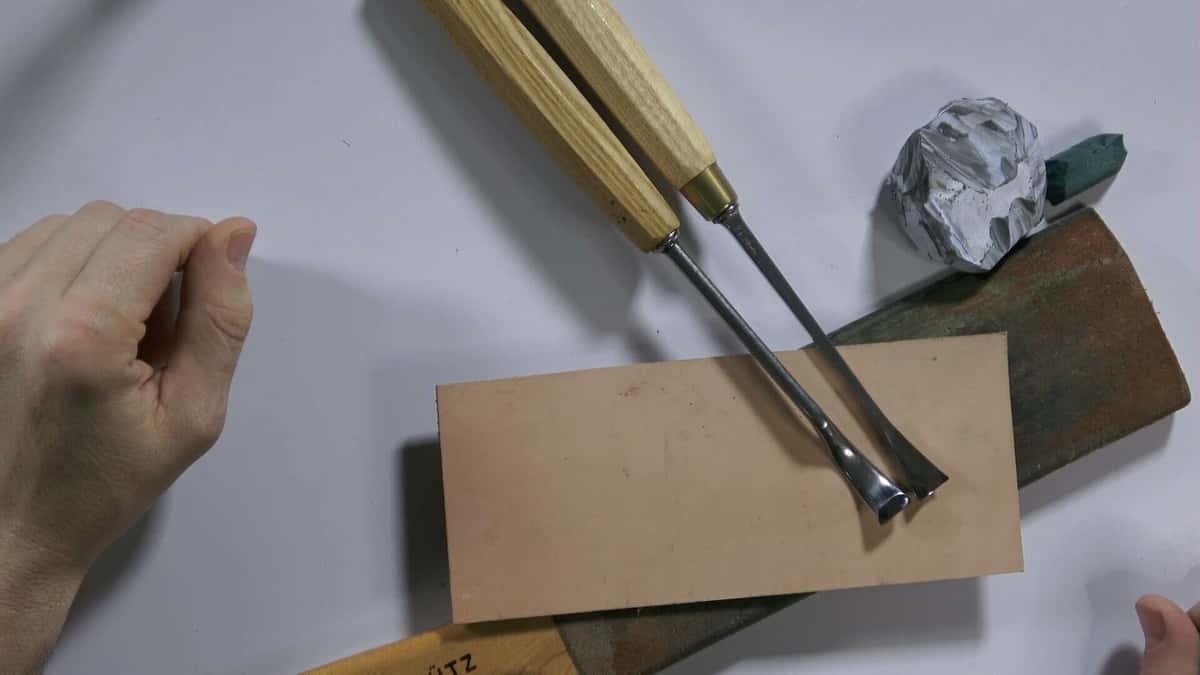
Two gouges and a green compound bar on a scrap of leather. One bar of this lasts for years, which is why the wrapper is still lying beside it.
In the acanthus lessons I stop mid pass and say it. The most complicated stropper is a piece of leather and a little bit of paste. It really does not have to be super complicated stuff. A couple of strokes on the stropping leather and the tool is back.
You strop on a pull, never a push, or you slice the leather. Do not rock the tool while you do it, because rocking rounds the bevel over and then the gouge stops entering the wood at all.
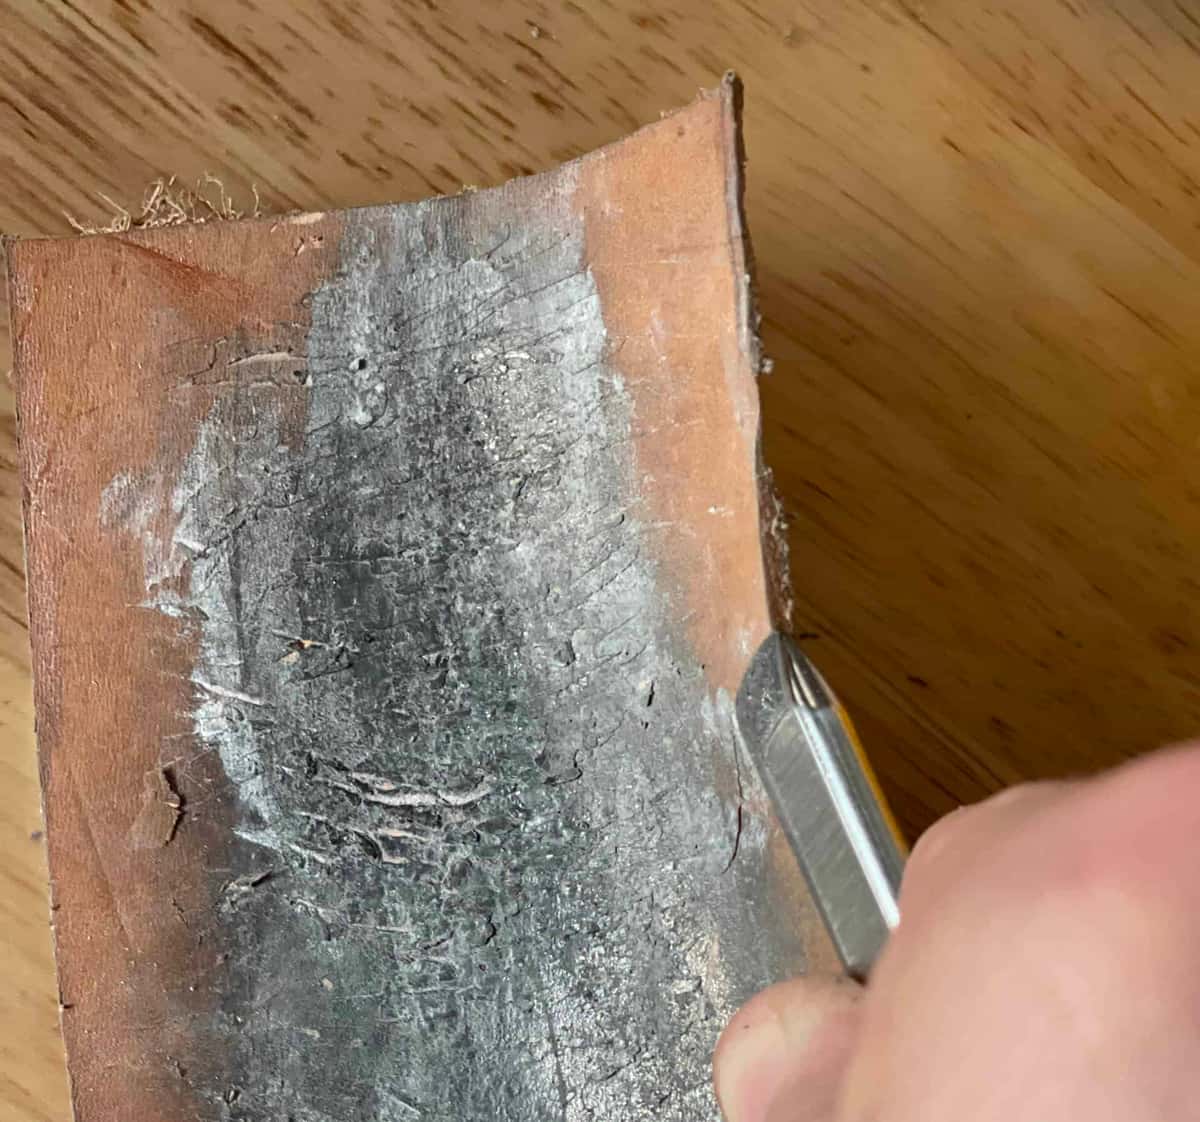
A V tool needs each wing done separately, then the point checked against the light.
A flat bench stone comes next, once you nick an edge. The powered wheels and buffing systems come after that, and they are a convenience, not a requirement. I use them because I carve every day and I own about five hundred tools. Not yet, in your case. The sharpening course walks each tool shape through the whole method in order.

A powered wheel is fast and completely unforgiving, so learn the bevel angle by hand before you let a motor near your gouge.
What wood should be on the bench?
Basswood, kiln dried and flat, is the board that lets you learn the tool instead of fighting the grain. Europeans call the same tree lime or linden, and it has been the carver default for centuries for one reason. It gets out of the way.

Chips this size, curling and not crumbling, mean the board and the edge are both behaving.
I said why in my own words in the lily box lessons. That is why I like to work with basswood, because it does not have a lot of grain. Straight grain, fine even texture, knots uncommon. The wood database entry for Tilia americana puts it at 410 lbf on the Janka hardness scale and calls it perhaps one of the most suitable species for hand carving. The same page lists its stiffness at 1,460,000 lbf per square inch, and what that stiffness number actually predicts at the bench is a short read worth having.
Buy it kiln dried and flat. Look down the edge before you pay. Wood keeps moving with the moisture around it long after the mill is finished with it, which the USDA Wood Handbook lays out in more detail than any carver needs. If you already have a board sitting in the garage and you are wondering about it, run the hand tests that tell you whether a board is worth carving before you commit a design to it. Turning a rough plank into something you can carve is its own job, and preparing raw wood for carving covers the steps.
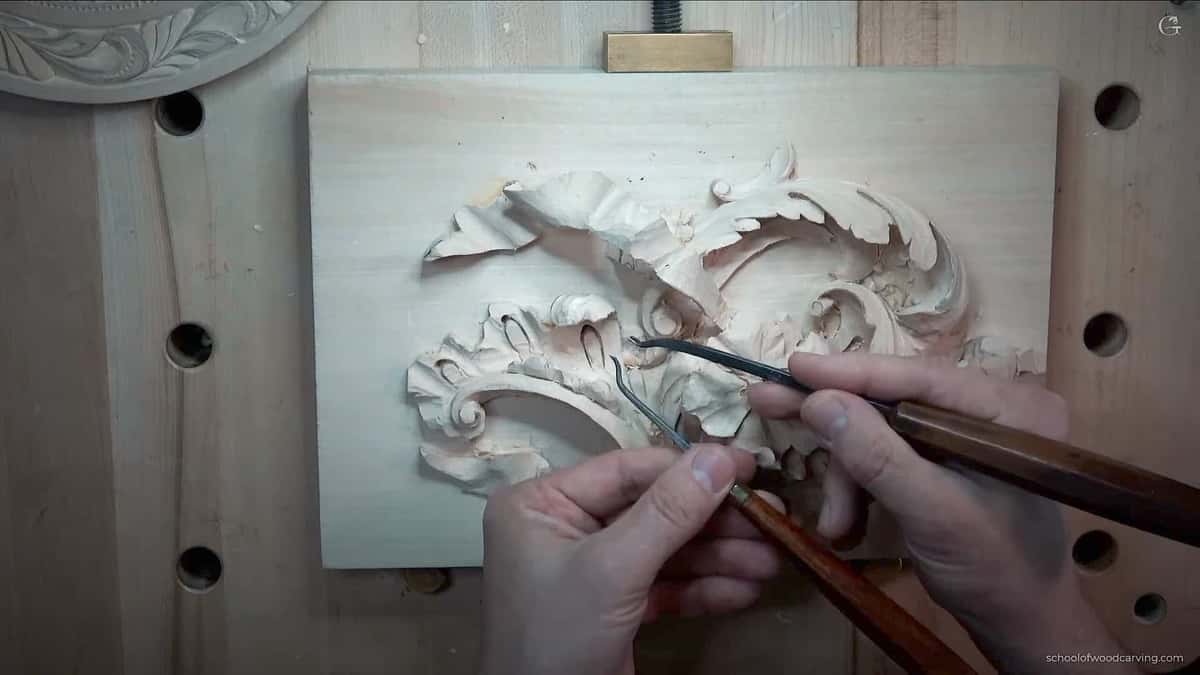
That brass bench stop takes the whole push of the tool, and the board never leaves the spot.
Other species carve beautifully. Butternut, walnut, cherry, European lime. The species that carve best is a whole argument of its own, and so is basswood measured against the rest. For the first board, take the soft one.
Does the light on the bench really matter?
Light decides what you can see, and you cannot carve a shadow you cannot see. On the April 2020 livestream somebody asked about my lighting setup and I gave the whole answer, because it is not a small thing.
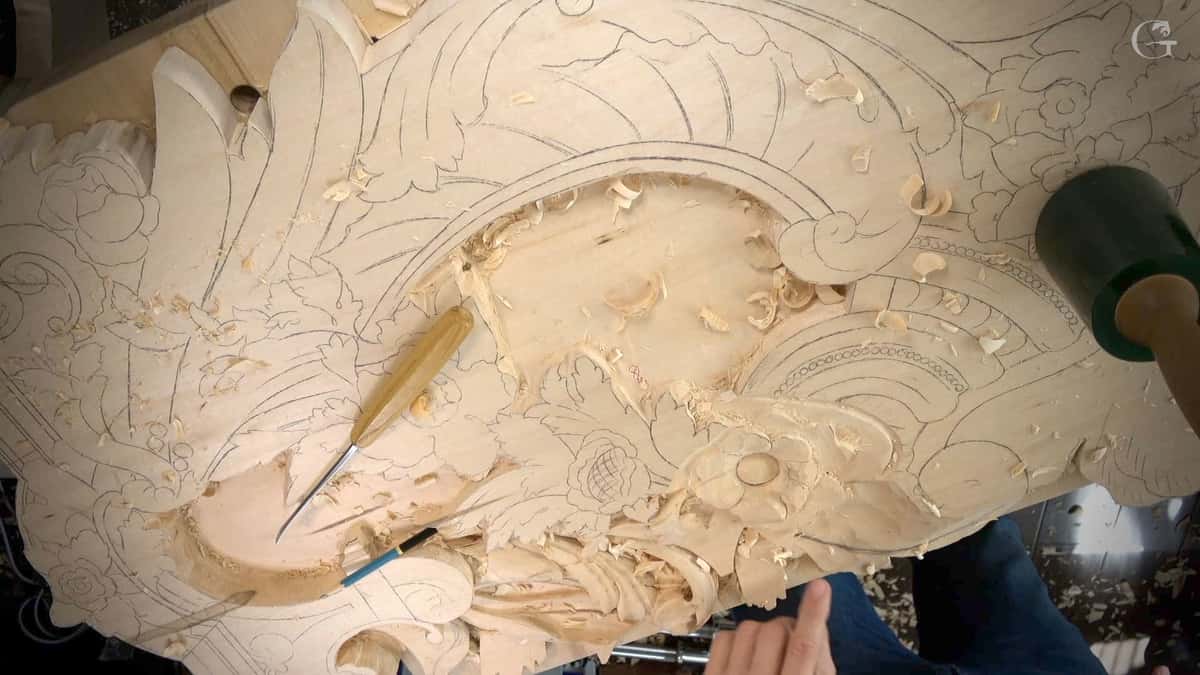
Pencil still runs over the flat wood while the middle has been carved down. The eye reads only the shadow.
I like magnifier lamps, and I have two of them. Those lights I can position from any point on my workbench, and I can cast any type of shadow. I do not like the light from straight above, because it just dulls all my carving. Get one lamp on a movable arm. Two is better, because you can turn one off and see exactly where the shadow falls.
And here is the sentence I keep repeating to students, because it is the whole job. Wood carving is all about the lights and the shadow. All about lights and the shadow. So the lamp belongs in the kit list, not in the nice-to-have pile.
How do you set up a bench for your first hour of carving?
Five steps, and not one of them costs money. They will save you a season of frustration, even if you are carving in a corner of a small room. If you want the woodworking bench itself argued out, the bench I carve on every day is written up separately.
Step 1, clamp the board down before you pick up a single tool
Batten across the end, clamp through a hole or over the edge, then push the board hard with your hand. If it moves at all, tighten again. This step is not optional and it takes ninety seconds.

Brass hold-down at the top edge. The panel has not shifted since it went on.
Step 2, lay three tools in front of you with the edges pointing at you
Sounds wrong, feels wrong, is right. Reading the sweep at a glance beats picking up four tools to find one. Leave a hand width between them so you are not reaching over an edge to grab the next.
Step 3, pull the lamp low and off to one side
Straight overhead flattens everything. Low and sideways throws the shadow that tells you how deep you actually are.

A class bench mid morning. Three rows of Swiss made gouges wait beside the panel, every edge turned toward the carver.
Step 4, strop the gouge you are about to use
Ten strokes on the leather. Do it before you start, not when the tool has already begun tearing the fibers, because by then you have torn the surface you were trying to carve.
Step 5, take one pass in a corner nobody will ever see
You are testing the wood and the edge together. If the chip curls off clean, carry on. If it crumbles, the board is dry and brittle or the edge is not there yet.
What do you not need to buy?
Skip the boxed set of twelve, skip the power carver, and skip the sanding kit. The boxed set is the classic first purchase and it is usually the wrong one. You get twelve tools, you learn three, and the other nine sit in the roll with the factory grind still on them.

A roll like this belongs to a carver twenty years in, and it will teach a beginner nothing.
On the workbench organization lesson I put it this way. I have like half a thousand. Just imagine if I am going to place them all on a bench. I am going to get lost. So I keep two, three, five at the most in front of me, and the rest live in the storage unit I walk back to.
Sandpaper is the other one. A carved surface is meant to be left off the tool, and sanding rounds the crisp edges that make the shadow work in the first place. Save it for a flat ground you are levelling, if that. The back issues of Wood Carving Illustrated will teach you more than any accessory on that list.
None of this makes the craft easy. Which skill turns out to be the real wall is not the one most people brace for, and what the first year actually asks of you is worth reading before the parcel arrives. For the tool question worked through on video, with real tools in my hand, there is my course on carving tools, and everything else the school teaches sits behind the same door here. The tuition supports orphans and widows, which is the part I care about most.
Buy the four gouges and the clamp. Get a board of basswood and a lamp, and give yourself an afternoon. Wood carving asks very little of you at the start, and almost everything later.
Frequently asked questions
Can you carve wood with only a knife?
For small figures and chip work, a good knife is genuinely enough. It stops being enough the moment you want depth, because a knife cannot excavate a background or hollow a leaf. The moment a beginner wants a background lowered, a #9 is the tool they come asking about.
Which four sweeps should the first four gouges be?
Start with a #3, a #7, a #9 and one V tool, in widths around 6 mm to 14 mm. The shallow one models and cleans up, the two deep ones hollow and excavate, and the V tool draws the outline. Extra widths in those same four beat extra sweeps you never reach for.
What weight mallet should sit on a beginner bench?
Twelve ounces handles relief and ornament well, and that is what I use on acanthus work. Sixteen to twenty ounces suits deeper roughing in hardwood. Anything heavier I keep for roughing, though I will pick up a thirty ounce head when a deep panel needs it.
Does a carving bench have to be heavy?
Heavy helps, because what you are really buying is the absence of bounce. A thin top soaks up the mallet blow and most of the energy never reaches the wood at all. Put mass under the work, and every blow you swing lands where you aimed it.
Do you need power sharpening equipment to start?
Leather and compound hold a factory edge for a long time, and a flat bench stone repairs a nick. Powered wheels are for people carving daily who cannot afford the minutes. Learn the bevel angle by hand before you let a motor near it.
Are second hand carving tools worth buying?
Often yes, and old English and Swiss steel is frequently better than new budget steel. Check for pitting inside the flute, because rust there never fully sharpens out. A short blade that has been ground back forty times will still carve, as long as the flute is clean.
Filed under
- best beginner knife for wood carving
- different sizes of wood carving tools
- do I need a wood carving mallet
- how to carve wood safely
- how to choose carving gouges
- knife types for wood carving projects
- must-have tools for wood carving
- needed safety gear for carving wood
- neededs for wood carving tools
- preparing wood for carving
- safety gear for wood carving
- setting up a wood carving workspace
- sharpening tools for wood carving
- tips for wood carving beginners
- types of gouges for carving
- types of wood best for carving
- Wood Carving Basics
- wood carving chisels for starters
- wood carving starter kit items
- wood carving techniques for beginners
- wood carving workbench recommendations