

Alexander Grabovetskiy, woodcarver, School of Woodcarving · Published 2020
How do you make a carved line more perfect?
Quick answer: A more perfect line is what I said I could make once my final line was placed. In Venice Room 27.10 I took a number 7 and went gradually to that line, until I was about half a mil away. Other lessons use the same words for drawings, outlines, rasp passes and a fit.
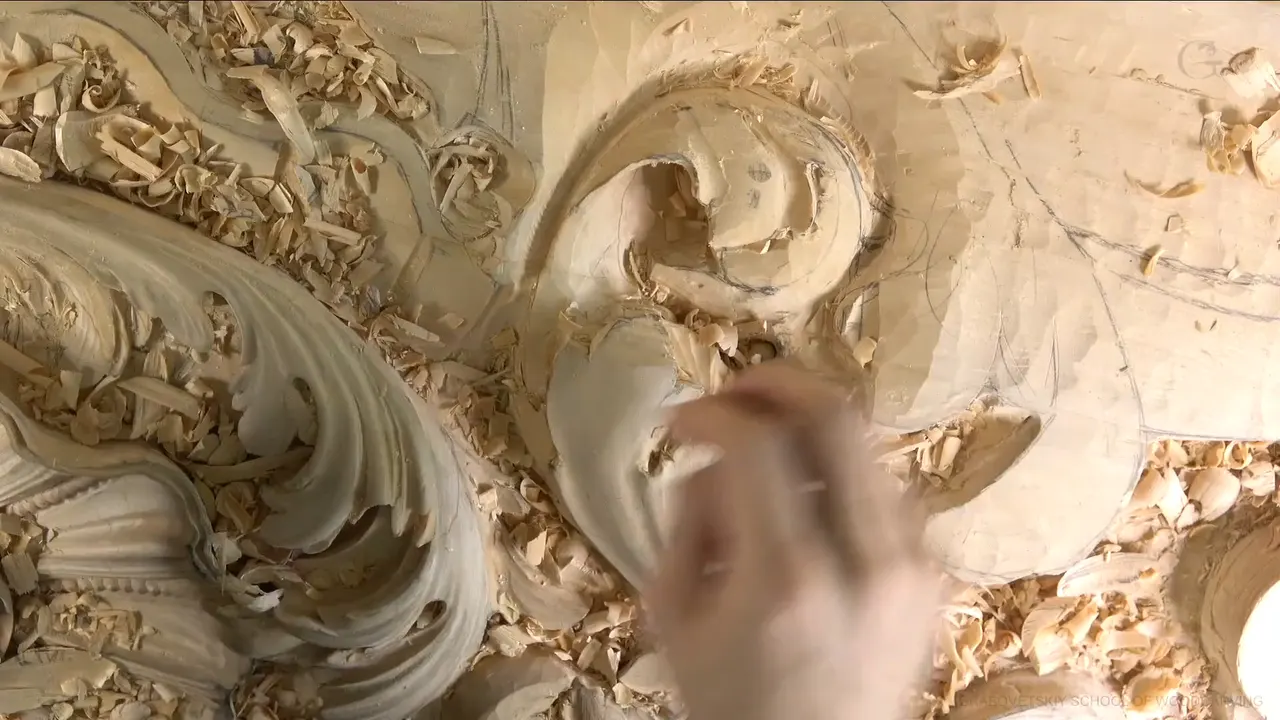

More perfect is how I say a placed line can come closer to finished. I used it twice in Venice Room workshop 27, part 10, about a line I had just placed, and later about the movement on the far side of it. Have you ever looked at a line and known it was close but not right? In other lessons I use the same two words for drawings, outlines, cleaning passes and fits. Every passage below is mine, spoken on camera.
Where do I say it in my lessons?
- Twice in workshop 27: a placed line, then the far side of it.
- On a drawing in the furniture panel course, and again on one I let stay loose.
- On an outline in workshop 75, begun with an 11.
- With a big chisel and two 80 mm gouges, each set on its line.
- At cleaning time, with a rasp, and with a clean-up I planned to do off camera.
- For a fitting in Hashemi Flowers, planned after the first depth was taken.
What came first in part 10?
The part opens in the middle of a thought. On the other hand, there's an easier way to do it. The easier way would be a number 11 again, at 4 millimeters (5/32 in), and then start moving in.
I looked at the result, and I disliked how it looked right there. I told you I could take another gouge to fix the overall movement. That was only a plan.

Going deep was not needed, because that part will be a pseudo ceiling. I said it's never going to be visible or accessible. I apologized for covering the view with my head, since I can't help it.
A straighter tool came next, and it looked kind of a little better. Now I could work, probably, on more final details.
How did I place the final line?
My hand held a number 7 at 10 millimeters (3/8 in). It was actually a little bigger than 10, maybe about 11 (7/16 in). Not too happy about how the shape came out right there, I started with the reach. It had to be perfect, so I shaped it, and that way I knew it was perfect.

Second came the final line, placed the way it would look. At least in this region, that was it. Then came the words this page is about: now I can make it more perfect.
Same tool, a number 7, gradually to that line. About right on it, I said, maybe half a mil away. A half millimeter is about 1/50 in, and I called that good from this side.

What came on the other side of the line?
The opposite side was next, and its movement needed the same treatment. Too weak a movement is always possible, I said, and I wanted to avoid it.
An undercut was also on my list, a little bit underneath. A smaller tool would do, because not much material was left on that side. Logically it should look like it's flipping from inside, going all the way that way, and I had to create that feel.

I used a number 11 at 2 millimeters (5/64 in) for that. There will be a shell there, so I stopped right there.
One more job waited. A section did not look too nice, because too much material sat there, and it needed chopping out. Careful, I told myself. Probably a number 9 at a quarter inch (about 6 mm) was my pick, going underneath the movement of that leaf, little by little. Maybe a bigger one, a number 11, and I would see how it works. The part ends on that plan.

Does a drawn line get more perfect too?
It does, and I said so in the furniture panel course. In Designing Furniture Panel, lesson 11, I was working out a design by drawing, in part 2. Taking one point and coming back this way would be better, I thought, like an S shape. I did like it. Then I asked myself how to draw the eye toward one line. Maybe repeat this movement.
I was not sold yet. I kind of like that movement right here, but it's not perfect. What I would do is take this tool again. I would find my closest circle and place my more perfect line, then get rid of the rest.

Lesson 13 of that course, part 2, brought charcoal shadows on a drawing, a hard stick and a softer one. Then came a word for anyone drawing a pattern of their own. Don't be afraid if it's not as accurate, not to the exact line. It doesn't have to be.
You get it to the exact line when you carve it. So you're going to get that more perfect movements. The paper can stay loose, and the wood is where the line closes in.

How does an outline get more perfect?
In part 4 of workshop 75 the first topic was my middle line. Looking at two points, I named the 60/40 rule. To be exact, that's 38% and 62%, a golden ratio rule, and that would be my middle line. Sloping it was still to come, and the line might move once I did.
I would approach that area carefully, to keep the overall feel of it. But I could create the outline right away, pretty much. I chose a number 11 of 15 millimeters (about 0.6 in), for a more perfect outline.

I praised this tool, too. Its side works as a flat tool, and you get really close to whatever you need to. Go clean through, I warned, and you split the wood and damage the backside. Approximately 10 millimeters (3/8 in) stayed behind before I hit too hard, and then I'll go through that cut. It will be much safer.
Workshop 1 of the room gives the same job a plainer shape. Part 7 had me just talking about a jigsaw and raising its guard to see better. Next I was right to the line, ready to change my way and clean a little bit, and I could see what was going on. The perfect outline was right there. The easiest way, I said, is to work around the detail, then just go to it.

Can a big chisel set a perfect line?
Twice I said so, and once I thought it might be too big. In Furniture Panel, lesson 39, part 3, a smaller grounding tool would probably take some of the material inside first. Then my big, big chisel could go right on the line, a 90 millimeter (3 1/2 in) one, and a mallet would make the line.
Don't overdo it, though, because the wood is somewhat fragile. That's going to give me a perfect line, and that's what furniture makers love, the perfection. The same from this side, by mallet or just by pushing down, gives me perfect, perfect line.

Lesson 15 of the same course, part 7, went another way. I was trying gouges against a shape on the panel. Number 5 was not completely perfect. An even bigger one just matched, a number 7 at 80 millimeters (3 1/8 in).
I thought again. Maybe that size was a little too big, but the line it gave was perfect. What I've done before is take about half an inch (13 mm) first, chopping multiple spots closer to the line. Near the background, be careful not to get too deep, because tool marks there are hard to remove later.

Size was the point in workshop 149, in part 1. I picked a number 1 of 20 millimeters (about 0.8 in) first, and then I said that a big number one is always better. Mine is 80 millimeters (3 1/8 in), a huge one, and set on the line it gives almost perfect line.
Does cleaning make a line more perfect?
This is the plainest use of the words. Blending came first in Chamomile and Bow Rosette, lesson 2, part 2. I really didn't want to see any sharp edges, and it had to look natural. Back bends are my pick there, and some small ones help a lot.

An edge should not look really straight, either. Some kind of movement, some waviness, with a small tool, gives me a more lifelike look. Afterward I would spend a little more time cleaning everything, to make it more perfect, and I would go all the way around.
The words come with a limit in workshop 31, part 2. One movement was not my favorite. But that is an easy fix, just a number 5 or number 6 for a really nice profile and a straight down cut. It gave me almost perfect movement.
Later, I said, I would clean the rest, maybe off camera, and bring that part closer still. There's nothing special about cleaning, and it takes time. Sometimes it makes no sense to spend your time on camera. Essentially nothing new to learn, just the same way every time, for a lot cleaner work.

A rasp does the same job. In workshop 24, part 5, I planned to follow again, probably with just the rasp inside of those cuts. A few seconds apart I said it twice.
In the Lily Box course, lesson 8, I scraped out my marks in part 2 and could see the place I scraped. Some spots were not perfect, I should say. A small gouge could fix that, and I used a number 4 at a quarter inch (about 6 mm), a really small, tiny one. It looked okay, but not exactly the way I wanted to see it. From above, the transition was not as nice.

What about a fit?
Hashemi Flowers, lesson 42, opens on a depth. Part 1 has me knowing approximately I had to go an inch deep. A little less, maybe about seven-eighths of an inch (22 mm), was my plan for the beginning. After that I would start the fitting more perfectly, if it makes sense. A gouge of about three inches (76 mm) came first.
One more line is about the look a careful pass can give. Part 1 of workshop 147 had a convex and a concave, and I would make them a little more perfect if you wish. Helpers I had in hand would work a little on the inside, even if it was smooth enough, and make it even nicer. The high spots could come down, almost like it's done by router.
Then a caution. It does not have to look machine-made. The profile tapers, and no molding machine can do that yet. So a line can come close without turning into a machine line.

What is behind the words, then?
| Lesson | What I was bringing closer | My own words, spoken right at that moment |
|---|---|---|
| Venice 27.10 | A final line, then a number 7 walked toward it | Gradually go to that line |
| Next, 27.10 | The movement on the opposite side of that line | Make this movement more perfect |
| Panel design 11.2 | A drawn line set by a circle | Find my closest circle |
| Panel design 13.2 | A drawing I said could be less accurate | Not to the exact line |
| Venice 75.4 | An outline begun with an 11 gouge | I'm going to create that more perfect outline |
| Furniture Panel 39.3 | A line set with a 90 mm chisel and a mallet | It gives me perfect, perfect line |
| Venice 149.1 | A line set with a number 1 of 80 mm | Almost perfect line |
| Chamomile 2.2 | A clean-up pass around the rosette | A little more time cleaning |
| Venice 31.2 | A movement fixed by a 5 or a 6 | Perfect, almost perfect movement |
| Venice 24.5 | A rasp inside the cuts | I think I can make it even more perfect |
| Hashemi 42.1 | A fitting after about 7/8 in of depth | Start the fitting more perfectly |
Read the right-hand column and you hear the same two words on a placed line, outlines, drawings, big tools, a rasp and a fit. Each time, something was already put down, and I brought a tool to it afterward. In 27.10 that tool was the number 7.
Nothing here is a rule. One drawing was allowed to stay less accurate, and in Lily Box 8.2 the small gouge left a transition I was not happy with.

What can you try on your own board?
Pick one line you have already placed, and look at both of its sides. Is one side nearer to done than the other? Part 10 went in that order for me: a final line, a tool brought to it a little at a time, and then the far side.
Workshop 27 sits in Venice Room, part 3, workshops 26 to 37, with the rest of this board. Shall we carve?
How it's done
- Place the final line. Part 10 began with me setting down a final line in that region before saying anything about more perfect.
- Bring the same tool to it. Same number 7 in my hand, and I went to the line gradually, ending near it.
- Turn to the opposite side. Its movement needed the same treatment, and I did not want it too weak.
- Undercut with a smaller tool. Little wood was left on that side, so a number 11 at 2 mm did the undercut.
- Plan the chop. One section had too much material and did not look nice. My pick was a number 9, working underneath a little at a time.
Frequently asked questions
Does more perfect mean the line is finished?
My 7 in workshop 27 stopped short of the line, and the opposite side still waited for its pass. Even in 31.2, one movement got only the word almost.
Should a drawing be exact before you carve?
In lesson 13 of the furniture panel design course I said a less accurate drawing is nothing to fear. The exact line comes when you carve it.
Which tool brings a line closer?
Across these lessons: a 7, an 11, a 90 mm chisel, a big 1, a rasp and a small 4. Set on the line, the big ones gave a perfect or almost perfect result.
Do you clean on camera?
What to carve next
- Venice Room (Part 3) workshops 26-37
- Venice Room workshop 27
- Furniture panel design, lesson 11
- Furniture panel design, lesson 13
- Venice Room workshop 75
- Venice Room workshop 1
- Furniture panel, lesson 39
- Furniture panel, lesson 15
- Venice Room workshop 149
- Chamomile and Bow Rosette, lesson 2
- Venice Room workshop 31
- Venice Room workshop 24
- Lily Box, lesson 8
- Hashemi Flowers, lesson 42
- Venice Room workshop 147