

Alexander Grabovetskiy, woodcarver, School of Woodcarving · Published 2020
What does "I'm after" mean when a wood carver says it?
Quick answer: In part 4 of workshop 43, talking about an eye and its pipe, I said I cannot break my movement, and a concave came next. I say "I'm after" in other lessons too, with a different aim behind it, such as a shadow, a convex pipe or a long, even cut.
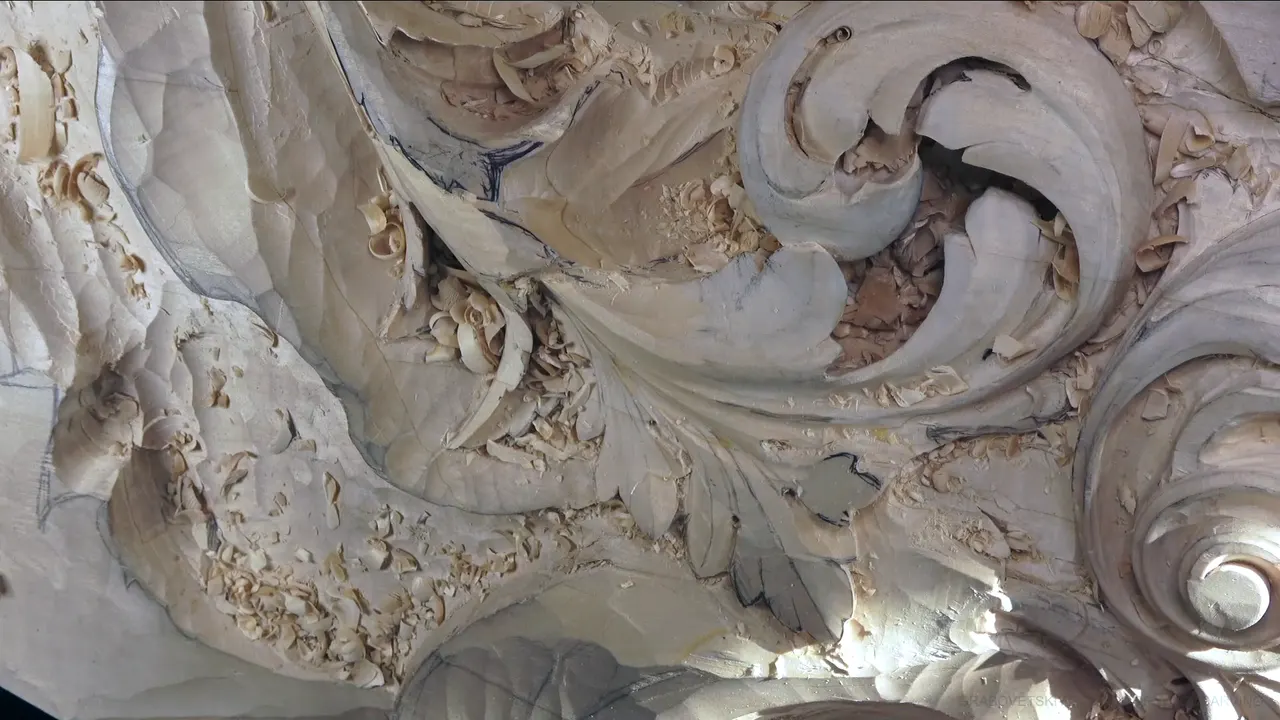

In part 4 of Venice Room 43, I said "That is the movement I'm after" about an eye and its pipe, and a concave on a side came next. The same words turn up in other lessons of mine, each with its own aim behind them: shape, shadow, pipe, thickness. You get every one below, with what I did next.
Have you ever put a gouge into a leaf and not known what the cut was for? Did you stop halfway down a hollow and wonder if it was enough? My own doubts went out loud over the wood, and this page starts there.
What I wanted, in six lines
- A concave and a convex, blended, in part 4.
- The furniture panel wanted a pipe exaggerated, and Modern Acanthus a convex one.
- Three workshops and the Grinling Gibbons class asked for a shadow.
- A thickness to leave, in workshop 66.
- Consistency, in workshop 93.
- Not real patina, on the lily box.
What was I after beside the pipe in part 4?
This part opens in the middle of a thought. I don't, like I said, have to develop completely, but I still would love to give some form. There is an eye, and every eye is supposed to have some type of pipe. "But I cannot break my movement. That is the movement I'm after."
Then came the plan: I need to create a concave on a side. Let me see, I said, if I will be able to use a number 7 right here, and four millimeters (about 5/32 in), and go in just like that. Then the goal, in my words: "All I need is just to draw attention to the lines. Okay. To the movement. That's the goal."

A concave comes first, and a convex next. "But again, that is a concave, and then it's a convex, and I need to blend it together." I hope it makes sense when I'm saying blend it together. I said, let me get a little cleaner cut between the lines, and when I cast a shadow, you can see it's actually a really nice movement, not bad at all.

Right there I could also give a little concave and go also toward the center. Otherwise, it doesn't make sense. It does make sense, don't get me wrong. Most of the people don't even know the difference, but it makes a big difference for me.
How far did I take the middle ridge?
The middle ridge was next, and I did not want too deep of a concave right there. Maybe just a number 1. Well, actually, hold on, maybe number 3. A big number 3. My plan was to start at the edge and stop at the pencil mark, and then came my verdict. I don't think it's enough.


It looks like I've done something, but not really, because I just took oxidation or whatever, the dirt, it's accumulated. Not good. Probably going to go deeper, maybe with number 7, at least at some point. Maybe a smaller number 7 just around that pipe.
What did I make of a concave that is deep to a certain point?
I saw the original work where people left it like that, just the concave to the certain point. I still needed to blend mine. "But I'm not sure if I'm going to like it or not."

Next came the tool, and my verdict: that is a little big tool for the job. A little too big of a tool. I needed to clean the edge at that moment, otherwise it doesn't look too good, and then a small number 3 would completely blend that in.
What was left to fix in part 4?
An area. "I've got an area I need to fix. That's a bit too thick." It's supposed to give me the right movement right there. Maybe I have to use a concave again, but a tiny one, with the number 3 concave only. I think I was able. Let me cast a shadow. I've got the ridge, and I can see that.

One side stayed on my list: "I also need to take care of this side." A kind of tricky area, a double pipe, pipe on pipe close, and I don't want to create a big cluster. So it has to be just indication. "Just indication of the movement."

A further plan was for another spot, because right then it just didn't look too good, although it didn't look too bad either. I think I should also do concave, concave, and convex in the middle. It isn't a must, but I think it will look good.

Where else did I say these words?
The same words turn up in other wood carving lessons, and each passage below names its lesson and links to it.
Did I want a shape first, and not the final look?
On the furniture panel, in lesson 29, I had kinda rolled it right underneath. That is just preliminary, it's not the final look, I'm after just establishing overall shape. So I would jump to another side again and get those corners.
Overall, that's what I'm after, I said in Venice Room 7, part 8, except one of the areas I'm not really happy about. I'll tell you later what I'm talking about. Then I said what you see isn't the final look, and of course it will look a lot more detailed.

Part 7 of workshop 44 starts with "I'm after shape at first." On another hand, nothing stops me from actually making the divisions. I could do another small division right there, and that will give me more or less curliness.
Which shadow was I after?
A plug cut came up in workshop 62, and it was too early right then, because I still needed to clean everything. It's a little later stage, I said. For the eyes, my plan was to just excavate on the side, and that will give me that shadow I'm after. Later, really deep excavations on the sides were giving me a shadow I was after.
A high spot came up in workshop 66: "I don't want to break it, although it's solid yet." I did not undercut anything, but still it's among the tougher spots. "But I need the full depths of it, okay? Like I said, I'm after that shadow." Bigger number 9, maybe 20 millimeters (0.8 in), but I could not be sure we would fit that. Nope.

The aim in workshop 63 was a line. It gives me really sharp edge. "Don't worry about this part, it's going to be undercut, it's going to give me a shadow, all I'm after is just that line." Maybe I should use a little smaller tool, like three-eighths of an inch, about 10 millimeters.
Furniture panel, lesson 27: I didn't want to lose the background depth, so I still wanted to stay with the same depth. "I'm not sure if you can see, but it's already casting the shadow. That's what I'm after."
The Grinling Gibbons class, lesson 13: I call it plug cut just because that small plug pops out. You could use a normal drill, I guess, but I don't see any advantage in this case, and I am all the way through. Can you see that dark hole, how it already creates some separation? Looking from above in the same part, I saw that dark spot. It gives me an extra shadow, "but it's not enough for me," and later on I'll separate that stem.
Butterfly plate, lesson 13: I asked you to see how shallow the cut is. If it does not fly, I can re-cut again, and it will be everywhere the same. About a cut leaning a little bit on the inside, in part 1, I said it is the effect I'm after. If you look from above, I said, you see the area we work on, and it's supposed to cast some shadow.

Which was it, a pipe, a convex or a raised part?
Modern Acanthus lesson 4: I said it one more time. "I want to see concave convex. I'm sorry. I want to see convex." Whatever you see an eye on an acanthus, you really have to create the pipe. "Pipe is always convex." I would create the cut first, and I'll explain that on a blackboard.
Earlier in that lesson I used 7 millimeters (0.28 in), and 10 millimeters would give me the same result. My hand sat really solidly, my thumb a leverage point, for small scoops. I'm going to drop it. You don't have to be dropping too much. If you want to go a little farther, you can create the feel like it's rolling backward.


Furniture panel again, lesson 27, part 1: I really wanna see this pipe exaggerated. This part I don't worry about yet. Later on I cannot clean it, but I wanted to create that convex right there, and all I need to do is just a blend.
Part 2 of that lesson named a number 11 again, probably five millimeters (0.2 in). "I'm after creating pipe, which is gonna go from this point all the way here, but to create that pipe, I really need to drop the whole thing right here." I would drop that side even lower, almost to the background. I know I lost the feel of a flipping motion, but it's okay. I'll fix that.
The Venetian flowers rosette, lesson 4: gradual movement from underneath this section, a little higher, then downhill, downhill, downhill, and then uphill, uphill, uphill. I really want to keep that section as a raised part. I planned to hit that ridge with the back bend, to make it a little nicer look. Then, in the same part: "This edge has to be a little raised, just like going uphill like this."

In workshop 69 I wanted to raise a little bit this part. After 5 millimeters (0.2 in), I should use a bigger one, maybe 10 millimeters (0.4 in). Even 10 millimeters is too small. 15 millimeters (0.6 in), because I don't need that sharp ridge on this side. I raised that up, but it's not clean, because it is kind of against the grain. But it's okay.
How thick, or how even, was my aim?
Workshop 66 again, part 12: the thickness between this point and my finger down is approximately six millimeters (about 0.24 in). That much I'm leaving. Maybe even less, maybe about five millimeters, 3/16 of an inch (about 4.8 mm).
Less than that I don't need to make it, because I really need some solid wood, otherwise it will be too fragile. Although it's not a big deal, I could leave a connection point at this point, and then it will be solid.

Over in part 6 of Venice Room 7, I don't worry if it's not flying out, some small parts, small chips, because I can always clean that with a different tool. But for me, I'm after a really consistent long cut, beginning to end. So I'm just pretty much sliding my tool and letting it catch if there are some high spots.
In workshop 93 I have to keep an eye on the distance between this edge and the ridge I just created. Right now the section is exactly one-eighth of an inch, okay, three millimeters. I'm doing it little by little, a cut and then a step back, and I'm after consistency.

What else did I want, besides a cut?
Lesson 29 of the furniture panel has a talk about steel. "I'm after quality of the steel, not just the look." The look is also important, I should say, but you can change the look. You can do the handle yourself.
On the lily box, in lesson 13, the color was not going to be real patina, which is when you see some more gray colors. I wanted to do first the blending, and then just shade some spots.
In another part I said, let me make it darker right here, but not too much, because it's already a lighter wood. If I create too dark around, it brings that lightness even more. On a dry brush, what you see is just the water. Because I applied some color closer, it picks a little bit of the color and brings that out. "It's one of the effects I'm after."

Where did I say it, and what came next?
Five of the places above sit in this table, side by side.
| Lesson | My aim | What came next, in my words |
|---|---|---|
| Workshop 62 | Shadow from deep excavations on the sides | A plug cut, later |
| Venice Room 69 | To raise a little bit that part | A bigger tool, 15 millimeters (0.6 in), once ten was too small |
| Modern Acanthus 4 | A convex pipe on an eye | The cut first, then a blackboard |
| Butterfly plate 13 | A shallow cut, everywhere the same | Re-cut again if it does not fly |
| Lily box 13 | First the blending, before any shading | Then just shade some spots |
Where can you watch every one of these lessons?
Every one of these lessons sits inside one of my courses. Venice Room Part 4 holds workshops 38 to 49, and workshop 43 has twelve parts of its own. Every course of mine is one click away if you start here.

How it's done
- Mark the limit of the first pass. A big number 3, starting at the edge and stopping at the pencil mark.
- Go deeper around the pipe. Maybe a smaller number 7, just around that pipe, at least.
- Blend a hollow that stops short. It is deep to a certain point, and I need to blend it, so a small number 3 would blend it in completely.
- Fix a thick spot. A bit too thick, and maybe a tiny concave again with the number 3.
- Keep a double pipe to an indication. Pipe on pipe close, no big cluster, just indication of the movement.
Frequently asked questions
How thick did I plan to leave the wood in workshop 66?
Approximately six millimeters (about 0.24 in), maybe about five millimeters, 3/16 of an inch, I said, and I did not need to go under that. I needed solid wood there. Otherwise it would be too fragile.
Is the pipe on an acanthus eye concave or convex?
Whatever you see an eye on an acanthus, I said, you really have to create the pipe. I also said the pipe is always convex. I had just corrected myself, too: concave convex became convex, and I said I was sorry.
How did I plan the color on the lily box?
Real patina was not the plan, and that is when you see more gray colors. I planned the blending first and then some shaded spots. In another part I held back from going too dark, because the wood was already lighter and too dark around brings that lightness even more.
What to carve next