
Alexander Grabovetskiy, woodcarver, School of Woodcarving · Published 2018
How do you fix a crowded acanthus design?
Quick answer: Fixing a crowded acanthus area is, on my walnut panel, a matter of keeping the main outline and changing only what sits inside it. One of the two leaves went underneath the other, and the visible one got bigger, so it matched the thicker acanthus on the opposite side.
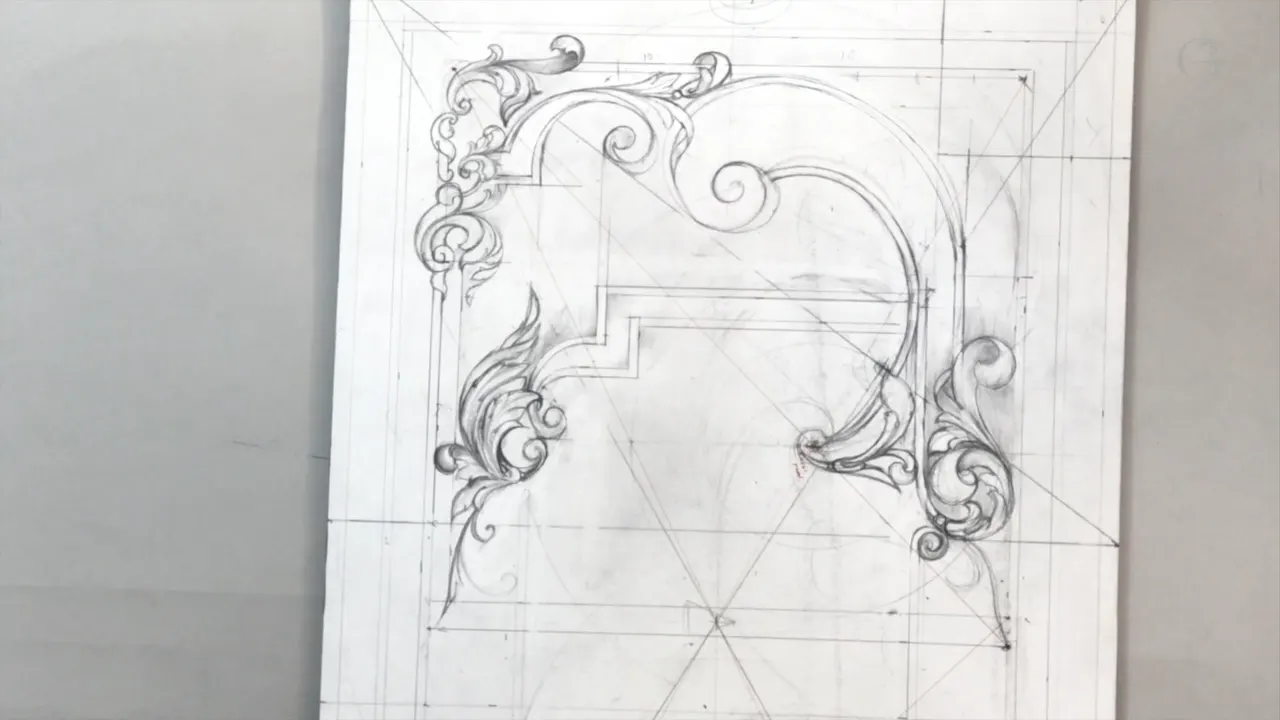
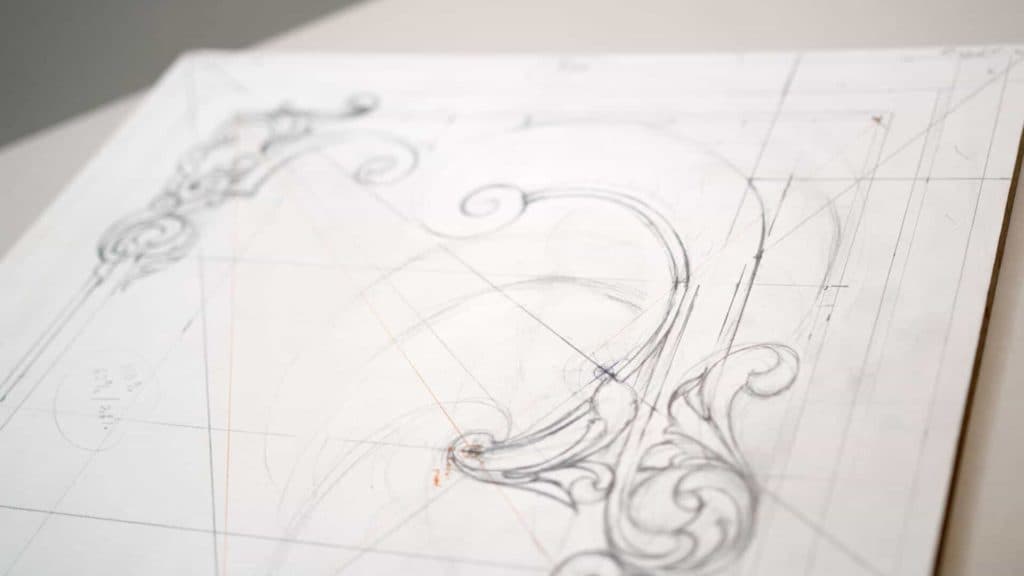
Fixing a crowded acanthus design is where lesson 9 of this walnut furniture panel starts, and I did it without throwing away the outline. I stepped back from the area I drew in the last segment and stared at it. The movement itself was really good. But it was too crowded for that area, and it was going to draw my eye away.
Ever looked at a picture where one busy spot kept pulling your eye? And did the rest of it still feel fine? That one spot is the part to change, and the rest can stay where it is.
Below is each change I made to the Carving Furniture Panel design course drawing in parts one to four of this lesson. One T-stop in there stays on purpose, and I explain why.
The changes to this area, one line each
- I kept the main outline and changed only what sits inside it.
- The double acanthus stayed double, one leaf under the other.
- The visible leaf grew to match the thicker acanthus on the other side of the panel.
- One ending now follows the baroque diagonal.
- A second line shows the side of a volute, so it looks more like 3D.
- One T-stop stays, since the overall movement continues beyond it.
Which spot got which change?
Six places on the drawing moved in this lesson. Here they are next to the reason I gave on camera for each one.
| Spot on the panel | What I changed there in lesson 9 | My reason on camera |
|---|---|---|
| The crowded acanthus area | One leaf went underneath, and the one you see got bigger | To be somewhat consistent |
| A spot short on detail | A different movement, a main eye, then subdivisions | I wasn't 100% happy |
| One ending of a volute | Rebuilt on a line parallel to the baroque diagonal | You still feel that line |
| A thin volute | A second line drawn as its side | A more 3D feel |
| Opposite side | A curl behind the molding, the other side over it | Plenty of those in the 17th century |
| Another spot in part four | A simple acanthus leaf, just a simple one | I do like what I see |
When is an acanthus area too crowded to leave alone?
In my case, when it was going to draw my eye away. Like I said before, it's a really good idea to step back, look at it, stare for a few moments and check if you like it or you don't. In my opinion this area was not looking too good.
I said the same thing another way in lesson 3 of my Principles of Design class. It's a busy design, I told that class, and I know that. But you have to create that busyness in the right spot, and you have to fill space based on the golden ratio.
Lesson 2 of the same class puts it as a fight. Space around makes a big difference, and the emptiness and the busyness fight for the idea.
Why keep the outline you already drew?
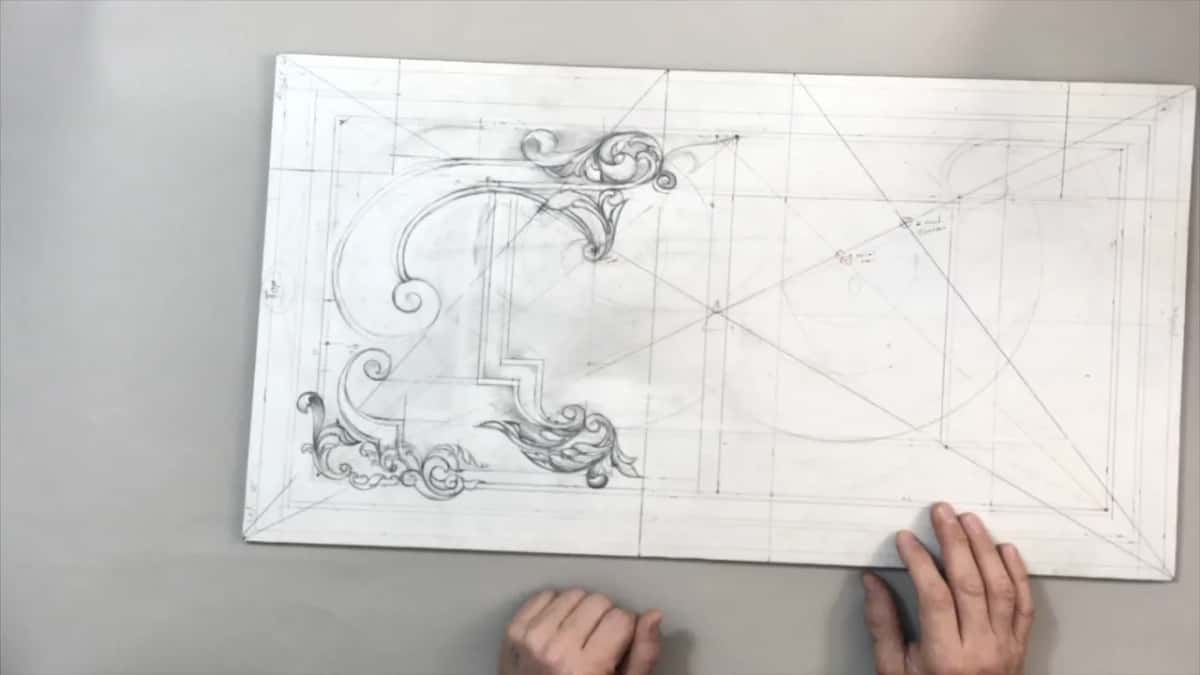
The outline was never the trouble here. I'm still going to keep the main outline, I said, and then I changed the double acanthus. Well, it stayed double. One leaf is now hidden underneath the second one, and I thought it would look much better that way.
The Venice Room course has the same moment. In workshop 73 one section just didn't look too good. That movement mattered to me, really important, but only overall, to keep the flow, like an invisible line going all the way. The section itself was not too appealing, in my opinion.
Why did the leaf you see get bigger?
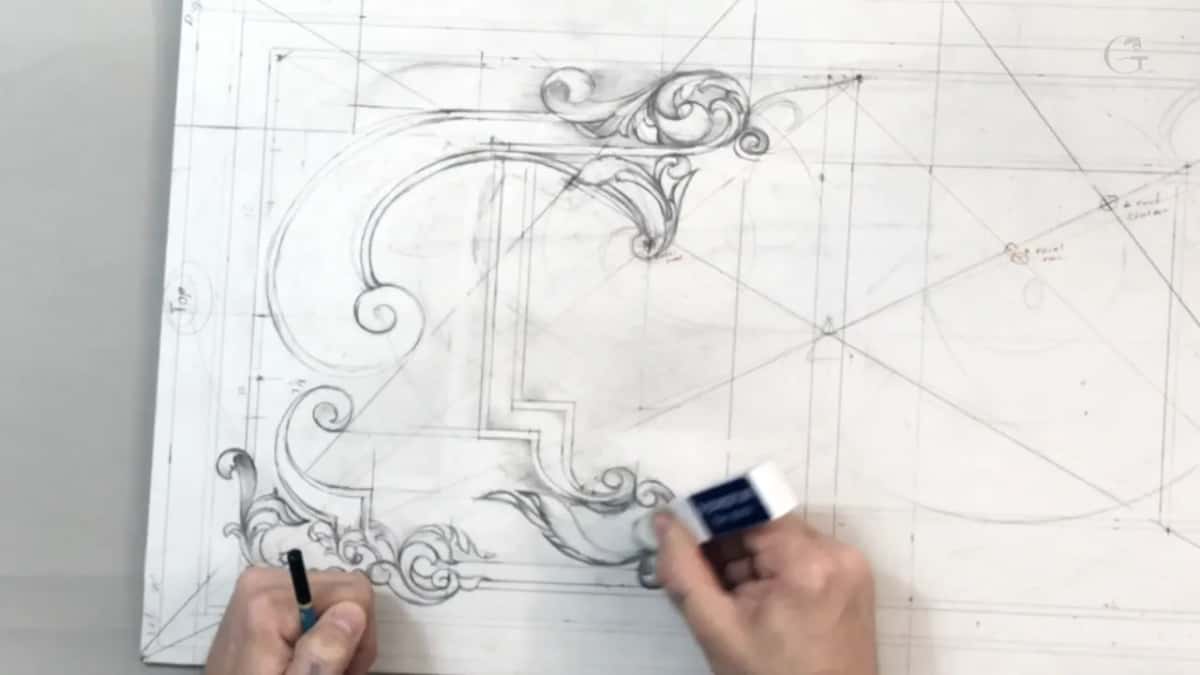
The other side decided it. On that side I had a little thicker acanthus movement, and on this side it was just a little too small. I would like to be somewhat consistent, so I drew just a bigger acanthus here.
And even that needed another pass. Right after it I said maybe this is not looking too good also. A moment later I said it would be better now.
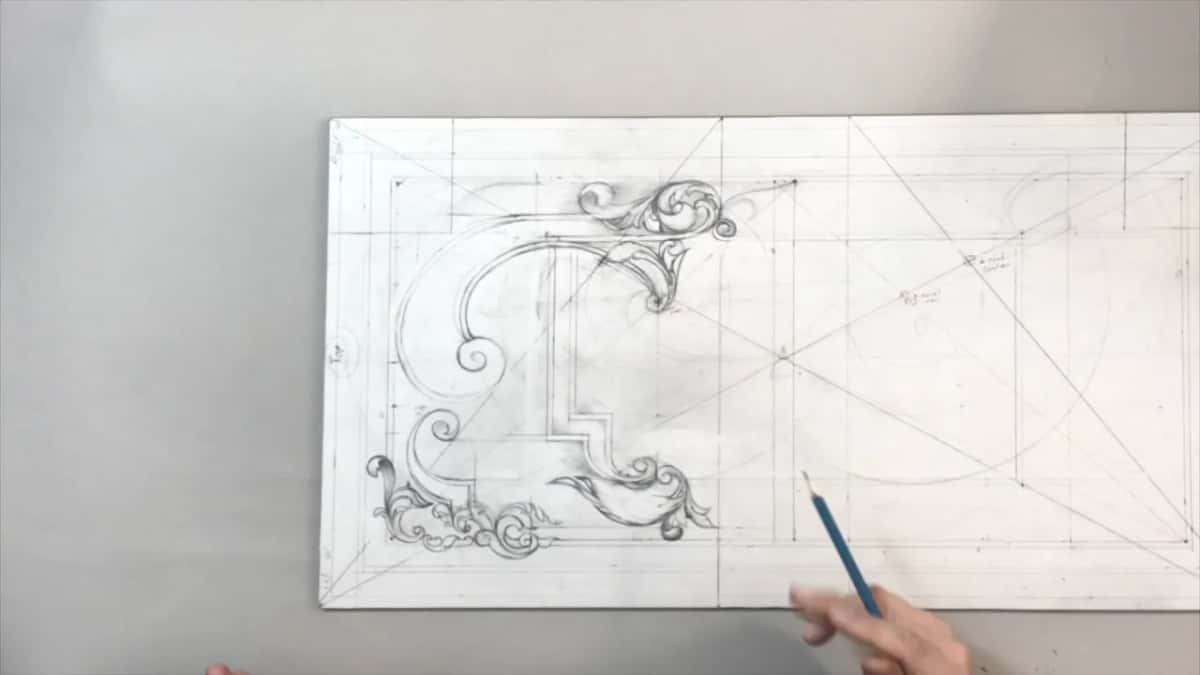
What if one spot is not detailed enough?
I made a different movement there, in a spot that had the opposite trouble to the crowded one. Well, I shouldn't say I don't like it. I liked it, but I didn't think it was detailed enough, and I drew a little different movement and then made the main eye.
After that I kept the eye I already had and let one leaf sit underneath. One move got longer, and two of its new movements could come from underneath. I still kind of didn't like it. It just didn't feel too natural.
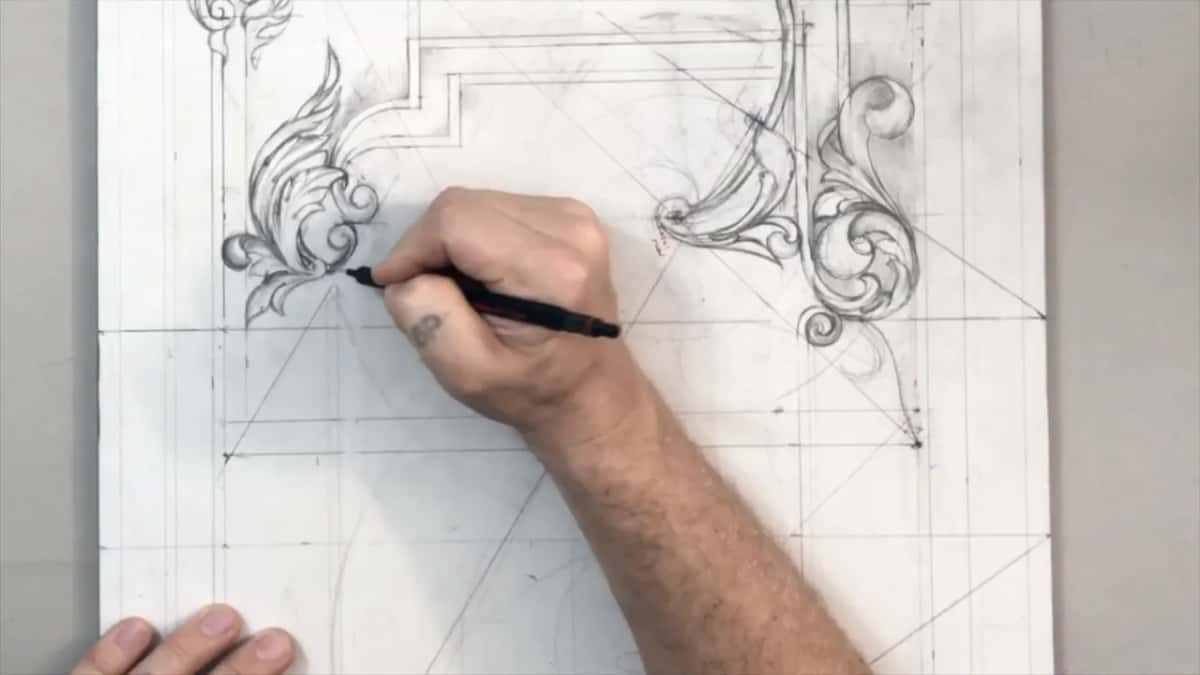
Part two is where I drew a parallel line and put my eyes on that same line, the habit you saw in lesson 4. Then came the micro subdivisions, and that gave me my central line.
How can a hidden swirl tie the area together?
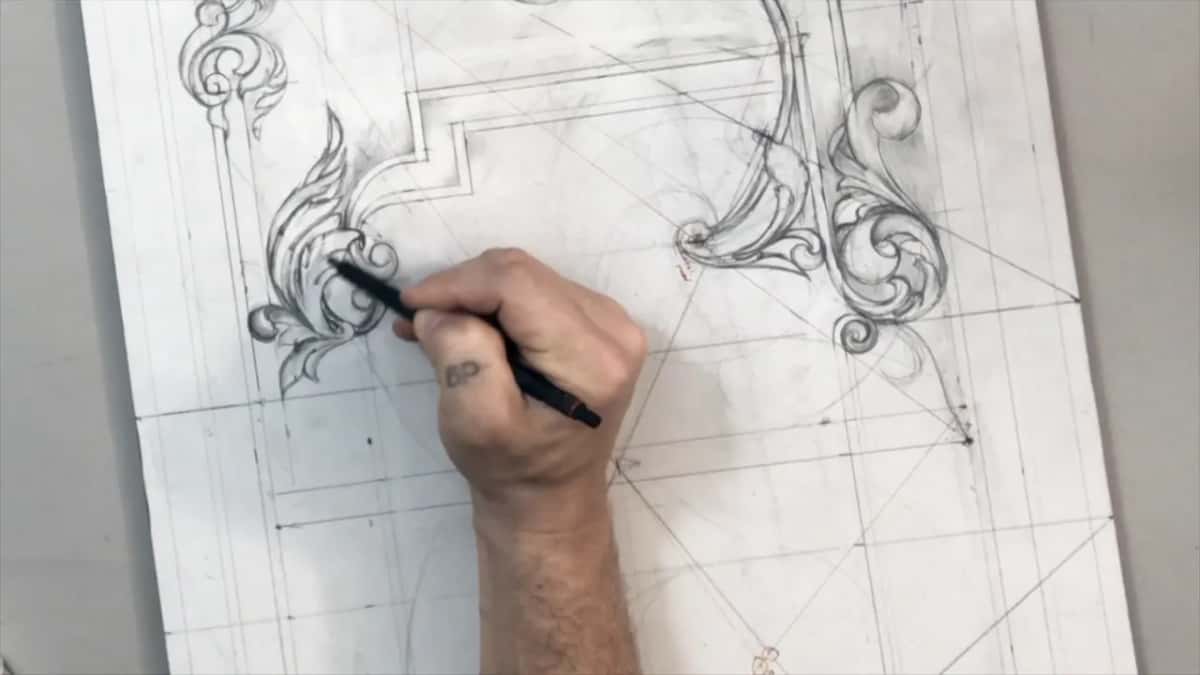
By carrying the movement where nobody can see it. I still kind of liked the movement in one direction, so I continued a swirl that is invisible. You won't see it, but it's going to feel like everything is just connected, in my opinion.
The second part picks it up, with one leaf that should feel like a part of this movement, so it wraps now. Just going to wrap it, I said.
The next lesson keeps the same idea. There I said that just because we have that invisible line, I still would like to make it feel like there is one.
Why build an ending on the baroque diagonal?
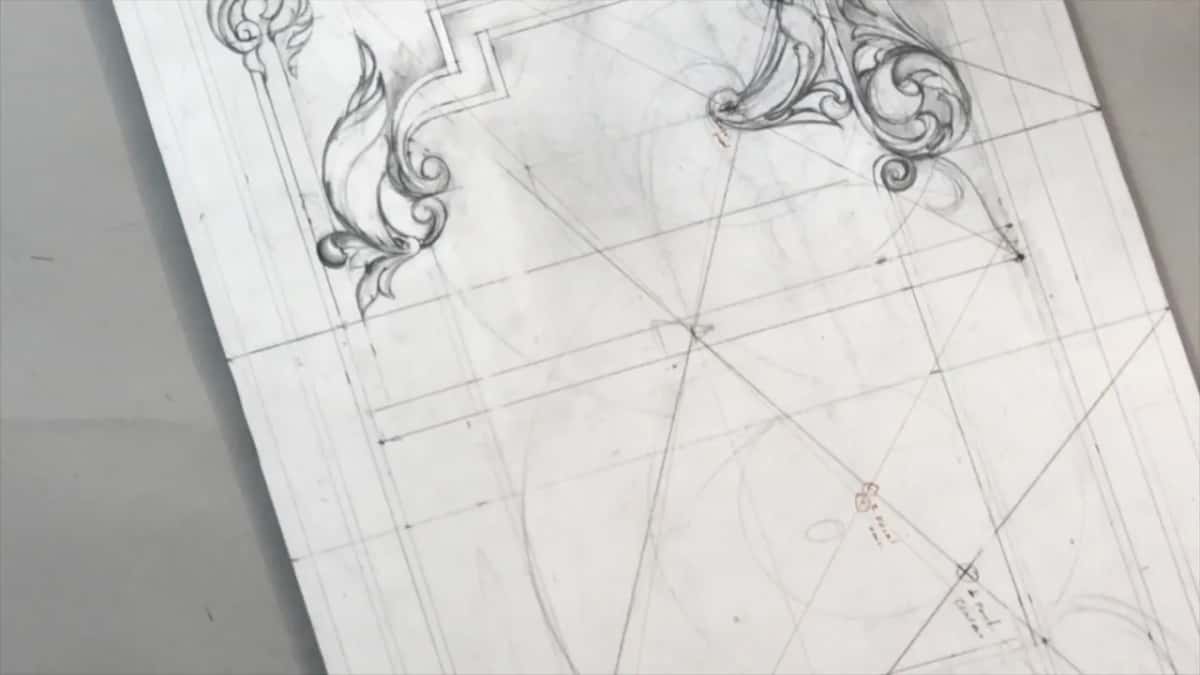
That ending sat closer to the outside. I didn't like how one part ends, I said in part two. Overall I liked the idea, but I wanted to keep the same parallel line to my diagonal, pretty close to the baroque diagonal, and I based it on the main baroque line just because it's closer to the outside.
Here is the order I worked in. I marked my starting point and moved it down. I took a ruler and drew a parallel line, and then I set my movement on that diagonal, which meant getting rid of part of the curl and redoing it.
You're not going to see this line. But believe me, you're still going to feel that line, even as an invisible line.
I gave the two diagonals their names in lesson 7. And in the Principles of Design lesson on the law of arabesque, a word Wikipedia ties to scrolling and interlacing foliage, the main arc goes on the baroque diagonal, and the law of repetition repeats that movement on a different scale.
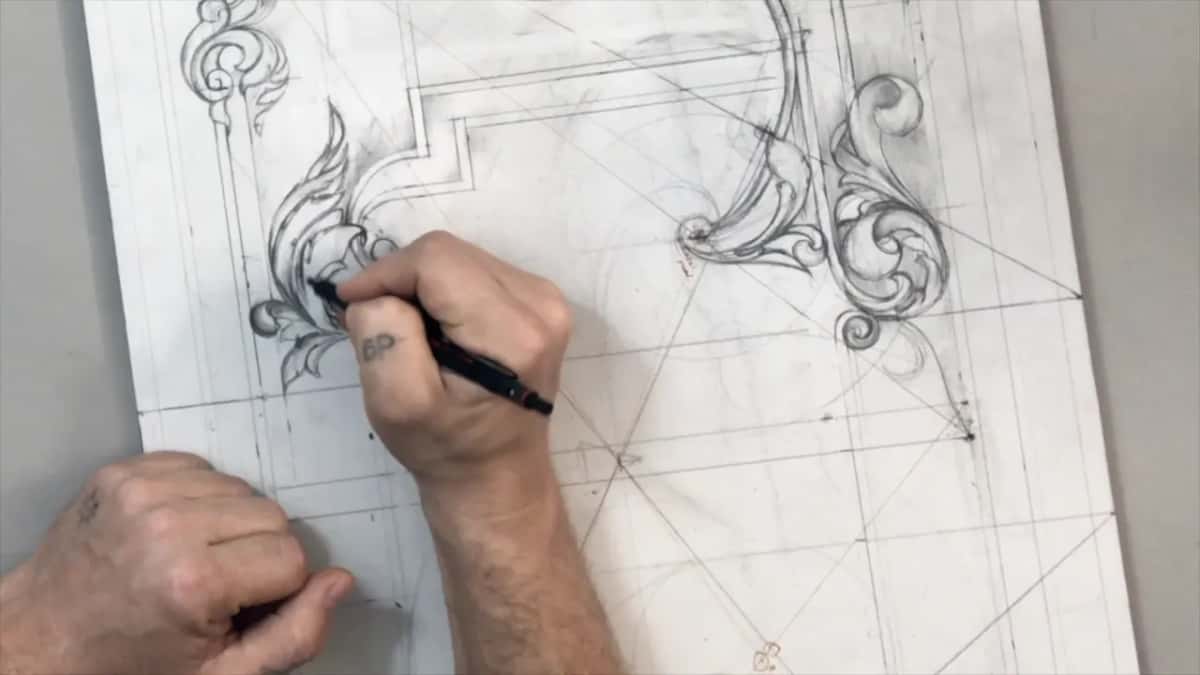
Curl or volute, which word fits?
Volute, and I corrected myself on camera to say it. I was about to get rid of part of a curl and redo that curl. Or should I call it volute, I asked, which is more accurate. That is a volute.
The volute page on Wikipedia calls it a spiral, scroll-like ornament that forms the basis of the Ionic order. Its page on the scroll in art covers the wider run of spiral and rolling ornament.
A spiral on my drawing is not always a volute, though. Further on I said maybe I could just do a volute movement, but it won't be a volute. That was just a movement, and that way I hit that line.
Right before it I added something smaller. Not the main acanthus movement, only a small foliage, a small detail. Sometimes that is worth adding.
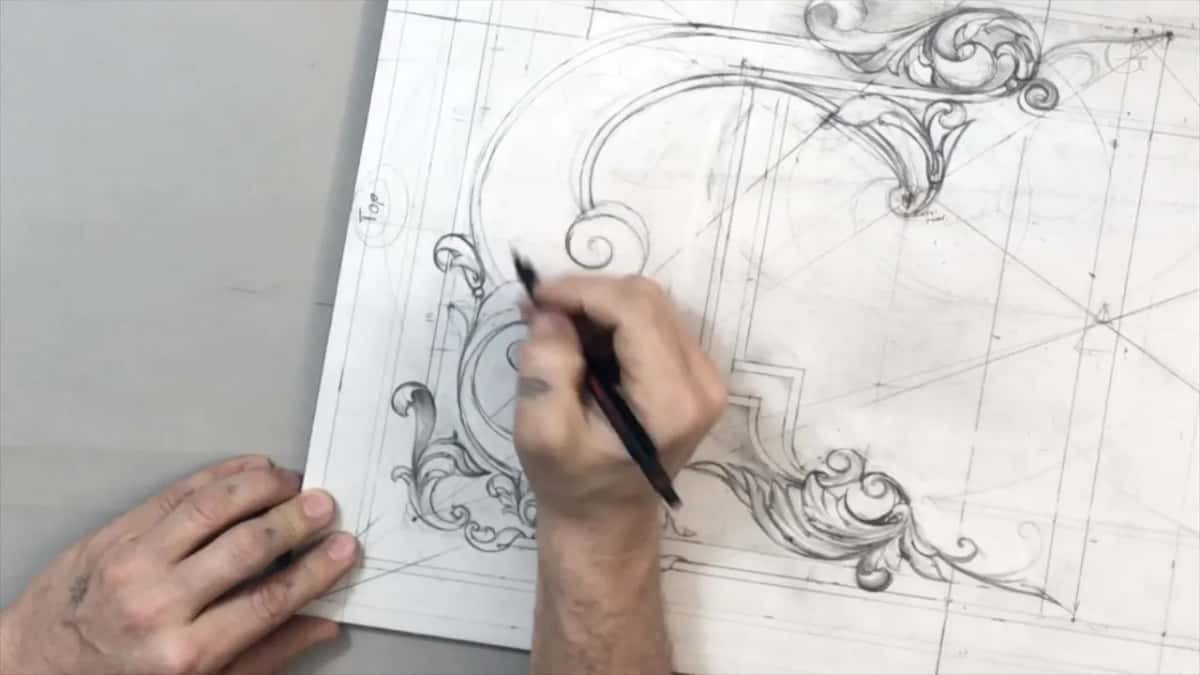
Does a flat drawing of a volute ever look round?
It can, once you draw its side. During part three I made one volute look a little thicker. The new line would look like a side of the volute, and then I repeated the same thing on the next one.
We're going to give it a more three-dimensional feel, I said. That's one of the techniques they used in the 18th and 19th century, and even later, to make it look like it's 3D. Back in lesson 1 I planned this panel as a really low relief carving with the effect of 3D.
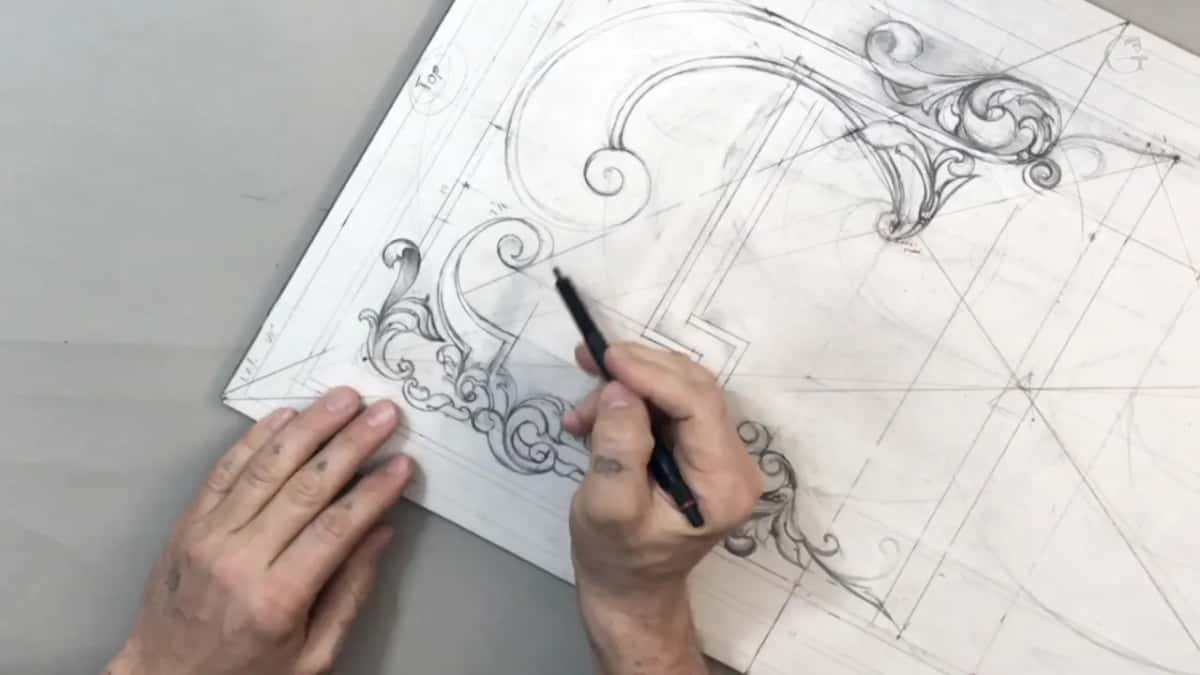
Just before that, some micro pipes kind of bugged me, so I made some shadows, and then it was good.
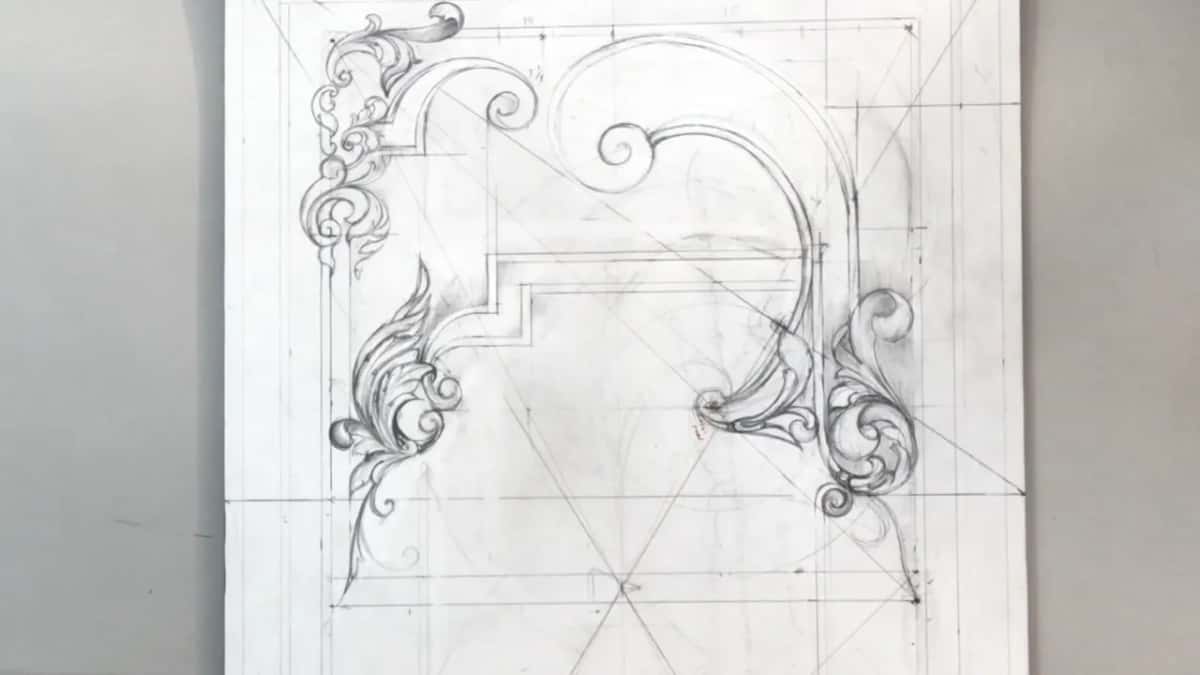
Can a leaf curl behind the molding?
Part three has one that does. I repeated the movement on the other side with a little different detail, one like a curling behind of the molding.
It wasn't too much in the 18th century, I said, but before, in the 17th century, they had a lot of those elements, where one element just curls behind and sometimes even returns back. I just curled mine back. The other side would overlap that molding.
Then I tried to make it exactly the same as what we'd done before, and I didn't like it. Maybe like that, I said, and I left it for now.
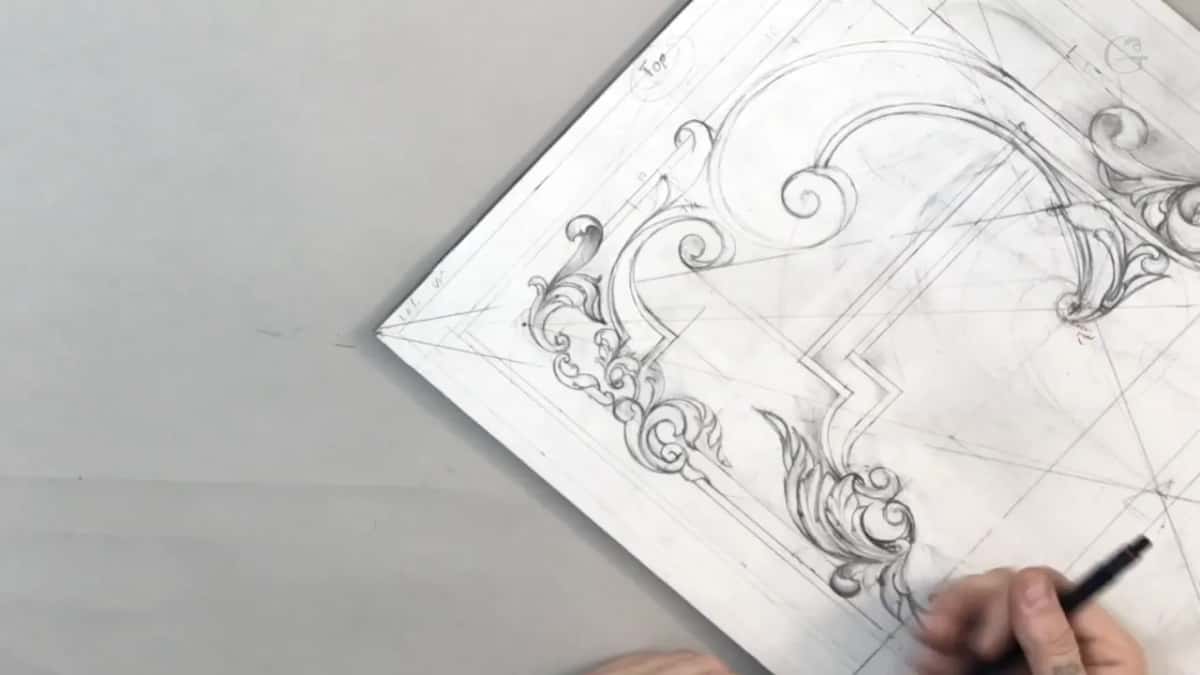
The carving of that idea comes much later, in lesson 36 of Carving Furniture Panel Part 3. There one part is supposed to feel like it just goes right underneath of the molding, and then flips and goes on top of the molding.
Is a T-stop ever allowed to stay?
It stays when the movement keeps going after it. I told you about T-stops in lesson 6, where the rule comes in. There I said there is no such a thing as a T-stop. If one line hits another like that, it's breaking the rule of the flow, and it's not going to look organic.
At the start of part three I made one section more rounded and found the closest one on my circle template. Remember what I said about the T-stops? That would have been one if I hadn't connected those two lines. Now one line goes under the other one, and it still didn't feel right to me.
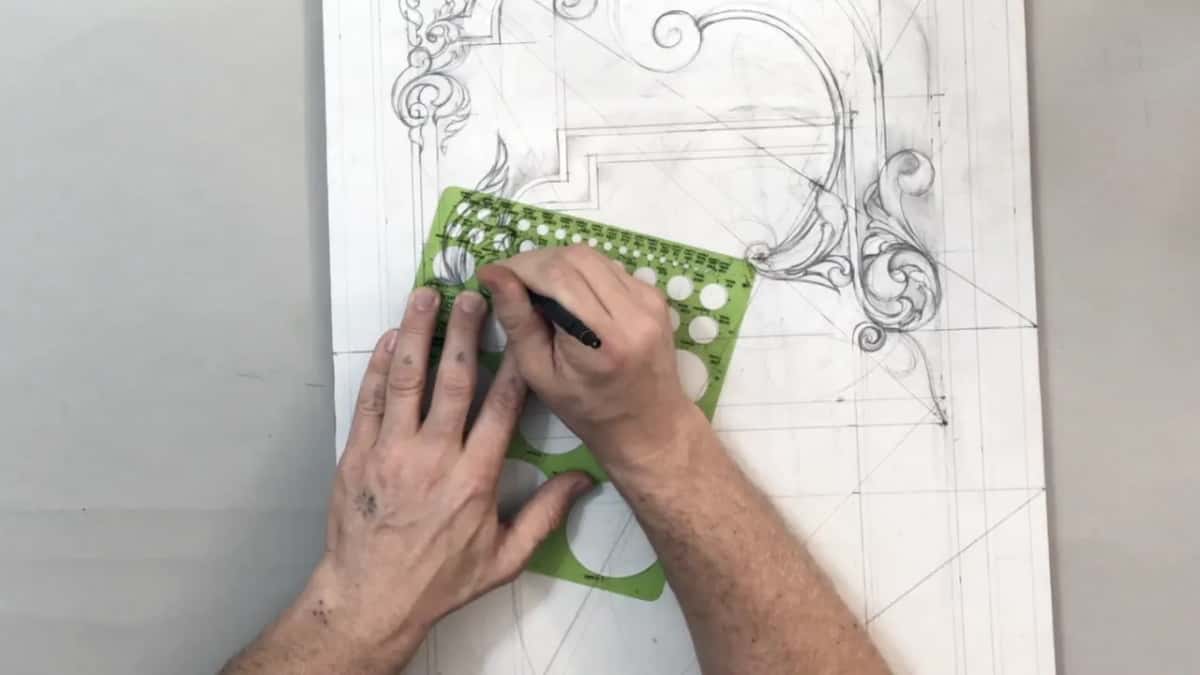
The fourth part has the exception. If I just finished my leaf like this, I said, it would be considered a T-stop, but I'm actually continuing the movement. The overall movement is still the same and carries on right there. In cases like that it's an exception, and it would still look good.
That fits the T-stop you can't see, from lesson 8. Two lines touching is the hard kind of T-stop, and there is also an invisible kind. If a leaf travels on and hits a point, it still counts, and it won't look good.
The rule follows this panel into the wood. During lesson 19 of the carving stage one movement was supposed to go to the center, and what I had was almost like a T-stop, so I shaped it to look like it goes all the way in. Lesson 21 has it too, where I turned a detail inward a little nicer, because I really didn't want to see a T-stop.
Is this area the main idea of the panel?
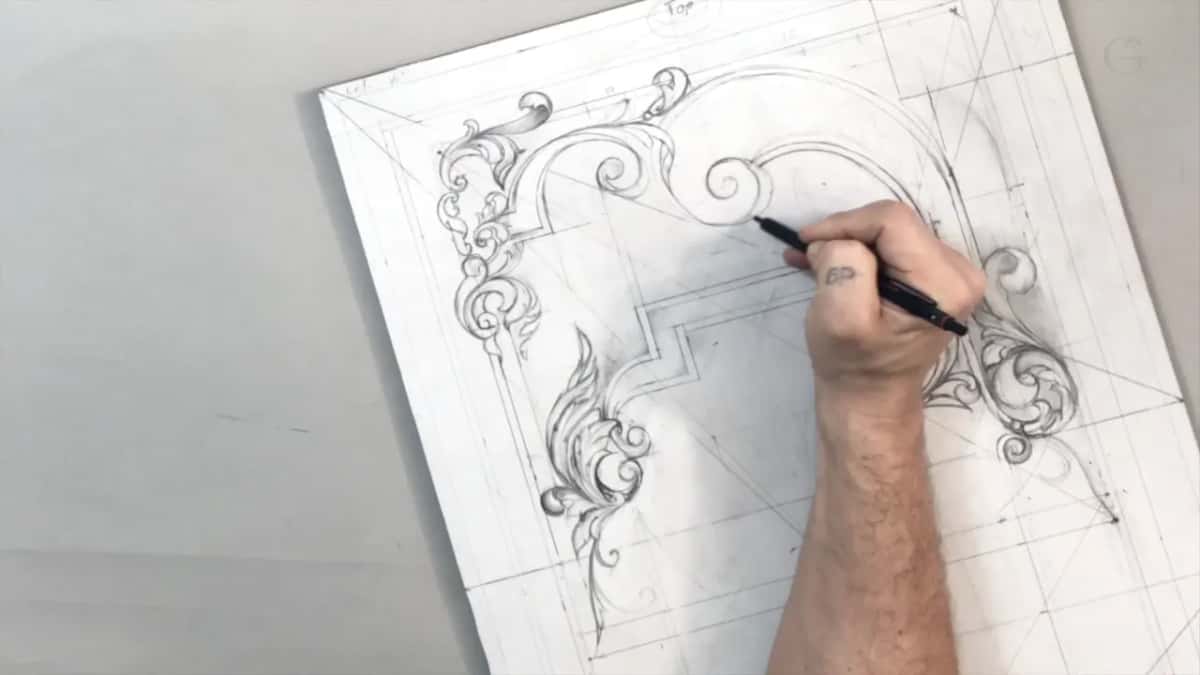
This area is background. Part three is where I said I'm just developing a background of this panel. The main idea will be developed in its own place, with flowers and some movements with those flowers, and some of this will be covered by them. What I wanted here was the overall feel.
The panel stands upright, like a door panel in a frame, with its main idea at the top, the way I set it up in lesson 1.
Repeating helped here too. I thought repeating one movement on the other side was a wonderful idea. I could also do exactly the same in one more spot, I said. I know it's a little change of the design, I said, but it's going to make more sense.
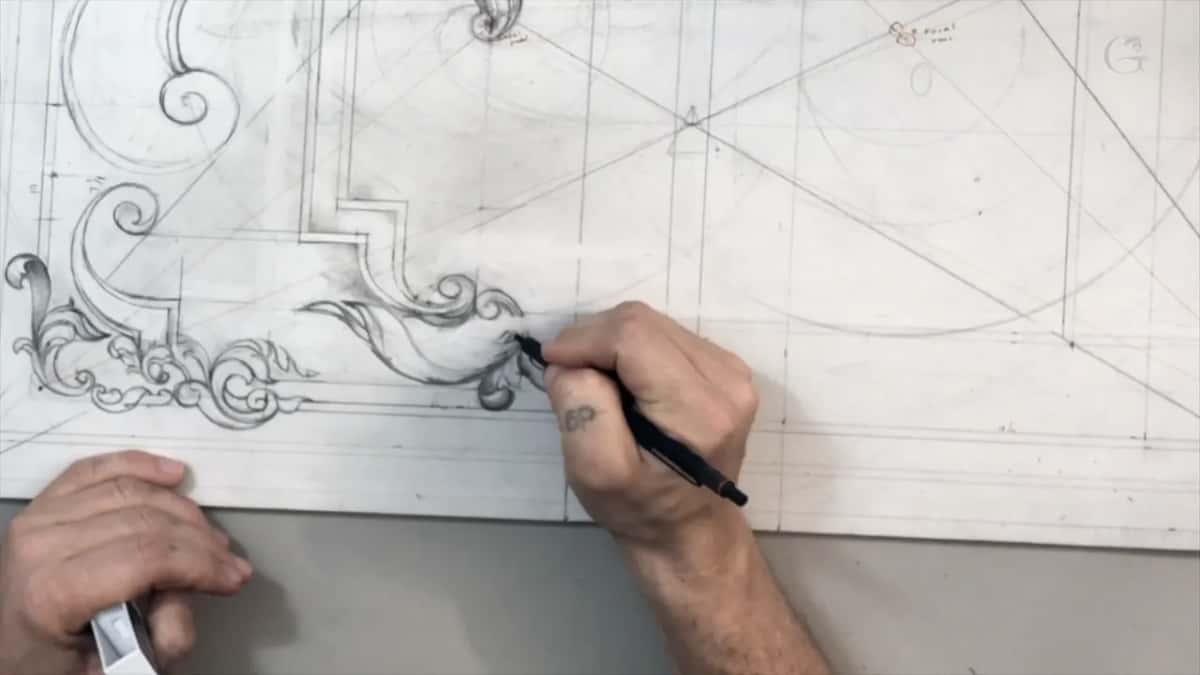
The repetition came back in the last part. Why don't I just repeat the idea, I asked, the law of repetition, and I moved it that way. Earlier, in part two, I had noticed that what I had in one place was about the same as another, which, in my case, just made perfect sense.
What do you do with a part that still bothers you?
I kept on changing it. Part four opens with me saying no. I tried another way and said that is much better, a much better move, in my opinion.
Later in that part another spot didn't look right to me, so I put in a simple acanthus leaf, just a simple one. The molding line moved and one piece wraps underneath. I liked that spot.
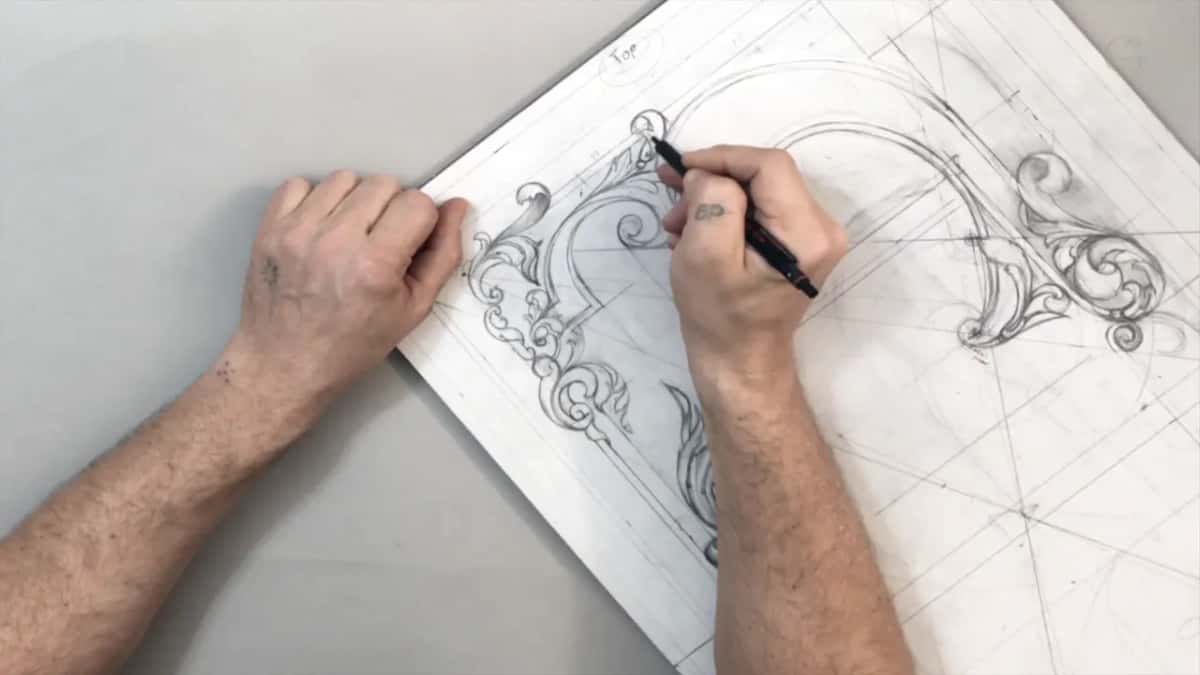
Then I checked whether the next area looked good too. Nope. It didn't look too good to me. Overall I liked the main idea, but not the development of how it looks. I said I kind of wanted to unite it and get a different pencil, and that is where this lesson stops.
In lesson 7 I said it's sometimes a good idea to leave it for a few days, not touch anything, then come back and see what you would change.
It's the same with the gouge. During lesson 19 one area was bugging me a lot, and I said sometimes it's good practice just to walk away from the area which bugs you. In Venice Room workshop 69 I put it plainly: step away for a couple of seconds and look at it, and if it makes sense, it's good. If it doesn't, just change it.
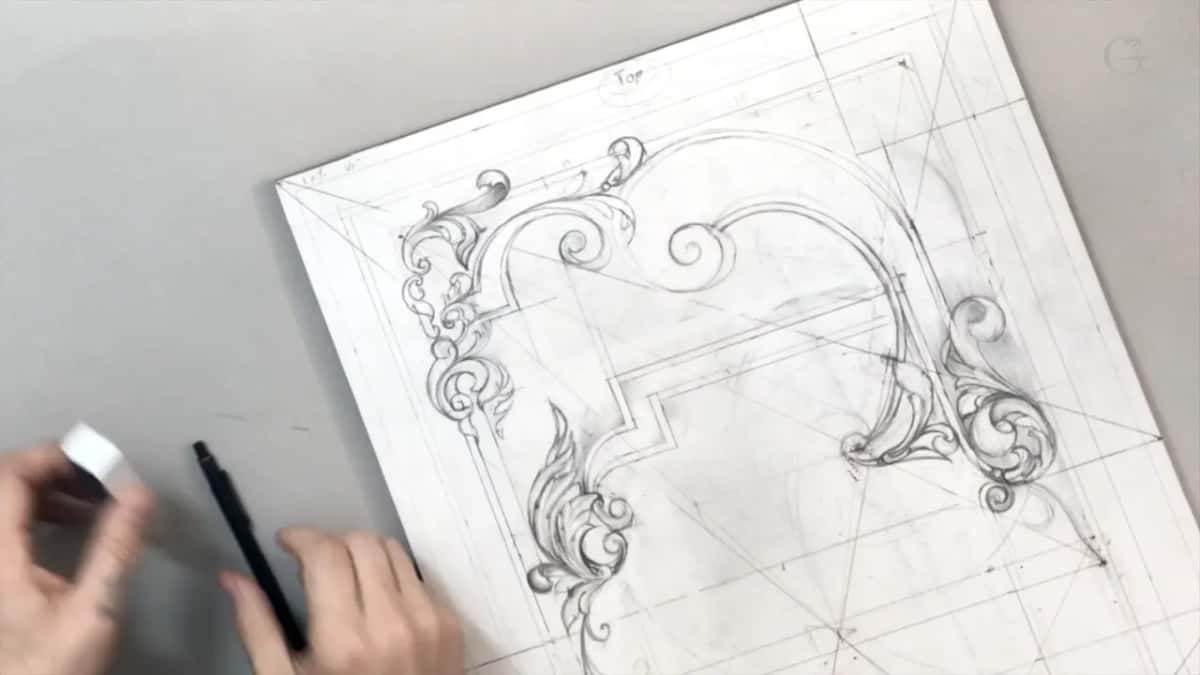
And in the lesson after this one I still didn't care for what I saw. I'll come back, I'll fix it, and I'll develop it, I said. It's just a process.
This whole design course, and the carving stage after it, is open with Access to the school. In this lesson that meant pencils, an eraser, my ruler and one circle template.
How it's done
- Stare at the area again. Look at what you drew last time for a few moments and check if you like it. On this panel the movement was good, but too much of it sat in one area.
- Keep the outline. Leave the main outline alone. Turn the double acanthus so one leaf hides under the second one.
- Enlarge the visible leaf. Compare both sides of the panel. Where one acanthus runs a little too small next to a thicker one, redraw it bigger so the two stay somewhat consistent.
- Rule a parallel line. Mark a starting point, take a ruler and draw a line that keeps parallel with the baroque diagonal, then rebuild the ending on it.
- Give one volute its side. Add a second line that reads as the volute's own side, and repeat it on the next one.
- Check it one more time. Stare at it again. If a part still bothers you, change it, the way I put one plain leaf into a spot I didn't like.
Frequently asked questions
Do you throw out a crowded acanthus and start again?
On this panel I kept the main outline. The double acanthus stayed double, but one leaf slid beneath the other one, and the leaf you can see got bigger. I told the camera I thought it would look much better that way.
What is the difference between a curl and a volute?
Wikipedia calls a volute a spiral, scroll-like ornament and says it forms the basis of the Ionic order. On camera I started to call mine a curl, then said volute was more accurate. Later in the same part I said one movement I drew would not be a volute, just a movement.
How do you make a drawn volute look thicker?
Draw the side of it. In the third part of this lesson I gave one volute a second line that reads as its side, then did the same on the next one. My words were that it gives a more three-dimensional feel, and that they used it in the 18th and 19th century, and even later.
What to carve next
- Carving Furniture Panel, Design, Part 1, the whole course
- Designing Furniture Panel 8, the lesson before this one
- Designing Furniture Panel 10, the lesson after this one
- Designing Furniture Panel 6, where the T-stop rule comes in
- Principles of Design in Wood Carving 3, busyness in the right spot
- Carving Furniture Panel, Part 2, the carving stage