
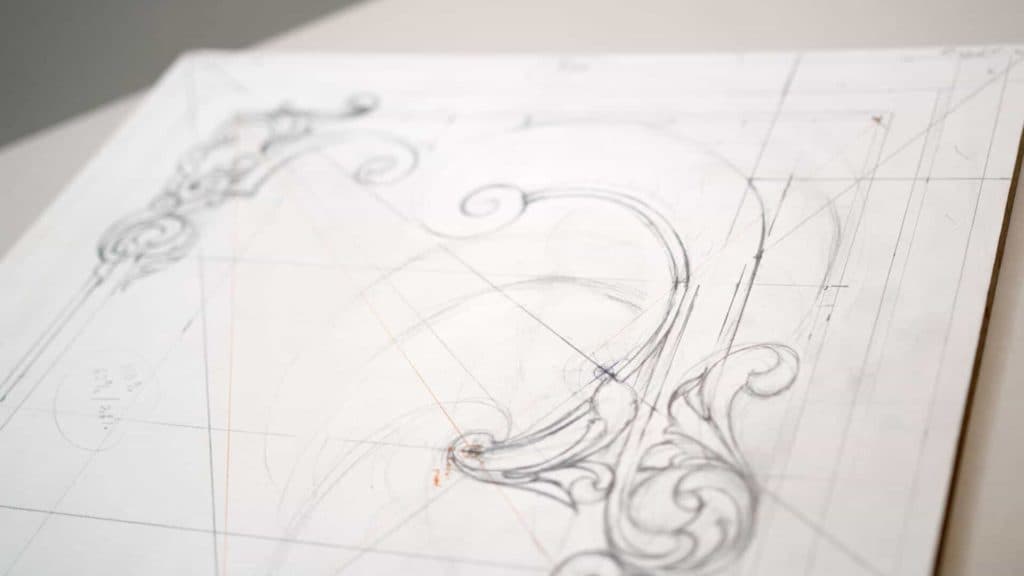
Alexander Grabovetskiy, woodcarver, School of Woodcarving · Published 2018
Which direction does the eye travel across a carved panel?
Quick answer: Reading direction on a carved panel is the corner where your eye starts and the way it moves from there. A Western mindset starts on the left side, up top, and moves down to the right. An Eastern mindset begins at the upper right point and reads downhill the other way, like a book.
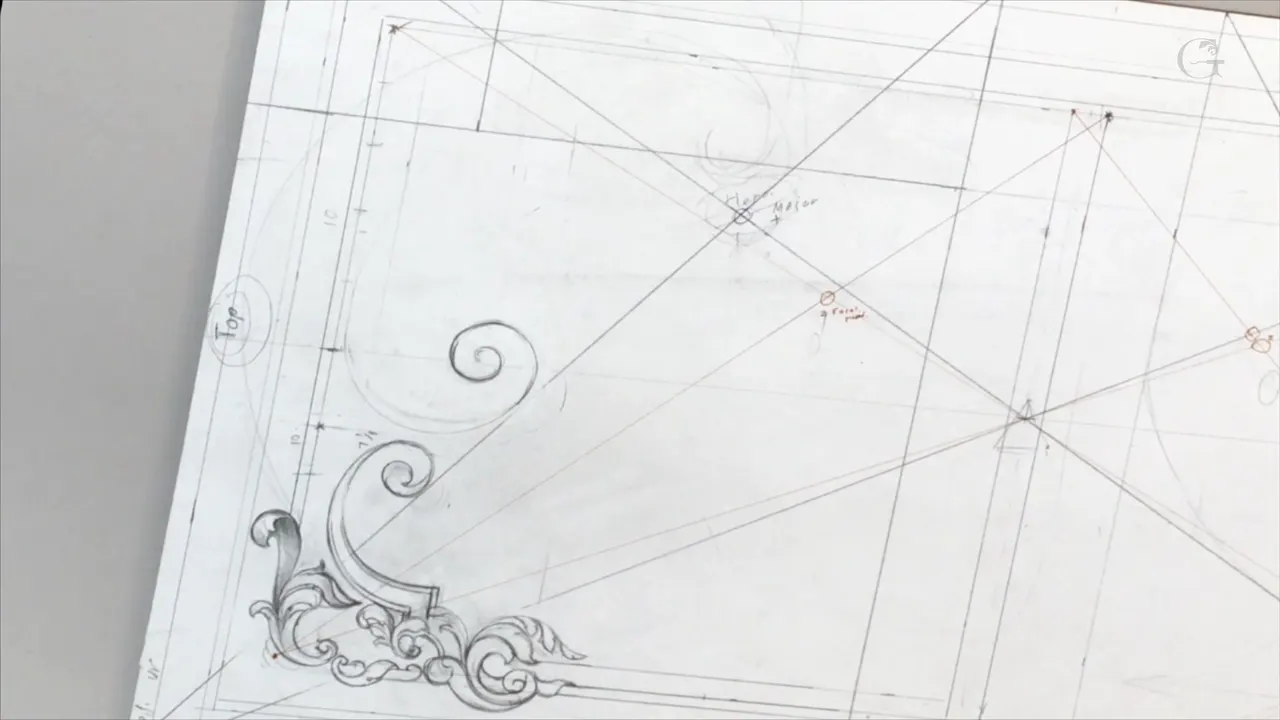
Reading direction on a carved panel is the path your eye takes, and it follows the same rule as reading a book. If you have a Western mindset, you start on the left side and move down, so left to the right, down. Someone more from the East starts at the right upper point and reads downhill the other way. In lesson 5 of my furniture panel design course I prove it with a small car on a slope. After that I try to make one walnut panel read both ways.
You read this page from the top left, right? And when a line ended, your eye dropped to the next one and went back to the left? Then you already carry the habit this lesson is about. This lesson has the car test and a line set at 6 of 10. It also has a paper scrap in place of a ruler, plus the hidden lines under the flowers.
What lesson 5 settles about reading direction
- A car drawn on a line falling away from the upper left goes downhill to a Western eye.
- On the opposite diagonal it climbs, unless you read the other way.
- I started this design in the left upper corner and want it to read from both sides.
- Layer one, the background movements, gets drawn even though lots of it will hide under flowers.
Why did the design start in the upper left corner?
Most of my students read left to right, and that is where I started. They come from different countries throughout the world, but most of them are from the Western world. I tried to explain the reason before, in lesson 1. You read a composition the same way you read a book, and that goes for more than an artistic one. So from the beginning my design moved out of the top left corner, and I developed it from there.
Which way is a car on a diagonal moving?
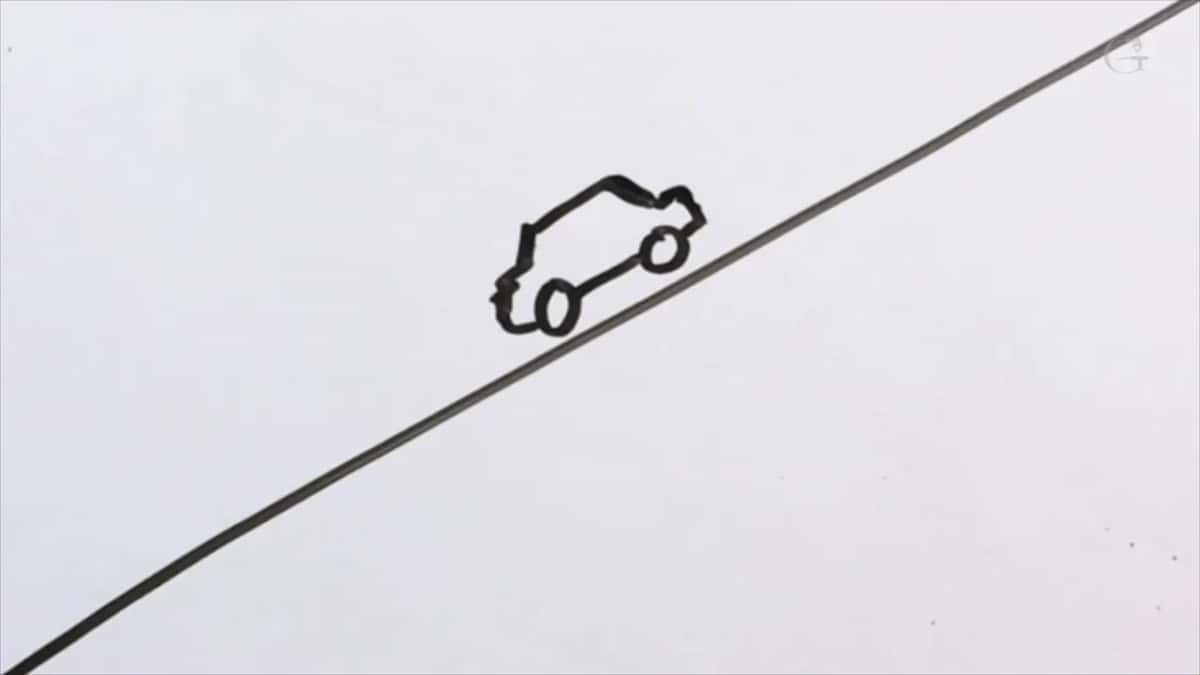
That depends on the corner where your eye starts. To prove that point, I drew a space, a canvas, on a whiteboard. A line went from the upper left corner, downhill and diagonally, and right in the middle of it I drew a small vehicle. Now tell me, please. When you look at that picture and at that car, what direction does it move?
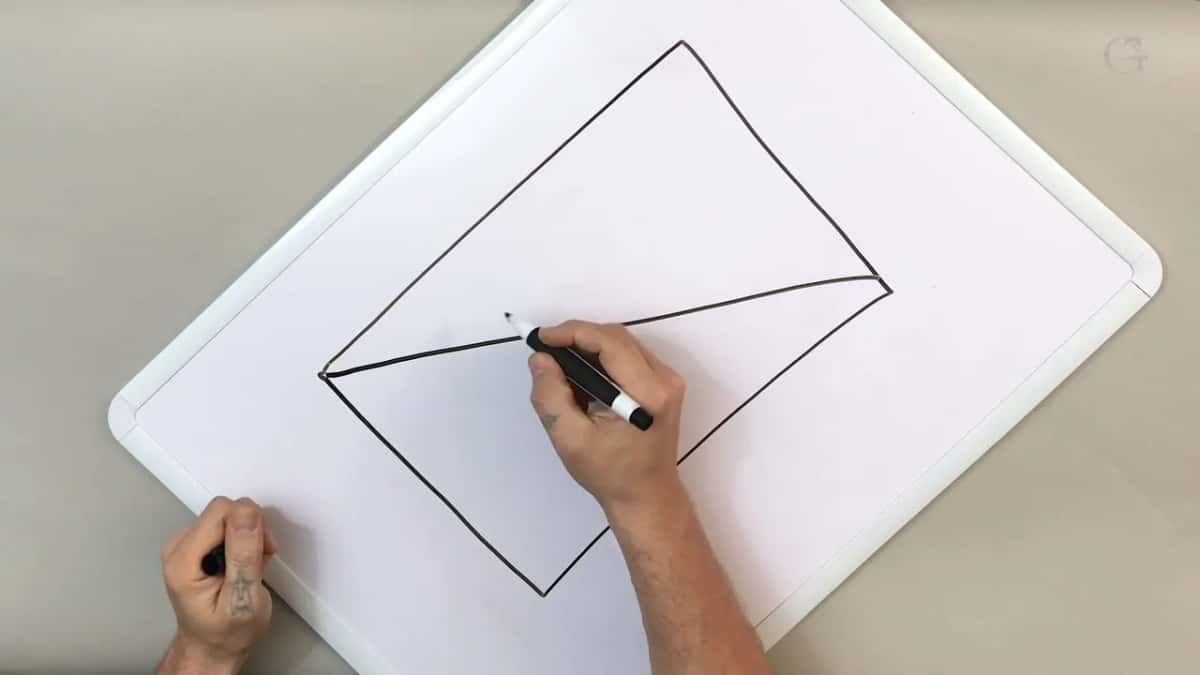
With a Western mindset, I have absolutely no doubt it probably looks like it's going downhill. Your eye always starts in the left top and goes that direction.
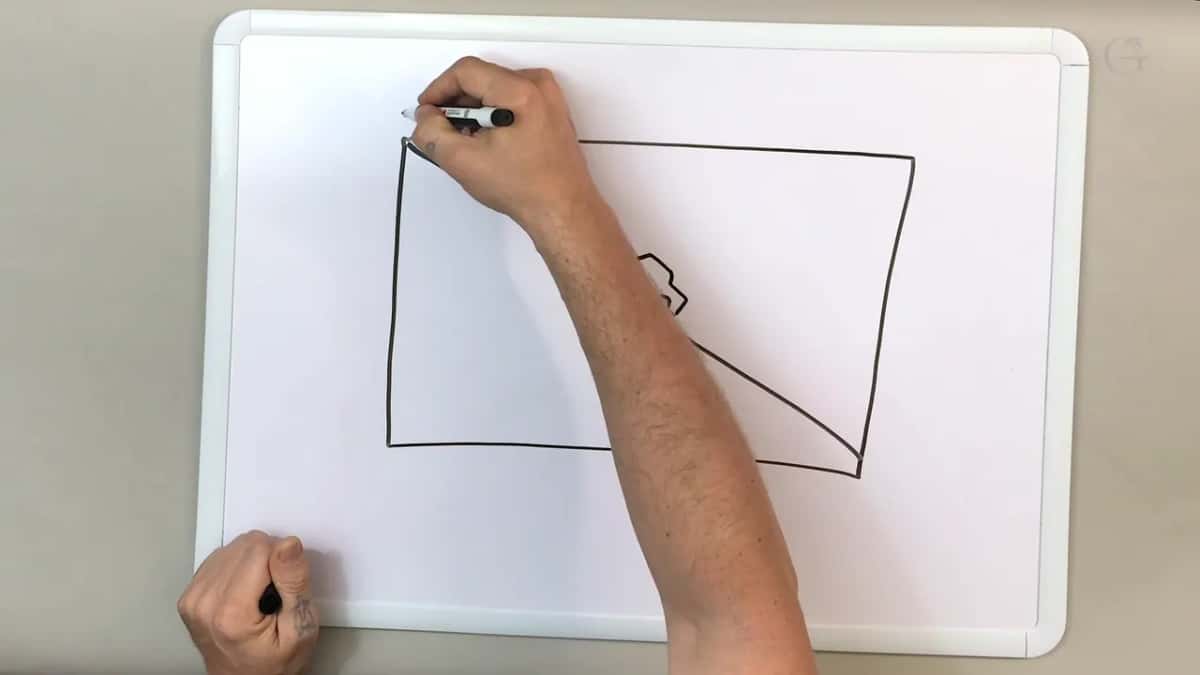
Then I did the opposite. My second diagonal line started at the right top, and I drew a representation of a vehicle on it again. Same question. To a Western mindset it looks like it's going upward, because again you start at the left corner, and from there the line climbs. Someone with an Eastern mindset or reading takes it the other way, and for them the car is going downhill. That's just how our brains work, and we are not the same.
Can one carved panel read both ways?
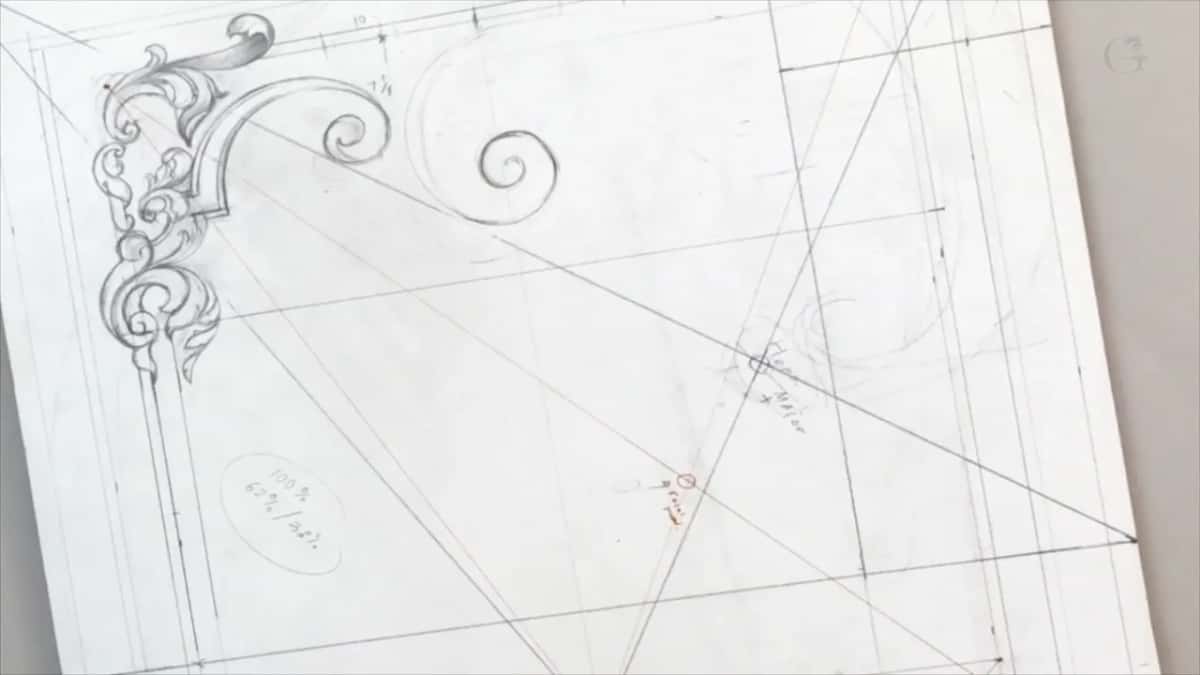
This one is my try at it, to unite two worlds, the Eastern and the Western, or should I say the Western and the Eastern. The development of my movement began at the left upper corner. Later on, when I develop the movement on the other side, your brain will still read it in both directions, from this point and from that point. I'm trying to confuse brains a little. You'll be able to read it right to left as well as the other way. I hope it does make sense what I'm doing. My own reason for wanting both worlds, Asian and European, is in lesson 1.
What are the first questions to ask a blank board?
The first one is which direction it will go, left to the right or right to the left. In my Principles of Design course, lesson 4 I said you've got a blank piece of wood, or a canvas if you want to paint. The second question is the diagonal, Baroque or Sinister. The third is whether it will grow, or fall, or both, and I said most likely both. But who is going to be dominant? After that come the golden points and the position of the main idea. Right away you have a picture in your head, and after that you develop whatever.
What does the 60/40 rule place on this panel?
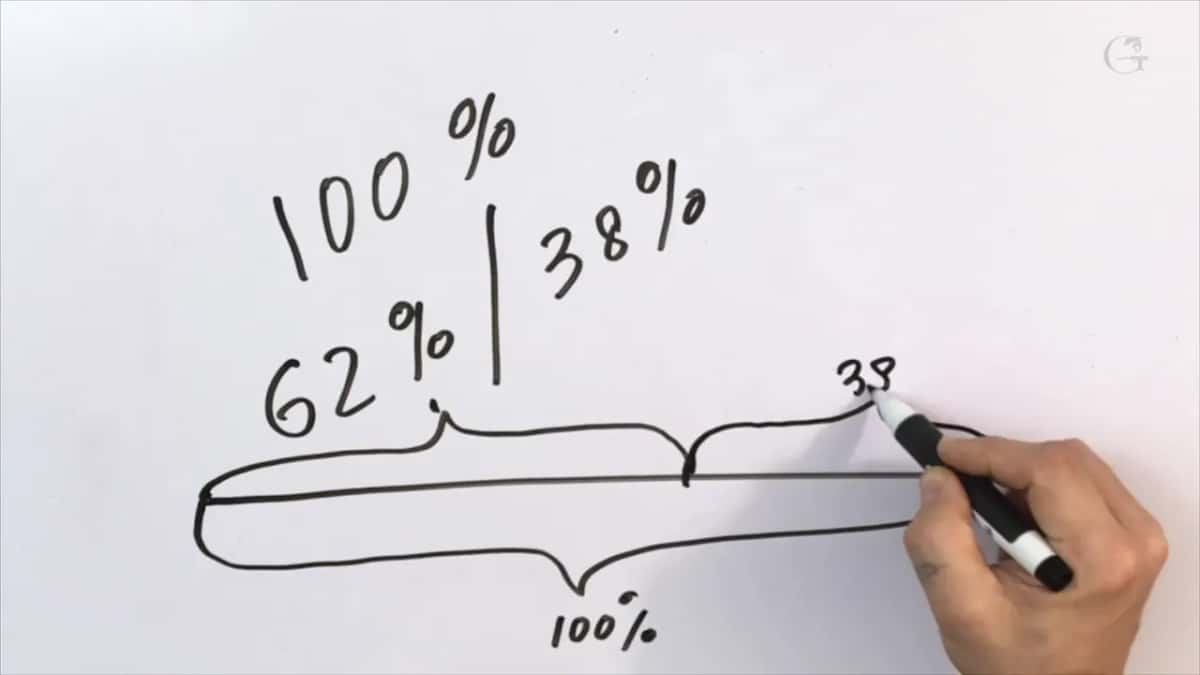
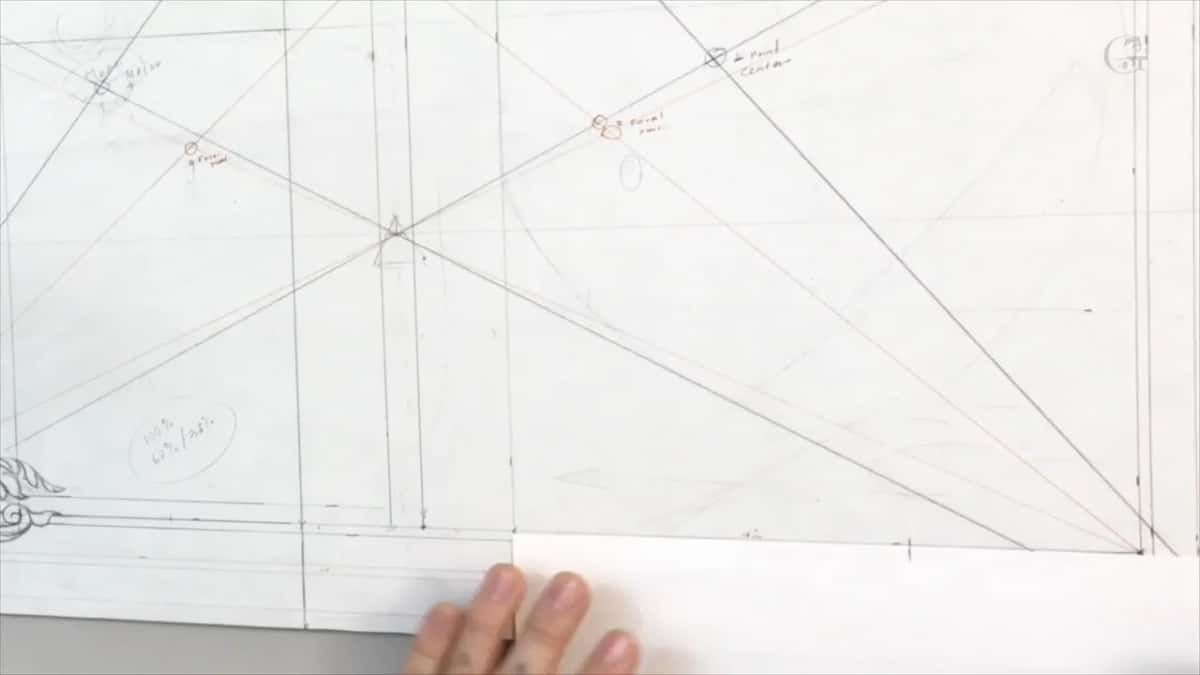
It gives me the line for the inner panel at about six parts out of 10. I wanted to establish an inside right here, like a central panel. Six of 10 is the easy way to remember my measurement. Say a line stands for 100%. The rule is 62% against 38%, approximately 62% on one side and approximately 38% on the other. To simplify that, you can always say 60/40. I worked out the golden center the same way in lesson 1, and in the next part of lesson 5 I already had my point, the line at 62 out of the 100.
Why carry a measurement on paper instead of a ruler?
That way I don't have to use any ruler or measurements. To measure from this line, the easiest way is probably just to take a piece of paper, mark it and carry it to that side. I did the same on the other side. The reference point stays the same line, and I carry the mark over.
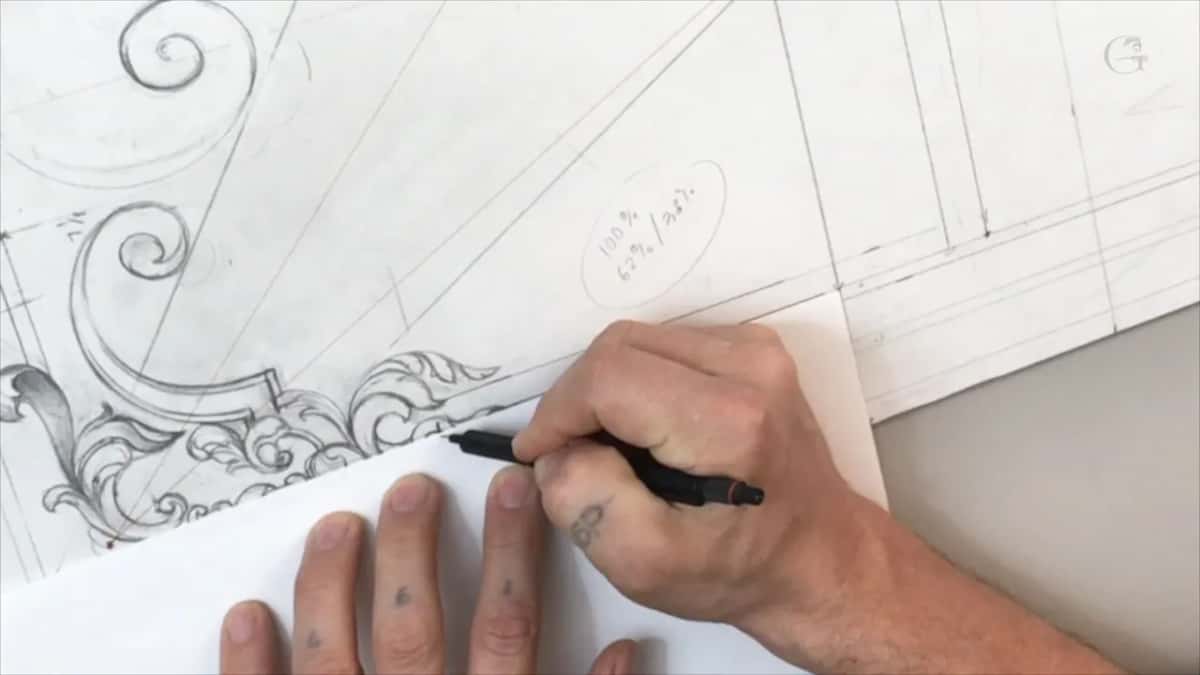
Later I needed it again for the next area. I measured the point against the outside of the line and carried that across. Once more it went over for my minor focal point, with another line drawn after it. I know all of those lines are kind of confusing, but they will make sense later on, believe me. They are really important lines.
| What I placed | How I placed it on the drawing | His words |
|---|---|---|
| The inside panel line | Six parts of ten, or 62 against 38 on a line of 100 | Approximately six parts out of 10 |
| A distance carried to the other side | Marked on a scrap of paper against one reference line | I don't have to use any ruler |
| Bigger movement | The small one's widest point, measured and used again | Not perfect, but really close |
| Inner molding | The molding I already had, repeated twice | Exactly the same right here |
Where does the eye settle on this panel?
On the center of the inside perimeter, the second and minor point of the composition. Next I set up the main energy, or enclosure. There is such a thing as an enclosure rule. The overall main focal point is right here, where we've got the main hero, the master of the composition point. So the real center, the one your eye will focus on, is right there.
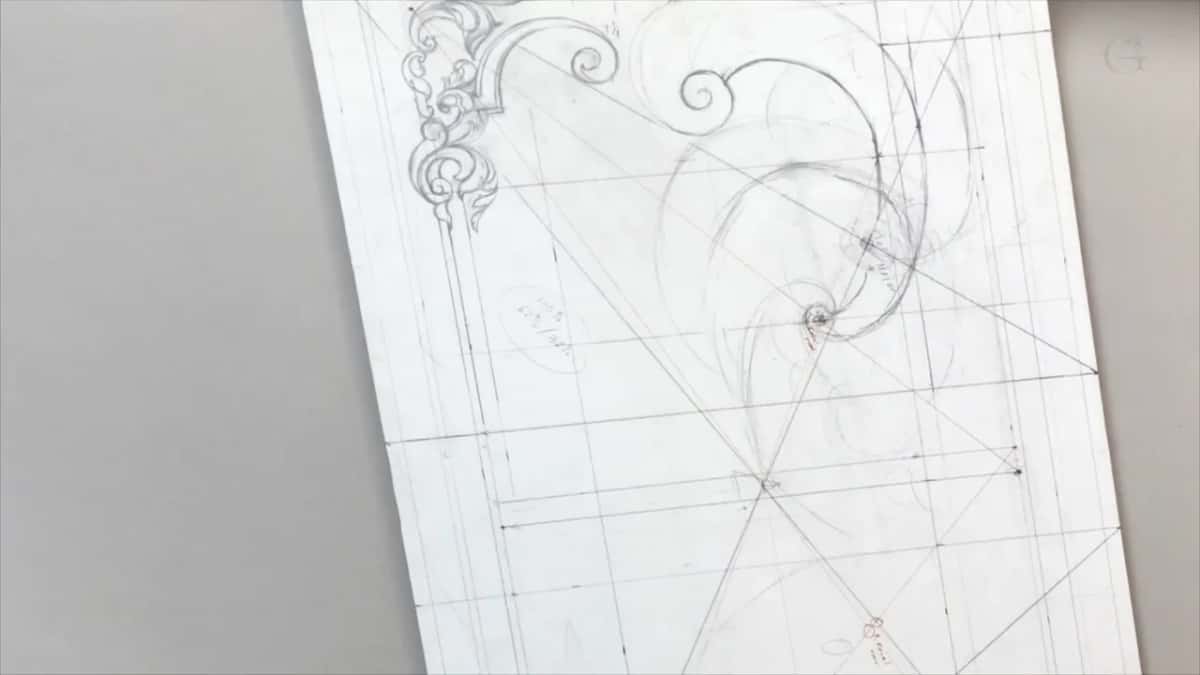
I drew energy movements that go around like a spiral and keep going in that direction. Once it's done, you'll see more in it than lines, curls and arches. It will have some energy and some 3D feel in it.
Is true art feeling or geometry?
To me, the true art is the real math, the real geometry. Unfortunately, since the 1950s, since the 1960s, I'd say the true art was made smaller, into some kind of soul therapy. Like, it makes you feel good. A true craft takes some knowledge when you develop a piece of art, and that is more than strokes of different colors and a random composition.
Let me tell you a story. When my youngest daughter wanted to be an artist, we found a teacher here in the United States. We thought the teacher would teach all the composition rules, all the color palettes and so on. It didn't happen. The teacher talked about how if it feels good, that's good, and you don't need to know anything, just draw whatever you feel like. It just doesn't work like that.
That's why you can't find too many true pieces of art from the second part of the 20th century and the beginning of the 21st. You still can find them. Just not as many as it used to be. On this piece I'm trying to develop the true artistic approach.
Why draw lines the flowers will hide?
I want it to feel like everything grows from one point, the focal point of the inner part. Right now I'm doing layer one, the background movements, and that will be hidden, by the way. Lots of it ends up behind the main idea. I drew one line to connect this point to that point, just to get my main movement.
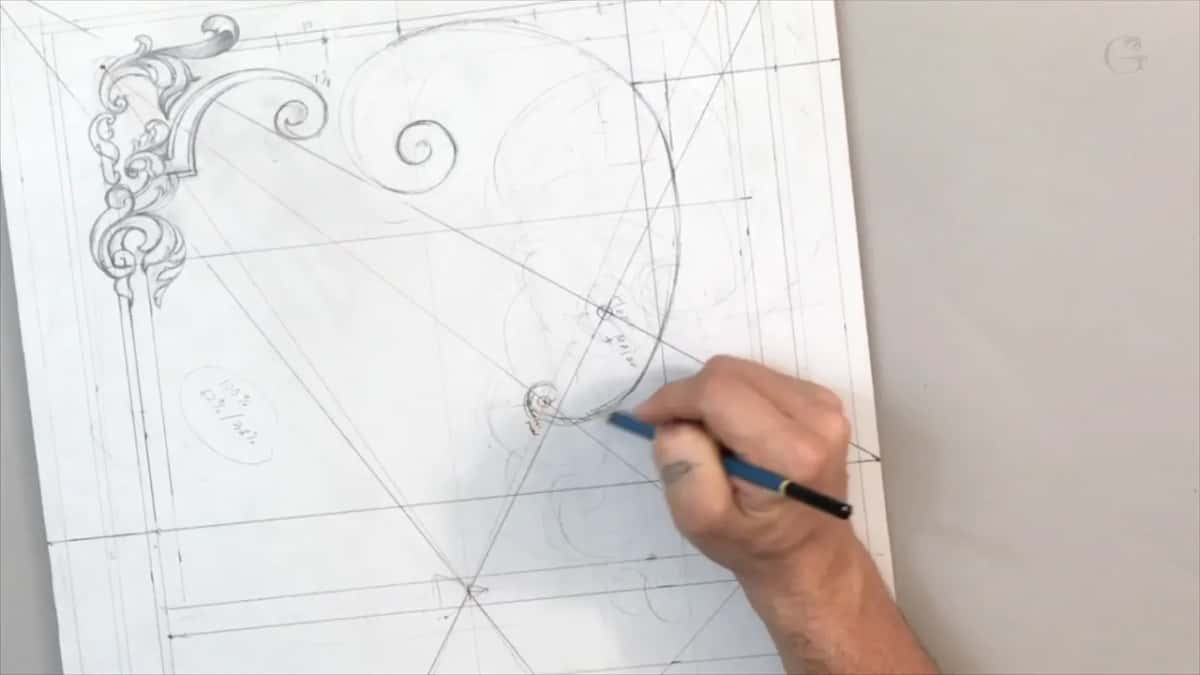
I also want another movement from the main hero, maybe reaching that line, with spiral movements just like that. I don't know yet. Maybe it's a good idea, since it will still be interleaved all together. Later, on the inner panel, I said it once more. Lots of that stuff is going to be hidden underneath the flowers, but I still want to make sure you can feel the movements.
Which area gets the main cluster of flowers?
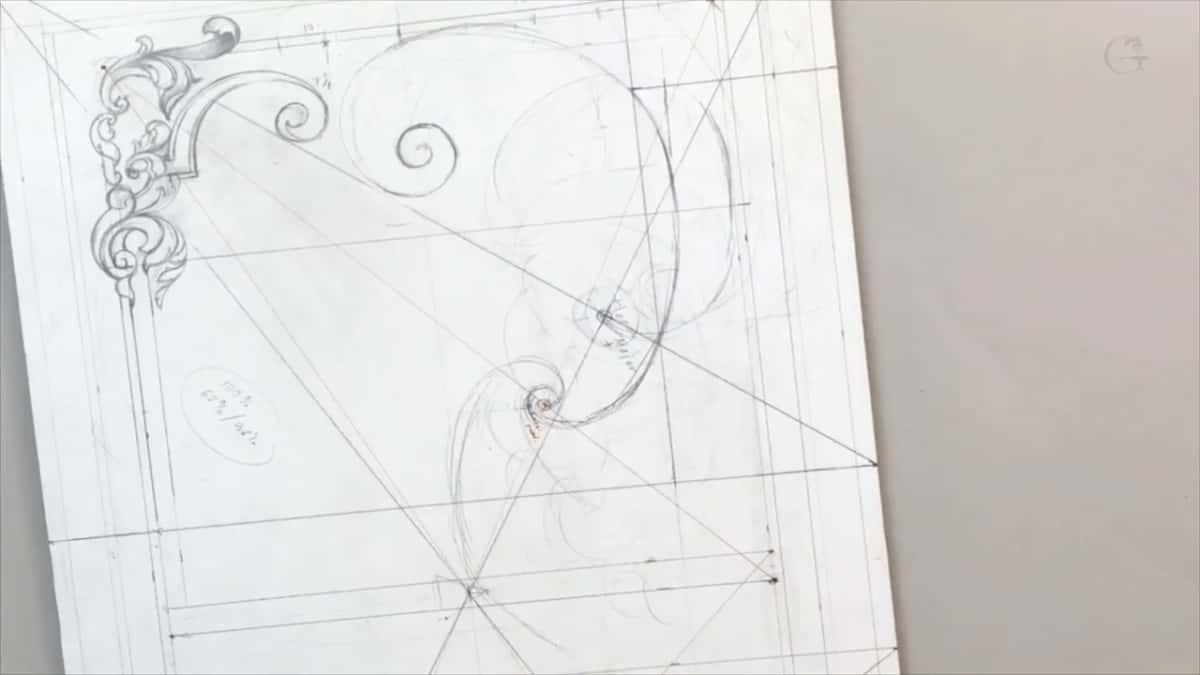
One area right here gets the main cluster of my flowers, and it's a good idea to bring it all the way to that line. And because we got this hero, I can get the cluster over here too, like a background cluster. It will have an upper layer, a second layer and a third layer, going backward just like that. I understand it's almost impossible to see what I see. I have a picture already established in my brain, and that's so hard to explain. The flowers themselves get carved later, in the carving stage.
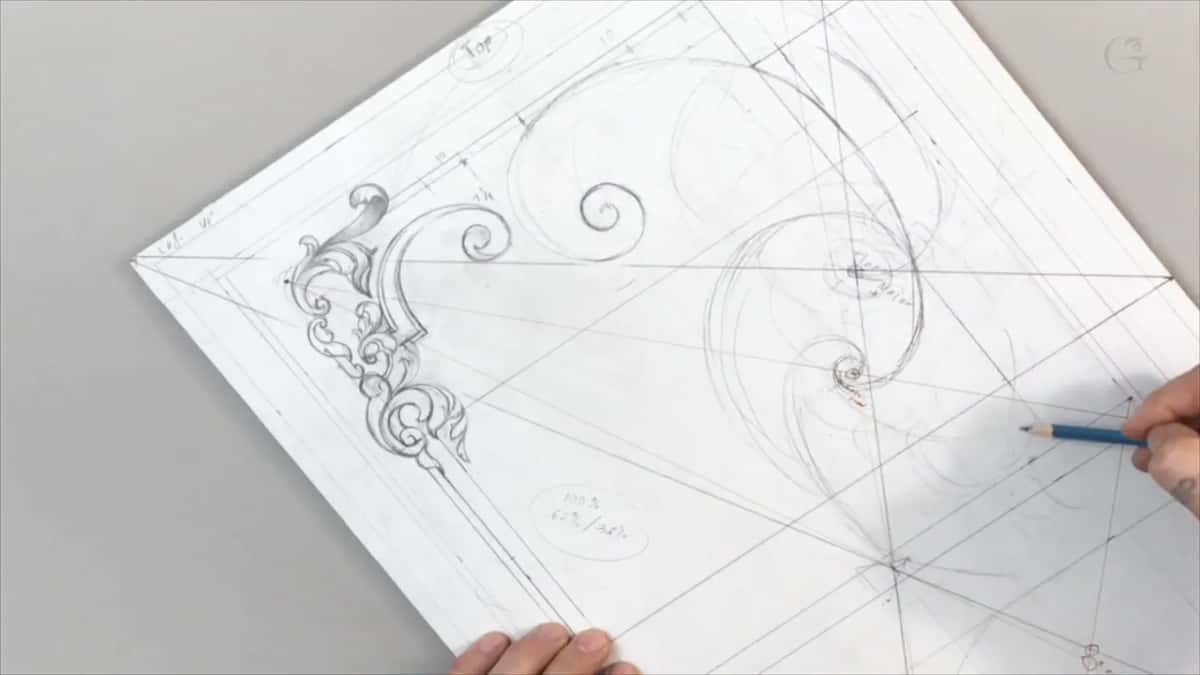
How do I size a movement that runs narrow to wide?
It starts narrow at one point and gets wider as it goes, and I size the bigger copy with a measurement that is already on the board. Again from this point, you can see it go narrow at first and then wider. I'll repeat that idea on this side, on a bigger scale. What's the best scale for that? I think it's a wonderful idea to use the same measurement. I took what is inside right here at the widest point and used the same measurement over there.
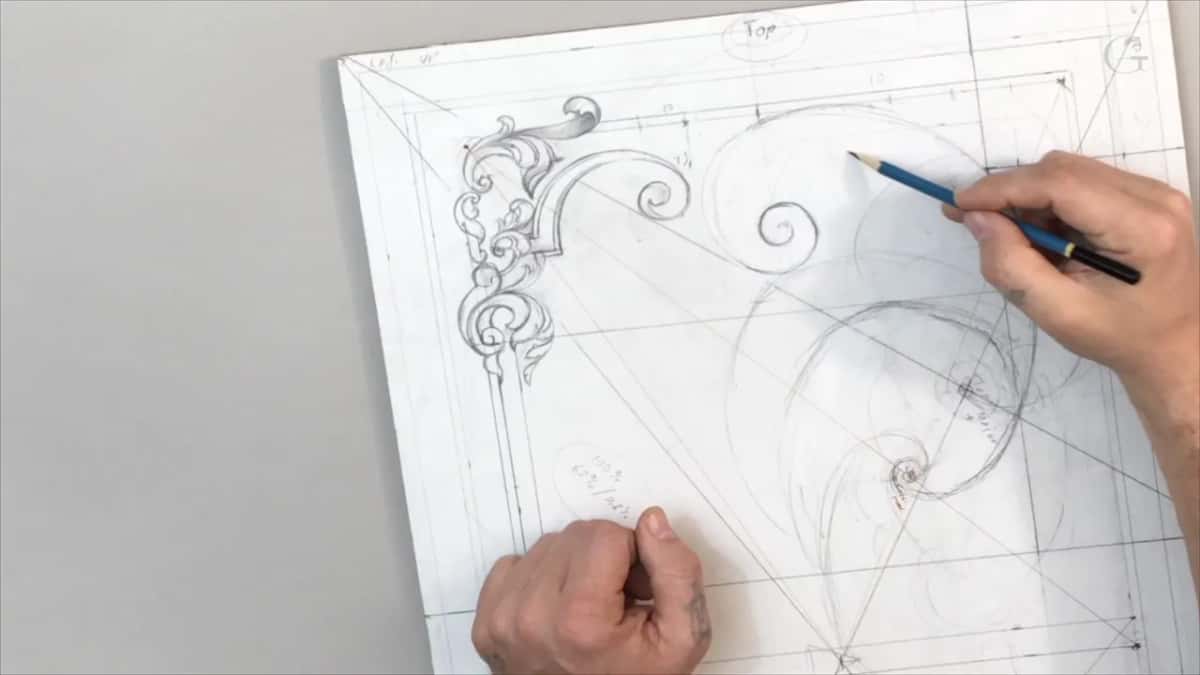
It came out pretty close to an intersection, measured from the outside of this line. Not perfect, but really close, and that will be really good. More geometrical. Geometrical movement, I should say. I call it the law of repetition in lesson 8, narrow to wider, even on negative space.
What do I do when a line comes out too straight?
I keep working on it, because a line that's too straight doesn't feel organic to me. Since I have a 3/16 inch (about 5 mm) molding right here, I repeated it on the inner panel, exactly the same on both sides. I didn't really like that it was too straight. I still wanted to hit that point, and I still wasn't too happy with what I saw.
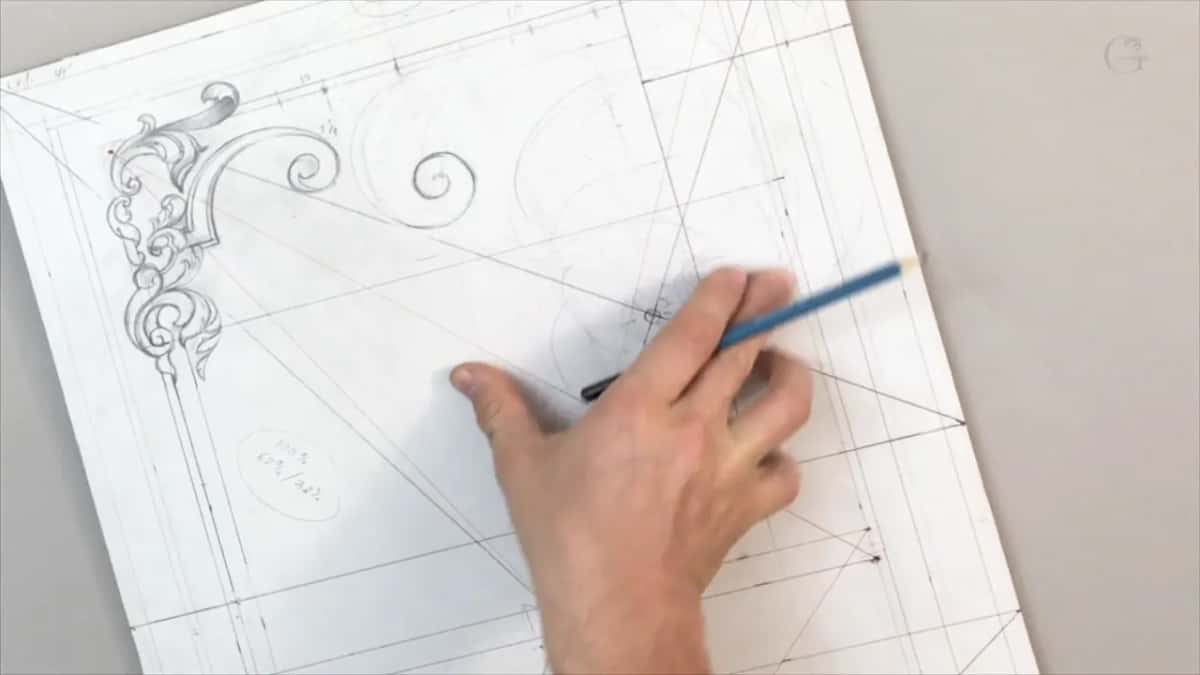
Please forgive me. I'm just trying to develop the idea of what I want to see, and make it look like it's moving organically in the right directions. In the Principles of Design course I reminded students that nothing is straight. Everything just has a curve. The same panel gave me a carved line a little too straight in lesson 20 of the carving stage. It still wasn't that bad, but I really wanted it to repeat another movement, so I had to rework it a little. That happens a lot, actually.
How does the inner panel get its own boundary?
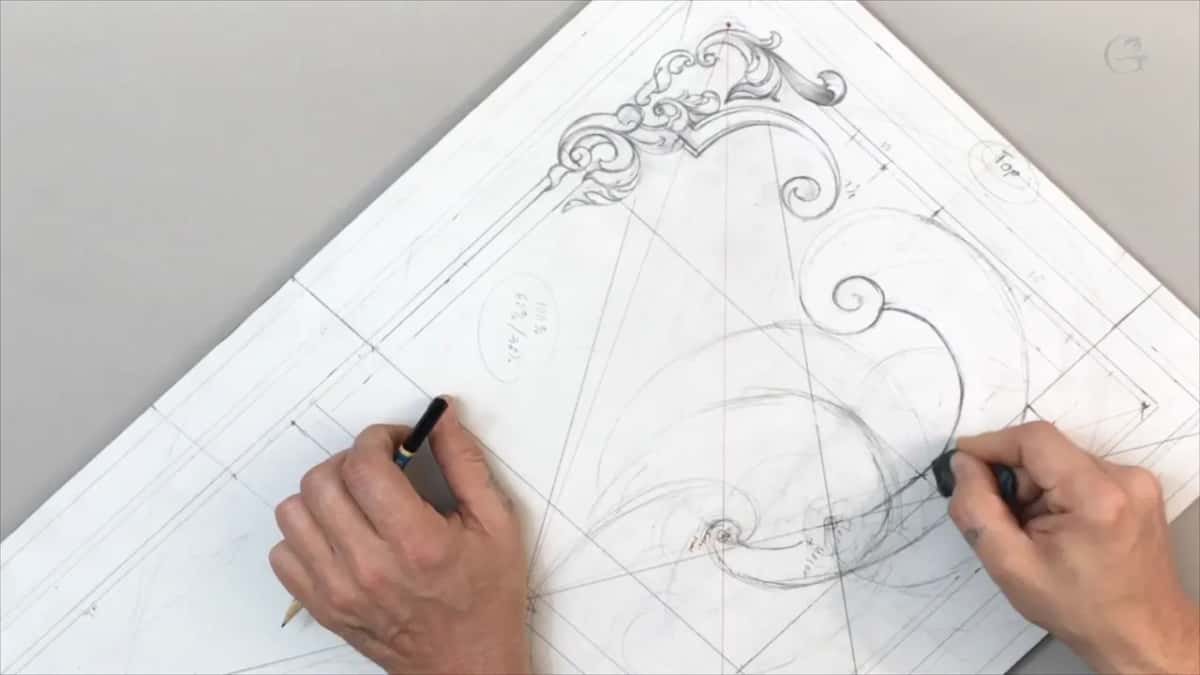
I repeat a movement down to the bottom on both sides, and a vertical line gives me another boundary. It was a good idea to repeat this movement down from the outside on both sides, with a vertical line, to get even more. That gives me another boundary for developing the inner panel, an inside panel.
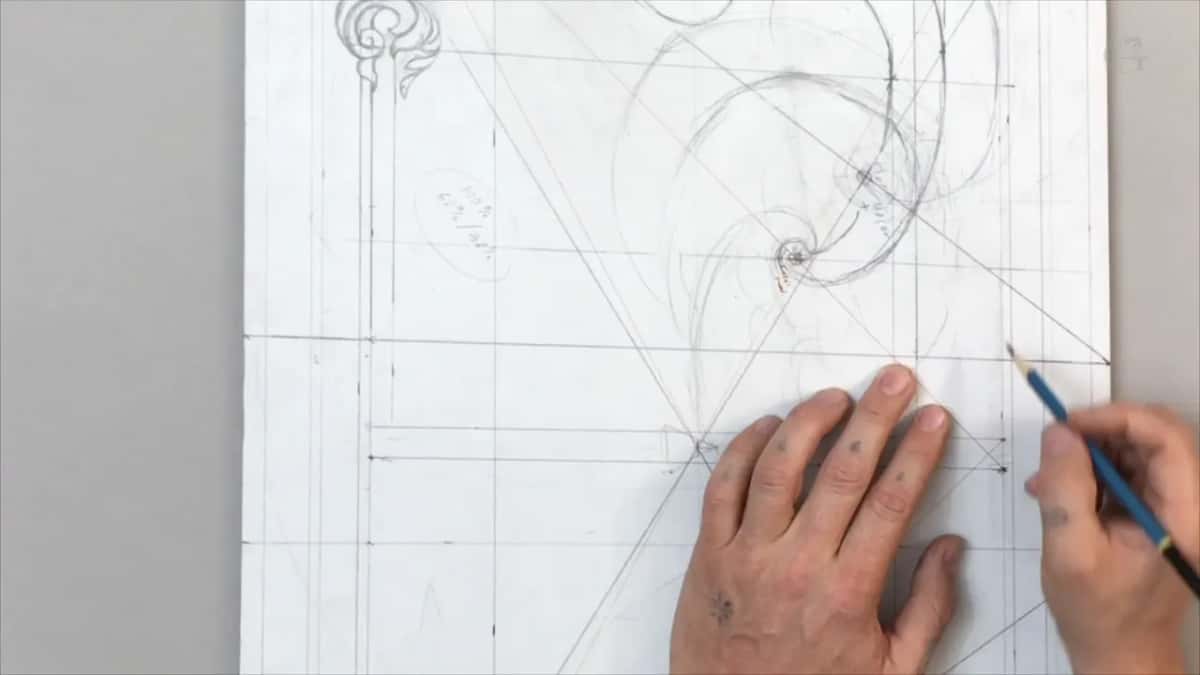
I do understand not everything makes sense right away, but hopefully it will. I really like the idea of staying in and filling the space between those lines, so I made my return movement, kind of like this. A lot of that ends up hidden too. I didn't know yet what to do with it, but I'll do something. It hit this line and became the main movement of this section. I wasn't really happy with what I saw there, so I tried to start it from narrow.
How long do I keep erasing and redrawing?
Until I get what I feel it's supposed to look like. That is the usual process for me, how I design something. I establish the main movements, and then the details and so on, with a lot of erasing and redrawing. My teacher would tell me something I passed on in lesson 49 of my Hashemi flowers course. If there's a day when you look at your work and say it's beautiful and you couldn't make it better, that's the last day of your artistry. Lesson 6 goes on from this drawing.
Would you like to see every one of these lines go down by hand? And to draw your own panel by the same rules? Then start here, with the design first and the wood carving after it.
How it's done
- Pick the corner where the movement starts. I began in the top left because most of my students read left to right.
- Mark the top and both upper corners. With the top decided, I named my left up and my right up.
- Set the inner line at six of ten. Treat the line as 100% and mark about 62%. Rounded off, that is 60/40, and it is simpler to keep in mind.
- Carry the distance on a paper scrap. Hold the scrap to the reference line, mark it, carry it across.
- Draw layer one before any detail. Connect the points to get the main movement, add spiral movements off the hero, and expect much of it to vanish later behind the flowers.
- Repeat a movement on a bigger scale. Let it run narrow, then wider, and size the bigger copy with a measurement the board already has.
- Erase and redraw. Main movements first, details after, until it looks the way you feel it should.
Frequently asked questions
Do Western and Eastern viewers read a carving differently?
I have no doubt they do. For a Western mindset, a car drawn on a line that runs down and to the right rolls downhill, and on the opposite line the same car climbs. An Eastern reading begins on the other side and sees that second car going downhill.
What is the 60/40 rule in carving design?
Call a line 100% and put your point at about 62% of it, which leaves about 38% on the other side. Rounded, you get 60/40. The rule set my inside panel line here, and I keep it in my head as six of ten.
Why would a carver measure with paper instead of a ruler?
Mark the distance on the edge of a paper scrap, then carry it over, starting each time at the same reference line. I did it for the inner panel line, for the next area and again for my minor focal point. The scrap stands in for the ruler.
What to carve next
- Carving Furniture Panel, Design, Part 1, the whole course
- Designing Furniture Panel 4, the lesson before this one
- Designing Furniture Panel 6, the lesson after this one
- Designing Furniture Panel 1, where reading direction comes up first
- Carving Furniture Panel, Part 2, the carving stage
- Principles of Design in Wood Carving, lesson 4