
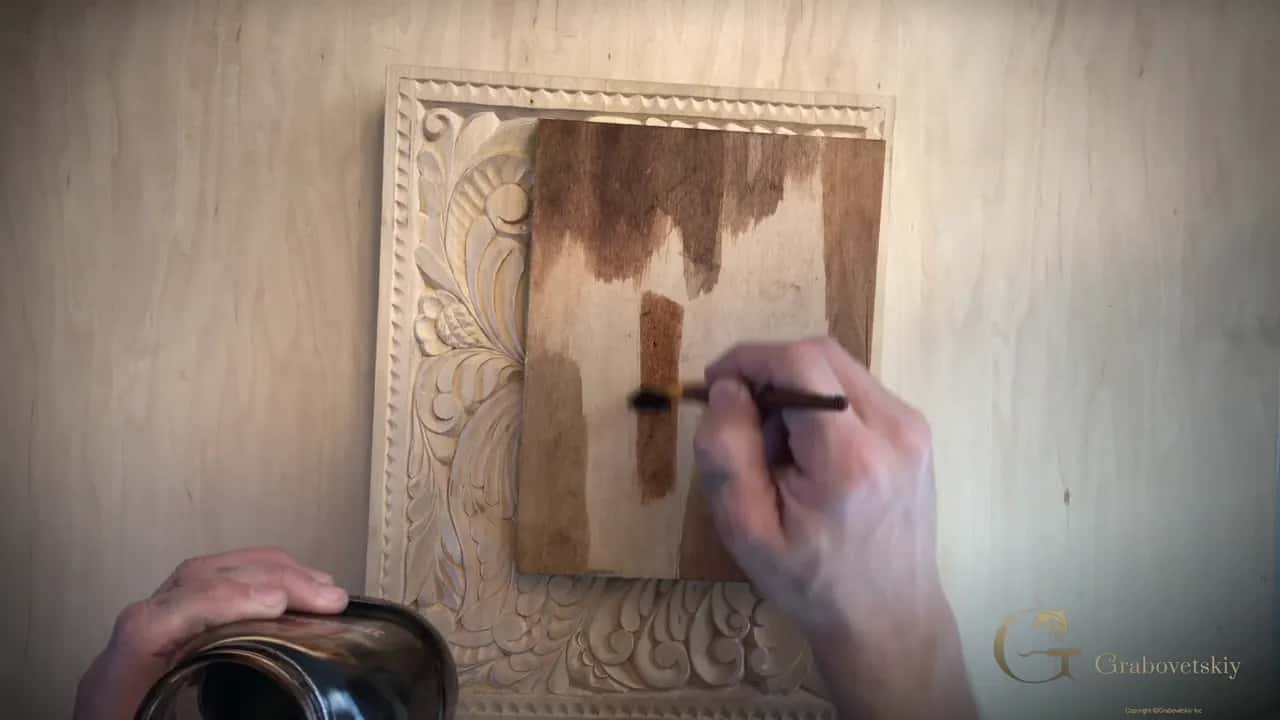
August 29, 2024 · Updated August 20, 2026
By Alexander Grabovetskiy — Master Woodcarver · Founder, School of Wood Carving · 18 min read
Should I oil Wood before Carving?
Oil wood before carving is the wrong order, and the answer is no. I brush oil on at the very end, after the last pass with the gouge. Raw dry basswood slices clean. Oil does not sit on top like paint, it soaks into the cell wall and changes the wood you are about to carve.
Somebody told you oil makes the wood kinder to the edge. I know where that comes from. It sounds right. A panel that has sat in a dry shop all winter feels like a brick under the gouge, and a bottle on the shelf looks like the fix.
Wrong fix. Over forty years of carving, first in Russia and then here, and I have never oiled a panel before starting it. Not once. Below is what oil does down in the fibers, whether it wrecks your edge, the one liquid I do brush on first, and how I finish a piece.

Pencil first. The blank is oval, and nothing else has gone on it yet.
- No oil on raw wood. The bottle waits until the carving is done.
- Boiled linseed and tung oil are small enough to get down inside the cell wall, so they change the wood near the surface for good.
- Thinned yellow glue is the only thing I brush on first, and only on a fragile part, and only once it has dried hard.
- Your hands leave their own oil. The dark patch where you hold a panel is oxidation.
- Olive shows up oily with nothing added at all, and glue does not grab it the way glue grabs poplar.
What does oil actually do to the wood fibers?
Oil goes down into the cell wall, stays there, and never washes off or sits on the surface the way paint does.
The Forest Products Laboratory put numbers on this. A resin has to be tiny to get inside a cell wall. Penetration runs well under about 1,000 Daltons, and the ceiling sits near 3,000. Linseed and tung oil both make it in. The walls they reach hold less water and swell less than the bare walls beside them.

Only a pencil has touched this wood.
Take that as a carver and not as a chemist. Whatever you brush on soaks a little way in and stays. Brush it on first, and every pass of the gouge for the rest of the job runs through a layer you cannot see and cannot take back out.
Bare wood gives me room to change my mind. A clean carving with no sanding even takes water without complaint. The grain barely lifts. Once dry, that surface is ready for whatever I decide to apply.

Waste on the bench. Every petal is still flat at this stage.
Will oiled wood ruin the edge on my gouge?
Anything extra on a surface pulls at the edge a little, and you will be back at the strop sooner than you planned.
When I scrape a surface with a knife instead of slicing it, somebody always asks whether that kills the tool. It dulls your tool, absolutely, and I am not going to lie about it. But if you are a wood carver, you have to resharpen your tools anyway. At least buff them constantly, and on the next buff it is going to be good again.

One leaf roughed out inside the beaded rim, the gouge idle for a second.
A dull edge is not my reason for saying no. Sharpening is the second of the three things I teach, right behind design, and you will be doing it every day of your carving life. My reason is plainer. You cannot get the oil back out.
Oil does have a home on my bench. My Trend mirror paste dries out on me, and that stuff is not cheap. Three cans gone already. A little mineral oil softens it right back up, and the compound itself is still the same.

A rope-twist border, worked bent low over the bench.
Is there anything worth putting on wood before you carve it?
One liquid earns its place on raw wood, and oil is not the one. Diluted yellow glue, brushed onto a fragile part, then left alone until it has dried hard.
Yellow glue has resins in it, and Titebond is just a brand. Dilute it with water, as much water as possible, then soak the fragile area. Some resin gets inside of the fibers, and as those fibers are held together with those resins, you can work more safely without it breaking. That gets me to a paper thin edge safely.
Before you carve it, before you touch it with the knife, do the same thing. Glue, water, wait. I do not reach for this often, and it covers one small area rather than a whole panel.
Where does the fragile part come from? Usually from me. Carve too close to the edge and that edge becomes really fragile, and one careless pass takes it clean off.

One leaf edge already thin enough to curl.
There is a second reason to reach for it, and it has nothing to do with fragile edges. If you are not planning to use a shellac, and you do not want a stain, and you just want the natural color of the wood, that diluted glue can be the whole finish. It soaks through everything in your design. Do not be too crazy with it. The resins get inside the fibers and they bind, and that holds really nicely.
The glue can go through the whole thing, actually, well past the one fragile spot. I rarely go that far. And the glue is not armour, so the resin ends up inside the fibers instead of on top, holding them while you work. You will still break it if you overdo it.

Fresh carving comes up pale.

A finished pale panel, teardrop knife still in hand.
| What goes on | When I put it on the wood | Dries hard | What it does to your gouge |
|---|---|---|---|
| Boiled linseed or tung | Only after the carving is completely finished, never before | Yes, slowly | Nothing at all, the work is done |
| Watered down glue | Before the knife touches something fragile | Yes, hard | Dulls it, so you resharpen |
| Mineral oil, food safe | On a kitchen board that people will eat from | Never hard | Stays soft right inside the wood surface |
| Oil from hands | Every time you touch bare fresh wood | Not ever | Darkens the spot you kept touching |

A rack of gouges within reach, one handle already in hand.
Does the answer change for a relief panel or a piece in the round?
Relief is where the question bites hardest, since a panel gets carved section by section over weeks while the done sections sit there waiting.
That depends on the project. It all depends on the project, and on how I am going to finish it. Paint grade, or a piece I plan to stain, I protect nothing.

Two stages on one board. Roughed acanthus beside a section still flat and drawn.
For a piece I want left natural, I do protect the carved part. You just get a cloth or a paper towel, place it right over the section you finished, and continue to work. Gloves help too, though with gloves I cannot grab my handle.
Dust is not on my list of worries, and people are surprised by that. There is no dust in my shop to speak of, because I work with hand tools and hand tools make chips instead of dust. What lands on a finished section is my own hands.
Round work is harder for a different reason. You turn it and hold it, so your hands reach every face many times. Oxidation does the damage, not grease. You can have absolutely clean hands, and I clean mine all the time, but when you are touching it a reaction happens inside of the wood and it becomes darker.

Brass dogs holding the work down, and a heap of waste to show for it.
What if the wood was already oiled before it reached you?
Carve it anyway, then plan for glue and finish to behave differently, and test both on the back before you trust them.
Some wood is oily with nothing added, and olive is like that, same as teak. I glued an olive blank down with paper and Titebond 2 for the lily box, the sandwich method, and it let go. Usually with basswood it does hold. Olive is different, and the glue is not sticking as nice as it sticks to poplar. The stuff is somewhat oily, and you can feel that right inside of it. Where it stuck out I peeled the glue right off. The gopher wood in the same box held a little better.
That same blank moved on me. A few days after I scrolled it the paper started bubbling, and the glue was not the culprit. This olive wood is not really dry, and it is moving. Furniture and millwork usually leaves the kiln at 6% to 8% moisture, and a board short of that keeps shrinking while you work.
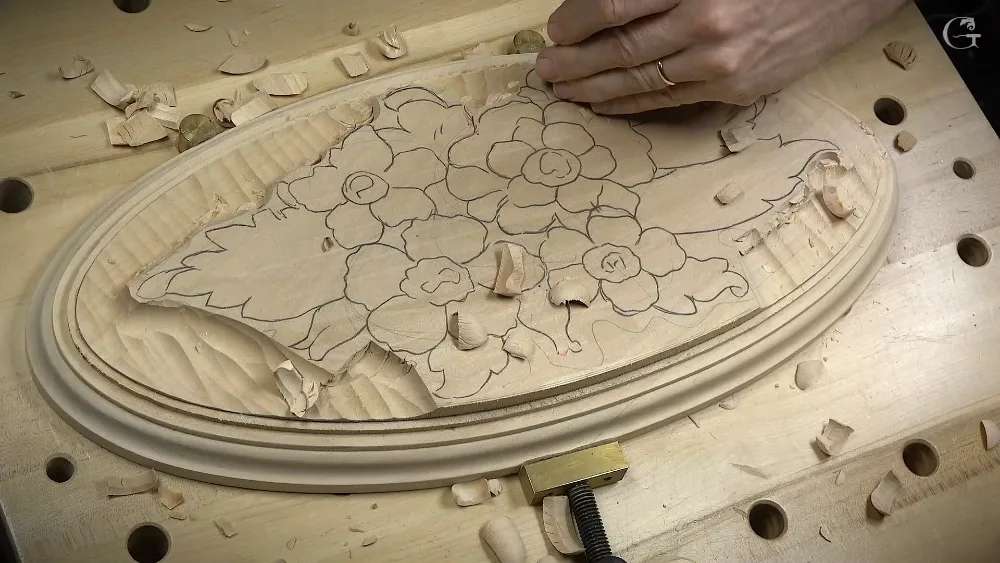
Ripple marks left behind where the waste came away.
A board somebody else oiled hurts you in the same two places. Glue holds worse. Stain and shellac go on uneven.
Should you sand a carving before the finish goes on?
Sanding is allowed, and it is absolutely okay to sand a thing. Everything hangs on the finish and on the application. Gold leaf wants a stabilized surface. A panel headed for paint does not care.

A scraper instead of paper.
The pipe organ shade in my shop is going to New York, all gold leaf, water gilded, mid German Baroque. For water gilding the surface has to be stabilized first. Organ work carries a number I like, roughly 50% wood and 50% holes, which tells you how little material is left holding the rest.
So how did they do it before sandpaper? Shark skin, some say, though not everybody lives close to the ocean. In England they used the reed rush, the weaver reeds, and that is about equal to 400 grit. Grinling Gibbons used reed rush, and the 15th century guys used glass.

Pierced acanthus, still bare.
Mirka makes the mesh I use, and it is a mesh rather than paper. Whatever dust comes off goes right inside the holes of the mesh, so you are not leaving too much abrasive down in the fibers. For gold leaf I finish at 4000 grit, and after scraping I burnish with an offcut of the same species, which brings the surface up shiny on its own. Before any sanding I like a light coat of sanding sealer, because kiln dried stock moves and that movement makes a problem of its own.

A knife over scrolling acanthus.
What grit do you use once the color is on?
Two forty, after trying four hundred and thinking about one eighty. I ride across the ridges and expose bare wood, and that gives the piece a natural look. Not everywhere. Careful, and with the grain.

The block goes on flat, and lightly.
Underneath that surface are avocado, gold, white and raw umber, blended together without losing the color. Losing the color is the thing I watch for. It is easy to overdo, and I really do not want to overdo it.
Sanding a coloured surface also tells you what is dry. Some spots come up darker, and darker means not dry yet, so the leaves were ready while the deep background was not. Once oil goes on, the ridges you exposed throw a really good luster and that area gives the feel that it is real wood.
One thing went wrong on that vase and I am not hiding it. That is what I was afraid of, I said out loud, and then I blended it back. Still okay. But I wish it had not happened. A small scraper on the high spots does the same job with less risk.

Same liquid, two surfaces, two results.
How do you finish a carving once the carving is done?
Color goes down first, then oil, then shellac right on top of the oil, then gloss if the piece asks for it.
People ask me about sandpaper far more than about oil, and both land on the same surface. Here is my answer on sanding a carving.
Step 1, scrape and burnish instead of sanding
Europeans used to grab a piece of glass and scrape the surface with it. I use a carving knife. After scraping you burnish with the same species, and American basswood, pretty much the same as European lime, comes up shiny. Gold leaf needs that shine.

Working an edge back by hand with a short pale stick.
Step 2, put the color down first
A bigger brush moves faster here. I keep a two inch brush on the bench for exactly this and it saves real time on a panel. I also do not mind leaving a little more on inside the stain, since it will penetrate, though it takes longer to dry when I do.
I attack the background first and build a transition toward an almost natural color. Black goes down first, then gold and white on the high spots. Where a stain leaves a white patch it did not penetrate, I go back and reapply.
Then I walk the whole panel once more looking for white spots where the stain never took, checking everywhere carefully rather than trusting the first pass. A finish can go farther than this if you want the piece to be more unusual. I had been practicing a crackle finish on the back of an offcut, which is the only reason that walnut was lying on the bench at all.
Step 3, brush the oil on and let it soak
After the coloring I use oil. Danish oil and tung oil are two options, and either gives me a really beautiful amber. A scraper is too early on fresh oil, because the surface is still a little too wet.
Step 4, shellac straight over the oil
Shellac goes right on top of the oil, and I have never regretted that order.
Step 5, gloss only if the piece needs it
After shellac I might go to a high gloss finish, maybe lacquer, and how many coats depends on where the piece will live. A carving hanging in a dining room needs less armor than a board somebody scrubs. For a kitchen board I use mineral oil from the pharmacy and stop there.

Wet all over now, the towel standing by.
Can you make your own stain instead of buying a can?
Vinegar with iron dumped in it gives a dark brown, and that is the old way to stain. Where it lands decides what it does.

Deep cavities like these are where an ager settles.
Put it on a bare white spot and not much is going to happen. Brush it over wood already carrying the natural stain and it comes up blackish. So it is an ager. I run it into the cavities and around the corners when I want a piece to look old, and the piece I compared it against in the shop was a leftover walnut board, yellowish, near the color the lime wood had reached.

Color first. The oil has not touched this yet.
Some people say that mix is food safe, because it is vinegar and iron, and it should be safe. I stay careful with that word on anything a person eats from. Wax is safe too, and wax carries a different catch. It is not water resistant, so apply wax and that board can never go under water.

Half the panel done, half of it still raw.
If the top is carved, how do you use the board?
You use the other side. Somebody asked me online how you are supposed to work on a board that is carved all over. Well, yeah. The carved face is the decorative side and the flat back is where the food goes.
I did not stain the sides of that one either. You could finish it with the same stain all around, and for a board somebody actually uses I would. Mine was going to be a decorative piece. I made it for the class, for the lesson, so the sides stayed bare and nobody minded.
None of that changes the order of work. The carving happens first on raw wood. Color comes second and the oil goes on last, and the side you eat off gets the same mineral oil as the side you look at.
How many coats of oil does a carved board need?
Three coats, sometimes four, fed in until a nice sheen comes up. That is butcher block mineral oil on a thick basswood board, from the cutting board lesson, and it is the one place I will hand you a number.

The same panel once the oil is in, dark and shining.
I am not going to save on oil. It will not soak all the way in one go, so I feed it three or four times, and I am not really afraid to just pour it on. One side was already sucking all the oil inside while I stood there watching. The board is thick and it has to go deep.
After about 20 minutes, once it has penetrated a lot, I wipe the excess off with a rag. Then it sits about a week until it dries before I can use it. With three or four coats on it you can wipe the board with water and you should not have any problem. Do not try to save on that stuff.

And this is how it gets there, poured not brushed.
That bottle cost me about $8 at a local Home Depot and it is going to last me forever. Lowe's carries it. Menards, if you live a little more north.
The old builders knew beeswax and plain oil, most often boiled linseed. I am from Russia, and in St. Petersburg some buildings are around 300 years old. All the window jambs and the sash and the doors were wood, they applied boiled linseed oil, and the wood looks really fresh even today. Three centuries later. Nothing rotten, no wormholes. The National Park Service and the Forest Products Laboratory both publish free guidance on old wood.
One warning there, and it matters if your piece goes outside. Oils are natural products, so they are food for mildew and outdoors they feed growth. Those Petersburg sashes sat under eaves for generations. A garden carving is a different animal.

Guiding the tool along pale wood on the last passes.
I had two basswood blanks on the bench for the hazelnut blocks, one pinkish and one yellowish, from two different sides of the United States. Same species, different color, and I still have not decided which one I like better. Both dry. A number nine at 20 millimeters went through them like butter. Wood nobody has touched will tell you what it wants to be.
Frequently asked questions
Does oil make wood softer to carve?
Soft is the wrong word for what happens here. Oil settles inside the cell wall, then stays put, so the surface changes without getting easier under the gouge. Dry wood carved with a sharp tool already slices well. If a board fights you, the edge or the grain direction is the real problem.
Can I put oil on a carving I have not finished?
Hold off until the last pass is done. Anything you brush on now sits in the fibers of every surface you still have to carve, and you cannot take it back out. Cover the finished sections with a paper towel and keep working on the next part.
Why does the wood go darker where I hold it?
Oxidation is doing that, not grease. A reaction happens inside the wood when your fingers touch it, and I clean my hands constantly and still see it. Lay a cloth over any area you have finished. Painter's gloves work, though I cannot grab a handle properly in them.
Is mineral oil safe on a kitchen board?
Plain mineral oil from the pharmacy is what I reach for on a board. It costs less than the bottles at the woodworking store, it stays food safe, and you can put on several coats. Let each coat soak in. The oil is where I stop.
What do I brush on a fragile part before carving?
Yellow glue thinned way down with water. Soak the fragile spot, let it dry hard, then carve. The resins bind the fibers so a paper thin edge survives the tool. This is the only thing I ever apply to raw wood, and only on the one area that needs it.
Filed under
- advantages of oiling carving wood
- benefits of oiling wood for carving
- best oil for wood carving
- can oil prevent wood cracks
- effects of oil on carving blocks
- how oil reduces wood splintering
- how to prepare wood for carving
- oil and wood texture for carving
- oil for best wood carving results
- oil impact on finishing wood
- oiling basswood for carving
- oiling techniques for woodcarving
- oil wood for carving smoother
- preparing wood blanks for carving
- recommended oils for hardwood carving
- should I oil wood before carving
- tips for oiling wood for carving
- types of wood for carving
- Understanding Wood for Carving
- wood carving tool maintenance with oil
- wood grain highlighted by oil