

Alexander Grabovetskiy, woodcarver, School of Woodcarving · Published 2020
What does a wood carver mean by "I don't want to see"?
Quick answer: The line about not wanting to see something is one I said at the bench right before I cleaned. In Venice Room 44, part 9, it came over marks on a pipe. In other lessons of mine it came over ridges, tool marks, a wall, flat areas and empty spots.
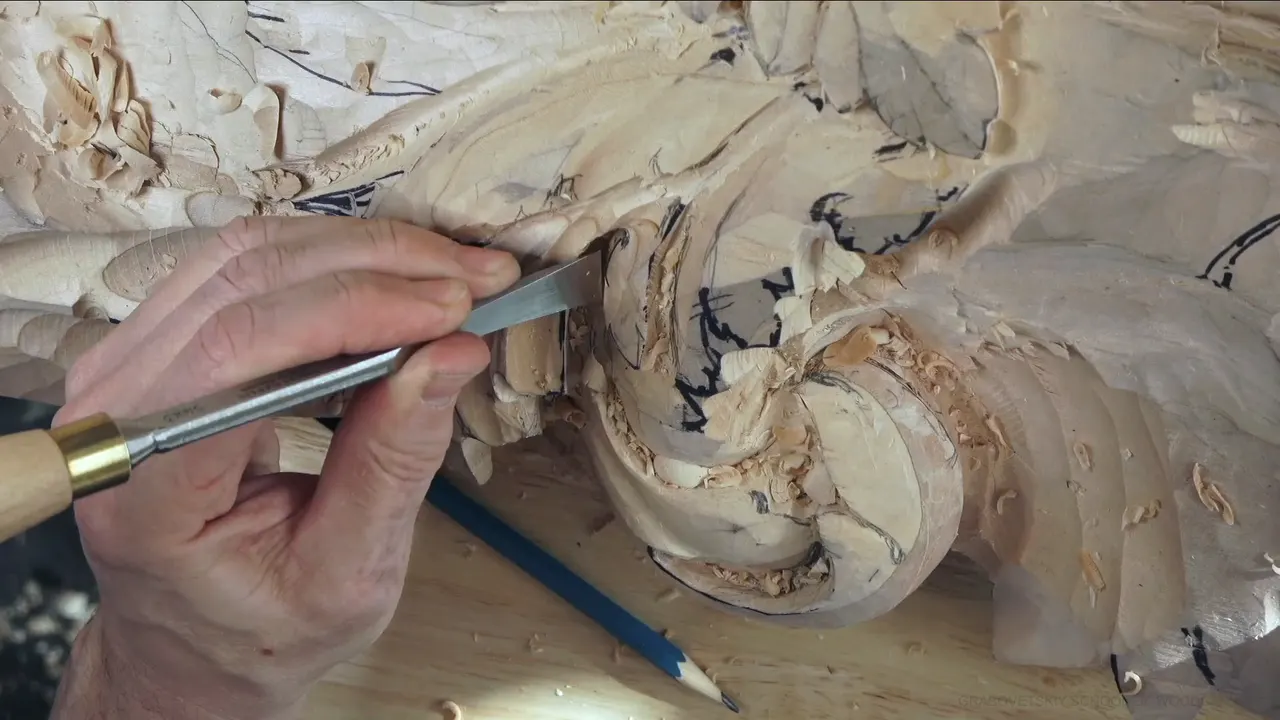

Not wanting to see something is a line I said in part 9, right before I cleaned off the marks. In Venice Room 44, part 9, it came over a pipe. I planned a cleaning pass: "Let me now clean all those marks, which I don't want to see." Below are the tools I picked.
Have you ever looked at a fresh pipe and seen only the marks? Does your eye land on a ridge before it lands on the shape? Then you know the spot I mean. Everything below is something I named out loud at my bench, in wood carving courses from other rooms and panels too, and what came next wherever I told you.
What did I clean off the pipe in part 9?
Marks first, and then a side I called undercut already. Create a cut like that, I said. It's more like undercutting, almost. Well, it's actually not almost, it is undercutting pretty much.
I needed to get to it somehow, with a spoon that didn't have to be an 11. Probably just a number 3 small spoon would do, because that side was already undercut, and I could remove it right there. Inside of it, always a good idea, a number 8 or a number 9, and take the plug out, and create a shadow.

Then came what I don't need. This is a little too big, I said, and my plan was 2 mm (5/64 in), a number 11, to clean that to the cut. That gave me space for the pipe.
A pipe was going all the way, which was going to be a little challenging to get around here, but it's okay. It had to hold together with the overall movement, otherwise it wouldn't make sense. A concave in there was supposed to run the whole way.
Of course, the best tool for the job would be a number 11, I said. It had to go from this, and I could bring out the beginning of the pipe a little more. Closer to one spot, that tool would not fit, but nothing stopped me from doing at least the beginning.

Next I'd use a much smaller tool. Oh, actually, I need to undercut pretty much right away, otherwise I won't be able to do that pipe. The inside didn't have to be too deep, just a little bit.
I had that side, and then, let's take care of this side. And here you go. I've got a pronounced pipe.

Of course it had to be blended and cleaned. It's okay. It's not that complicated to blend it all together, just take out those ridges, and you should be able to see the development. For some roundness on the pipe I used an upside-down number 3.
Coming to the eye, I think I've got one of the mistakes: I got this edge too weak. That's not good, and now I need to deal with that. A few lines later, I think I took care of it, and now it's not bad. Get a little more pronounced eye.

Next, a number 8 gouge for the plug cut, just like that. Then let me clean all that mess with a smaller tool, and I could actually remove even deeper. Don't pay attention to the rest of the mess. What I wanted next was to get this part below that part.
Which cuts came right before and after part 9?
Part 8 begins on a pipe I called really excellent, and part 10 begins with too many divisions. The pipe in part 8 still needed blending, because I did not want ridges as of now. Pretty much just the shaving is what I was doing. Then I touched my beautiful concave with the edge. It's better not to do that, but I can always clean it.

Another pipe came up, and logically it was supposed to go that direction. The movement had to continue. That meant excavating underneath and going below it. The only tool I could fit was a number 11, used just on the side. A 4 mm (5/32 in) number 11 looked slightly too big, and I would need 3 mm (about 0.12 in) or even 2 mm (5/64 in).
Later in part 8 came an edge to clean a little. I would undercut it later, but for now I needed to make sure I was looking at the right movement. Part 10 opens on the divisions. There are too many, which is a little confusing, but I really don't need to see a big chunk at the same level.
A lot better movement was the goal there, and I would take a bigger number 11 to get it. That one was a little too big, and I needed to switch to a smaller one, like half an inch (12.7 mm), to continue the excavation underneath. One spot in that part needed to be much deeper, because it would be visible from the bottom.

Which ridges and sharp lines go first?
The sharp ones, in the lessons below. In workshop 82, part 2, I needed to get rid of ridges, this ridge and that ridge. Sharp ridges had to become more like a transition to the convex, and a flatter number 3 did it, about 10 mm (25/64 in).
Part 10 of that workshop had a pipe too. I probably had to roll it and make a chamfer cut or a fillet cut, because it's a part of a pipe. One side, then the same thing on the other side. The carbon paper mark had to go as well, and I'd just scrape at that.

Workshop 74, part 3, asked for a smooth transition from inside out. That ridge didn't look too appealing, and it didn't look too good. A normal tool could do it, but I do have back bends, and in this case a back bend would help me a lot. I'd just knock that ridge down, and go exactly the same all along.
Part 1 of that workshop was about gradual. It really has to be just gradual. I said yes, three-dimensional, but gradual, and extreme lines were out. A little later, it looked like I'd achieved the result I wanted to see, and a really nice movement was going on.

On my furniture panel, lesson 19, part 5, I told you not to overdo it, because it's got to be organic. I wanted neither sharp lines nor a big valley or big dip. A ridge in part 7 was too big for my taste, so I would blend it nicely.
Also in part 7, one of my cuts looked almost like a T-stop. That is not good, so I would make it look like it goes in to the end. Lesson 21 has me saying maybe I just have to turn this way inward a little nicer, because I really don't want a T stop.

When do tool marks stay on the wood?
Until the later cleanup, going by two boards. Workshop 68, part 10, has a question for you, see why I did not go all the way to the first layer? I left approximately an eighth of an inch (about 3 mm) on the bottom, because later on I'm going to clean it up.
Going too deep would leave some tool marks on a layer, and tool marks were not what I was after. After that I fixed the point. Not like it's wrong to have tool marks, but not everywhere. One piece probably had to extend a little bit, so that this side and that side were equal.
The same care ran through lesson 16 of the furniture panel. Another deep pass was out, just because I'd said before it's not done yet, and we're still going to undercut some of the stuff, and marks left on the background weren't wanted. That meant being really careful how much material I was taking out.

Big marks were not wanted. In workshop 48, part 5, I'd chamfer it slightly, slightly, slightly, slightly, and go in completely. In Hashemi lesson 14 the mark was a tear. Keep an eye on what the grain does, I said, and attack that spot from the opposite side.
Workshop 44, part 1, had its own mess. I'd lower down one side a little bit, actually not a little bit, and unfortunately you don't see that from the side. After that I wanted to take care of some of what I don't need to see right there, and take out all that mess.

How do I deal with an empty spot or a wall?
I give the spot a job, or I take the wall down. Furniture panel lesson 14 had a spot where I liked the overall movement, but I did not like the development right there, and I really didn't want empty space. Probably we're going to develop it somehow like this, I said, and then, let me think.
Workshop 46, part 3, was a lighter touch. I wasn't going to do too much right then, because I still had to fill one spot later on somehow. You don't want just an empty spot there. A movement of some sort needed to go in. The goal in workshop 70, part 5, was to use that area, and I really didn't want an empty spot. I still wanted to excavate and create deep shadow, and I needed some kind of shadow there. A marker, probably, would indicate my movements.

A big opening came up in workshop 73, part 11. I wanted that eye, but not that big opening. I didn't know yet whether to do that, or whether I could bring the eye right across this way, and that way, and create extra separation right there. Maybe that's what I have to do.
The wall sat in part 6 of the same workshop. Now it doesn't look too good, and I named that section the wall. Trying to remove it was the plan, and a little later I thought it looked much better.

Why do I ask for movement on a flat area?
A flat area still has to have movement when you look from the side, as I said on my modern acanthus. A part had been straight and flat, and I was not too happy about that, so I wanted a low, a high, and then a lower part again, even if it ends up as a flipping motion. Like I said, there are no straight lines when you look from any perspective.
A smaller number 9 was my plan, three eighths of an inch (10 mm), to create that flipping motion. In lesson 19 of my furniture panel I could go down right there, but a straight line from a side view was out. That would be a really nice undercutting effect, with really good shadow.

The flat surface in lesson 19 was another case. It's got to be roundsy. Overall roundsy. You could leave it like that, but I wanted to make sure it rounds inside, underneath and undercuts. The same tool could probably give a little more roundness on the inside in workshop 59, part 8, because that area was too flat, and I was really after that shadow effect.
Can the same line turn around on me?
A line can, and it did for me in lesson 6 of my floral and molding course. I started to say that I wanted those facets gone, and then I stopped myself. I shouldn't say that. I like those facets, but not as much, so I need to be mindful how many facets I'm leaving.
That one was going to be covered with paint, so it was not a big deal for me. Still, if it's too sharp ridges, it's just a little destructive, I'd say. Blending it was the plan, with more time a little later for cleaning all that stuff.

The weak edge came back in workshop 41, part 12. Just go down, but not too much. I was creating some shadow, but if I went too deep, the edge would become really weak, and I wanted to avoid that. Later on I could go around and undercut much deeper and create much more separation, but for now it was fine.
Here they are side by side, each with what I named and what came next.
| Lesson | What I named at the bench | What followed |
|---|---|---|
| Part 9 | Marks along a pipe that I called undercut already | Spoon, plug cut, smaller tool |
| Room 82 | Sharp ridges where a transition to the convex was needed | A flatter number 3 |
| Workshop 74 | A ridge between the inside and the outside | A back bend, to knock it down |
| Lesson 68 | Tool marks left on a layer, if I went too deep | Left 1/8 in (3 mm) for the cleanup |
| Panel 19 | A cut that looked almost like a T-stop | Make it go in to the end |
| Room 73 | A wall, and a big opening beside an eye | Try to remove the wall |
| Lesson 70 | An empty spot that I still could excavate | Deep shadow, and a marker |
| Modern acanthus 5 | A part that was straight and flat, seen sideways | A smaller number 9 |
Where can you watch the part?
In the workshop 44 lesson, with all twelve parts, inside the Venice Room Part 4 course, which holds workshops 38 to 49 of the same relief board. Its neighbors are part 8 and part 10, and workshop 43 comes right before it, with workshop 45 right after.

Is there a spot on your board right now that looks wrong from another angle? Then bring that board along, and carve it with me in the room. The tuition opens every workshop, and you can start here.
How it's done
- Name the mark out loud. In part 9 I said it as my plan: let me now clean all those marks.
- Pick the tool that fits. A small spoon, probably a number 3, could do a side that is already undercut, I said, and I planned a 2 mm (about 0.08 in) number 11 for the cleanup.
- Undercut right away where the pipe needs it. Otherwise, I said, I could not do that pipe, and the inside needed only a little bit.
- Blend and take out the ridges. Blending it all together was not that complicated, I said, and I used an upside-down number 3 for the roundness.
- Deal with a weak edge. I named the edge as one of the mistakes and said I needed to deal with it. Then I said it was not bad.
Frequently asked questions
Which gouge cleans a side that is already undercut?
A small spoon, in part 9. The spoon didn't need to be an 11, I said, and probably just a number 3 would do, because that side was already undercut. Inside of it, I said, always a good idea, a number 8 or a number 9.
How deep does the inside of a pipe go?
On the part 9 pipe, the inside only needed a little bit, and I needed to undercut pretty much right away. A spot in part 10 got much more. I needed to make it much deeper, I said, because it would be visible from the bottom.
Is it wrong to leave tool marks in a carving?
I left approximately an eighth of an inch (about 3 mm) on the bottom in workshop 68, because going too deep would leave tool marks on the layer below, and later on I would clean it up. It's not like it's wrong to have tool marks, I said, but not everywhere.
What to carve next