

Alexander Grabovetskiy, woodcarver, School of Woodcarving · Published 2020
What does "not too much" mean when a wood carver says it?
Quick answer: "Not too much" is what I say when a cut, depth or push should go a little and then stop. In Venice Room 44, part 6, I planned a little inward cut toward a pipe and held it back, since I did not want to undercut beneath that pipe.
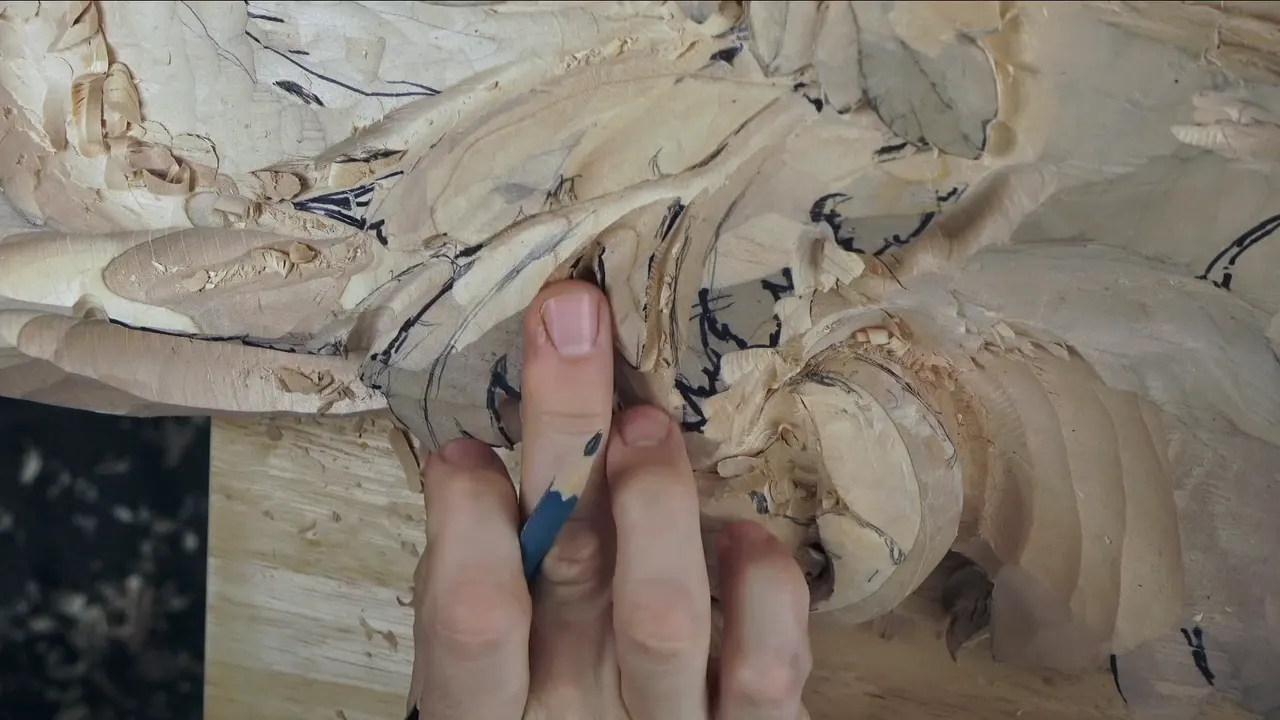

Too much is the line I stop short of when a cut, color or push gets close to something I want to keep. In Venice Room 44, part 6, that something was a pipe. I planned a small cut in toward it and said I did not want an undercut beneath that pipe.
Have you ever had a gouge in the wood and felt the next push could spoil the piece beside it? Did you wonder where to stop? This part of workshop 44 is short. So beside it I put the same words from other wood carving lessons of mine, with my reason each time, and I name each lesson as I go.
What happened at the pipe in part 6?

The part opens on a maybe. I really want to raise one part, I say, and then, "Maybe yes, maybe no. Let me think." By 00:22 I have an answer. I probably want to raise it, but I need to clean it first.
Next comes what I'm guarding. "I don't want to lose this ridge," I say, nor do I want to take it more down, because then I lose the overall feel of dimension. So keeping it gradual, "but still high," is really important to me.
At 01:02 the plan is probably a big number 11, and at 01:28 I say I'm using 20 millimeters (about 0.8 in). "Oops, that's not good," comes next, and then, "Oh, that's actually okay, but I should control better."

What I'm after, I say, is to raise this ridge. Maybe that is a little too big, I add. Then I report that the ridge is raised, even if it's not divided yet. The dividing is still a plan at that point, and I say I will.
Next I need to show that this piece belongs to the ridge running all the way, show the eye, and show that one movement goes underneath another. Twice I ask myself what else I have to do. The answer is a plan to blend a little this way, maybe with the number three.

Just before the four minute mark I say this part can go a little lower, and I want to create another eye. My reason comes in the same breath. It will give me more movement, "more interesting movement, I should say."
For that eye I name a bigger number 11, 15 millimeters, "about five-eighths of an inch." A second eye means I have to make the rotation with my tool somehow, go around, and change the direction of the movement. That, I say, is already giving me what I wanted.

Then comes the line this page is about. Maybe I can exaggerate the movement a little more, I say, and I plan a move to the right and a little inward cut. At 05:36 I hold that cut back from the pipe, and the reason follows at once: "I don't want to undercut underneath of that pipe." By 05:51 I think it has given me enough movement.

Because I do have that pipe, I need to lower one part down. "But it has to be, again, gradual." Maybe a little more down, I add. Then, at 06:49, I've got the effect of the raised part, "which I'm happy with." The last lines are a plan to blend everything together, and then this: "I don't need those ridges."
Why hold the cut back from the pipe?
My reason on camera is short. I was not after an undercut under that pipe. What I said next was the trade, because with the pipe there, one part had to come down, and gradually.
Undercutting is the subject of the Venice Room course page for workshops 38 to 49, where I say I am one of the ones who undercuts a lot. On a relief like this one that hollow is what throws a shadow. At this one spot, though, my choice was a small inward cut and a gradual lowering instead.
Do the parts on either side say the same thing?

Part 7 has a cousin of it. Cleaning around one area, I say too much in there is not what I want, so I'm going to take out some of what I don't need, "but also without damaging this part." Depth comes in the line after. It's important not to dig too deep.
Later in part 7 I plan a number 11, maybe half an inch (about 13 mm), since I want a little more on that pipe. "Not much, but a little more." Part 5 holds back as well. Before I go too extreme I still need some material, since that part still has to develop, and I got to stop somewhere.
What is the limit protecting when a line sits close?

The piece below was my worry in workshop 33. I thought a number seven would give better definition than a six, like 5/8 of an inch, about 16 millimeters, and I went in with it. But only so far, because damage to the lower piece was not my aim. "I need to leave some space for future."

The same idea turns up at a deeper spot in workshop 27. I'm going to excavate there, but some of the material must stay, and I want one movement, one line, left alone. Otherwise the transition to the ceiling would not be as nice. "So that is probably the deepest I can go right here."

Numbers come into it in workshop 51. My plan there was to go approximately 3 millimeters (about 1/8 in) away from one side and down approximately a quarter inch (about 6 mm) from the ridge. I also had a line I meant to keep, because I still wanted that detail, and that is why I was careful. Maybe a quarter inch is a little too much, I say, "but we'll see." A moment later comes my verdict: "Which is actually okay."

Back in workshop 24 it comes twice in a few seconds. The spot is not visible from the bottom, and it's never going to be, but I have to be careful. In this area I cannot do too much, I say, while right there I can do a little more. Then the same warning comes back for the next spot.
Why stop when more work is still coming?

Workshop 97 is plain. I take a number seven, 14 millimeters, "half an inch," to clean whatever is left there, a little bit only, because I still have to work my area a little later.

A clock goes on it in workshop 30. One side gets a little for now, no more yet, "until I'm happy with the final detail." The bigger picture is the reason in workshop 70. I can outline that part right away, I say, but just partly, because it still has to make sense in the overall movement.

The Roman Acanthus course, lesson 13, shows the same thing as a plan. A good next step would be to take out back material under the leaf, so the sections go somewhat underneath, a little bit. I could use the same gouge I was working with, 3/32 of an inch (about 2.4 mm).
Can a shape get too much for the movement?

In workshop 28 I want another concave, but only a little bit of one, "for just the sake of the movement, where you can see the movement." Then workshop 49, at the end of this same course, has me going for even more concave movement. More, I say, but held back, and after that I need to take a ridge out.

The Furniture Panel course puts a figure on it. In lesson 33 the middle part could be slightly raised, only slightly, with a somewhat convex feel but not a huge convex. Closer to the inner paddles the depth stays the same, "about three millimeters. The most, probably four." That is about 1/8 in, or 5/32 in at the most.

Grape Onlay 11 has it at the connection points under the grapes. Underneath, you've got to connect to other spots. Also only a little, I add, so the composition is not overwhelmed. "So be wise."
What if there is plenty of wood to take?

The case where I could take a lot is workshop 50. One part will go underneath and deeper until it just hits the bottom, and the shell part will be the highest spot. So for me it's safe to remove a lot more. I cap it in the same breath and warn myself about getting too excited. The next tool I name is a number seven, one inch (25 mm).

In Furniture Panel 18 I say let me remove some of the material right there, since that area is a little too much for the router plane to handle. Too aggressive is what I'm avoiding in this area for now, and it's better to be a little more careful. I'll use number 11 again, I say, and I want to make sure I'm not digging too deep.
A habit is what I call it in workshop 21. I could chop in a little with a number one for the beginning, I say, held back because I avoid digging into the background. "Maybe it's not a big deal, but just a good habit." The plan after that is a number 11 to clean it out. Shaping one side in workshop 18, I stop myself, because I want to keep it. "But little exaggeration."
What if there is not much wood left?
The same words can also count what is left. Carving the lily flower in Lily Box 10, I need to check how much material I've got left. Not a lot, it looks like, "but I'm still okay." The reason comes next. Later on the detail goes on the inside, the middle lines of the lily, and I want to make sure I have plenty of material for it.
Hashemi Flowers 39 has a thin spot too. The thickness left there is small, but it looks like I'm okay, so I reach for a small gouge, like 1/32 of an inch (about 0.8 mm), and undercut. Can you see that shadow? My number seven there is marked six millimeters (about 1/4 in), yet I say it is pretty much five (about 3/16 in).
Venice Room 74 makes it a depth check. I need to be really mindful how deep I'm going, and there's little material left. My words are "I don't think I want to go deeper." A moment later I plan to exaggerate a flower and create a lot more shadows, though I still need some space for my second layer.
Does it work with a knife and a brush too?

Pressure counts too, in my beginner course. On a small volute for a kitchen cutting board in workshop 12, I go almost straight down with a slight bevel, only slight. Then I tell you to be really careful not to press too much, because you are really close to the edge. Too much pressure, and you can destroy it.

In the Plate with Butterflies course, lesson 11, the tool is a knife. The plan is to set it inside a concave, slightly, and make the same cut at the same angle, not as deep, about a millimeter or a millimeter and a half (about 1/25 to 1/16 in). "Let's do it," I say.

Color has the same limit. In Lily Box 13 a softer spot needs some more water, because I want it gradual, and I add only a bit. The next part has me wanting one spot darker, but held back, because it's already a lighter wood. Too dark around it would bring that lightness out even more, "and that's not what I'm after."

Even a pencil gets a limit. Redrawing the movements on the second layer of the Lily Box, lesson 7, I go approximately, not exactly how I drew it, though not far off either. I still have to be accurate to the original design, and there's nothing wrong with some variations, I add.
Where did I say it, and why?
Nine of those moments sit side by side here, each with its reason.
| Lesson | Limit | Reason |
|---|---|---|
| This part | A small cut in beside the pipe | Keep the pipe |
| Room 33 | Going in with a number seven gouge | Spare the lower piece |
| Room 27 | Excavating close to a line I wanted | Keep some material |
| Venice 51 | A quarter inch down below the ridge | Keep the detail |
| Venice 97 | Cleaning what was left, a little only | Work comes later |
| Workshop 70 | Outlining a shell right away, but partly | The overall movement |
| Panel 18 | One area a bit hard for the router plane | Stay careful |
| Board 12 | A slight bevel near the edge | Pressure can destroy |
| Lily 13 | Darker color on a lighter wood | Lightness shows more |
Every row pairs a limit with what I said about it on camera, in my own words at the bench.
How can you use it at your own bench?
Start with the beginner lesson, since that one I said straight to you. Near an edge, watch the pressure. The other lines are me at my own bench. In part 6 I had a pipe to keep; in workshop 33, a lower piece; in workshop 51, a detail I still wanted.
The lesson 44 page covers the whole workshop, and the course page holds the rest of this acanthus panel. For all my lessons in one place, start here. One small line closes part 6, spoken just after the blending plan. "I don't need those ridges."
How it's done
- Find the part to keep. In part 6 of workshop 44 the part next to my cut was a pipe.
- Plan a small cut. My plan was a move to the right and a small cut inward, kept short of that pipe because I wanted no undercut beneath it.
- Bring the slope down. With the pipe there, one part had to come down, and the slope had to stay gradual.
- Check the effect. The effect of the raised part was there by 06:49, and I was happy with it.
- Blend it all. Blending everything together was the plan at the end, since those ridges were no longer needed.
Frequently asked questions
What was I keeping safe in part 6 of workshop 44?
A pipe. I planned a small cut to the right and kept it short of the pipe, because an undercut beneath it was not my aim. Because the pipe was there, I needed to lower one part, gradually, and by the end of the video the raised part looked the way I wanted.
Is the limit only about depth?
Depth is one case of many. On the Lily Box I held back water to keep it gradual, and color because the wood was already lighter, and a redrawn pencil line stayed close to the original design. The beginner lessons put the limit on pressure, a slight bevel near an edge.
Why stop when there is plenty of wood left?
In workshop 50 I had wood to spare, since the shell would be the highest spot, and I said it was safe to remove a lot more. In the same breath I said I didn't want to get too excited. Furniture Panel 18 had me staying careful in one area for now, digging only so deep.
What to carve next