

Alexander Grabovetskiy, woodcarver, School of Woodcarving · Published 2020
How do you give a wood carving better movement?
Quick answer: In Venice Room 44, part 10, I said I did not need to see a big chunk at the same level, so I needed to improve the movement. My plan was a bigger number 11, then a smaller one for the dig underneath, and a secondary eye, and I said the leaf must be checked in the three-dimensional world.
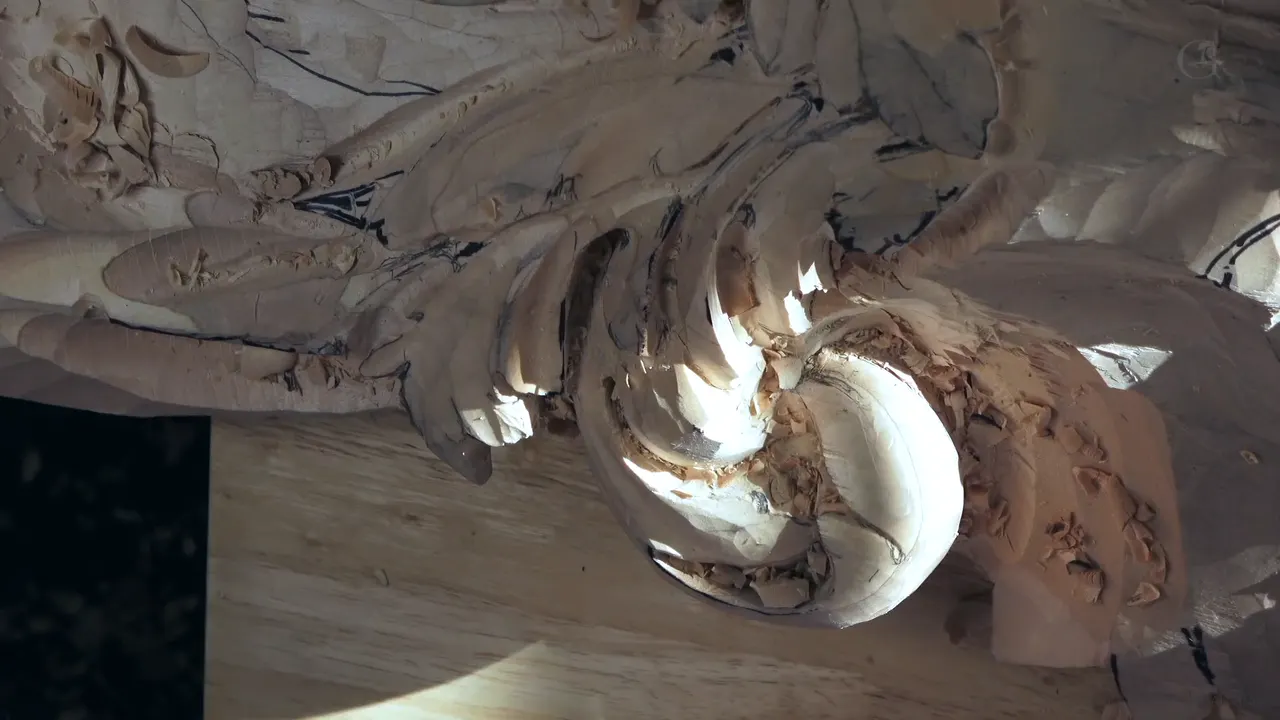

Better movement in wood carving is what I ask for when I see a big chunk at the same level. One acanthus in Venice Room 44, part 10, gave me the line: I need to make a lot better movement to this one.
Have you ever looked at a carving and felt one part just sat there? Did you know the next tool, or only that something was off? This page follows what I did in that part, and then what I said when the same wish came up in other lessons, so you can see which tool I reached for each time.
Why did this acanthus need better movement?
Early in the part I told you I need to make sure I'm doing that the right way, because I know there are too many divisions, which is a little confusing.
And to do that, I said, again I'm going to take a bigger number 11, then start moving like that.

Underneath came next. Yes, I will need to go underneath, I said, and that way the whole movement is going to blend much better if this is going to go underneath.
That one was a little too big, and I needed to switch to a smaller one, smaller like half an inch (12.7 mm), and continue the excavation underneath. Careful not to slip, I said, and I meant the head of the acanthus.

Where do you put a second eye?
One of the eyes was right there, and it was one of the divisions. Another part had to belong to the same movement, though. So which means I really have to create some kind of secondary eye, I said, and go like that on the inside.
That one had to go much deeper, because it's going to be visible from the bottom. So that is a good spot. Really good spot to get really good and nice movement in.

A neighbor part came next. I could also work on that part a little better, I said, and let me think how I can do that. I can actually lower this one underneath of that movement. Kind of an interesting spot, I know. It needed blending too.
How do you check movement in three dimensions?
By stopping to look. It's gradually moving this way, I said, but I need to check how it looks in the three-dimensional world. This line has to be nice and at tangent, and it goes from up, down.
To take care of it, ride on top, I said, go like that and rotate this way.

From the side, it looks actually really good. Let me clean a little bit, I said, or a little more than a little bit. One chunk needed it too, since right then it didn't look too good.
The sunlight came into the part as well. Look how beautiful sunshine today, I said, shining right on my face. Then back to the carving. That was going to be a subdivision, and I do not want to lose it. It would go that way, and that is the middle line, my future middle line, which I do not want to lose. Again, it's not right. I need to move that middle line this way, otherwise it's not going to make sense.

In part 9 of the same workshop I said I love the movement so far, and I wanted to get one part below another part.
Which gouge gives better movement?
The one that fits the spot. In my lessons it was a number five in one, a number 11 in another, and a number three in a third. The table puts eight of my lines side by side, each close to the words I used.
| Lesson | My words | Tool |
|---|---|---|
| Venice 44.10 | A lot better movement to this one | A larger number 11 |
| Room 38.6 | Some shape right away, plus better movement | Number five |
| Workshop 39.5 | Excavate a little deeper for better movement | A 7 mm number 11 |
| Lesson 42.11 | For better movement, a concave and a raised ridge | Number eight |
| Venice 72.9 | Already better movement, with whatever I don't need removed | Number 11, 10 mm |
| Workshop 31.6 | Pre-establish better movement here, in a hidden spot | Probably number seven |
| Lily Box 3.4 | A different gouge, maybe number nine, for better movement | Number nine, 5 mm |
| Panel 14.5 | Going from underneath, for better movement | From underneath |
The rest of this page goes through those lessons, one at a time, with the words I said and the tool I named.

Venice Room 38 had the same wish in part 6. I liked how a spot developed. Beautiful, I said. Of course, I needed to probably give it some shape right away, and a little better movement, like number five. I also wanted to clean it overall, because it didn't look too good yet. That number five needed sharpening, since it leaves some trail.
Seven millimeters (about 9/32 in) and a number 11 came up in workshop 39, part 5. I have to excavate inside a little deeper, I said, because I need to create even better movement for that section. Let me see if this is too big. I planned to excavate a little deeper between, without losing one detail that will be part of that movement.
The sides of that spot got nothing yet, and I gave the reason. I still have to work around, and there is no reason to do extra work if I don't have to.

A part went up in workshop 42, part 11, and I said it does look good. It just repeats that part, and this is going up a little bit too, so maybe it makes sense. A concave right there is what I have to do, and raise up a little bit this ridge. That should mean a little better movement.
The concave looked a little too small. That's number seven, I said, and I think I should give a little bigger than that, number eight. Now this one is a little raised, and that is a good thing. A convex was possible there, but concave probably looks better.

A plain line sits in part 12 of workshop 45: not fix, but make it better. Movement, I'm talking about. Much better. Number three, that's what I'm using. It was like a ball going like this and ending up right there.
After that I liked one slope better, and the next shape also needed to repeat that slope and go in more. Not the final shape yet, I said. We're just establishing that shape. I didn't want to repeat the same thing I did on the other sides, and I still wanted those movements a little different.

Holding back shows in Venice Room 54, part 3. I still sometimes can hit the edge and break it, so the final detail would come a little later. Now I could give a better shape to the element sticking from underneath. Much better movement, that's what I need, and I was cleaning it a little with my skew.
Then I showed the composition: two deep spots, a deep spot on another side, and more if you go farther. If I wouldn't excavate too deep in those two areas, it would look different. It wouldn't look developed. I'm always trying to get about the same depth.

In Venice Room 62, part 12, I wanted to preserve the wall of one element, otherwise it will be hard to clean. So the plan was to get the big number seven and create some better movement right there, so I get the right outline.
Without pushing too hard, I said. It's always better to clean that with the number 11, and always, always better to be more careful. Extra careful, I should say.
In part 9 of workshop 65 I said originally I had two pieces kind of tiny, I mean how wide they are. Maybe I can move this section all the way like this, I said. Yes, it's three-dimensional movement, but I think it gives me a lot better one overall.
Not move, but expand. A little more expanded, so the overall movement is more gradual. Then the eye. This has to be a part of that movement, which means I need to logically place an eye somewhere, and that is going to give me a really nice pipe going all the way, and a really, really good movement.

A number 11 of three-eighths of an inch, 10 millimeters, was the plan in Venice Room 72, part 9: remove whatever I don't need. And see, the movement is already much better. Even more extreme was possible, I said, but what I'm after is a really pronounced convex.
A curl had to be decided in part 11 of workshop 75. The decision was how to curl this one. One option, I said: bring my point to this point, and that gives better movement, I would say. An S curve would follow this way, with a separation, and this part going under like that.
Yes, it does make more sense now. Rolling it like that could give even more nicer movement, and I still need to undercut a little bit, to create some space for the shadow.

A part you may not see can still need it. The words in part 6 of workshop 31 are: it has to make sense, even if you don't see it, because that will be visible from the bottom. So I need number seven probably, and pre-establish better movement right there. Good enough for now, at least.
A slope in the opposite direction followed, and a double-check, because I don't want to create something which will not look nice.
Maybe one extra movement on the inside was my plan in part 12 of workshop 29: an extra subdivision, an extra eye. I will need to move my pipe a little bit, but that is absolutely okay. I think the movement will be much better.
Leaving it like that long was possible, I said, but I don't think it gives the right detail. It doesn't give the right feel. If it doesn't feel right for me, probably for somebody else it will be the same thing.

I've got about a quarter inch (6.4 mm) deeper, I said in part 10 of Venice Room 21, so I think it's plenty of depth. Later on, I can undercut underneath with the number 11, which gives even better movement.
Now a smaller tool, probably number eight and four millimeters (5/32 in), for that letter S shape, which gives the feel like it moves and curls a little on the inside. The outside, maybe number five, eight millimeters (5/16 in).
One line in part 1 of workshop 69 puts the choice of tool plainly: use whatever tool fits and establish better movement. Here it was just number three. A little deeper was needed in some of the spots, I said. For the clean, maybe an upside-down number three. I hit a little bit of that side, but it's okay. For me, a cleaner convex side matters more.
I said I am using number 11, 5 mm (3/16 in), in Venice Room 95. Then a change: that is actually going to give me a much better movement, moving this way, so that actually makes more sense. After that, a bigger one, and I will use 12 mm (about 1/2 in).

Does better movement work in other carvings?
The words show up in my other courses too.
On the furniture panel, in lesson 14, part 5, it's going to go from underneath, and the movement gets better, much better. I also wanted to hit this curvature with some type of movement, and maybe create a much bigger acanthus right there. I think it will look much better with development in this area. Next I said I don't quite like it.

In the lily box course, first layer lesson 3, part 4, I said it won't be true flow right there, but as much as I can, I'll do it. Maybe a different gouge. Maybe number nine, trying to fit right there, to create better movement. That was number nine, 5 mm (3/16 in), and you can see I already rounded this section.
A different area came next, with number eight, carefully, because I am working on a glue line. That is why I have to be really careful how I approach this operation. I controlled the tool with my fingers. This finger is just like a limiter, I said, and I'm just trying to stop myself.

Where does the work in part 10 start?
The big chunk came first, then the first tool and a smaller one for the dig underneath, and a second eye followed where the part belonged to the movement.
Workshop 44 holds this part, inside the Venice Room Part 4 course, along with the rest of the leaf. The workshop 44 page lists its parts. Look at your own carving for one chunk that sits at one level, the way I did in part 10.
How it's done
- Find the chunk. Find the big chunk, the thing I said I don't need to see.
- Start with a big tool. Take the first tool bigger, move across the part, then plan to go underneath so the whole movement can blend.
- Switch to a smaller tool. When the first tool is a little too big, take a smaller one, like half an inch (12.7 mm), and continue the excavation underneath.
- Make a secondary eye. Where a part has to belong to the movement, plan a secondary eye and dig it much deeper if it will show from below.
- Check three dimensions. Check how the leaf looks in the three-dimensional world, and look at it from the side.
- Protect the middle line. Keep the future middle line, and move it when it's not right.
Frequently asked questions
Which gouge do you take for better movement?
It depended on the spot. Venice Room 38 had number five, workshop 39 a seven millimeter number 11, workshop 45 number three. Workshop 69 put it in one line: use whatever tool fits and establish better movement.
Do you have to see a part for it to get movement?
In workshop 31 I said it has to make sense even when you can't see it. I planned number seven to set up the movement there. The secondary eye in part 10 was to go much deeper, since it would show from below.
Why dig underneath to get movement?
Part 10 had the line that the whole movement would blend much better that way, once the part goes underneath. Room 21 had the undercut with a number 11 planned for later, and I said it would help the movement.
What to carve next