

Alexander Grabovetskiy, woodcarver, School of Woodcarving · Published 2020
What does "too far" mean when a wood carver says it?
Quick answer: Too far is a call that a line, pass or part has gone beyond its right place. In Venice Room part 44.4 I name one separation and plan a small shift for it. Other lessons use the same words for depth, distance and reach.
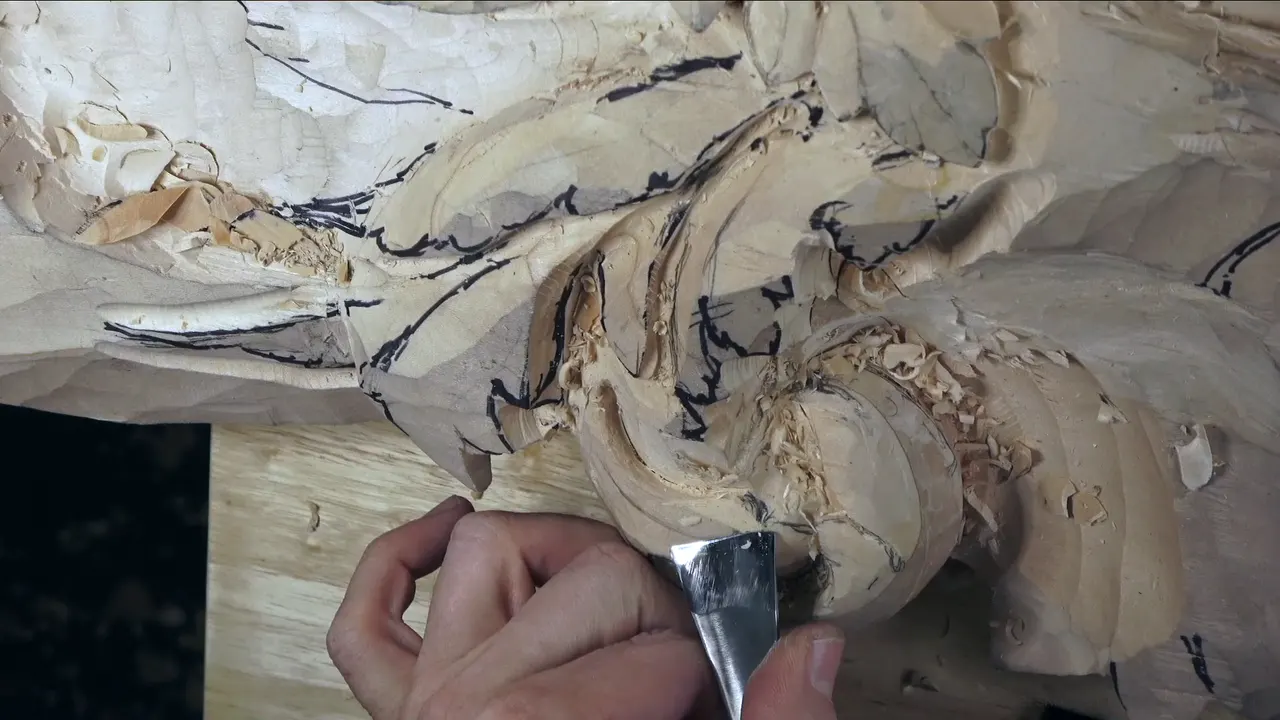

Too far is my phrase for any line, pass or part that sits past the spot where the carving wants it. In Venice Room 44, part 4, I name one separation and say I plan to move it a little bit. Other lessons of mine use the same two words for eyes, volutes, depth and reach.
Ever looked at a line on your carving and felt it sat a hair too far over? Did your gouge hang in the air, with no idea which way to move? This video is short. So beside it I put what I say about the words in other wood carving lessons of mine, and I name each lesson as I go.
What does too far mean in this part?
The part opens on a plan. "I need to move this one a little farther this way." Next I say what I'm talking about, the separation. The next line names the trouble: "I've got a little too far this way."

My plan for it is short. I'll shift it slightly toward this side, and I call that more logical, "for me, at least." The payoff is room to work. That way, I can create a separation on the inside with no problem.
Depth comes next. At 01:07 I say a little deeper is what I'm going to do right there. Where it will be seen is my reason. It will be visible from the bottom, so I need to see roundness in that area. Number five is the tool I name for it, as a plan. After a quiet stretch the captions give me this at 02:09: "Okay, that is good."

At 02:29 I name the tool for the next job, number 11 at 7 millimeters (9/32 in), and say I'll outline a little better. One side I leave alone for now. I won't do too much to it yet. I might do some development on that side, and I leave the call open.

After that I say I'll get some marks down, just to indicate my separations or divisions. The shape needs roundness, I say, and only one part of it turns down, a little bit but not much. For that I'm probably going to use a bigger number 11, 20 millimeters, "three-quarter of an inch."

Near the end I limit the movement itself. It has to be more gradual, and I say so more than once. I also name a plan, excavating a little deeper underneath, which would give me much more of a three-dimensional look. An eye is going to come too, I say, and something is going to go in one direction.

Does the phrase show up in the parts next to this one?
Part 3 has a cousin of it. I talk about bringing a separation in, and I'm really not too happy about how far that sticks out. "But it's okay. Not a big deal." Part 5 gives a stop sign instead. Before I go too extreme, I still need some material, because the part still has to develop. "I got to stop somewhere."
Further on in part 3 I step down a size, to a number 11 at 2 millimeters (5/64 in), because "this tool is little too big now." In part 5 I left about 20 millimeters at the lowest point, "about three-quarter of an inch of the material." In these parts the words come with a second thought: bring it closer, take less or stop.

What do I do when two parts sit too far apart?
Take workshop 26, where I look for a place for an eye. The first spot is wrong, I say. At the next one an eye is going to be too far, I say. My answer comes in a breath. "So I need to create the eyes closer." One goes here, one goes there, and each one marks a division.

Workshop 31 has the same trouble with a volute. I'm checking from the sides, I say, and what I don't like is how far a part sits from the main volute. Right now it sits a touch too far, and I say the part has to come closer. I name my trusty skew for it, and I plan to carefully bring the part "much closer to this line."

Hazelnuts 4 is another carving with the same eye for distance. Nuts that feel too far apart will not look good, I say. Some of the husk will be "raised up a little more at the meeting point," and I say that meeting point must stay.

Then workshop 29, where I stop and doubt myself. I'm unsure about the movement, because I'm wary of overwhelming this side. "Maybe I've got too far," I say, and I should get closer to the mark I made. The word from part 4 is back as my reason. It would probably be more logical.
One more line from there: so much is going on that it "just distracts the eyes," and I say I'll use number seven to clean it.

How do I fix a pass that has gone too far?
Boundaries come up in workshop 86 too. A volute is coming, so I warn myself off, and I admit I'm afraid I already overshot. I have to stay a little bit away from it. First I need to carve this way, and that will be my boundary. A check follows, "close, but not too close yet."

The Furniture Panel course shows the slip the other way round. In lesson 15 I talk about my router plane and say, "that gives me really, really consistent depth." I add that I can get a little closer with a knife. A moment later I say, "I think I kept away a little too far in this case." The way I could take care of it is "a flatter gouge, like maybe number three," with a rubber mallet.
Lesson 17 of that course is short on drama. I say I'm using only the left side of a number 11, 3 millimeters (about 1/8 in), so the tool "becomes like No. 3 pretty much for me." A little after that, I say a spot is slightly too far. The line after that is "It's okay."
What follows is the reason. The spot has to be a little lower anyway, because a leaf flips above this detail. That is what happens with a hand push technique, I say: "a little less control."

A part that could run on or turn back shows up in workshop 89, where I could flip it completely and have the piece return this way. Or it could go all the way this way, and in that case it runs past where I want it. I would probably return somewhere right there, and I add, "So multiple ways you could finish this one."

How far is too far for one pass?
At times I give a number. In workshop 5, after "nice movement, nice curvature," I say I need to make sure I'm not pressing too far. I'm supposed to keep away approximately an eighth of an inch, about 3 millimeters. And the point is short: "I want to be safe."

A different reason to stop sits in workshop 92. Overdoing it is not my aim, because oak leaves will grow in this area, and I need that chunk. In this direction, I say, I'd rather not go too far. All I need right now is to establish the movement right there.

In workshop 81 I plan to carry a pass on to a point, "but not too far because I can't exceed the depth of cut this section. That would be mistake." Next I say a smaller number 11 veiner is what a really beautiful pipe needs, since another pipe will sit on this side, so I must be mindful of the space I'm using.

Tool size trades for room in workshop 39. I need a U shape in one spot "for future," because taking too much material there is a worry. I don't know yet how I'll develop that part, and I want to keep it. The gain is depth. With a U shape, I can excavate much deeper without going too far. Should I go bigger? I ask, then name a figure: "I could use 30 millimeters" (1 3/16 in).

Over in workshop 74 comes a tight spot. There is not much space to work around, and my thought is to leave it, since pushing it too far would be a mistake.
Do the tool and the wood change what too far means?
Modern Acanthus 6 finds me talking to the camera about the area around an eye. "Don't go too far. It's not gonna look nice." I would not undercut right there, I say.

Lesson 5 of that course says a small number 11 can give "even nicer undercut," but I warn against being too crazy about it. However much you love those movements, I say, the pass can overshoot, and then you have to explain every time that it was on purpose.
The knife brings its own warning. Greek Acanthus 3 has the same worry. You have "a tendency to break easier" with it, I say, so I ask you to make sure you're not going too far with the blade. My first carve went "90 degrees all the way down," the second "with the bevel," and I add that you can see how quickly the big chunk comes off.

In Hashemi Flowers 10 the hold-back is in the hand. I tell you I'm not pushing my tool, and not pushing too far. I'm rotating it, sometimes right to left, sometimes left to right. The spot is a "marriage line," my name for the place "when the grain meets," and I approach it "from both sides" until it disappears.

Lily Box 2 puts the check in my hand. I hold the tool by two fingers, "just pinching," and I work "without forcing." I reference my hand to make sure I'm not traveling too far, because the edge there is really tiny, and a slip would break it. You could hold with two hands too, I add, if that feels more comfortable.
What if the trouble is my own distance?
A few of these have nothing to do with the wood. Workshop 43 has a side that is "too far from my point of view," and my head may be in the way of the camera, so I ask you to forgive me. The work there is "excavation on inside, like a plug cutting," and the area "is not too convenient for me."

Other words carry the idea in workshop 55. The piece is too big, so it has to stay in place, and walking around is not what I want. From this position, one section would be a bit too far for me. The next line is a different job. I could bring a part down slightly, and it would blend a little better.
How do I judge it, by eye or by rule?
By eye. At workshop 94 I look at a meeting point and the point where a line meets. Just before, I mention a golden ratio approach, "if you wish." One option would run past the mark, and I say it would not look good. I decide by eye: "really, I have to just eyeball it."
Where did I say it, and what came next?
Ten of those moments sit side by side here, each with the move that followed.
| Lesson | Trouble | Move |
|---|---|---|
| This part | One separation sitting beyond where I wanted it | Move it |
| Room 26 | An eye set where it would be far out of place | Eyes closer |
| Room 31 | A part far off the main volute | Bring closer |
| Panel 15 | A spot where I had kept away too far | Flatter gouge |
| Hazelnuts 4 | Nuts that would feel far apart from each other | Raise the husk |
| Modern 6 | Going on too far near an eye, which would not look nice | No undercut |
| Hashemi 10 | Pushing the tool instead of rotating it | Rotate it |
| Greek 3 | Going on too far with the knife | Stay careful |
| Venice 92 | A movement running into the oak leaves nearby | Keep that chunk |
| Venice 43 | A side that sits out of my point of view | Forgive me |
Each time the phrase brings a second thought, such as moving a line, trading for a smaller tool, setting a number or stopping.
What do I take from all of this?
In the words I use, the phrase covers a gap or a push that I judge by eye. From there I move the line, pick a smaller tool, keep a bit of wood or stop. The short version sits in Venice Room 44, part 4.
Now look at your own workbench. Find a line that sits where it should not. The lesson 44 page covers the whole workshop, and for all my lessons in one place, start here.
The Venice Room course for workshops 38 to 49 holds the rest of this acanthus carving. These clips come from my Venice room carving and other courses of mine, and every figure in millimeters and inches on this page is mine, with the conversion beside it when I did not give one.
How it's done
- Name the line. In part 4 of workshop 44 I point at the separation and say it has gone past where I want it.
- Say the plan. My plan is a small move, since that is more logical for me and leaves room for work on the inside.
- Check every position. Workshop 31 has me checking from all the positions, and one part has to come closer to a line.
- Keep a gap. Workshop 5 has me holding a gap of 3 millimeters (1/8 inch) to stay safe.
- Stop where wood is needed. Workshop 92 stops me short, because I need that chunk.
Frequently asked questions
What did I say about the separation in part 4 of workshop 44?
I said the separation sat too far this way, so I planned a slight shift. That would be more logical, at least for me, and then I could create one on the inside with no problem.
Can one carved part sit too far away from the next one?
Workshop 26 had an eye that was going to be too far, so I wanted the eyes closer. Workshop 31 had a part a touch too far from the main volute, and I said it needed to move closer.
What gap did I plan to keep when pressing a tool?
Workshop 5 gives a number: I'm supposed to keep away approximately an eighth of an inch, about 3 millimeters (1/8 in), and I wanted to be safe. Workshop 86 has no number, only a little bit away.
What to carve next