

Alexander Grabovetskiy, woodcarver, School of Woodcarving · Published 2020
When do you need to be accurate in wood carving?
Quick answer: Accuracy in wood carving is how close a pass lands to the line or shape you want. In my lessons the early outlines stay approximate. In Venice Room 44, part 11, I went more accurate because it was a somewhat final cut, and if one pass gives the concave, there is nothing to redo.
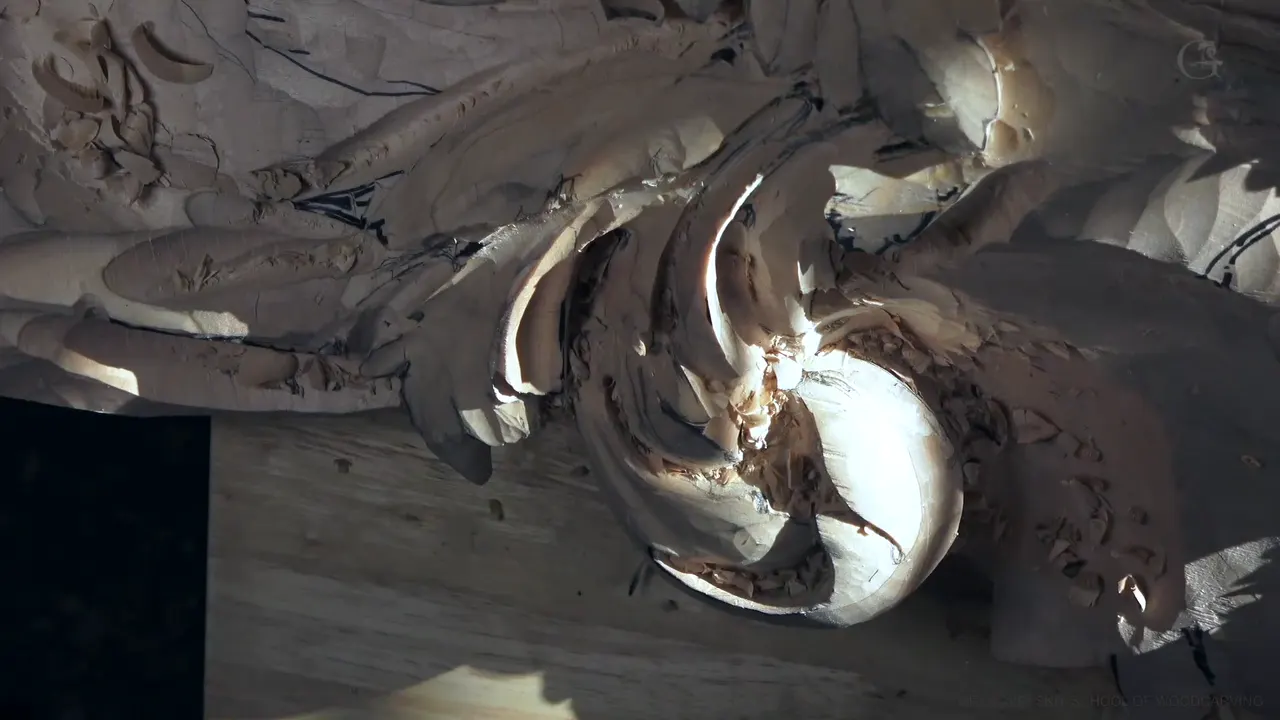

Accuracy in wood carving is how close a pass lands to the line or the shape you want, and in my lessons it goes up as the work gets near final. Part 11 of Venice Room 44 shows the moment it went up on one Venetian acanthus, and I said the reason out loud.
Have you ever written a quick note to yourself and later copied it out clean for someone else? Did the clean copy get more care than the first one? A carving goes the same way. Rough is fine where the wood will still change, and care belongs on the pass that stays.
This part is short, about seven and a half minutes of work on one leaf. So next to it I put other lessons of mine where the word accurate came up, with the tools and the depths I named, and you will see which of your own passes can stay rough and which ones can't.
Accurate or approximate, in six lines
- Once a pass was somewhat final in part 11, I went more accurate, so one pass could give the concave with nothing to redo.
- A Roman acanthus outline and a relief cut were allowed to miss a little.
- Accurate did not mean computer-made. I asked for a leaf that still looks human-like.
- A groove for future beads needed real accuracy, and so did one edge on a furniture panel.
- Held slanted to the line, not square, my tool would make a cleaner pass, I said.
- Eyeball first, check after.
Why did part 11 get more accurate?
The pass in front of me would stay in the wood. It opens with a little deeper cut. That is good, I said, and a side cut followed, then an undercut pretty much underneath of one piece.

After that the overall picture showed. Probably I could already subdivide this piece, I said, and it would be really, really nice and curly. A secondary division was harder to call. I'm not sure if I should or not, I said, and yes, I am thinking out loud.
One subdivision was a must, otherwise it won't look good. The others I could get by without. I know it's hard to see, I said next, and this part needed a little cleaning.

Then came the line this page is built on, a little before the two and a half minute mark. And yes, I am cutting more accurately right now, I said, because it's a somewhat final cut.
See this. It gives me a really beautiful concave already, and really, I don't need to redo it if I can get it just in one cut. The reason sat in one word, final, and the care went where the pass would stay.

Did that one pass settle it? Maybe that is enough without the secondary separation, I said, and for now I didn't see the need for it. That part made me happy, and the one I was not happy with was how I want to see this spot.
Care also followed the eye of whoever looks at the carving. I said one part of the leaf was more important than another, since one would sit much farther away and the other closer to the eyes. That's why I'm giving a lot more details to it. I hope it makes sense.

A small eye came up next, one I could create there and which I think I should do. Not big, but still an eye. Then a ridge needed blending, and the sun helped a lot, because I could see how the light hits and see clearly what I had to do.

Doubt came after that. Maybe I don't like what I've done, I said. Maybe yes, maybe I do. A separation also had to go inside. My plan was a preliminary cut for it, and I said I need to blend underneath of it. Later in the part came the words I clearly see that separation now.

Near the end I talked about what was possible. Of course I could give a much better shape now, I said, and better separations, and nothing stops me from giving a more or less finalized look. And that needs to be gone anyway, I said about one spot. See that, not going to work. I have to use a different one, number five, a little bigger.

Can your first passes be approximate?
In my Roman acanthus lessons they could. Around one outline I took a number three gouge, half an inch or 13 millimeters, and said please don't worry about if it's not too accurate right away. You still have a lot of wood, I said, and that piece was really thick.
A relief cut later in that course got the same freedom. I'm not really worried about if it's not that accurate yet, I said, it's just a relief cut. Smashing my fibers was the thing I did not want there.

In the hazelnuts course a preliminary cut was to go all around one hazelnut husk, and I said super accurate was not needed there. All I have to do is keep an eye on what the grain of the wood does.
For the outline on my Floral and Molding panel I said I'd take maybe a number 11, 7 millimeters, a little bigger than a quarter of an inch. It doesn't have to be really, really accurate, I said, maybe a couple of millimeters deep.
Layout gets the same room. The circles on my vase with grape leaves were just boundaries for the future design, and there I said I don't need to be too accurate, just approximate.
How accurate is accurate enough?
Accurate enough to look made by a hand. When a line is not completely accurate, don't worry about it, I said early in the Roman acanthus course. You're still a human being, and you can't do it like a machine, although you can try, but I believe it won't look as nice.

Two lessons later, in Roman acanthus 5, I put it more firmly. You still have to be accurate, please don't get me wrong, but not to the extreme, like it was made by a computer. Please make sure it still looks human-like. I really like eyeballing, I said there, because it trains your eyes to see in three dimensions.
A copy is a different job. For some kind of replica, I said in my hazelnuts lessons, you'd have to do really accurate dimensions and probably measure. My own plan there was to just eyeball it.
My furniture panel layout went approximately too. For more accuracy you can spend more time and even use a ruler, I said, but even my way it would still come out accurate, believe me.
For the chamomile and bow rosette I said I'll just eyeball it, because I don't really need 100% accurate. Anyone who worries about that can go ahead and use a paper again, I said.
A transfer has its own limit. Carbon paper was the plan in Venice Room 79, and I said that just because it's 3D, it is not as accurate as I wish. But I'll be really close. One section I already knew I would have to move a little.
Which passes must be really accurate?
The ones that set room for parts still to come. In Venice Room 57 I had a number 11 veiner and said this cut has to be really accurate. It really has to be accurate. With it I was setting the space between my future convex and my future beads, bead moldings if you wish.
A couple of millimeters deep was my figure, a little more than 1/16 of an inch, and you could go a little deeper, like 3/32 of an inch (about 2.4 mm). The groove needed to be really consistent, and it is better not to rush anything.
Keep an eye on the sides, I said. If those ridges start to crumple, or the fibers are breaking, that's enough, and that is the deepest you can go with that particular tool. Mine was 2 millimeters (about 5/64 in). After it I planned a smaller veiner, also a number 11, one and a half millimeters, 1/16 of an inch, inside the same groove to dig deeper. As for why I didn't grab it from cut one, there's a limitation how deep you can cut with the tool, I said, and those edges you can break easily.

An edge on my furniture panel asked for the same care. That pass needed real accuracy, I said, so my tool had to be really sharp, because I almost don't create any pressure. I let the tool do the job.
Lines count as much as depth. In workshop 57 the job was to tie my movements together with the overall movement, really accurately, I said. That piece would be seen from the bottom, and from other points of view in a room.
Where people stand counts too. Venice Room 63 had my plan for a much deeper shadow inside one spot, and I had to make sure it was really accurate, because it will be visible, really close to a face. Not too close, but still. It had to be 100% beautifully done.

My part 11 line about detail for the nearer part says the same thing.
Where does precision come from in wood carving?
From the angle of the tool, on my tray. With a number two in the Tray of Blessing lessons I was still slicing, not pushing. I held the tool at about 45 degrees to the cut I was following, not at 90, and I said that way my cut would be more accurate and much cleaner.

Later, with a number nine planned for a concave in part 3 of the tray, I said your cuts become more and more accurate, so you're controlling a lot more.
Venice Room 68 had the same change of pace. Holding a number 11, seven millimeters, like a quarter inch, I said my cuts right now would be a little more accurate, not as choppy. Then I hit my first layer. Made a mistake, I said. That concave went about six millimeters (about 1/4 in) deep.
Next to the middle line and the eye the care went up again. I don't want to hit that middle line, I said, and I don't want to hit my eye, so for me it is important not to make the mistake, and better to take my time and start excavating a little at a time.
Speed has its own risk. At the start of part 12 of this workshop I would love to get one undercut quick, but that would be a big mistake, I said, because with the position of that detail and the grain, too much could chip out the whole thing. Later in that part I named the bigger number 11, since with it I'll be able to create a cleaner and a faster cut. I probably should use the mallet too, I said. With the mallet I'm always gaining a lot more control.

Sharpness, angle and control carry a lot of what people call precision wood carving.
What did more accurate mean on this acanthus?
It meant something a little different each time I said it in this course.
In part 7 of this same workshop my preliminary cut was planned for a number seven, 14 millimeters (about 9/16 in). One side and this side needs more accuracy, I said. In this case, I added, I probably should use a number 11.

In workshop 46 I was able to move a line a little closer to my jigsaw cut and still be accurate. A number 11 veiner, 5 millimeters (3/16 in), was the tool I named to go around it.
One part later a movement was sticking too much out. I can always fix it, I said, and I thought going up would be more accurate.

Back in workshop 38 the word meant something else again. I could get by with just two separations, but I still like to see triple. That's kind of more accurate, I'd say.
The table puts seven of these moments side by side, close to the words I used.
| Lesson | What I said | Stage |
|---|---|---|
| Venice 44.11 | More accurate now, since this pass was somewhat final | Near the final shape |
| Roman 3.2 | Not too accurate right away, with plenty of wood | Outline with a #3 |
| Roman 16.1 | Not that accurate yet, it was only a relief cut | Relief cut |
| Hazelnuts 3-1 | No need for super accurate, just watch the grain | Preliminary cut all around |
| Venice 57.7 | Really accurate, slow and consistent, no rushing | Groove before the beads |
| Panel 22.3 | Really accurate, so the tool must be really sharp | One clean edge |
| Tray 2-3 | More accurate and much cleaner, the tool slanted | Slicing with a #2 |
Where should a beginner practice accuracy?
On a mark you can check, the way I did in Roman acanthus 12 while I was eyeballing. I'm pretty much actually accurate, right on the mark, I said. You don't have to eyeball if you don't feel comfortable. Take a piece of paper, put it at the end of the eye, make a mark and transfer it to the other side.

But I still would like to suggest you train your eyes. Do it by feel, and then check if it's accurate or not. On more complicated pieces there is absolutely no way you can measure, and that is where your eye helps you a lot.
Workshop 44 holds this part, inside the Venice Room Part 4 course, and the tuition opens every workshop in it, the loose outlines and the passes that stay. Mark one point by feel on a scrap today, then check it with a strip of paper.
How it's done
- Outline with wood to spare. Around one Roman acanthus outline there was a lot of wood left, and I asked you not to worry yet about being too accurate.
- Watch the grain. On a preliminary cut all around, watch what the grain of the wood does, which was all my hazelnuts needed there.
- Mark by feel, then check. Eyeball the mark first. Then check whether it's accurate, or carry it across with a piece of paper set at the end of the eye.
- Sharpen before an exact pass. An exact pass wants a really sharp tool, so it takes almost no pressure.
- Slice at an angle. Slice instead of pushing, and hold the tool at about 45 degrees to the line you follow, not 90.
- Take care on the pass that stays. When a pass is somewhat final, carve it more accurately, so one pass gives the concave and nothing needs a redo.
Frequently asked questions
Is a hand carving supposed to look perfect?
Not like a computer made it. In the Roman acanthus course I said you still need accuracy, just not to the extreme, and I asked that the leaf still look human-like. A carver is still a human being, and I believe work done like a machine won't look as nice.
Why does the part nearest the viewer get more detail?
My Venetian acanthus had one part that would sit much farther away and the other closer to the eyes, and that's why I gave the closer one a lot more details. Workshop 63 had one spot I wanted really accurate, since it would be visible, really close to a face.
Does a sharper gouge make a pass more accurate?
For one edge on a furniture panel I said the pass wanted a really sharp tool, because I almost don't create any pressure there and let the tool do the job. On my tray, a tool held at an angle to the line would give a cleaner and more accurate pass, I said.
What to carve next