

Alexander Grabovetskiy, woodcarver, School of Woodcarving · Published 2020
What does "would love" mean when a wood carver says it?
Quick answer: Part 12 of workshop 44 has a spot that I could undercut at once. My wish was to go fast, but I said it needs care. The plan I gave in that part was gradual removal, and the tool with a maybe was the No. 11.
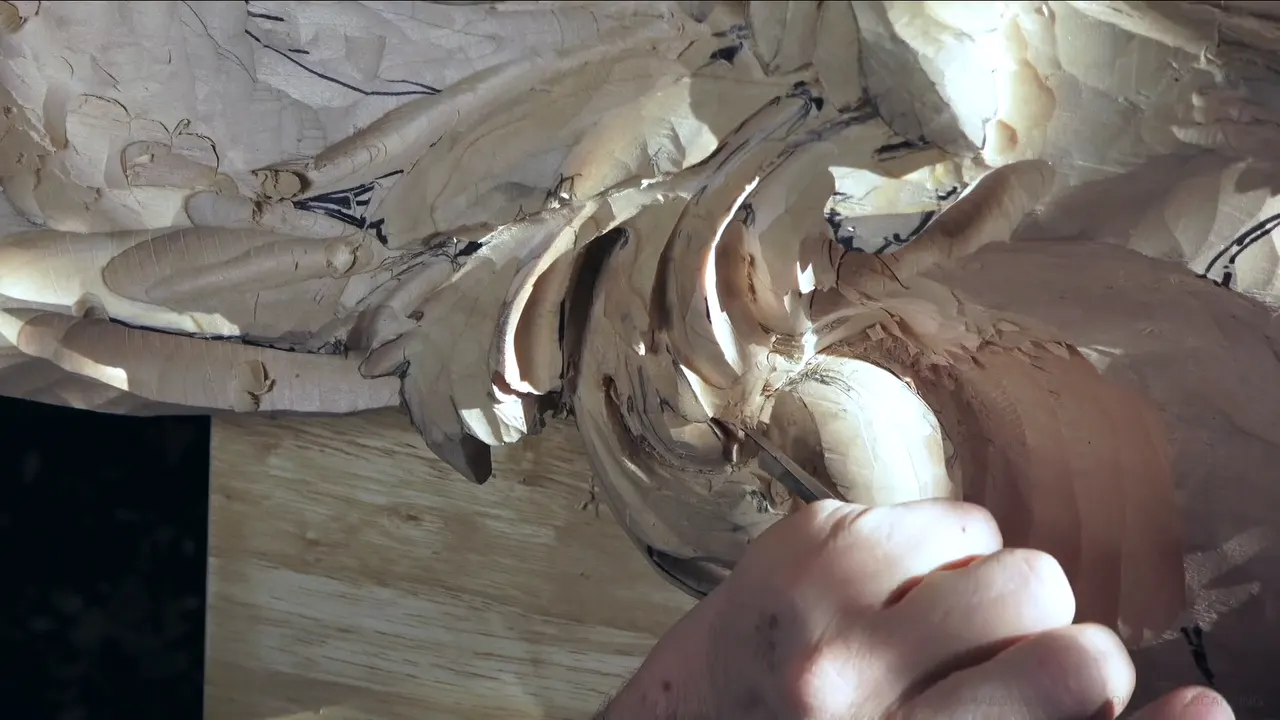

In Venice Room 44, part 12, on an acanthus, I said I would love to get that quick, but that would be a big mistake. The answer I gave myself was gradual removal.
Have you ever wanted a spot finished fast, and known the wood might chip out if you tried? Did you take the quick way anyway? This page follows part 12 line by line, then goes through other lessons where I named a wish.
What was the wish in part 12?
The part opens with the words: Here we go. Go down. And actually, I can undercut pretty much right away. The brake follows at once: got to be careful, because doing it too much can chip out the whole thing. The reason I gave was the position of this detail and the grain.
The wish got a verdict. It would be a big mistake, I said, and then I said it again. So it's probably better just to take time and do gradual removal.

A tool came with a maybe. And maybe even with the No. 11, I said, then: "No. 11 is always the best tool for the job." And get that thing out just like that.
Where did the dig go after that?
Underneath. See, what I did, I actually created a lot of material for this piece. A separation I could do right there, but logically, I could continue with this piece and go underneath like this. A check came first: let me see if this is the right position for the separation, I think. So that is not good. Again, I'm looking at the invisible line.
I said let me do that, and give that separation right there. Exactly the same idea, what I've done above. I can use No. 5, and I actually got to be careful how I do it. And excavate underneath of this line.

Beautiful movement, I said, and then I said it once more. So this goes underneath, and that is sticking from underneath. It just blends in all together and gives that unique look, which is an authentic look, especially to that Venetian style. And they had a lot of excavations like that.
Cleaning came after that: let me clean it. A little too big of a tool, I said, but there is a lot of material to remove on the side, so I can take care of it a little later. At least I have pronounced eye now. The detail goes down, and I do have a separation right there.
That separation had to come right away: let me get it. More or less finalized. It's not final, but at least not going to lose it. And yes, because there's an eye, logically, I have to create pipe a little later.

How did I choose which piece goes underneath?
By thinking it through. Let me think how I want to do it. I could go the same idea, get this one below that one. Or, on another hand, because it's above and it's much higher, why don't I just do opposite? Get this underneath of that one. That makes sense, but I need to get the bigger No. 11, because it creates a cleaner and a faster cut.

The mallet came up next. To give it more control, I probably should use mallet, because with the mallet, I'm always gaining a lot more control. And go like that around. That's probably deep enough. I don't want to go too deep.
Too deep is not going to be good, I said. And I could clean it: I mean, I'm talking about the upper part. How high it is, I really like, and I most likely going to keep it that way.

One spot sat on a glue line. I have right on the glue line between two layers: there was a second layer, and there is a glue. So at least I need to remove that, and go that direction a little bit. That is good. Some divisions can be created there too.
Underneath again go the final lines of the part, because it's one of the most important parts. This part. Going to use No. 11 and 3 millimeters (1/8 in), and carefully go underneath.

Where else did the wish come up?
Other Venice Room workshops hold it, and so do other courses. The words repeat, and what stands after them changes. The table puts those wishes side by side with the tool I named near each. The rest of the page goes through them.
| Lesson and part | My wish | The tool I named there |
|---|---|---|
| Workshop 44, third part | see a big shadow, plus deep excavation | Number three, then number 11 at 3 mm (1/8 in) |
| Room 41, sixth part | be logical | No. 11 at 4 mm (5/32 in) |
| Lesson 43.4 | give some form, and draw attention to the lines | A number seven at 4 mm (0.16 in), if it fits |
| Workshop 43.8 | develop this movement | My skew chisel, the big one, one inch (25.4 mm) |
| Panel 23.4 | give extra movement without extra separation | A smaller one, 1.5 mm (1/16 in) |
| Venice 72.3 | get a little nicer, faceted less cut | My veiner |
| The furniture panel, lesson 22, part 12 | get better line work | The same number three |
Does a wish come with a limit?
Sometimes the limit was the wood. Grinling Gibbons, Maine class 12 has it: I have to be mindful. Below, I don't have too much material underneath. As much as I would love full undercut, I'm just not able to in this case. And that's all right. As long as some kind of shadow falls, I'll be fine.

Another place is Venice Room 12, part 11. We should be good, I said, and I wished for some kind of line work too. But gradual, so I don't mess up again. In a different lighting condition, you'll see it.
How clean the work looked set the limit in Venice Room 103, part 2. That continuation of the movement was on the side, and it's not as clean as I wished to see it. I'm getting close, I said. I am getting really close.
A wish was also something I did not have to follow, and Venice Room 20 (part 10) has it. How clean it looks right here is what I really like, because I used the really big gouge, and I wished to keep that like that. But do I have to? Oh, absolutely not. Whether to do that flipping backward movement stayed open: maybe I should, and if I don't like it, I'll redo something new. After that came my plan: let me use number seven and create roundness.
A ridge came up in Venice Room 50, part 11. Losing it was out, because this movement is a part of that development. I want to make sure I'm not doing the mistake, and my wish there was to not make mistake. All right, then somewhere right here, and go in.
Leaving a spot is a wish too. Maybe off camera, I said in Venice Room 67, part 9, I'll just clean little better this section. But now I wished to jump to do something else, because I'm pretty tired of this section. You should see overall development of it, and I think it looks good.
What did I wish to see in the wood?
The shadow wish sits in part 3 of workshop 44. I wanted to get that point rolled in, so I stopped right there. I really wished to see deep, big eye and deep excavation right here, and yes, I will create some movements on inside. I really want to see a big shadow. Deep shadow, I should say.
Tools followed: number three, just a straight down cut, then number 11, 3 millimeters (0.12 in), and take this out. Spots like that are really important to create, I think.

One more line comes from workshop 41, part 1: I think I found the solution I want to see right here, something like that to develop. You have to look at it from all the positions to understand exactly what is going on, but you will once it's done. Nice, interesting movements are what I'm after.
A plan stands in workshop 43, part 8. I wished to develop this movement, and I sketched some idea how I want to develop it based on my original movements. This one, for example, will go downhill and continue on this side. My skew chisel came first in that plan, the big one, one inch (25.4 mm), for a preliminary shape.

Over in workshop 32, part 10, a big chunk bothered me: I still kind of don't like how it looks, and I wanted much better development. Widening it a little bit more might help, I thought. It has to be divided in three, and this could just go underneath of that part.
A really important leaf shows in workshop 34, part 4, so I need to widen it. An eye comes there, with the pipe running all the way back. A much wider area, which goes downhill, was what I wished for there, and I also would like to see some really nice separations.
Venice Room 17, part 12, was a repair. I also wished to fix this movement, because it still doesn't look too good. Exactly the same might work: start from almost nothing here and just continue my cut all the way, with the same tool, carefully.

Editing brought a wish after the fact. The reason I got the big screen TV, I said in Venice Room 57, part 4, is that I was filming for school so many segments, and it feels I'm doing the right thing. But when I was editing, I found so many spots I wished to change, and it was a little too late. What I wished was to see like you see on a screen. Then came my question to myself: why don't I just connect myself a big screen TV and just see ahead of the time?
The same words reach past carving. In Sharpening Large Gouge, I said that people who own a big gouge have a question how to sharpen it, because it's not the same as a small one: it's big, and I still wished to maintain the same bevel. I could take it on a stone and just do it by hand, but I really like to see consistency on my bevel on this side. For some reason, on a stone, it's much harder to reach than on a machine, which is the one I'm going to use today.
Does the wish change the tool?
On the furniture panel (lesson 23, part 4) the wish came with a doubt. I'm not sure I can create what I want, because I wished to give extra movement, but without creating feel like it's just extra separation. With the smaller one, one and a half millimeters, I would say. A 16th of an inch (1.6 mm). Yeah, it gives me a really, really deep movement.
Lesson 22 of that panel, part 12, has a number three in my hands, and I could probably do it just like that. Probably just better line work, so I can understand what is going on in my flowers. They don't look too appealing as of now, and I need to understand a little better what I designed.

A reason sits in workshop 41, part 6: too much movement this way would distract from overall movement. Still, I wished to be logical, which means that part goes under this part. One point might get much deeper excavation (maybe I create it, and I probably will, because it makes sense), just to create extra shadow. Step one would be just to go underneath, with a less deep cut. Number 11 in four millimeters (5/32 in) is what I'm using.

I love that element for a later reason. In the future, below the corbels, there will be columns with about the same movement.
A limit on the form came with workshop 43, part 4. Like I said, I don't have to develop completely, but some form was still the wish. Take an eye: every eye is supposed to have some type of pipe. But I cannot break my movement. That is the movement I'm after. A concave on a side is needed, and let me see if a number seven fits right here, at four millimeters (5/32 inch). All I need is to draw attention to the lines, to the movement. That's the goal.

What does the wish say about a clean finish?
A clean finish comes up in Venice Room 65, part 6. The side of a pipe meant going against the grain, but I wished just to keep it clean. Yes, I tried those rifflers, those rasps. I still kind of like my traditional way, without sanding or shaping. What I really like is the finish out of the gouge or chisel, since it gives those beautiful marks. The tool must be really sharp, though. Mine doesn't look super sharp right now. Maybe skew will help.

A ridge I could hit pretty much right away shows in Venice Room 72, part 3. Something a little nicer was my wish, faceted less cut, if you wish. For me, ridge makes more sense. Carefully just blend it. And yes, I see that I need a little better blending with my veiner.

Where does part 12 sit in the course?
The last part listed in workshop 44 of the Venice Room Part 4 course is part 12. The workshop 44 page lists the other parts. Look at your own carving for the spot where you would go fast, and ask what the gouge and the wood have to say about it.
How it's done
- Check the detail and the grain. Part 12 warns about the detail's position and the grain before an undercut.
- Take time. Gradual removal takes time, and maybe the No. 11 is the tool.
- Find the invisible line. Before a separation I checked the position, and I looked at the invisible line.
- Dig underneath the line. The No. 5 was in my plan, with care about how I do it, to excavate under that line.
- Bring a bigger tool and the mallet. A bigger No. 11 creates a cleaner and a faster cut, and the mallet gains a lot more control.
- Stop before too deep. Probably deep enough, I said, and too deep is out. The part ends on a plan: go underneath carefully with No. 11 and 3 millimeters (1/8 inch).
Frequently asked questions
What did you wish to get quick in part 12?
Going fast was my wish, and gradual removal was the plan I named.
Why be careful with the undercut?
Doing the undercut too much can chip out the whole thing, I said, because of where that detail sits and the grain.
Why did you reach for the mallet?
In part 12 I said that to give it more control, I probably should use mallet.
What happens when the wish cannot be met?
What to carve next