

Alexander Grabovetskiy, woodcarver, School of Woodcarving · Published 2020
What does "always better" mean when a wood carver says it?
Quick answer: Always better is my phrase for the way I would rather go when another way works too. In Venice Room 46.6 a number 4, smaller and sharper, could have done about as much, and still I sharpened my number 5. In other lessons it went with cross-grain slicing and coming in from the outside.
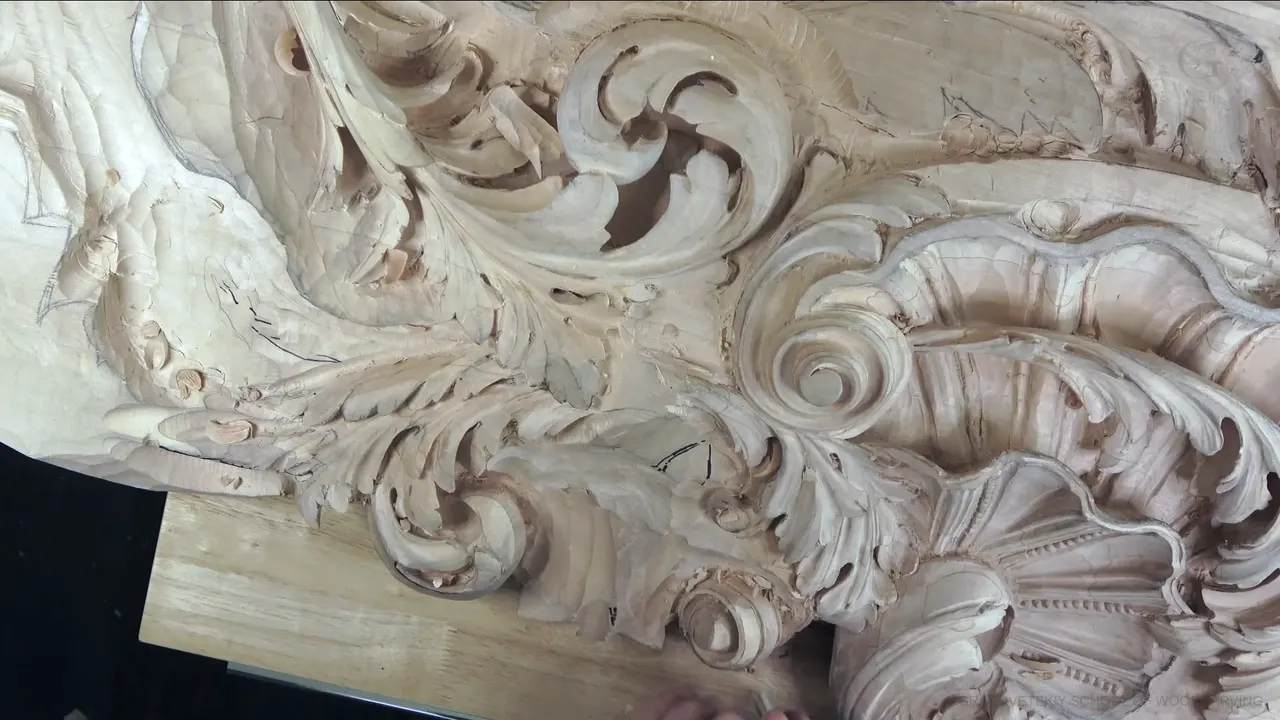

Always better is my phrase for the way I'd rather go when another way works too. In Venice Room 46.6 I was going against the grain with a number 5. A smaller, sharper number 4 would give me about the same result, I said, and then, "But it is always better to just sharpen the tool." So the wood carving tips on this page come from my own lessons, each one tied to the spot I said it.
Have you had two ways to do one job, and both looked fine? Did you still lean toward one of them? That's what this phrase is for. Below you'll find each place it came up on camera, with what came along, and the times I called the other way fine too.
Part 6 runs a little over seven minutes. That's short, so other lessons and courses of mine sit beside it here, and each one links to its own page.
Spots it came up on camera
- Workshop 46, part 6, sharpening a number 5 rather than reaching for a number 4.
- Cross-grain slicing.
- Coming in from outside toward the line or the middle.
- A small tool for flexibility, and a big one wherever it fits, when that's possible.
- Something to crank against, and a hand behind the blade.
- The real piece in front of you, and a flip to check the other side.
How did part 6 get to that point?

The first job was a deep concave, concave number one, with a 3 mm (about 0.12 in) number 11 veiner. I could do it with the two millimeters (about 5/64 in) also, I said, but I think I'd like to get that deep and nice with three. Even there I named a second tool before I picked one.

I was talking about at least one-eighth of an inch deep, about 3 mm. That's going to give me a beautiful detail that I can repeat everywhere, I said. The depth had to be the same, approximately, everywhere. You can see the edges of the tool, I said, and by those edges you're able to tell if it's deep or not.

A second one went in on the other side, about maybe 15 or 16 millimeters away, which I put at about five-eighths of an inch. Same tool, the same veiner, both directions and all the way in, with a little more depth in one spot.

Next, I said, I'd make a concave and also a concave, and that would become a convex. My tool for it was a number 5 of about 12 millimeters (just under 1/2 in), for a concave in that spot, line to line. That's what I need to do, I said.
Why sharpen when a number 4 would do?

The grain was against me, I said, and there's no way, I can't come from the opposite side. I needed to sharpen that number 5 probably a little better. Or I could use about a number 4, a little sharper one, a smaller version. It's going to give me about the same result right here, I said, and I said it twice.
Then came the line from the top of this page. Let me do that, I said, and I'll be back. I'll sharpen it, and we'll continue.

I gave no reason in words right there, and the next thing I did on camera was the test. All right, let me try it, I said, and yes, now it's sharp. Just like a doctor's tool, like a surgeon's tool. I mean, really sharp. See how long the bevel is? I have a really long bevel, and what I really like about it is that I can get tiny slices if I need to. Just a shaving like that.

After that, I said, I need to go around first, line to line. Maybe I'd hit the right-hand side a little, because I really don't need that pencil mark anymore. Let's go this direction. I've got to be careful, I said, maybe just a little smaller slices.
Is the other way wrong, then?
On my furniture panel I said every school, every master has his own approach to pretty much the same idea. We all have a different approach, not necessarily better than others, "although every master thinks his approach is always better. Almost every master, not all." Then I told a joke about a guy who wanted to learn carving like in the old days, as the apprentice of a master.

Later on that same panel, one way to outline was a stabbing cut. To show it, I took probably a number 5, 3 mm (a bit under 1/8 in), and placed it straight down. That's an acceptable way of carving, I said, but that's not my preference, because you're creating too much stress. You're spreading those fibers both directions. Outlining first is always better. But if you want to go much quicker, that would be acceptable, I would say. Why not?
With a chamomile rosette in front of me, I said I like number 11. That's always better, but I'm all right, I can use just the same tool. Then, well, you know what, I'll switch to number 11, I said, and number 11 is always better for me. You'll find that one in lesson 3 of the rosette.

Bigger tools got the same words on another furniture panel lesson, with a limit. Using bigger tools is always better if you're able to, I said, and it's going to be much quicker. It's not always possible, but if it's possible, it is always better. For my hazelnuts the plan was a number 9, 20 millimeters (about 0.8 in), and I said the bigger tool you can use, the better at this stage, always.
Size flips with the spot. Over in lesson 4 of that rosette I asked you again, please use smaller tools. A smaller tool gives you a lot more flexibility, I said. Yes, it takes maybe slightly longer, but smaller tool is always better.
Which way should a slice go to the grain?
Across it, on my floral and molding panel. The grain of the wood ran one direction, and I said it is always, always better to create the cut across the grain, always better. Don't forget, every slice, every cut has to have some type of rotation, like a slicing cut.

Venice Room 85 had me angling a little, like 45 degrees, because of the grain. If I do it this way, I said, I can split, and split too deep, and I can make mistakes. So I have to just do it across the grain, or perpendicular to it.
A block plane gets the same idea in the hazelnuts course. If you're not familiar with planes, I said, it is always better not to plane straight along the grain. I usually like to do it at 45 degrees, kind of slicing it, and that way you're getting really beautiful shavings. It's flat.
Pushing gets the same answer. When I'm teaching in person, I said in that floral course, the biggest mistake I see lots of people make is to just push, and that's no good. Lots of resistance. It's possible if the tool is sharp, but your finish cut is not going to look as nice, and you're going to get tired a lot quicker. So, always better slice it.
Where do you come at a shape from?
From the outside, going in toward the line. Lesson 10 of that floral panel is where I said attacking the piece from outside inward is always better. Working the other way, you're catching the grain sometimes and creating the break, so it's not the safest way. My tool is really sharp. I'm able to do that, with absolutely no problem.

Sequence is really important, I said in lesson 13, and I've mentioned that multiple times. From outside toward the center is always the best.
An end was weak in workshop 45 of this same course, and I showed how the grain ran. I should use a heavier one, I said. It'll be much quicker. When you work with the mallet and big tools, don't go all the way to the end. Approaching from the end itself, I said, is always better. Otherwise you can break it easily. I should say I can break it easily.
On a later panel lesson I said I'd just outline it carefully, carefully, with a 2 mm (about 5/64 in) eleven, a veiner. You could always use a mallet, I said. It gives you better control. Mallet is always better.
One part of my grape onlay would end up completely airborne. It's better to attack from both sides, I said, and right after that, always better. Yes, I am airborne, I said, then, not me, but that part.
What did I say about careful work?

In workshop 62 I was cleaning without pushing too hard. Cleaning that with the number 11 is always better, I said, and being more careful, always, always better. Extra careful, I should say. And I had no idea, I said, why a number 6 ended up in the drawer with the number 11s.
For workshop 66 I needed a spoon veiner, and maybe 7 mm (about 9/32 in) would work, I said. I had leverage on that point and it was a big chunk yet, so I was pretty much safe to crank against it. Still, protecting it with another piece of wood is always better, if you have it, or something like a cookie. In my case a cookie was not going to work, but it's a good idea. Otherwise you can just use your finger as a leverage point.

Shaping an olive on my lily box, I said to be careful when you carve like this. A slip can hit your finger, and if it's really sharp, you can cut really badly. Holding it on the backside, behind the cutting blade, would be always better. Then, see that crack right there? I needed to change the direction and come from the opposite side. Maybe I should actually do that from the beginning, I said.
With a big tool on my furniture panel, don't dig too deep into the background, I said, or you're going to damage it. Stopping right before is always better. Elsewhere on that panel I said I'm not forcing, I really don't want to force anything, and I don't want to destroy my edges. So it's always better not to, I said. Just turn to another tool, even smaller, like 1 mm (about 1/25 in). And where I might need to clean a spot later, I kept it a little bit higher, which I also called always better.
Try to control your tool, I said in my Roman acanthus course, and stop before you hit with the corner, the round part. Going back with the previous tool, just to clean it, is always better.
Does a screen show it the same?

In workshop 61 I blended a side so it would feel like it's going in, then out. On the screen, I said, sometimes you don't really see the true picture. In real life, it's of course always better.
My tray got a flip and the same words. Keep flipping it, I said. Sometimes you carve from one side and you don't really see what is going on on another side. Flipping it to check what is going on is always better.
Why did I keep saying it?
On the floral panel it came out as "It is always better..." Then I said I know I mentioned that a lot of times, maybe sometimes too many times, but it's important, just in case you didn't hear or didn't catch it. Pushing on toward that intersection would split it and create a crack in the wood, I said, and that would not be the safest. Whenever you have a triangle like that, you have to make a relief cut. I call it relief cut. Call it whatever you like, I said.
As for which tool, I really like to use number 11s on that project, I said, and you could even use a V-tool. I was trying to be more authentic to the original carvers who worked on a project like that.

Back in workshop 15 it came with a hedge. That's why I really like relieving cuts, I said, so it's always better, I think, in my opinion. For lesson 2 of the floral panel, with a number 9 at 10 millimeters (about 0.4 in), I said again that a cross-grain cut is always safer. Yes, that is my opinion, but it's always safer.
How did each one go?
Here they are side by side, with the lesson each one came from.
| Lesson | What I called always better | Said with it, out loud, on camera |
|---|---|---|
| Venice 46.6 | Sharpening my number 5 rather than taking a smaller 4 | The 4 would give a similar result |
| Furniture panel | Outlining first instead of a stab straight down | Quicker is acceptable too |
| Floral panel | Making each slice cross-grain, always, always | Every slice gets some rotation |
| Room 85 | Going cross-grain, or perpendicular to it | Splitting can go too deep |
| Hazelnuts course | Planing at 45 degrees, not straight with the grain | Really beautiful shavings, and flat |
| This course, 45 | Coming at a weak end from the end itself | Otherwise it breaks easily |
| Workshop 66 | A spare bit of wood to crank against | My cookie would not work there |
| Lily box | Holding the piece behind the cutting blade | A slip can hit a finger |
| Room 61 | Seeing the carving in real life, not on a screen | A screen can hide some of it |
| Chamomile rosette | A number 11 for that side, for me | I could have kept the same tool |
Where is part 6?
You'll find it in the Venice Room Part 4 course, inside workshop 46, one of its twelve parts. Part 5 comes before it and part 7 after, on a carved relief board, working around a volute with a veiner and a gouge.
Is there a tool on your bench right now that could use a few minutes of sharpening? On mine, that number 5 got them before the next slice. If you want to watch every pass, the tuition opens every workshop of the Venice Room.
How it's done
- Set concave number one. A 3 mm (just under 1/8 in) eleven, at least one-eighth of an inch deep (about 3 mm), with the depth approximately even everywhere.
- Read the edges of the tool. By those edges you can tell if it's deep or not.
- Make the second one. Same veiner on the other side, about 15 or 16 mm away, which I gave as about five-eighths of an inch, run in both directions.
- Bring in a number 5. About 12 mm (about 0.47 in), for a concave in that spot.
- Sharpen before going on. Going against the grain with no way in from the other side, I sharpened it rather than take a smaller number 4. Then it was really sharp, with a really long bevel.
- Go around it before more slices. I said I need to go around first, and maybe just a little smaller slices.
Frequently asked questions
Why sharpen a gouge when a smaller one would do?
My Venice Room board had another choice, a little sharper number 4, a smaller version. I still said sharpening the tool is always better. After it, the long bevel let me take tiny slices, just a shaving.
Should you carve with the grain or crosswise?
Crosswise, or at a right angle to it. My Venice Room 85 lesson showed a way that can split, and split too deep, so I said I have to just go cross-grain. For the hazelnuts course I planed at an angle, not straight along the grain, and got beautiful shavings.
Is a big gouge better than a small one?
Where it fits. Bigger tools are always better where possible, I told you on a furniture panel, and much quicker, but not always possible. In a rosette lesson I asked you to please use smaller tools for a lot more flexibility, even if it takes slightly longer.
What to carve next