

Alexander Grabovetskiy, woodcarver, School of Woodcarving · Published 2020
What does bulky mean in wood carving?
Quick answer: Bulky is my word for a spot on a carving that holds a lot of wood. In most parts on this page I say it as too bulky, and the next line is about taking wood off. In Venice Room 46, part 1, I ask for more bulk on one side instead.
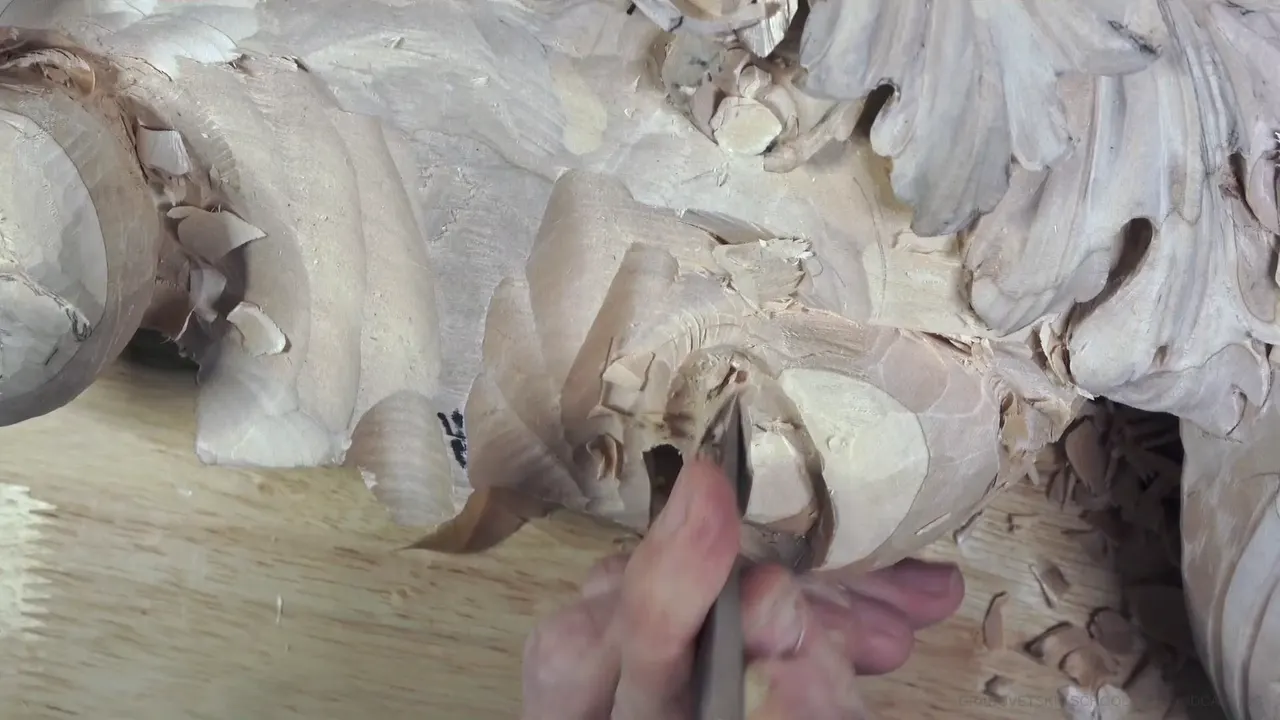

Bulky is my word for a spot on a carving that holds a lot of wood. In most of the parts on this page I say it with "too" in front, and the next line is about taking wood off. This part flips it. Here I ask for a bulkier look on one side.
Ever stood back from your workbench and felt that one lump was just too heavy? Did you take it down, or leave it? This part is short, 392 words. Parts of my other lessons sit beside it on this page, from the Venice Room workshops and from other courses of mine.
What does bulky mean in part 1 of workshop 46?
The line comes at 02:39. First I say I did not want to repeat others, and that I do have a head of acanthus on another side. The line itself reads: "I need somewhat bulky look on that side also. Something much bulkier."
A little before it I say "let me work on inside, and I'm going to go out." Really good, actually, is how it will look, I say, "even if I know it just looks a little intimidating."

What was I doing before the line?
At 00:28 I put it this way: "I'm just checking everything before I start developing the details." At 00:42 the verdict comes in two short lines. "That is not good right here. So it's not gradual." Gradual is what it must be, I say twice, and a little bit right here needs a clean up.
A redraw is next: I can probably just redraw a more or less final look on this side. The redrawn look will be the inner part. I'll leave a ridge all around, approximately, "not a quarter inch" (about 6 mm), "but maybe 5 millimeters, about 3/16 of an inch."
Number 11 is the tool I name at 02:48, to go in a little and clean up. The edge comes next: I really need to establish it. "It's got to be a tangent. So this edge has to be tangent." A tangent is a line that touches a curve at one point and runs the same way as the curve there.

Then, at 03:40, excavating in around that barrel is a thing I could start. "Not the barrel, but it's how I call that part. It's not technical name for it, by the way. That's just volute or voluta." A volute is a spiral curl, the kind that tops an Ionic column.

How did the edge get made?
A skew comes up at 04:37, because I need it for a really nice edge. "Almost no cutting. It's just shaving pretty much." What I'm after, I say at 05:23, is "just doing a gradual movement. Beautiful and gradual."

It doesn't look too gradual yet, I admit at 05:31, but I at least was able to solve some problem. I am able to move the line a little closer to my jigsaw cut and still be accurate.
A number 11 veiner is next. I give its size on camera: 5 millimeters (3/16 in). Then "Go around like this." The part closes on a verdict about a different word: "I need to take care of this chunk because it's too much." Bulky itself is missing there. Even if something gets developed right there, the chunk is still too much.

What do parts 2 and 3 of workshop 46 add?
Part 2 starts with a tool. Number seven, about one inch (25 mm), will probably be the best one, I say. At 04:18 I say the barrel is supposed to be complete or almost complete round, and let me use a bigger tool. And at 07:42, getting closer to the line I made with the big number seven will give me "really beautiful and tangent, continuous movement."
Part 3 opens with "Now it's really good." One spot still needs filling later, because nobody wants to see just an empty spot there. From below I look at how gradual my movement is. About 1/8 of an inch (about 3 mm) has to go, maybe a little less, maybe about 3/32 of an inch (about 2.4 mm). A couple millimeters only.
The next rule is short: you got to catch that initial form. Once you can, "later on, there is absolutely no problem what kind of movements you could create." For my deeper grooves, the tool is a five millimeter (0.2 in) number 11 veiner.
Why would I want a part to be bulkier?
In lesson 90 of the Venice Room, part 11, the tool is a really big gouge, number seven, three inches (about 76 mm). I want a little more bulkier on the bottom of that drop, and a lot less at the top. It will sit really close to the main body and be much thicker at the end. "Otherwise, it's not going to look natural."
Later, approximately half an inch (about 13 mm) lies between the surface and the line. From the side, it "does not look good." Slightly too bulky, I would say, though "I still don't want to make it too thin."

Bulky can be the plan, too. Workshop 38 of the Venice Room, part 9: I want to get an area a little more narrower, "because right now, just too bulky. Which was, of course, as you understand, done on purpose." I kept that material to the end.
Grain matters here, since I have to be kind of careful how it runs. Number three would do. Further on, that is a little too big, an oversweep. I should probably use number two, "maybe even bigger, to make sure I'm not losing overall movement."

Part 3 of workshop 142 takes the other side: I don't want it to look bulky, and everything the same is out too. This side should be a little lighter. My reason: flowers are coming, the big idea in this section, and I don't want to overwhelm with that detail.
When do I say too bulky?
The acanthus head in the Venice Room 2 lesson gets it plainly. "It's too bulky." Upside down number seven could handle it. Then I mean to use the same tool and establish my head of the acanthus a little better.

Part 4 of lesson 14 brings a second subdivision "because right now just too bulky for me, to my taste." Chopping it and cleaning it is one way, but not the way I like. I like what the original carvers did. My concave cut is going to start from almost nothing, almost no pressure at all.

"it's too much bulk right here. So it doesn't look right." So says my verdict in lesson 34, part 4, where the shape has to blend into the overall feel. Number five should chop that down. Maybe a little better, I say, and then "it looks much better."
Over in workshop 42, part 4, I call one side too bulky, though only a little. Making this part a little more tinier and bringing it on inside would look like the main body lays on top of this folded leaf. Undercutting much deeper is needed, and it is kind of hard not to break it, "but it's not impossible."

Constant checking and rechecking from different points of view is what I describe in lesson 63, part 3, and if it doesn't make sense, I'm redoing it. A lot more slope is possible right here, because that's "too bulky or bulking out too much." A skew could probably do this direction. It's much quicker, I think.
That same part has a choice in it, and it is a short one. Even deeper excavation is possible, "but I don't have to." Another development with the flower is coming, so all I need is pretty much this chunk visible.

The shortest case is in lesson 69, part 11. Here I say I don't really like how bulky this area is, "but that's okay. We can always fix it." Over in lesson 70, part 5, a chunk has to go because it's a little too bulky. I need a gradual movement, the same as what sits right here.
Lesson 71, part 4, gives the reason on camera. A chunk that I don't need in this area "doesn't really serve any purpose, so it doesn't look good." I want to get rid of it. A double check follows, then a marker so you can see it better, then "same idea, same tools": I'll use just the number 11, at 3 millimeters (about 1/8 in).

Lesson 75, part 9, says it is somewhat too bulky, so I need to slope it gradually this way, or create a round motion this way. It is good, but "not 100% makes me happy." Let me create a preliminary cut, I say, to guide my eye to the right motion.
Lesson 82, part 1, carries a bigger worry. What comes next I do not know, maybe a secondary level underneath. But for now, "that's not going to make sense if I'm going to do too bulky section right here." That part needs to go and some kind of opening needs creating: I'll take number nine, quarter inch (about 6 mm), just to start with an across the grain cut.

"This bulk right here has to be gone all the way down a little later," I say in lesson 86, part 10. "Not all the way down, but it's going to be a lot less than what you see right now." Lesson 90, part 10, gives a verdict instead: "Right now, it just looks all bulky." I need bigger tools, I say, and I use a number seven.

Do other courses use the word too?
Yes. Furniture Panel lesson 20, part 6: I'm still not too happy with what I see, "because it's a little too bulky." Let me remove most of it, I say, and get nicer concave all around, since I can always develop details inside after I've done my concave. I probably could use just number 11 and make my initial cut. "Just initial cut."

Class 10 of my Grinling Gibbons course in Maine is where I say I need little more openings: "too bulky as of now." Separating the thing is possible. A look follows at how close I got to the opposite side: just like 1/16 of an inch (about 1.6 mm), so some spots like one millimeter (0.04 in).

Is bulk always a bad word?
No. Lesson 10 of the Byzantine acanthus course, part 3, has me position a piece on a board. Closer to this edge, by a little, because I want to see "the bulk of it coming closer to the golden ratio." Here the bulk is the main part of the piece, and I place it where I want it.

The Venetian Flowers Rosette course, the third video of lesson 2, has the idea that one part goes really deep in this section, "but then it's going to be bulking up and then go down again." Overall shape comes next. A flatter tool, number two or number three, would work, and in my case it will be number three, hit from above.

Bulk can also mean the waste. In Furniture Panel lesson 32, part 1, it does not have to be perfect at this point "because it is just removing the bulk, getting the shape done, establishing the main shape I should say."
The Carving Plate with Butterflies course has two lines. Lesson 3, part 2: let me remove bulk of the material with the knife. Back in the first video of lesson 2, when you're removing a bulk of material it is always better to carve across the grain, and that's much easier to control.
How do the places fit side by side?
Here are ten of the moments, with what was bulky, or wanted bulkier, and what came next in each.
| Source | What looked too bulky, or wanted bulkier | What I named next, a tool or a step |
|---|---|---|
| Lesson 2, part 14 | The head of the acanthus, too bulky in my words, then a tool | Upside down number seven |
| Video 14.4 | A spot too bulky to my taste, so a second subdivision comes | Almost no pressure at all |
| Workshop 34, part 4 | Bulk I don't like, so it did not look right | Chop it down with number five |
| 38.9 in Venice Room | Bulk done on purpose, with the material kept to the end | Maybe number three, maybe bigger |
| Class 42, part 4 | One side too bulky, to be made a little more tinier | Undercut much deeper |
| Part 3 of lesson 63 | A chunk bulking out too much, so slope a lot more | Slope more, with a skew |
| Lesson 71, part 4 | A bulky chunk that serves no purpose and doesn't look good | Number 11, 3 mm (0.12 in) |
| Video 82.1 | A section too bulky, so some kind of opening is needed | Nine at a quarter inch (6 mm) |
| Class 90, part 11 | A drop I want a little more bulkier on the bottom | A big seven, three inches (76 mm) |
| Workshop 142, part 3 | A side that should be lighter, not bulky | Just a little lighter |
Eight of the ten rows call something too bulky, then name a tool or a step. The 142 row says I don't want it to look bulky, and gives a reason. The row from 90.11 asks for the opposite, more bulk, and that is the one that sits next to this part.
What do I take from all of this?
The word is a verdict, and what follows it changes. Sometimes a tool follows, sometimes a slope, sometimes a second subdivision, and in one place material kept to the end on purpose. Here the word is a want, because of what sits on another side.
Now look at your own workbench and find one lump you have been calling too much. My choices are on camera in part 1, and the lesson 46 page covers the whole workshop. For all my lessons in one place, start here.
The Venice Room course for workshops 38 to 49 holds the rest of this wood carving work. These parts come from my Venice room carving and from other courses of mine, and every figure in millimeters and inches on this page is mine, with the conversion beside it when I did not give one.
How it's done
- Check before the details. Part 1 opens with a check of everything before the details start. That check is at 00:28.
- Redraw the inner part. A more or less final look on this side can probably be redrawn. That look becomes the inner part, with a ridge all around.
- Name the bulk you need. In the same part I ask for more bulk on that side, because another side already has the acanthus head.
- Establish the edge. The edge must be tangent, I say. For a really nice edge I need a skew, with almost no cutting, just shaving.
- Go around with number 11. A veiner, number 11, and the line is: go around like this.
Frequently asked questions
What did the side with the acanthus head need?
A head of acanthus already sat on another side, and I did not want to repeat others. For this side I asked for a somewhat bulky look, something much bulkier, at 02:39 in part 1.
How wide did I say the ridge should be in part 1?
Approximately 5 millimeters (3/16 in) all around, and not a quarter inch. That ridge belongs to the inner part, which I say I can probably redraw, before I start developing any other details.
What did I call too bulky in workshop 38?
One area in part 9. I wanted it a little more narrower, and I had kept that wood to the end on purpose. My number three sweep was a little too big, and I probably should use number two, maybe even bigger.
What to carve next