

Alexander Grabovetskiy, woodcarver, School of Woodcarving · Published 2020
What does a couple of millimeters mean when a wood carver says it?
Quick answer: A couple of millimeters is what I said about the wood left to chop off before excavating in Venice Room 46.3, beside 1/8 inch (3 mm). In other lessons the same words covered thin walls, depths, gaps from a line and cracks.
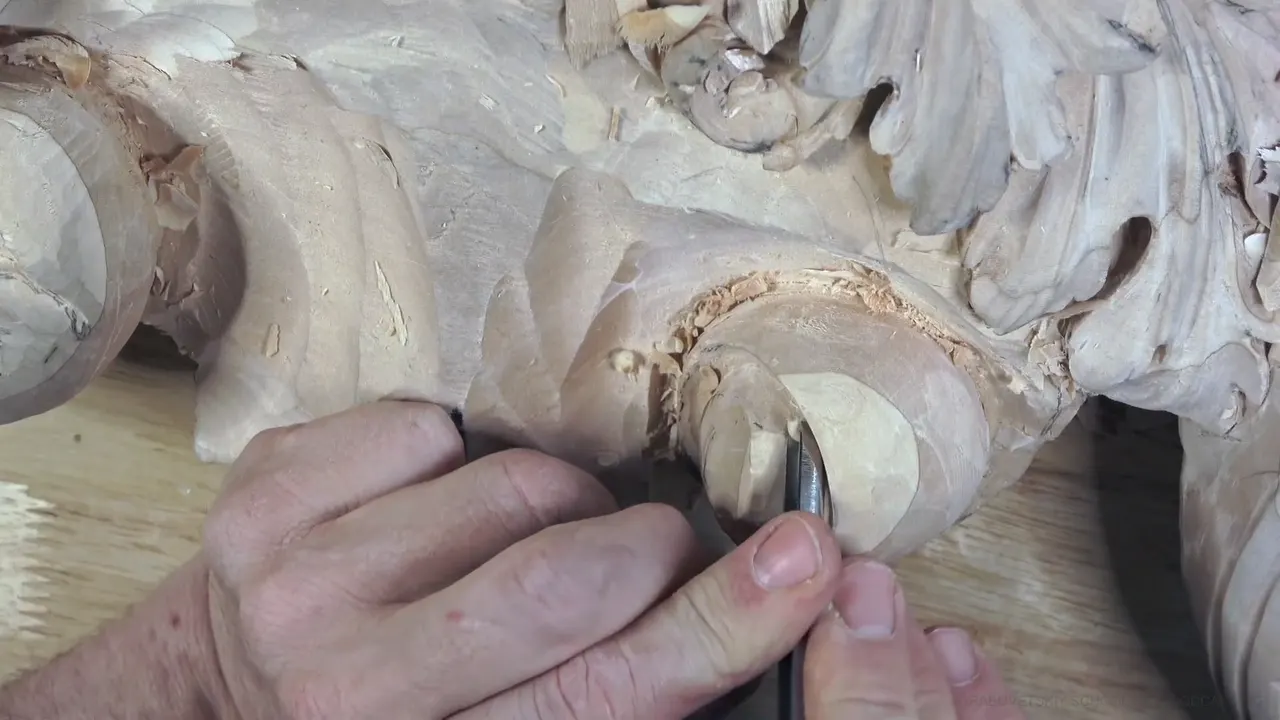

A couple millimeters is the amount I named in Venice Room 46.3 for wood I still needed to chop off before excavating. I put it beside about an eighth of an inch (3 mm), maybe a little less, maybe 3/32 of an inch (2.4 mm). Elsewhere the same words sit beside a wall, a depth and a gap.
Have you ever looked at your carving from underneath and wondered how much wood to take? Then these numbers are for you. I set my figures next to those words, lesson by lesson, in the metric system and in imperial units, so you can see the size in the wood.
Where in workshop 46 did I say it?
Part 3 of workshop 46 opens on a good note. Now it's really good, actually, I said. I still had one spot to fill later on somehow, so no big move right then. Some kind of movement has to go there, because you don't want to see just an empty spot.
Then came the check. I was looking just from the bottom at how gradual my movement is. It looked like I needed to chop about 1/8 of an inch, maybe a little less, maybe about 3/32 of an inch, right there. I said, "A couple millimeters only." That chop was meant for before excavating and creating the details.

Okay, that is good. Then, now I can work my details. "See? Nothing complicated."
Right after that I told you what I call it. It's just to catch the form. You got to catch that initial form before just doing all the details. And if you're able to catch it, later on there is absolutely no problem what kind of movements you could create.
Why a number 11 here? I said you can go really deep with it and still create a really nice, smooth transition on the inside. That makes it better for finishing, I said. A different gouge could outline the main form of the middle part of the volute first, and then I'd go around.
Which number 11 sizes came next in parts 3 and 4?
A 5 mm (about 3/16 in) number 11 veiner came first, to establish my deeper grooves. Around, around, and around. I can lay it on the side of the tool and just go excavate inside. Deep like that is not what I want, okay? I really want to keep that slope.

The 11 should give me a deeper dig and a deeper shadow, I said. Later in part 3 I said that one is four millimeters (about 5/32 in), and that three millimeters (roughly 1/8 in) might be next.
The next part starts on that next size. Three millimeters or even two. My three was missing from its place, which means I misplaced it somewhere, so I picked another one, still a number 11 but a European size.

The edge needed my eye, because, I said, breaking it is always a possibility. Take time and excavate bit by bit, I said, rather than press too hard and watch the effort vanish. Then: "Probably that's the deepest I can go with the three millimeters." Deeper would take two millimeters (nearly 5/64 in). Next came my verdict that this is probably enough, and I didn't want to overdo it.
Over in 46.2 the depth worry shows up too. I got to keep an eye how deep I'm going, I said, to avoid a mistake. It's not pierced work, so I don't want to go all the way.
In part 4 I also said I'd show you from this point of view, just like if you would look inside. Later in that part I said no, I'm not going to sand all of the inside, because there's no reason. I can create a beautiful dome effect there.
A straight number 7 can make those volutes with no problem, I said, but the effect is going to be different. Here I got a dome underneath, and it gives just a deeper shadow. With the 7 I could get just to a certain point.
Where else did I use those words?
Seven lessons are in the table. Each row names the spot and the kind of amount, written the way I said it. They differ, so below I take them in groups.
| Lesson | What the spot was | Role the amount played in that spot |
|---|---|---|
| Workshop 46, part 3 | Wood taken away ahead of the details | Wood to chop |
| Furniture panel 17 | Extra material left for now around an outline, with a little more in places | Left for now |
| Roman acanthus 16 | A concave that stays visible, with the lowest point named | Depth of a concave |
| Workshop 57 | A question of depth, answered while I slowly created a groove | Depth of a groove |
| Floral and molding 12 | A wall of wood that I still wanted to undercut for shadow | The wall |
| Workshop 104 | Space to stay away from the line if you don't feel comfortable | Space off the line |
| Lily box 9 | The opening I called too big | A gap in the wood, the crack I looked at there |

Is it a wall I leave standing?
In lesson 17 of my furniture panel course I said I'll leave a little extra material for now. Further on I said I'm leaving approximately 1/16 of an inch (about 1.6 mm), a little more maybe, just slightly more than 1/16. Some spots, like 3/32 inch (2.38 mm), I would say. I put the words on it: a couple millimeters. Then: from one and a half millimeters (about 1/16 in) to about a couple millimeters, that's what I'm doing.
A curly detail came up in lesson 18. Let me work around it, I said, and stay away a millimeter (0.039 in) on both sides. Maybe less. Tiny at the end, yes, but the extra material is needed for now. Taking it straight to the line was not for me, since I can always make it smaller later, and I can't make it bigger. I called that impossible.
Further into that part: "I would say a couple millimeters thickness is what I left right here. So it should be plenty."

Floral lesson 12 gave me the word wall. A lower part will be removed, I said, and that is going almost the whole way down. Only a couple millimeters stays, and it will look like it's laying flat before it curls. Later I said it again: the wall, that side. Undercutting it was still on my list, for a shadow.
Lesson 8 of that course: on the side I would leave a couple millimeters, maybe even less. And now I can roll it, or shape it in a shape of a rolling.
How deep is that in the wood?
The Roman acanthus course has the plain answer, in lesson 16, and it comes with a number. It will still be visible, I said. There is a concave, maybe about a sixteenth of an inch (1.59 mm) to the lowest point from the upper point, and then: "A couple millimeters, no more than that." A little, even less.

On modern acanthus lesson 8 I said to dig around with the number 11, and "not so deep, don't do too deep." Couple millimeters deep, no more than that. Then I'd take a 7 of 14 mm (about 9/16 in) and attack with just the corner, to round that.
Up in Maine, the Grinling Gibbons class had me taking the same number 11, 3 mm (close to 1/8 in), for a "preliminary cut" straight up, to a connecting point. It won't be really deep. I'm not making that one more than, I don't know, a couple millimeters deep maybe.
Over in workshop 57 came the question: "And how deep?" My answer: a couple millimeters, a little more than 1/16 of an inch (about 1.5 mm). You could go a little deeper, I said, about 3/32 inch (under 2.5 mm) or so, but it has to be really consistent. I was slowly creating that groove.

The grape leaves vase had two figures for one concave. I could go down to one-sixteenth of an inch (1.588 mm), and sometimes even deeper, maybe three-thirty-seconds (about 2.4 mm), a couple millimeters. Slowly, and without pushing too hard. Those first concave moves exaggerate the convex later on.
Back in floral lesson 12, part 1, a small detail goes all the way almost down, to about three thirty-seconds of an inch (a bit over 2.3 mm), a couple millimeters down. No problem there. The volute came next, and I said to measure it.
Did I say two millimeters right after it?
Sometimes, yes. Lesson 36 had a concave, and I had to make sure how deep to go, because I really want it consistent. About 1/8 of an inch down (near 3 mm), like three millimeters, give or take. Or even a couple millimeters, just two (about 0.08 in). Even better, 3/32 then.
I also said I'll put that secondary line in, because it's also important. You're going to see that from below, and a line that isn't consistent won't look nice.
Spoon work was the call in workshop 34, just a spoon, because a straight tool is impossible to manipulate there. So just a number 11, and a couple millimeters, maybe. Two. Like 3/32 in (roughly 2.38 mm).

Workshop 80 had a depth check. Let me see how deep I've got, I said, and then, I've got approximately a couple millimeters more to go. Four millimeters (close to 5/32 in) in a number 11 can take that spot almost to the depth, but not completely, since I want to keep some for cleaning. I'll mark that high spot with the pencil.
How close to a line is a couple millimeters?
In workshop 104 I said I'm getting really close to the final design, so I won't leave too much space. Sometimes it's a good idea to leave a couple millimeters, three millimeters (just under an eighth of an inch), give or take. "But I'm not going to do that."
Then: "If you don't feel comfortable to do that right to the line, stay away approximately a couple millimeters or so." Watch the grain too, I said, like going downhill.

What other spots took a couple millimeters?
The Acanthus over Moldings course gave me a wall too, in lesson 8. Just attack from the side and clean it. It's good, I said, I've got the only maybe a couple millimeters wall. It's still deep enough, and it's going to give me really beautiful shadow. That's better than what was before.
Down in lesson 8 of the lily box one spot reached almost the first layer, the main lid. I left a couple millimeters and not more. Another spot could get even lower, I said.
In workshop 14 of the beginner cutting board I said we can take the triangle parts out first. I won't go deep, just about maybe 1/16 inch (1.6 mm), no more, like a couple millimeters only, and some spots even less. I need a different bevel right here.
Even a blade came up. In Acanthus over Moldings 1 I said a router plane with changeable blades gets you into the tiniest spots, like one millimeter (about 0.04 in) or a sixteenth of an inch, a millimeter and a half (about 0.06 in). The blade right now, I believe, is like a couple millimeters or so, and I need to change it. Just a couple seconds, I said, and my blade is going to be changed.
What about a crack that wide?
The lily box had a crack of that size, in lesson 9. I doubt I can take advantage of it, I said. Maybe I could. Then: "We're talking about a couple millimeters opening." Too big.
Some kind of filler would do, or epoxy, yet it would be too noticeable once the finish goes on. Better to take advantage of the crack and create extra details right above it.

Which tool goes with it?
On lesson 21 my eye would be really small, maybe tiny, and I could excavate that section with the smaller tools. "When I'm saying small tools, I can probably use a couple millimeters, two millimeters, number 11 at first." Two millimeters comes to about 5/64 of an inch.
Tiny spots got careful work in lesson 22. One millimeter (about 0.04 in) first, I said, and to make it cleaner I can use a number eight micro tool of 3/32 in (2.375 mm). Maybe two millimeters, and get in. I know you don't see that.
Bent tools showed up in lesson 11 of the same box. "One of them number eight, the bigger one, and this one is about, I would say, three millimeters, one-eighth of an inch, and this one is a couple millimeters, and that's a number seven profile." Then, too big, so a smaller one.

How would you try it on your own bench?
I look at the carving from the bottom and check it from all the points. I name the amount before I chop. If the spot is not settled, I leave a little extra material for now.

If going right to a line feels uncomfortable, stay a couple millimeters off it. Take time and excavate little by little. When a tool has reached its deepest point, I switch down, as I did with my three millimeters (a bit under 1/8 inch) and then my two.

You can watch the chop of 46.3 inside Venice Room Part 4, and each lesson above has a page of its own. To open them, you can start here.

How it's done
- Check every side. At 46.3 I said I had to look at the carving from all the points, the bottom included.
- Put a number on it. Before I dug, I named the wood to chop off.
- Dig the grooves. A 5 mm (about 3/16 in) number 11 on its side was the tool for my deeper grooves, and I wanted to keep the slope.
- Drop a size. At the deepest the 3 mm could go, I said I had to switch to a 2 mm (close to 5/64 in) to get deeper.
- Stop short. Probably enough, I said, and I didn't want to overdo it.
Frequently asked questions
How thin was the wall in the floral and molding course, lesson 12?
Only a couple millimeters stays, I said, and it looks like it's laying flat before it curls. A lower part would go. Undercutting the wall to create a shadow was still ahead.
What gap from a line came with workshop 104?
For anyone not comfortable going right to the line, I said to stay a couple millimeters off it. I added that you watch the grain, since it's like going downhill. Really close to the final design was where I said I was.
Which tool matched a tiny eye in lesson 21?
A number 11, at first, in a size of a couple millimeters, two millimeters (a bit over 1/16 in). My plan was to excavate that small section with the smaller tools, since my eye would be really small, maybe tiny.
What to carve next