

Alexander Grabovetskiy, woodcarver, School of Woodcarving · Published 2020
What does "dies in" mean in wood carving?
Quick answer: Dies in is my phrase for a carved movement that runs on until it fades into the wood or goes on underneath another part. In Venice Room 46.2 one went around and around a scroll and died in. On a furniture panel, I said another would go lower and lower until it was almost invisible.
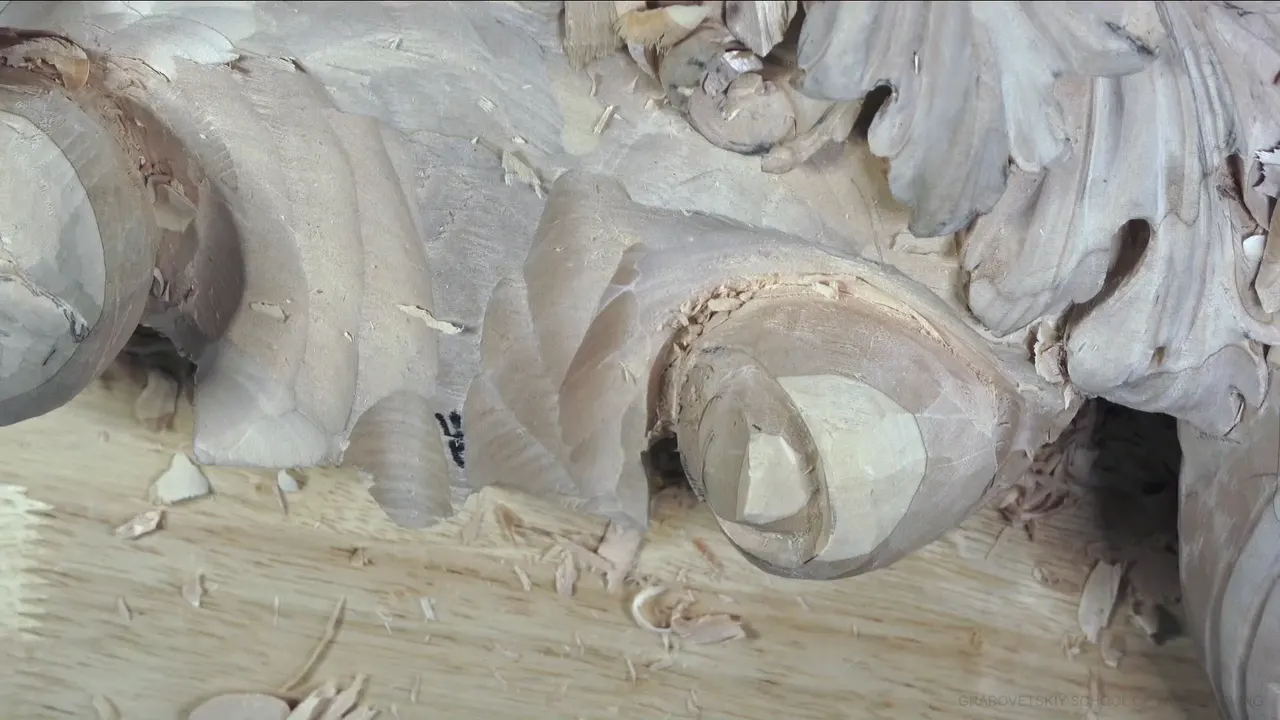

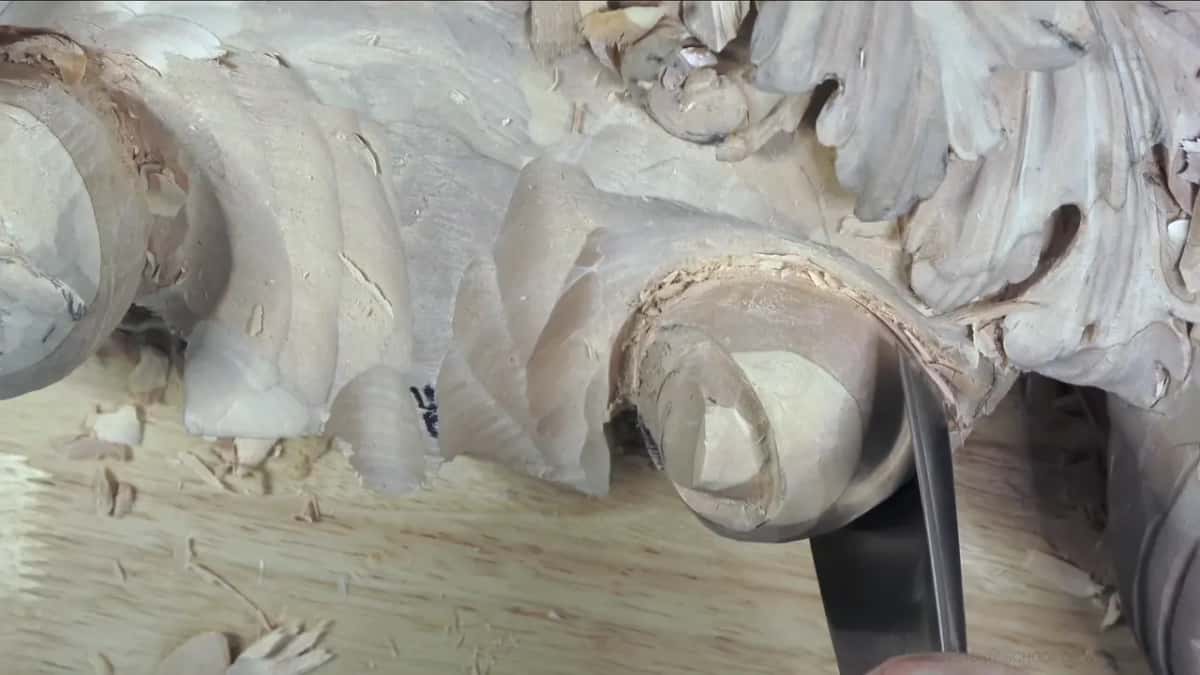
Dies in is my phrase for a carved movement that runs on until it fades into the wood, or goes on underneath another part. In Venice Room 46.2 I was carving around the barrel of a volute, and I asked, can you see how it develops nicely? It just goes around, around, on its way like this, and dies in. These relief carving notes come from my own lessons, and each one says where I said it.
Have you seen a carved groove that fades away instead of stopping at a wall? Or a line that slips under a leaf? Then you can carve one. Below you'll find the spots it came up on camera, what I was carving there, and how deep I let the wood go beside it.
Part 2 of workshop 46 is a short video. So other lessons and courses of mine sit next to it here, and each one links to its own page.
Dying in at a glance
- Part 2 had it right after I named a smaller number 11 for a little junk.
- It can fade until it's almost invisible.
- Or it goes on under another part, the way a line goes under an acanthus.
- On one furniture panel, where a line had to die underneath, I said I think I can't go past a sixteenth of an inch there, even less.
- Where nothing connected it, the spot would be too weak, I said.
- Where it dies is a choice, and once I put that choice off till later.
What came before the movement died in?

I started with a number 7, about one inch (25 mm) wide, probably the best tool, I said.

Then I wanted to see if a number three would work. It looked like it would, and I said I could probably give a clean edge with it.

Next I checked how far I was from the number 7. Not too far from the big number 7, I said. But at least I could give a big movement right away, pretty much, and go around and around like that. You'll hear that phrase again below.

That is actually good, I said at first. Oh, you know what? I spoke too early. I'd placed my tool back in its place, and I could use the same tool to clean that.

Again, I've got to keep an eye on how deep I'm carving. I don't want a mistake. It's not pierced work, so I don't want to go all the way. Pierced carving is a kind of openwork, where the holes go right through the board.

A little bit of the junk I can always take care of with the number 11, I said. With the smaller one, because I'd got pretty close to the finish line.

Then came the line this page is built on. Can you see how it develops nicely? Just goes around, around, on the way like this, and dies in. Okay. Just like that.
What did I fix after it died in?

The only part I didn't like was one movement right there, because it was sticking out too much. I can always fix it, I said, like that. I think it'll be more accurate, and it goes up like that.
Maybe one spot was a little too big, I said, and I needed to clean that side a little better too.

The barrel's supposed to be complete, or almost complete, round. Let me use a bigger tool, I said, and see if I can create a better look. By the way, that's a 7, but it feels like an 8.

That looks good, I said, except I could give a better shape to this side. After that I could just use any tool, pretty much. But I thought I'd make a better line just by raising my big tool. And it ends up right there, so that's good.
One chunk was still there, and I said let me take care of it. I really don't have to, because I could leave it and create some kind of design right there, but I don't need it. It'll look better without it, I think. And that anyway has to go underneath, to another side, which also solves the problem of how it's supposed to look from the bottom. I'm going to roll it down later on.
My last words in part 2 were a plan. I'd clean a little of this side, I said, and I had to get a little closer to my line, the one I'd just made with the big number 7. That's going to give me a really beautiful and tangent, continuous movement.
Where else in workshop 46 does a movement die?
In part 7 of workshop 46 I had to blend one movement together with another. The way to do that is just to add some kind of acanthus, which is going to end up like that, and it'll die on inside, I said. Then, going along that line, I said it goes right here, dies right there, and it's beautiful movement right here.
A concave came up in part 10. I was going to leave only about five millimeters (about 3/16 in), and the concave would carry on and die somewhere on the inside. It doesn't have to be five millimeters everywhere, I said. Right here it'll be only an eighth of an inch (about 3 mm), and that's going to disappear underneath.
Does it fade out, or go under something?

It does both, and I've used the word both ways on camera. On furniture panel 21 one part was going to be a little high, and then go low, low, low, until it dies to death. It's almost invisible, I said, but it'll still be detectable by eye, and it'll be all organic movement.
Over in workshop 62 of the Venice Room a concave would be narrow at one end. It would go from almost nothing, wider, even wider. It's just going to go, go, go, I said, and die inside of that volute.
Back in workshop 10 I still wanted a convex first, and then it would go gradually down and down and die to the concave. It's got to be gradual, I said, which means almost nothing from that point. The space on one side of workshop 150 would be no more than a quarter of an inch (about 6 mm). It'll be higher on that side because it goes from that point down, down, down, up, up, up, and it'll die inside of this volute.

Other times it goes under. For furniture panel 28 I picked the micro tool again, three millimeters, a number 8, about 1/8 inch, for a concave. I'm not going to touch that edge, I said. It's supposed to be a high spot. You can see I'm just making a bunch of small slices, but this concave is going to die right underneath here. That'll give me really beautiful shadow play. In painting, that play of light against dark goes by the name chiaroscuro.
My center line on the grape leaves vase will be dying underneath the big movement. Earlier in that same video I wanted to fix a line, because it's not going to be visible. If you continue this line, I said, it'll die in pretty much the same direction as that movement, just like a tie.
With the grape onlay, one part already goes right underneath, and logically I have to continue it somewhere on another side. I said I'm going to die in right underneath from this side.
How deep can you dig next to a line that dies underneath?

For furniture panel 20, only a little. I can't go deeper than a 16th of an inch (about 1.6 mm), I think, even less, because this line right here is supposed to die somewhere underneath that element. And logically, I don't want to excavate too much.
I guess it's possible to get a little deeper. But let me do a shallow background first, I said, and the tool I named was a number 8 at 1/8 inch (about 3 mm).
What does a line need before it can die under something?

A connecting point. In workshop 31 I wanted a movement going downhill, all the way to the backside, just underneath the acanthus. And then I can just die right underneath of it, I said. Let me set up that acanthus first, I said. Otherwise, it has to die almost from underneath right there, but there is no connecting point. And for me, it would be not so smart to create too weak a spot.
On grape onlay 10 I wanted to connect one section with another piece, so it goes right underneath, and make a complex movement that dies underneath. I want to watch how it goes from underneath, I said, because I want to make sure it's connected. I also didn't want to create a problem for myself, with an overcomplicated movement close to my future grape.
Who picks the spot where a carved line dies?

I do, and once I put it off. During workshop 70 I said there'll be a point somewhere, which I'll decide later, where it'd be my main point, if it'll die in this section. Or maybe it's a good idea to move it somewhere right there, I said, and have some interesting movement.
For workshop 47 I didn't want to lose one movement. This movement has to go to this point, I said. The reason why, I just want to follow the overall movement and also die somewhere right there. The middle line is supposed to just be logical.
In workshop 48 I needed another one going that direction, to die somewhere right here and become part of this head. Later in that workshop, when I got to my divisions, I said let's say this will die over there, and that part will go up like this.
Workshop 45 had it too. This one will go the whole way like that and die this way, I said. Maybe I should use a smaller one now and not crush it.
And workshop 102 had this: if you place a tool there, you can see the concave go and die in. And that is the back line of our overall movement.
Not every spot is a good one. In the beginner course where I carve a curly kitchen cutting board, workshop 14 had one line that wasn't nice when it would just die right there, and it doesn't create a nice flow. That's common when you draft everything really quickly, I said. Although they're not mistakes. We can always refine.
Spots where it died in, side by side
Here they are with the lesson each one came from.
| Lesson | What died in, and where it went | What I said |
|---|---|---|
| This part, 46.2 | Something going around the scroll's middle, on its way | Goes around and dies in |
| Same workshop, part 10 | One concave, set to die on the inside | Doesn't have to be five millimeters everywhere |
| Furniture panel 21 | One raised part, brought lower till almost gone | Almost invisible, I said |
| Furniture panel 20 | A line meant to go under that element | A sixteenth of an inch, even less |
| Venice Room 62 | Concave from almost nothing, then wider | It would go and die inside the volute |
| Room 31 | Downhill movement going right underneath the acanthus | A weak spot, with no connection |
| Grape leaves vase | My center line, under the big movement | Will be dying underneath |
| Kitchen board 14 | A line that just died right there | It doesn't create a nice flow |
How do you know it died in the right way?

In lesson 4 of the grape onlay, I said I'd go until I was happy with it, and then I was somewhat happy. I went straight down, then leaned, toward my previous cut, then straight down again, until I'm happy with how it actually dies in. And I am somewhat happy, I said.
Panel 21 of that furniture course had one spot where I just didn't like how it transitions. I can always create a blending cut, I said, and right here it has to just kind of die in. And now I'm happy. It just goes from that side, goes in, in, in, in, turns this way, and goes underneath. That's beautiful.

For workshop 26 I took a flatter gouge just to give a first movement. And yes, I was going against the grain, actually upward. If my tool is sharp, I'm okay with that, I said. You can see it just goes really nice and smooth and dying right there.
Then the lily box, where a number 4 at 10 millimeters, three-eighths of an inch, was maybe a little too big, with too much sweep. A number three at 6 millimeters, a quarter inch, was much better. Although I could create a nicer concave, I said, gradually, of course, dying to the main movement. That lesson is lily box workshop 7.
Where is part 2?
You'll find it in the Venice Room Part 4 course, inside workshop 46, one of its twelve parts. It comes right after part 1 and before part 3, on a carved relief panel, working around a scroll like the one on top of an Ionic column.

Is there a line on your own board that stops at a wall where it could fade away? On my Venice scroll, this one went around and died in. If you want to watch every pass, the tuition opens every workshop of the Venice Room.
How it's done
- Begin with a wide number 7. About one inch (25 mm), which I called probably the best tool.
- Try a number three. It looked like it would work, and I said I could probably give a clean edge with it.
- Watch the depth. I kept an eye on how deep I was carving. It's not pierced work.
- Clear the junk. A smaller number 11, near the finish line.
- Let it die in. Around on its way, then it dies in.
- Fix what sticks out. One movement was sticking out too much, and I fixed it. More accurate, I think.
Frequently asked questions
Does a carved line that dies in vanish completely?
Almost, and still not quite. One part of a furniture panel would run from high to low until it was almost invisible, but still detectable by eye, I said. All organic movement, I called it. That was lesson 21 of my furniture panel course, where the part started out a little high.
How deep did I dig beside a line that went under?
A 16th of an inch (about 1.6 mm), even less, on one of my panels. Logically I'd rather not excavate too much there, because that line was supposed to die somewhere underneath another element. I guessed a little deeper was possible, and planned a shallow background first.
What if nothing is there for the line to go under?
Venice Room workshop 31 had no connecting point, and to create a spot that's too weak would be not so smart, I said. My plan was to set up that acanthus first, an extra acanthus movement, and then the line could die underneath it.
What to carve next