

Alexander Grabovetskiy, woodcarver, School of Woodcarving · Published 2020
Where should a carved movement start on a wood carving?
Quick answer: The start of a carved movement is the spot I pick for a ridge, concave, flip or blend to begin. In Venice Room 46, part 12, I said I would not blend one line, because that ridge needed somewhere to begin before you could see it.
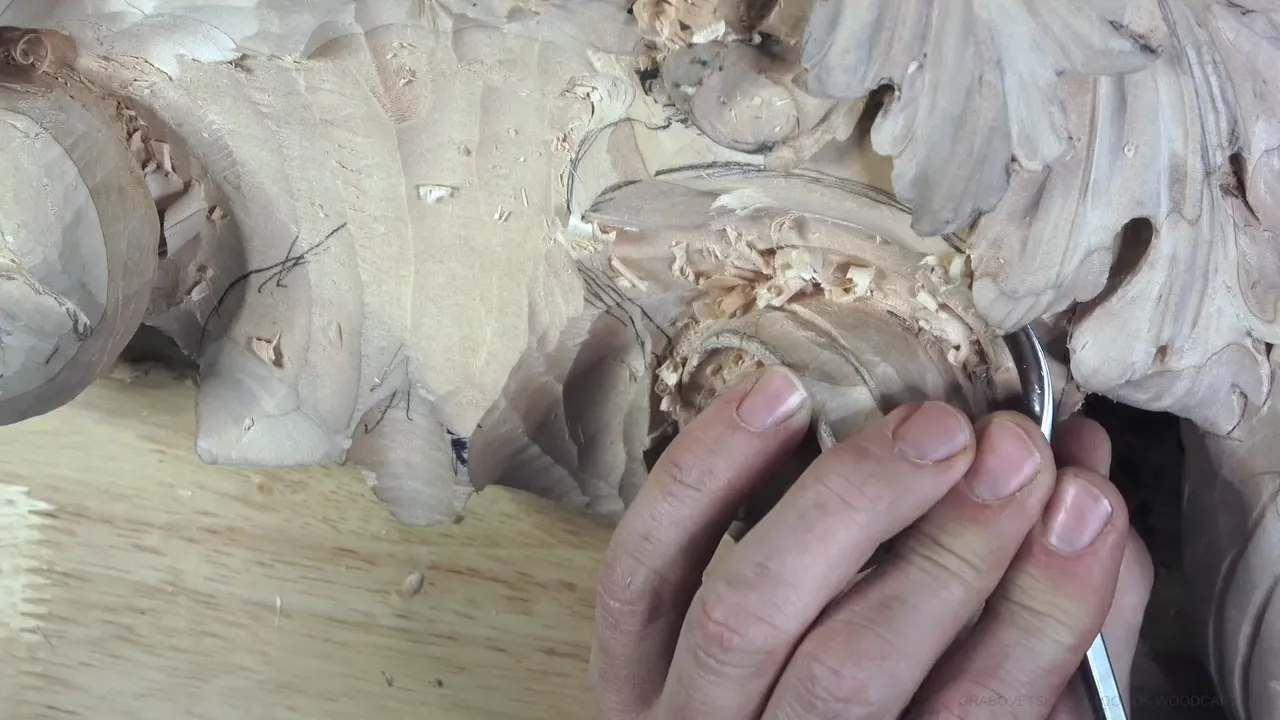

Where a carved movement starts is a spot I choose, the place where a ridge, concave, flip or blend begins. Near the end of Venice Room 46, part 12, I said one convex would not go all the way in and one line would stay unblended, because the ridge there needed a place to begin before you could see it. One line, kept on purpose.
Have you ever looked at a carved leaf and seen a sharp ridge run down it? Did you wonder where that ridge begins? In this video I chose one on purpose. Part 12 is the last part of workshop 46 and runs about seven and a half minutes, so beside it I put the times I said "start somewhere" across my other wood carving lessons, and I name each lesson as I go.
What decides where a movement begins
- This ridge needed a place to begin, so in this part one line was to stay unblended.
- On the Furniture Panel one flip was to begin almost at the background.
- On one rosette I began clear of the edge, because there I could miss and the grain was a guess.
- With the band saw, the closest point to the line.
- On one Venice concave, a run along the line from one spot would not look good.
- A start can move, and once I could see where a flow line was supposed to go, I thought it should probably begin lower.
What did I carve in part 12 of workshop 46?

Blending came first, then the edge. Just blend that together, I said, and I knew the edge needed a little cleaning, otherwise it's just a little distracting right here. After that came "and go around," then "even smaller," twice.

The tool talk was all out loud. Maybe I could use a straight one, I said, not spoon, not bent. Let me use 2 millimeters (about 5/64 in) to get underneath. And go, and go, until I completely undercut underneath of this detail right there.

Next came a question to myself. Am I going to use, again, probably just a skew to fix this movement right here? About half a minute later: "Now I can get much better cut."

Then the slip. Oh, that's bad, that is bad what just happened, I slipped and messed up with my edge. I'll fix it, I said, that's okay, and then I took it back: well, it's not okay, but I'll fix it. Maybe I need to just go with this tool. And fix it. A few seconds on, those were just chips on the side, and now it was good.
I said I wouldn't touch it anymore. Later would come a clean cut, what I'd call the final clean cut, because I have to double-check how tangent my line is. Before that last pass I really need to check everything.
Why did I leave one line unblended late in part 12?

This is the concave I'm after. An even smaller tool could do it, maybe 1.5 millimeters (about 1/16 in) instead of 2, and that one is probably what I'll use there for an extreme nice line, a beautiful and nice line. As of now, though, that is good.
The convex came next. This side needed knocking down to make it convex. Before the convex I could create another concave if I wanted to, but let me take care of this convex first. A little too big of a tool, I said, so I needed a smaller one, and this part has to go right underneath.

Then the line this page is about. And this convex, I'm not going to go all the way in, I said. I'm not going to blend this line, because I really need to start somewhere to see this ridge. It's not that big anyway, so I'm going to leave it right there. I'm going to leave it.
Two parts earlier, in part 10 of the same workshop, I had asked for a ridge already. The plan was to raise one side of a concave slightly, and that raised side would be the ridge. The concave would run the whole length with about five millimeters (3/16 inch) left, then die somewhere on the inside, with only an eighth of an inch (about 3 mm) at one spot. Undercutting would come later. But as of now, I just need that ridge.

Right after the ridge line, two passes got blended into each other. Blend those two cuts, that marriage line, and go to the middle line and blend it nicely. And yes, I got my cut in, which is no bueno. Too small of a tool, that's what I used. That's what happened, and the next need was a little bigger tool to blend better.

The part ends on a plan. Now it's all good, and now I can probably start developing the eyes and the pipes.
Where do my other movements start?

Venice Room 41 of this same course has the closest twin. To blend it I could use number three, the bigger number three, and the blending would begin about here, more or less, while I still want to keep this ridge, because it would be part of this movement. That part should feel like it grows inside and then out.

Lesson 22 of the Furniture Panel had a flip set the start. In one spot I could go almost to the background, because it's supposed to flip, and that flipping motion is supposed to start somewhere. In this case, almost from under ground, as I put it.

Back in Venice Room 11, in the first course of this room, it was a flip again, and I said my flip would begin right there. Yes, but it cannot be below, it has to go in just like that. And yes, I do love those flips, I think they look awesome.
My Hashemi Flowers course, lesson 14, needed a concave going underneath the other way, so the part would look like it's flipping. I'd begin it about here. Same small tool, to make a concave up, and I also have to be really careful not to overdo it.
A start needs an end, too. Workshop 36 of the room had one line go out, out, out, and die somewhere right there. So its start would be right on the side, and going around I left about two millimeters (5/64 in) from the inner edge. That is all I need, I said. I had to eyeball it, since my finger is a little too thick for good support on the side.
Two concaves can share a start. For workshop 101 I wanted the feel of some kind of miter, so my concave could begin right about here and the two would just get together. You won't see a line there, but the feel would be of two parts mitered together.
Side by side works as well. On workshop 127 the first convex was to begin over there and the second right here, after a shift of about six parts out of 10. Let me try the huge 30 millimeters (about 1 3/16 in) tool, I said, a number 11, of course, since I really don't need deep concaves, and that is going to give me a much smoother ride.
In the main flower bouquet of the Furniture Panel, lesson 23, the start was one single point. My start had to be right at this point, with the 1/16 inch number 11 (about 1.6 mm) I was using. I meant to bring another one right to that point too, because it has to feel like it's growing from the same point.
Workshop 81 had a separate movement that has to start somewhere in my volute. I didn't want the parts exactly the same width: this part the widest, this one the smallest, and this one medium.
Can you start a movement in the wrong place?

On workshop 89 I named one. I know there's a tendency to start somewhere right here and go along that line, but that won't look good. That concave was to go almost to the bottom, closer to the surface, and even better would be a number nine, maybe a bigger one, three-quarter of an inch, 20 millimeters.

The band saw has a start too, before any carving. In my Floral and Molding course the rule I gave was to start where you have the shortest distance to the line, to the design, and on that board it was only about a quarter of an inch (about 6 mm). That would be a big mistake to start somewhere else, I said. It's going to be a lot of waste, and I want to keep that part to use for something else.

For the Flower Rosette, lesson 2, I gave the reason to keep off the edge of that rosette. I can actually miss, and I don't know what's the grain going to do. So I start somewhere away from the edge, and I'm not taking too much material at once, and I really check that I'm not below my line.
First tries can be wrong. Working out a flow line in Hashemi Flowers, lesson 3, I said I think I should probably start somewhere lower. And on the design part of my Furniture Panel, lesson 7, one movement began right here, and I didn't like how it looks. The fix I planned was to carry the line up the whole way, and with 5 millimeters (about 3/16 in) of space there, the molding would feel continuous.
Why does the starting point matter?

Lesson 19 of the Furniture Panel is where I said it plainest. Yes, you have to start somewhere, and it has to be right there. An even deeper pass could follow with a half millimeter tool (about 1/50 in), even with a little mallet, deeper, deeper and deeper. But be mindful, we don't have too much material, too much thickness, so you can sometimes do it too extreme, and that's no bueno.
The same panel, three lessons on, has a start that fixes something. This movement is kind of not finished, so I need to begin right in this area, with 3 millimeters first (about 1/8 in), to kind of reestablish my cut, and I need to catch the grain.

In workshop 45 the wood picked. Because I had a big chunk there, I could actually start there and create right on the side. I know it's kind of hard to understand, I told you, and if I don't like it, I'll just take it down and recreate something.
Tool size moves with it. My pick for the start on workshop 35 was 1.5 millimeters, like 1/16 of an inch. I said I could go lesser there, even 1 millimeter (about 1/25 in), maybe even half a millimeter, because I'm able to get my brush in with no problem. But I still want to see deep shadow.
One spot on workshop 34 was still a little higher than the part beside it, and it just doesn't look good. For that I said I should probably use the back bend again and begin there. Maybe now it's the time when I can dig underneath of that future movement, but not much, because I need some of the material, some thickness of it.

My class in Maine on the style of Grinling Gibbons put it as logic. You really have to think about where's the center of that small flower, and bring that cut to the center. It's gotta start somewhere, I mean, that's the logic behind, it's got to start somewhere. Don't worry about cleaning up yet, I said, that is just preliminary cut.
Which lessons put the start where?
Eight of these starts, one per row, with the reason I gave on camera.
| Lesson | Where the start went | The reason I gave for it |
|---|---|---|
| Venice 46.12 | One line I kept unblended near the end of part 12 | To see this ridge |
| Panel 22.2 | A flip, almost at the background of the panel | Supposed to flip there |
| Rosette 2.1 | Somewhere away from the edge, a little way in | Unknown grain, a possible miss |
| Floral 1-1 | The shortest distance to the drawn line, at the saw | Keeps a part for later |
| Venice 89.8 | One spot I warned you about, then along the line | It won't look good |
| Panel 23.10 | One single point that another line is brought to | Growing from the same point |
| Hashemi 14.6 | About here, with the same small tool as before | So it looks like flipping |
| Gibbons 18-2 | Toward the center of a small flower | That's the logic behind |
One row is a warning, and the rest are places I chose on the wood, in my own lessons.
Where should you start on your own carving?

Take what I told you straight. With a knife on my Plate with Butterflies, I said I'd start somewhere right there, exactly the same angle like I did the previous cut. Not that you have to think about it all the time, but it's something you have to keep in mind. For a gouge or a chisel, the rest of this page is me at my bench.
The workshop 46 page covers the whole lesson, and the Venice Room Part 4 course holds all twelve workshops of this acanthus relief. All my courses are one click away if you start here.
How it's done
- Find the shortest way to the line. On my Floral and Molding board only about a quarter inch (6 mm) of wood lay between the drawn line and the side of the board, and where the design comes closest to the edge is the starting point.
- Stay off an edge. Clear of my rosette's edge, because right at it I could miss, and I didn't know what the grain would do.
- Keep the line a ridge will need. In part 12 the convex was to stop short and one line was to stay unblended, so the ridge had somewhere to begin.
- Size the tool. For two concaves on workshop 118 I named a big number 11, 15 millimeters (about 19/32 in), and said an even bigger one, like 20 millimeters (about 0.8 in), could work.
- Go up a size to blend. Too small a tool left a mark in my blend, so the next need was a little bigger one.
- Leave cleaning for later. The final pass was still ahead. Don't worry about how clean that is, I said; it still has to be developed.
Frequently asked questions
Can a concave start right at the eye of an acanthus leaf?
Workshop 57 did that. Here's the eye, I said, and I can start somewhere from here with the same tool, a number 11 veiner of 12 millimeters, about half an inch. I meant to lean it toward the left side, because I really wanted to raise the right-hand side ridge.
How do you keep a ridge when you start a pass next to it?
Workshop 50 had that worry. I don't want to lose this ridge, I said, because the movement there is a part of that development, and I would love to not make a mistake. Then I named the spot where I'd begin.
What comes before I start a concave on this leaf?
In part 11 of workshop 46 I said I need to create the concave first, and establish its boundary on one side, because it's really important not to mess up. Carefully, I was going to start my concave. My tool was a number 11, a medium bent spoon, about half an inch (13 mm) at the spoon.
What to carve next