

Alexander Grabovetskiy, woodcarver, School of Woodcarving · Published 2020
What does "obviously" mean when a wood carver says it?
Quick answer: Obviously is my word for a fact the wood, the tool or my plan has already made plain. In Venice Room 48, part 12, it came with a tool too large for the job, and I said I needed smaller ones. Elsewhere it marks an undercut kept for later, or a shape that looks wrong for now.
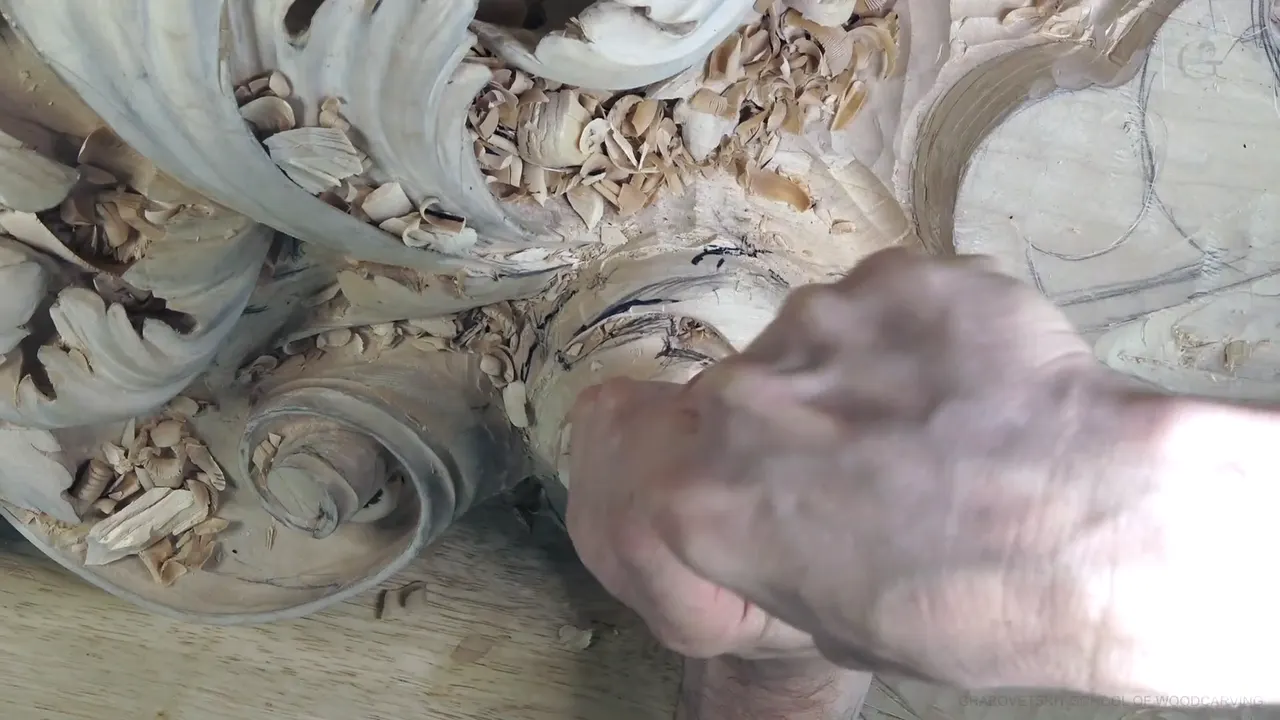

Obviously is the word I put in front of a fact the wood, the tool or my own plan has already made plain to me. In Venice Room 48, part 12, I said it while a pipe and an eye were going into the acanthus head of that workshop. But obviously, this tool is a little too big for this job, I said, so I need to use smaller tools. The fact came first. My answer to it came after.
Has anyone ever told you something was obvious when it wasn't, not to you? Have you heard a carver say the word and wondered what he saw? Read what came right after it on my board, and you'll know where to look on yours.
Part 12 runs about seven minutes. So I set other lessons beside it where I said obviously on camera, from Venice Room workshops, my furniture panel, the grape onlay and a few more. Each one is named, with a link to its own page.
Five plain facts the word came before
- The wrong size of tool.
- An undercut I was saving for later on, once the shape of the part was there to see.
- Some part that didn't look good yet.
- What the grain, the angle I could reach it from, or the softness of the wood would let me do on that piece.
- Something so plain I still had to think.
What was on the board in part 12 when I said it?

The video opens on a concave beside a pipe. 14 millimeters, half an inch, that's what I'm using, I said (14 mm is about 0.55 in), and it had to go with the pipe movement, right there.
I got that concave and ran it all the way to that movement, and the eye came out really pronounced. The next concave had to get done the same way.

Later on, it's going to be undercut, I said, but you should see the shape. Concave, concave, convex in the middle. That is actually really good, I said, really, really, really good.
One part stayed raised, because I still had to blend it together, and I wasn't going to touch that point yet. All it would take now was just clean up and extra subdivisions, in my words. Getting rid of that marker was the next plan. Then came a look I liked. Beautiful movement. I love it.

One spot needed a much nicer movement, and a concave there too, because I wanted to raise that ridge a little. Before that, I wanted the ridges gradual and nice, and I said I was going to take number three and clean that edge. In the next frames a wide, flat blade sits at the lower edge of the round. Even with more divisions to come, everything had to stay just gradual.
The lines just before the word went like this. This needs to be gone, I said, and that's going to become a pipe, so it has to go even below this eye. That is what I have to do. Right behind it, the tool in my hand got its plain verdict, the one I quoted at the top.
Did the smaller tool go in the moment I said it?

In my own order, the blend came first. First, I'm going to blend this area, I said, because I need to create the right surface for the pipe.
My next words were let me make this eye nicer, not recreate it, but make it nicer. Right there is a pipe, which means this part needs to be concaved, and the opposite side also, and that was the main concave. While I worked it, maybe this tool is still too big, I said.
At the very end the area didn't blend with the overall movement yet, because there was a line. I need to excavate much nicer there, I said, with a smaller tool. Everything's supposed to go down there. Which tool came next is not in this part.

Too big doesn't always mean a swap. On my furniture panel, workshop 27, I wanted only a slight undercut, not too deep yet, and obviously it's a little too big for this area, I said, but it's okay. And about all that mass, I added that it doesn't have to be perfect yet.
Back in workshop 47, part 1, the size came up without the word. I called the tool probably too big and went to a 2 millimeter number 11 (about 0.08 in) to go underneath. In 48.9, the part three videos before this one, the word came before a choice, obviously, I could go with number six or number five, I said, and let me try number five first.

The floral and molding panel, lesson 4, is where I needed a flatter tool, picked one I like, and said I'd just slice with the heel of it. Right after came obviously, it's not the only tool you could use. A number two or number three placed 90 degrees down, with a mallet, would also work. Just make sure you don't undercut it.
Why would I say obviously about an undercut I haven't carved?

Undercutting comes late in my order of work. Yes, later on I will undercut, obviously, is how it came out in workshop 47, part 12, and the Venice Room Part 4 course page goes into why the final one waits.
Workshop 31 of the furniture panel put the same idea another way. Obviously later on I will undercut some of that stuff, I said. My meaning was a number 11, half a millimeter wide (about 0.02 in), and an excavation something like this, for an even deeper shadow. But it's a little too early for this, I said. The workshop 31 page covers that lesson.
One workshop earlier, in workshop 30, the same panel had a section that blends really, really nicely, from above, and those concaves cast a shadow I really like. But obviously it's not the final look yet, I said then, because we still have to work.

Part 9 of workshop 47 had it in plain order. I'm not going to rush, I said. Undercutting was not for now either, and neither was my excavation inside, because right now I need to establish and create the movements. Then the word. So obviously, looks like logically, I have to have some kind of eye right there, and another eye is going to be right here.
What if obviously comes before a part that looks wrong?

Then the word names a problem I can see, and a fix gets named. In 47.1, I had just gone underneath with that small number 11 and undercut almost right away. Obviously, it doesn't look good, I said. What I have to do, take a gouge and blend that in. It creates the effect that this piece grows right underneath.
My grape onlay, lesson 1, had a hump I could obviously see was too big. I'll just remove it, I said. Here you go, that is the grape. You can see obviously how choppy that one is, I said next. I was working on just an overall shape of it, without worrying about the final result.

In class 12 of my Grinling Gibbons course from Maine, the line was obviously, I don't like the texture of it. It doesn't look good. The same number five I used before was probably going to clean up that area, carefully, carefully. And yes, I was working against the grain there, breaking the rule, and I'm okay with it, I said.
Does the wood itself make things obvious?

The grain can. Working along it on a Roman acanthus leaf, lesson 4, one side was starting to split. Obviously it would be much easier if I can attack that from that side, I said, and much cleaner. But I didn't worry about it too much, because it was not my final cut yet.
In lesson 6 of the grape onlay I was going through with a number nine of 1.2 millimeters (about 3/64 in), like a plug cut. Obviously I cannot attack from two sides, I said, so it's got to be from one side. So it's not gonna be that easy. Later in that clip, I am all the way through, I said.

The species counts too. In the grape onlay's final assessment I said it plainly. Obviously, lime wood or bass wood, that's kind of soft, it's not too good for scraping, but still you're able to scrape it.
Sharp tools are a plain fact too. In workshop 53 my plan was the skew again, on a movement that had to be tangent, three-dimensionally. It needed sharpening first. I just sharpened that off camera, I said, and it always helps to work with the sharp tools, obviously.
Can something obvious still need a second look?

The plainest case I have sits in part 8 of workshop 43, in the middle of a choice about a rolling effect. Let me think, I said, let me think. Then, oh, yes. Obviously, I do have to think. You're experiencing the birth of a piece of art, I told you then. Then, obviously, that is going to flip above, I said, and I don't want to lose that movement.
Checking belongs here too, and on my Venetian flowers rosette, lesson 1, the word came with a check. On some spots I am right on the money, so I can't overdo it. A 7 millimeter number 11 was next, a little bigger than a quarter inch as I put it, and I reestablished the line.

Laying out the next line on a Venice board, workshop 155, I said obviously, you have to hold it perpendicular, just to make sure you got the right distance. So I have to use logic how it's supposed to go. A 45 for the miter was the next need.
For workshop 45, part 5, the word came with something I liked. Obviously, you can see I'm already able to do the letter S this way, I said. It's not big, but still, it's a really nice detail. Later in that part, obviously, I could give little divisions right here too, I said, which is going to give me a more detailed look.
What about holding the work and cleaning up?

For my plate with butterflies, lesson 6, I had two dogs close to me. Because I've got those two dogs, I can easily rotate it and attack from whatever angle, pulling toward myself. And obviously I have to hold it with another hand, I said. But that's going to give me more flexibility.
For the chamomile and bow rosette, lesson 4, my tool was a really tiny number three spoon, about one-eighth of an inch (about 3.2 mm), I would say. Then came obviously, I have to change the positions and just work my way in. About one millimeter deep (about 0.04 in). Well, actually, one and a half millimeters deep, about a sixteenth of an inch, from the high spot to the background.

Inside is done, I said in lesson 11 of the butterflies course, and obviously, I'm going to take out all those pencil marks. I didn't want to waste your time on it. Either sandpaper if you wish or just scraping if you're more authentic would do, in my words, and it doesn't really matter.
The floral panel had it too, in lesson 7, with a reason for a tiny tool. Obviously, to create that curl, I have to excavate some of the material right here, I said, with a really small one, like a number nine at one-eighth of an inch (about 3.2 mm).
Where else did the word come, and what came next?
Seven lessons sit in the table below. Every row is a different lesson, and the first one is part 12.
| Lesson | Right after the word | What came from me next |
|---|---|---|
| Venice 48.12 | The tool in my hand, one size big for that job | Smaller tools, after a blend |
| Furniture panel 27 | A slight undercut, with a tool too large there | But it's okay, I said |
| Venice 47.12 | An undercut I was keeping for later on | Later, not on this pass |
| Grape onlay 1 | A hump on the grape that my eye said was too big | Removed, and there was the grape |
| Roman leaf 4 | One side beginning to split while I worked along the grain | Not the final pass yet |
| Gibbons, Maine 12 | Some texture I didn't like, and it didn't look good | Probably the same number five |
| Butterflies 6 | Holding the plate with my other hand while it turned | More flexibility for me |

Where can you watch part 12?
In workshop 48 of the Part 4 course, on the relief board this course is carved on. The workshop 48 page covers the whole lesson, and part 11 comes right before this one. If you want to carve along with me, start here.
Can you see one plain fact on your own board right now, a tool a size off or a side that splits? Pick up your gouge and give it one more pass of wood carving.
How it's done
- Look at the form before any undercut. In part 12 the undercut is for later on, but you should see the shape, concave, concave, convex in the middle.
- Keep the ridges gradual. Before raising one ridge, I wanted the ridges gradual and nice, and my plan was number three on an edge.
- Judge the tool against the job. My tool was oversized there, so smaller tools were the need.
- Blend before the pipe. First came a blend of that area, in my plan, because the pipe needs the right surface.
- Keep the concave in sight. Where a part goes underneath, I still want to see that concave, gradual and blended with the convex.
- Find the line that is left. A line still kept the area from blending with the overall movement, and I needed a smaller tool to excavate it nicer.
Frequently asked questions
What should you do when the tool in your hand is the wrong size for the spot?
In part 12 of workshop 48 I said I needed smaller tools, and in the very next line that I would first blend an area to create the right surface for the pipe. On the furniture panel, one tool was a bit big for an area, and that was still okay with me for a slight undercut.
Should you undercut before the shape is there?
I wait. The undercut comes later on, obviously, the way I put it in workshop 47, and in part 9 of that workshop I wasn't going to undercut yet, because right now I need to establish the movements. On the furniture panel I called the deeper excavation a little too early.
Does carving against the grain ever make sense?
In class 12 of my Gibbons course in Maine I did it, called it breaking the rule, and said I was okay with it. On a Roman leaf one side started to split along the grain, and coming from the other side would be cleaner, but that was not my final cut yet.
What to carve next