

Alexander Grabovetskiy, woodcarver, School of Woodcarving · Published 2020
What does the main form mean in wood carving?
Quick answer: Calling something the main form means it is the first full shape, put in before the undercut and the final clean-up. In my Venice Room workshop 48, part 1, that is all I need for now. Other lessons show a knife, a V tool and a number 7 doing that first job.
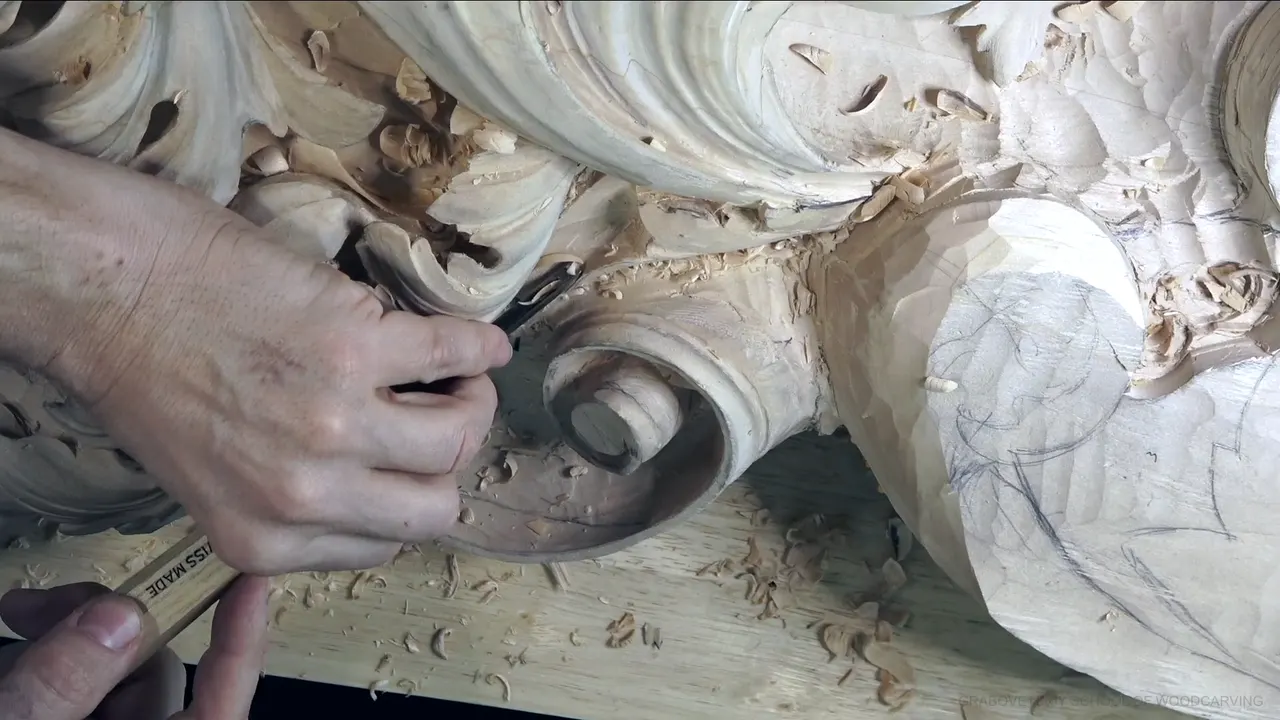

The main form is the first full shape of a carving, laid in before the final cuts. I say it at 06:58 of Venice Room workshop 48, part 1: "All I need is just establish the main form." The undercut can wait. So can the cleaner digging deep inside.
Ever cleaned one leaf at your workbench until it looked right, then found the next leaf would not match it? This part runs 447 words, and I say main form once. So I went looking through my other wood carving courses. Twenty-seven more video parts sit beside it on this page, each with its lesson.
What did I carve before I said main form in part 1?
The part starts slowly. "I'm going to start carefully and go in," I say at 00:05. Nine seconds later: "Here you go. I created that shadow line." Then I turn to the other side, ready to establish the movements there.

Next come the divisions. A big one goes that way, another goes this way, and a small division follows. Maybe it should be a little more curly this way, I add at 01:02. By 01:23 I plan to move one spot a little bit, so it repeats the movement right here.
The tool is wrong for the spot. "It's too big," I say at 01:40, and I plan a smaller number 11, like 4 mm (5/32 in). Six seconds apart come two short lines: "Just outline it again," and then "Just outline it again and again." I think it will look really nice.

What did I leave for later in this part?
Empty spots are fine, I say, because I am going to have some on the brackets at the side too. Near 03:27 a point looks wrong: "a little too pointy point," for this particular acanthus. Half a minute on, "This one is much better."

The list of what waits starts with the undercut, right after that better point. "Of course, I need to undercut that." A couple of small separations are coming near the point. Around 05:12 I say I need to go all the way, and that inside, where you don't see it, there needs to be much deeper and cleaner excavation.
A mess comes next. I can do it like a number six, I say, or a number seven will work. Those are options, not a record of what I used. "Right now it's not the goal to make it final look," I say, only "just to get a little closer to the final."

One word comes at 06:34, "beautiful." Next, the line this page is built on. Later I can go with an even smaller tool and undercut really nicely, but for now I don't need to. By 07:05 there is a point that is going to be mine, with a separation right here.

Which tool fits the main form?
"I'm using the tools, whatever fits," I say near the end of part 1, and then again, "Whatever tool fits." Before it was a number 5. Now it is a number 11, and I call it a little too big of a number 11.
Workshop 49 shows how I start. Venice Room 49, part 4, has me establishing the main form first, with a lot of veiners, which are number 11 tools. Here I name a number 11 of 7 mm (0.28 in), a little bigger than a quarter inch, and the job is outlining, "setting in." Later I plan 15 mm (0.59 in) again. I could even use 18 mm (about 0.71 in), a little less than three quarters of an inch.

In my hand it is a number 9 in Venice Room 69, part 4. A number 7 of 14 mm (0.55 in), I say, is an excellent tool to create the shape, any shape pretty much, if you can find one. The warning comes with it: "Let's not dig in too deep." You can put that first shape in little by little.
Other courses name other tools. A knife does it in Hashemi Flowers 45, part 1: "Just a knife to establish the main form." Roman Acanthus 2, part 2, uses any V tool, 60 degrees or 45 degrees, to set the main outline of a volute. Half an inch (13 mm) is the number 7 that keeps me above my rough background in part 4.

The Corinthian leaf starts with the eyes. In Corinthian Acanthus 3, part 1, step number one of that stage is to open the eyes, with probably a number 9 at first. My reason: I don't want to lose their location once the first shape goes in.
Later in that lesson, part 4 says what to ignore. I go around with the same gouge and keep an eye on the main movement, making sure it goes all the way to the center. "Don't worry about the edges yet," I say, because we're going to clean them for sure. I slice, and I keep the ridges high.

Another tool takes the same job in Venice Room 46, part 3. A different gouge can outline the main form of the middle part of a volute, I say, and it need not be a number 11.
Does the main form have to look clean?
Greek Acanthus 4, part 4, answers it. "That is just the main form, and if it's looking really rough, doesn't really matter at this point." The lines should still stay pretty close to the original one.

My reason for a semi rough look on the first layer, the second layer and the flowers sits in Hashemi Flowers 49, part 1. I put the main form down first. Off camera I decided to glue the second layer on top of the first, so I can see my arrangement. Once it is all assembled, I do my final cleaning at the points that are most eye-catching. I will not use sandpaper there, and I really like the chisel marks.
Over in Hashemi Flowers 5, part 4, I could undercut those leaves at an early stage, I say, but I will not, "because it's just the main form, but not the final cuts." A number 16 V tool makes a separation cut between two leaves, and then I take a number 8, about one inch (25 mm) wide.

Roman Acanthus 2, part 4, sees it from another side. "Those lines are not the final lines," I say. I work against the grain there, since otherwise I can't reach those areas, and that takes really sharp tools.
Back in Venice Room 3, part 3, I ask you to ignore the final form of the acanthus leaves, because we are going to go into much more detail later on. I say that for this stage it is only the main form. The main movement. The background has to come off.
On the furniture panel, in lesson 27, part 2, I think about dropping a whole section a little lower. Get main form, main shape, I say, and I can refine later.
Depth waits too. A warning sits in Lily Box 5, part 6: "Don't dig too deep on the inside." That would be a big mistake, I say. For this stage the job is the first shape alone, with the depth held back.

How do I know I have the main form?
Part 8 of workshop 48 gives the check in two short lines. "I just was trying to catch the main shape." Not long after: "I still have to do some eyes and divisions underneath and so on, but the main form is there."

The same words turn up in Venice Room 34, part 3. We've got it, I say, but we're still going to give some concaves and convexes, and I plan a number 11 again for a couple of notch cuts.
As of now, I say in Venice Room 97, part 5, it is a main form. Another convex and concaves are coming. I plan to refine the separation point with a 5 mm (3/16 in) number 11.
In lesson 49, part 7, of the Hashemi course, I say that because we used the gouge before, "it's already established the main form." All that is left is to undercut underneath.

A main form can take a few light lines, as Venice Room 9, part 4, shows. People put lots of lines there, really deep, inside the acanthus, I say, and it just doesn't look right. Mine are really subtle: "it's not breaking the main form, but it creates some really interesting movement."
Even sanding leaves it standing. Sanding is a good idea in Lily Box 12, part 7, I say, because of the beautiful grain of the wood. "I still keep the main form," I say, and the form is still there while I expose the grain.
Why not finish one spot before the rest?
The Grinling Gibbons class in Maine, lesson 4, splits carving into two schools, or approaches. In the first, you work your details area by area and clean one area up completely. Say you want to change the design after wasting so much time. "It's going to be really frustrating," I say.

My own way is the second approach: "I create the main form and then work the details." If I need to change something, I did not waste too much time.
A cut is held back for the same reason in workshop 97, part 4. Here I plan the same 5 mm tool for an outline, but the first shape is not set yet, so the cut stays shallow, about 1/16 of an inch (about 1.6 mm) deep so far. It's not the end yet.

Shell work sets a limit in workshop 71, part 11. I can go only to a certain degree of detail until I am done with the shell, so I cannot do much around that area. What I can do is a preliminary outline and the main form. A better shape comes later, and so do extra separations.
Even if separations are coming, I say in workshop 137, part 1, I am still going to outline the main form before them.
What do parts 4 and 8 of workshop 48 add?
A plan for wrapping opens part 4. Maybe I could develop "the same idea of wrapping like that, like a double wrapping" on the side you don't see, keep the outline and roll it. That would link two elements.

I plan to take the waste area out first, with a big number 11 of 30 mm (1 3/16 in). Around 03:00 I think I should go deeper right here, because I really want to see a full motion. Next comes the line: "So I'm just establishing the main form first." Next I say I have a really nice idea how I'm going to wrap it inside, on the bottom.
Then I say I will clean a little bit and start developing the movements. A big number 7 goes in if it fits, and it does. The movement it gives is really nice, about the same as the other movements I've done.

Where else do I say main form?
Eight of the lines sit side by side here. Each one comes from a different lesson, and the last column says what came next or what to hold back.
| Place | How I put it just then | What was left for a later step |
|---|---|---|
| Workshop 48.1 | For now I need only the main form. | Later, a smaller tool for the undercut. |
| Venice Room 3.3 | At this stage, the main movement and the first shape. | Much more detail comes later on. |
| Greek Acanthus 4.4 | Rough is fine at this point. | Lines stay pretty close to the original. |
| Hashemi Flowers 5.4 | A main form, with the final cuts held back. | I said I would not undercut that early. |
| Hashemi 49.7 | The gouge had already established it. | Only an undercut underneath was left. |
| Venice 34.3 | We have the main form. | Concaves and convexes were still planned. |
| Lily Box 5.6 | The job is the first shape alone. | Don't dig too deep on the inside. |
| Venice 97.5 | Only the first shape so far. | Another convex and some concaves were still coming. |
Two more lessons say it. In Venice Room 39, part 4, what I am working on is the first shape, and it has to go from underneath and go up. Outline only comes first in workshop 57, part 1, and next is the three-dimensional form, with concave and convex work.

What do I take from all of this?
One shape comes first. Knife, V tool, number 7 and veiner each did that first job in these lessons. What waited changed too: an undercut, separations and deeper digging inside. The order is on camera in part 1 of workshop 48, because I say it out loud.
Which spot on your own board is still waiting for its final cut? Part 1 sits on the lesson 48 page beside the other eleven parts. For all my lessons in one place, start here.
The Venice Room course for workshops 38 to 49 holds the rest of this carving, and my other courses hold the lines above. Every size on this page is mine, with the conversion beside it when I did not give one.
How it's done
- Outline first. Lesson 49, part 4, starts with a 7 millimeter number 11, a little bigger than a quarter inch, and an outline I call setting in.
- Name the divisions. Part 1 of workshop 48 names a big division, another one and a small one.
- Step down in size. At 01:40 the tool is too big, so I plan a smaller number 11, like 4 millimeters (5/32 in).
- Keep the depth shallow. My workshop 97 plan is a cut of roughly 1/16 inch (1.6 millimeters) for the time being.
- Leave the undercut for later. At 06:58 I say that for now I don't need the smaller tool.
Frequently asked questions
Which jobs did I leave for after the main form in part 1?
An undercut with a smaller tool comes later, I say. A couple of small separations near the point are planned, and so is deeper, cleaner excavation inside. Each is a plan, said with the first shape still in front of me.
How big was my number 11 in Venice Room 49 when I started on the main form?
Seven millimeters (0.28 in), a number 11, and I use a lot of veiners. Later in that part I plan 15 millimeters (0.59 in) again and say I could go to 18 millimeters (about 0.71 in).
Does a rough surface mean the main form went wrong?
Rough is fine at that point, I say on the Greek leaf. In the Hashemi flowers I left a semi rough look on purpose, and I got the first shape in place before anything else.
What to carve next