

Alexander Grabovetskiy, woodcarver, School of Woodcarving · Published 2020
What does a wood carver mean by thinking out loud?
Quick answer: In Venice Room workshop 48, part 6, I said I'm thinking out loud how I want to develop this one. I believed it would be better if my end of this movement landed somewhere right there, and the middle line maybe needed to go a little lower.
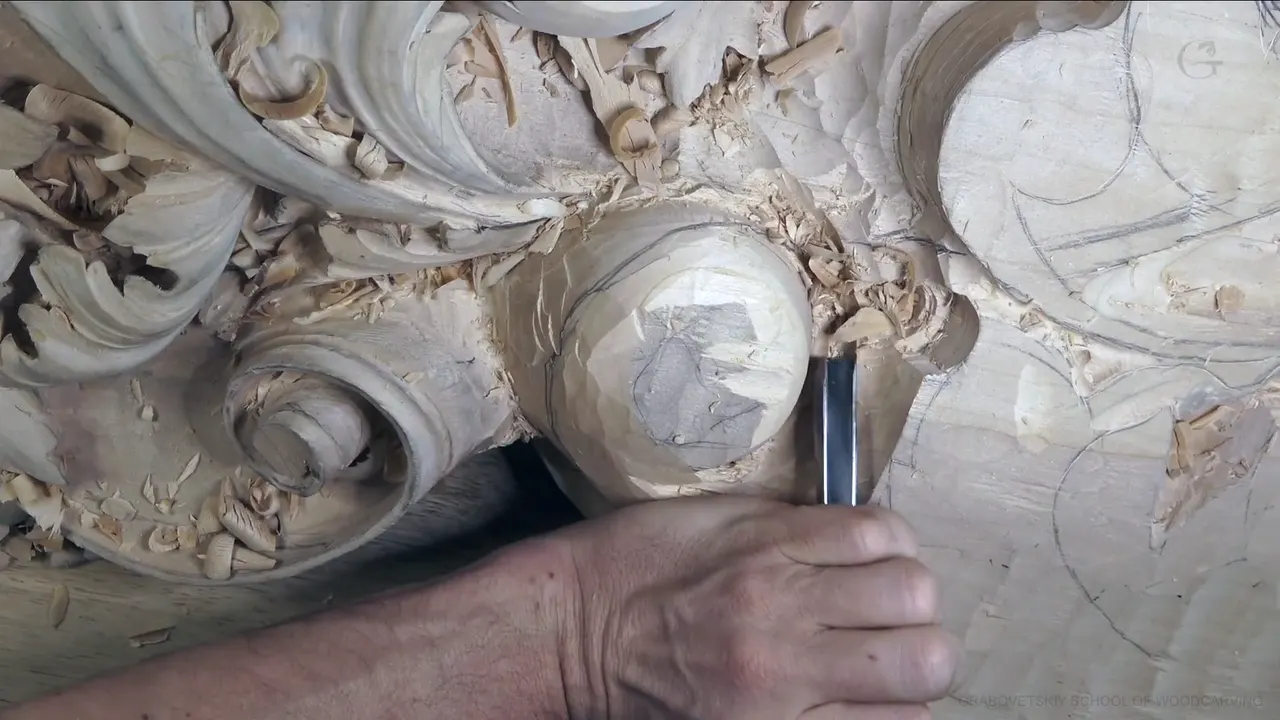

Part 6 of Venice Room workshop 48 is where I said I really want to tie together everything. That was on a head, with the end of one movement still to place.
Have you ever stood at a board with one spot that has no answer yet? Do you mutter about it while a camera runs? I did. In workshop 48 I worked it through that way, and in other lessons I said sorry for it.
Most of this part is planning on the board. Next to it I put other lessons from the Venice Room and from Lily Box lessons, each with a link to its page.
What did I say before and after those words in part 6?
Before them, I said I probably have to figure out right now how I want to see it. It must go somewhere at the beginning, so let me establish the middle line movement. That goes all the way, and backward, perhaps. I need to get a little deeper, and if I want to do it that way, I need deeper excavation on this side.
Maybe I could roll it backward, and that would still give me the full motion of the middle line. I could pretty much end this part above. Then that has to go like this, one of the divisions, just to follow this line. But it doesn't give me what I'm after, I mean overall movement. I don't think it's good. Better to do it a little differently, and I fixed my own word: slightly different, not differently.

Then came the words: I'm just thinking, okay, out loud, about developing this one, because I really want to tie together everything. It will be better, I believe, if my end of this movement lands somewhere right here. That way it continues the movement like this. There is a middle line, and maybe I need to lower it a little. Because of that line I could create extra separation one way and a little separation the other way, which is also a possibility.
Now I can develop the movements toward the middle line, and this will be the main one. A second is coming. Another one needs to go that direction and die somewhere right here. As part of this head, I still make it rotating this way.

I know it looks a little bit confusing, but there is nothing to be confused about, okay? Losing motion is what I want to avoid. Maybe this becomes part of that movement, and I have to create another one growing from underneath this way.
Let me get a marker and you will understand much better. Here it's going to be one main separation, right there a second one that goes the whole way like this, and a third one going this way. Then that becomes a part of a head.

I have a lot of empty space, and I'm not so happy about it. I'll probably make this one a little bigger and go right there. This is the biggest one. That one will be a little smaller, and this one the smallest. I should maybe go down like that, and not create movement this way. I'm happy with this movement, I believe. That will be the empty spot, not empty, but a deep spot.

How did the parts on either side carry that plan?
In part 5 I name two ways to develop one side of the leaf: across the whole side, or only partly, some going this way and some going that way. The movement of my middle line was going to settle that. In that part I said I left about 10 millimeters (about 3/8 in) from the outside and placed a line.
What I'm going to do first in part 7 is get probably about 15 millimeters (about 0.6 in) number nine and create a plug cut, and if you're going to use a mallet, sometimes it helps with those cuts. That spot is going to be much deeper later. I'm doing it just for myself, not to lose the big idea. The first cut is number 11 at 10 millimeters (about 3/8 in), and I go all around like this. The secondary cut is right here, and I have to go underneath. I just created the main movements, and I need to watch the size of each: this is the smallest, this a little bigger, that even bigger, and that the biggest. So it's logical for acanthus.
Do I say sorry when I say it?
The apology comes in part 4 of workshop 41. If I'm talking a little slower in development mode, I said, forgive me. That's me thinking, okay? Nobody is in my shop while I'm working, and the only one hearing me is you, on a camera. Sometimes that's maybe annoying, and I asked for patience. You see the creation process.

Lily Box 6 has the same apology, and I'm not very happy yet with the overall shape there. I want a really good tool to fix everything right here. Mumbling got my apology as well. That is the process, I said, and the goal of school. You won't get just the lessons from me. It is just like being with me in my shop, working together.

Think of a place where wood carvers worked, a guild or something, in the 19th, 18th or 17th century, with apprentices who would just watch pretty much what the master does. Believe me, when you watch someone work, you get a much better idea how it's done, how it's built.
Lily Box 3 has a shorter one. First, remove those wastes. I apologize, I'm just thinking, and mistakes are what I don't want to make. Let me use a mallet, that way I can control better.

My apologies for saying it out loud came in workshop 35, and I think that is a good problem to be solved. Overall it looks okay, but maybe I've got too many separations in one spot, and that could not be undone unless I lower that down even more and get rid of this separation. I love those separations, but too many. That becomes just the one single part, and this also just the one single part. I'll chop out this section, otherwise it just doesn't look too organic. It's a good thing I have extra material, and I did not lose too much.
What was on the board when I said it out loud?
Venice Room 27 has a flip. This flips from this direction, and I need an extra division right there. Sorry, but I'm thinking how it will look. I must pick where the point of this division goes, and this one obviously needs to be kind of higher than that one. Planned too: a little opening on the inside. We'll see. Then comes the preliminary outline, and I understand that sometimes it's hard to envision the detail, but I already have a picture in my mind.

Over on Venice Room 29, I'm checking from different points of view how it's looking. I'll use a skew to kind of refine this movement a little and see if I'm on the right direction. My question was whether to take this one down, and I think yes, with number 11, preliminary. Then: I think I kind of screwed this one. What I'm thinking is that if I have a small separation right here, it either goes on top of that part with this one going down, or this one is on top and that one goes down. That's the question, and logically this one has to go higher than that one.

On the board in Venice Room 31, I need to think how I'm going to fill this area, because I don't have too much material. Something is needed right there. I can excavate this, and then work out what to do, because a hole that is too deep is not what I want. I'm doing that out loud right now, at least. After it came some kind of acanthus movement, with a maybe, so that I don't have to undercut too deep and too low. Otherwise it has to die almost from underneath, but there is no connecting point, and for me it would be not so smart to create too weak a spot.

A division came up in Venice Room 32. This needs to be maybe widened, and I could divide that movement a little more. That would give me a much richer look, I'd say. This part can go underneath. I like that division right here, and I can probably go ahead and outline underneath, so that's probably my first cut. Unless it's five divisions, maybe I could actually add just a small, just a really small, to give an even more detailed look. Why not?

Maybe I shouldn't, I said in Venice Room 36, and I'll make this one above that one. I will later on make extra separations on it, but for now I'll just create the first cut around. Thinking what will look the best. An eye goes there. I also want to give some more dimension to it, because right now it just looks too flat and it's not too appealing. What I mean by that is that the surface is too flat, and I need to give a really nice shape to overall movement.

Does it change what I do with the tool?
A chunk I did not want to lose comes up in Venice Room 41. It's really beautiful, and it's what I have. Could I include this part, or could I not? I might. I know, but you will understand why. I believe I can do really nice detail, and maybe I need to grab a marker, or do it with the pencil with no problem, or work on paper and then get that maybe on a plastic and apply it right here. I didn't want to take time and just bore you with the development, but I think I found the solution right here.

You have to look from all positions to understand exactly what is going on, but you will once it's done. Nice, interesting movements are what I'm after. I can actually extend that all the way if I need to, and this part is going to grow from underneath. My first step would be to outline it with just a number 11. In this case I could go deeper, because there will be a twist.
Part 4 of workshop 41 has more on it. Because I had this down to the bottom, it gave me a chance to create even more three-dimensional movement, and that solved the problem, because I don't want to see too much empty spots. In workshop 48 I said I'm not so happy about a lot of empty space, and my plan was to make one piece a little bigger.
A division I was not sure about is in Venice Room 44. Now I can see the overall picture, and I could probably already subdivide this piece, which will be really nice and curly. I also need a secondary division if I want to subdivide that this way. I'm not sure if I should or not. I need to do those subdivisions, at least. That subdivision must. Other ones I could get by without, but that is a must, otherwise it's not going to look good. I carve more accurately right now, because it's a somewhat final pass. A really beautiful concave is there already, and I don't need to redo it if I can get it in just one pass. Maybe that is enough without the secondary separation, and for now I don't see the need for it.

A profile shows in Venice Room 58. Shaker crown molding looks like this, and if you install that, there is a ceiling and a wall, with the big concave on the inside. The challenge is to avoid getting too deep right here, although I could, because it would give me a really good movement, which repeats that side. Going deeper is possible, actually.
Venice Room 60 has the same words, with a reason attached. This movement could go up to here. Then it's a lot easier to excavate and create the details. Stopping it right here, on the other hand, gives me a really good shadow. So let me think. And yes, I know I'm saying it out loud. For me it's really important not to mess up, especially in this stage. This piece will be visible. How you look at it is also really important.

I should probably take this one right up to that point, and with the divisions it's going to look really good. At least you know my process of why I'm doing what I'm doing. I'll outline it and set that in. On the other side I'm not going to do too much, because maybe I'll change a little bit.
The same words in each lesson, side by side
| Lesson | The spot in front of me | My next words |
|---|---|---|
| This part here | Where on the board this movement should end | Maybe lower the middle line |
| Flip in 27 | Where the point of this division is going | Little opening inside, we'll see |
| Question in 29 | Whether I should take this down like that | I think yes, number 11 |
| Deep hole, 31 | Not much material, and a hole too deep | Extra acanthus movement, just underneath |
| Wider look, 32 | The movement could be widened and divided more | Outline underneath, a likely first cut |
| Crowding in 35 | Okay, but too many separations in one spot | Single part, and this one too |
| Too flat, 36 | Right now the surface just looks too flat | Give overall movement a nice shape |
| Chunk in 41 | Could I include this part, or leave it | Work on paper, maybe plastic |
| Subdividing in 44 | Secondary division, and I'm not sure I should | One subdivision is a must |
| Profile in 58 | Big concave inside, not too deep right here | Although I could get deeper |
| Shadow in 60 | Maybe this movement can go up to here | A really good shadow, stopping here |
The workshop 48 page covers the whole lesson, and the Venice Room Part 4 course holds all twelve workshops of this relief board. If you want to carve along with me, start here.
How it's done
- Say where the movement goes. I said I probably have to figure it out right now. It must go somewhere at the beginning.
- Set the middle line. I said let me establish the middle line movement, and that side needs deeper excavation.
- Judge the end you tried. That doesn't give me overall movement, I said, and I don't think it's good.
- Pick where the end lands. I wanted this movement's end to continue the movement like this.
- Mark three separations. With a marker I planned one main separation, a second one, and a third going another way.
- Size the three. One is the biggest, one a little smaller, and one the smallest.
- Name the deep spot. The empty spot is not empty but a deep spot, I said, and I'm happy with this movement, I believe.
Frequently asked questions
What came next on the middle line in part 6?
The middle line came up, I said, and maybe it needed to go a little lower. After it came extra separation going one way and a little separation going the other way, which I called a possibility.
Did I say sorry for it in other lessons?
In the lily box course, lesson 3 has my apology and lesson 6 has one for mumbling. Workshop 35 and workshop 27 have apologies too. Nobody is in my shop while I'm working, I said in workshop 41.
Does the board look confusing while I plan?
In part 6 it looks a little bit confusing, I said, and nothing is to be confused about. Sometimes it's hard to envision the detail in workshop 27, I said, but I already have a picture in my mind.
What to carve next