

Alexander Grabovetskiy, woodcarver, School of Woodcarving · Published 2020
What does a wood carver mean by "sometimes it's a good idea"?
Quick answer: In Venice Room 48, part 7, I said helping those cuts with a mallet was sometimes a good idea, after naming a number 9 for a plug cut. In other lessons the same words came before skews, smaller tools, flips, new positions and compressors.
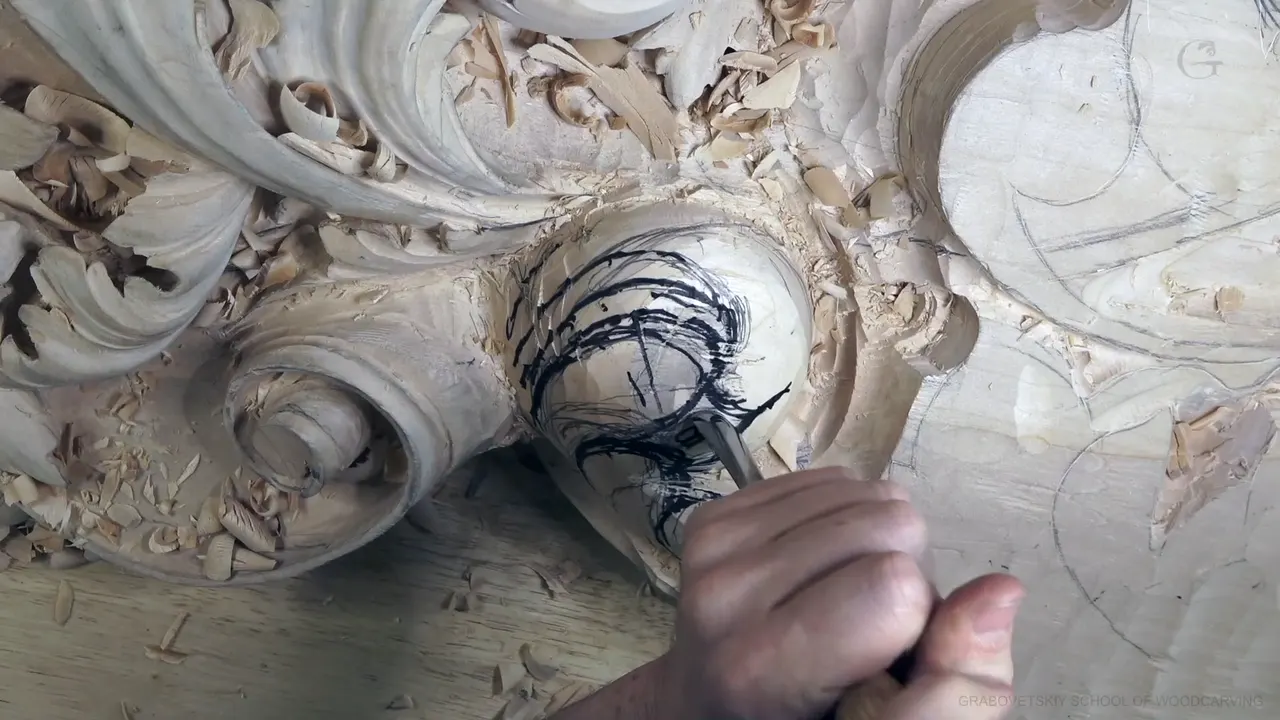

In Venice Room 48, part 7, I said that helping those cuts with a mallet was sometimes a good idea. Before that line I had named a number 9 for a plug cut. Those words are where this page starts.
Has another carver ever said sometimes and left you guessing which time he meant? Have you stood at your bench with a gouge in your hand and wondered whether a mallet would help or get in the way? Read what I said next in each lesson, and you'll know what to try on your own board.
Part 7 is a short video. So I set other lessons beside it where I used the same few words, from Venice Room workshops, the furniture panel, Hashemi flowers, the lily box and a few more courses. Each one is named and linked, and I keep close to my own words.
What the words led to in these lessons
- A mallet, to help the cuts of a plug cut.
- A different tool, from a double bevel to a skew to a much smaller one.
- A changed position, a flip of the cut, or a better angle.
- A pass held back: not to the final depth, not too extreme.
- Big tools, for slicing.
- Chips to clear, a pad that stops slipping, lights to see by, some color.
What was on the board in part 7 when I said it?

The video opens with me thinking about the board. Maybe I should bring this one a little closer, I said, and get that one a little bit underneath. The first tool I named was probably about 15 millimeters, number 9, to create a plug cut.
Right there came the line. And sometimes it's a good idea to help with those cuts if you're going to use a mallet, I said. Okay. Nothing else in this part names the mallet again, and a black mallet shows in my hand in one of the frames below.

That spot is going to be much deeper later, I said. But for now, it is just like that. And I'm doing it for just myself, not to lose the main, the big idea.

Let me make sure I'm doing the right cut right here, I said. My first cut would be a number 11 at 10 millimeters (about 0.4 in), going like that, and then all around like this. Next came the secondary cut. After it, another cut, and then, well, actually, I have to go underneath.
What did I do there? I just created the main movements, and I need to keep an eye which one, the size of it. This is the smallest, this is a little bigger, that is even bigger, and that is going to be the biggest. So it's logical for acanthus.

One movement would go a little bit underneath. I can excavate right away, pretty much, I said. I wasn't doing it too fanatically right then, and the word I gave as my reason was establishing. After that I said I need to blend that part underneath of that one, because it has to roll like that.

Next, my tool. I'm using just a skew, I said, and I could use just probably a gouge, but skew is also good. Again my plan was 10 millimeters, number 11 (roughly 0.4 in), to clean a little better underneath right there.
I need to make sure it feels like it's wrapping, I said. But I can see a high spot which I don't really like, and a number 7 will help me with that.

Now it's more gradual, I said. Don't worry about a little uncleanness, because it will still be developed. What I'm after is really nice gradual roundness, I probably should say, if I can even say that. And of course, you can just find the closest matching gouges and just create that roundness everywhere.

Even if it's not developed yet, I still have to develop some eyes. One part would go underneath of a movement. I need to use a little smaller number 11 because I do not want to lose it, I said, and I really like the overall feel of this piece, so let me outline it like that. My last words were that I need to blend that better in, and that it will roll underneath of this one. Not much, but still.
Which tool came with the words in other lessons?
The same line showed up in Venice Room workshop 47, part 12, before a number 1 double bevel. I'd slightly attack this side, I said, and the double bevel would get rid of the mess right there, some of it, I should say.

Part 2 of workshop 39 ended the line in a skew, and I put a maybe in front of it. With a skew, I can give actually any shape I want to. It was gradually moving, which I called beautiful.
Workshop 52, part 10, was about a number 9 and how much material I had to excavate. That depends on the wood also, I said. The smaller number 9 came right after the line, and I said I really love it. It has a cutting part only at the end, so I can get to the tiniest spots. I can't pull it like that, so I rotate it. Carving on inside like that is a plug cut.

My chamomile and bow rosette, lesson 4, put the words before even smaller tools. A small tool in my hand, without pressing, almost like a pencil. My example was a number 8, and I said those small tools are safer if you're working from the backside. After hours of work, a mistake there can break the piece. Don't press it.
The floral and molding course, lesson 1, used them before a skew tool for cleaning. Do you need to clean it? Oh, absolutely not. You don't. But I like to create a fresh canvas, and it's a lot easier to draw a little later when I place my lines. Just for the convenience.
Lesson 2 of that course put the line after a down cut, a stabbing cut. Using a mallet also was possible, I said. Then I said the words. Next I talked about a small tool, 3 millimeters, number 11, one-eighth of an inch.

A tricky area got the words, in Venice Room 12, part 3. I should use a knife or skew, maybe, and clean it like that, I said. Or give an extra detail to reinforce it, just some kind of convex, and that will be sufficient to hold that thing.
My Roman acanthus leaf, lesson 16, went the other way, toward really big tools. The one I showed was a number 1 of three and one-eighth inches (about 79 mm). With it you can pick all the high spots and see those areas really clearly that it is not even. With the big tool, the idea is the same. You're just slicing it. You don't have to do that, of course, but the reason I'm showing it to you, it's possible.
In my hazelnuts course, a small spoon V tool went with the words, for an area like that one. It was a 3 millimeter number 12 (close to 0.12 in), and you can use the flute at approximately 2 o'clock to undercut and create that sharp line. It will really look like the leaf is not connected. But it is connected, I said, and you must keep some point of connection. You can find that lesson on the hazelnuts course page.
What the words led to when the grain got in the way?

A flip, in Venice Room workshop 4, part 11. One side of the gouge cuts with the grain, and this side of the tool cuts against it. A flip followed the words: you cut on one side, then flip and just continue that cut from another side. That way, you can get a really clean cut on both sides.
A position, in lesson 1 of acanthus over moldings. Rotating my tool with each cut, I called that really important, and you can see what happens on the other side. The wood just catches the grain and breaks off. So I said to attack from the right position, and in my case that meant this side. Attacking from that side leaves my opposite side actually clean.
A smaller start, in my Grinling Gibbons course from Maine, class 15. I had a broken point. The words came first: if you experience the same problem, grab a much smaller tool at the beginning and gradually increase the size, because a smaller tool won't give up as much pressure. Even with that tool, attack with the grain and try to find the best angle of attack. I should say I shouldn't have any problem. I don't want to rush it.
The line came up in Venice Room 77, part 3. First it came before changing the position. Right away I added that I have to be careful not to hit the metal part. I could glue little pieces of wood, maybe, which is probably a smart idea, so if I hit that part, I hit wood.

The second time it came before extra handles on both sides, so you can flip it and work around that double handle. That's exactly the technique they used back then, I said. And how do I know it? I really don't know. I'm just reading some books, and the people who wrote those books can only guess.
Did the words ever mean doing less?
The furniture panel has a few. Workshop 18, part 12, put the line before not going all the way down to the final depth until you work the details. That final depth will come much easier once we work on the final details, I said. But that's okay. I'll just get as much as possible. I'm going to eyeball it, not measure it, and I'll use that 1 millimeter again (about 0.04 in).

Workshop 24, part 1, had a different call. You could clean it right away, I said, and spend a little more time cleaning it. Then came the words, before attacking right away and cleaning everything, because toward the end you still have to clean. I'll probably go back and clean everything. But some of the areas I won't need to revisit.
My furniture panel design lessons, workshop 7, part 2, used it for a pause. Take it away from yourself and look at it, I said, and stare for a few minutes. If it feels fine, continue to work. Another time, leave it for a few days and not touch anything, then come back and see what you would change.
Hashemi flowers 49, part 1, used the line for pointing my cuts toward the main point, which in that case was the center of the flower. My small gouge was 5 millimeters (close to 0.2 in), and it doesn't need to go all the way down. Even deeper is possible if I wish, but I'd rather not go too extreme, because the deeper you go, the more complicated it gets, and the harder it is to clean.

Did the words ever mean doing more?
Once, with a twist. Hashemi flowers 30, part 1, had the words before once you go a little extreme. Just number 5 was next in my plan, then a V tool again to clean that mess I just left. What I mean by extreme is that lots of that will be hidden with the upper layer. But when people look from the side, they can catch little tiny details, and that's a good idea to take care of.
The lily box, lesson 12, used them for exaggerating. Every petal has to be different, I said, and on one I could create really deep concave. Even exaggerating those concaves was an idea. I mean a flipping motion or a small undercut right there, which would give me really interesting movement. Really, that isn't required, but I love carving flowers, and it's really fun to create those types of movements. The number 8 in my hand was 3/32 in (about 2.4 mm).
What about the things around the carving?

Chips were the topic in Venice Room 27, part 7. There were so many everywhere, and I said I need to probably just brush this out. Next the words, and then a compressor to blow all the chips out. But with a compressor those chips will fly all over my studio, and then I have to collect them from everywhere.
The lily box olives lesson used it for a non-slipping pad, like a liner for the kitchen or the same material they use for a router. Place it on the board itself, I said, and it will prevent the slippage. But it's okay. I'm not going to bother with that.
My plate with butterflies, lesson 11, was a really slow process, and I don't want to mess up, I said. Putting the lights on came after the words, because it will be much easier to see. Yes, it's much easier to see, but I'm not sure you'll be able to see it. I hope you will.
My vase with grape leaves, lesson 3, was probably going to get sanded, and I'm using just a 400 grit to knock the high spots. Really, it isn't required. But that is a wood turning, and on a turning, I know, knocking down sharp points is a good idea, sometimes. Even without sanding, it still looks good.

The same vase used the words again for color. I know some of you would probably say, why would you do that, I like it without any stains. I like it too, I said, but color was the idea, especially on a wood turning project, because wood turners really love that stuff to make some unique finishes.
Where else did that line turn up, and what followed?
Eight lessons sit in the table below. Every row is a different lesson, and the first is part 7.
| Lesson | What followed the words in each lesson | What I said next |
|---|---|---|
| Venice 48.7 | A mallet, to help the cuts of a plug cut | Deeper later, not for now |
| Venice 47.12 | A number 1 double bevel, to take off some of the mess | Later on I will undercut |
| Furniture panel 18 | Holding back from the final depth while the details came first | I'll eyeball it |
| Furniture panel 24 | Attacking and cleaning everything right away, then the rest at the end | Some I won't revisit |
| Hashemi 49 | Pointing my cuts toward the center of the flower | Not too extreme |
| Roman leaf 16 | Really big tools, picking out the high spots | Only slicing |
| Venice 77 | Extra handles left on both sides of the piece | Flip it and work around them |
| Butterflies 11 | The lights on, to see better | Not sure you can see |
Where can you watch this part of workshop 48?
Workshop 48 of the Part 4 course holds it, on the relief board this course is carved on. The workshop 48 page covers the whole lesson. If you want to carve along with me, start here.
Can you think of one thing on your bench that you only do sometimes? Pick up your gouge and give it one more pass of wood carving.
How it's done
- Name the tool for the plug cut. Probably about 15 millimeters, number 9 (about 0.6 in), to create a plug cut.
- Think about the mallet. I said a mallet could help those cuts, if you use one.
- Plan the first cut and the secondary cut. My first cut would be a number 11, going all around, with a secondary cut and another cut after it.
- Name each movement by its size. The smallest, a little bigger, even bigger, and the biggest: I said that's logical for acanthus.
- Blend underneath. I needed to blend that part underneath of the next one, because it has to roll like that.
- Find the high spot. I saw a high spot I didn't really like, said a number 7 would help, and then called it more gradual, with a little uncleanness still to develop.
Frequently asked questions
Does a mallet help your gouge cuts?
In part 7 of workshop 48, after the plug cut plan, I brought up the mallet as a help for those cuts. In the floral and molding course, after a down cut, I said I could use a mallet also.
When should you start with a smaller gouge?
Workshop 52 had me saying how much material I have to excavate depends on the wood, and the line came before the smaller number 9. In my Gibbons course from Maine it was a much smaller tool at the beginning, then a gradual increase in size.
Why would a carver pick a very big tool to slice?
My Roman acanthus leaf had me saying a number 1 of three and one-eighth inches (about 79 mm) lets you pick all the high spots and see the uneven areas really clearly. With the big tool the idea is the same, slicing.
What to carve next