

Alexander Grabovetskiy, woodcarver, School of Woodcarving · Published 2020
What does "if you wish" mean when a wood carver says it?
Quick answer: "If you wish" is the tag I put after a word I picked loosely for a shape or an idea, like sphere for a bowl or hero for a flower. In Venice Room 48.8 it followed a nice and smooth transition. Said to you, it means the choice is yours, like measuring where I eyeball.
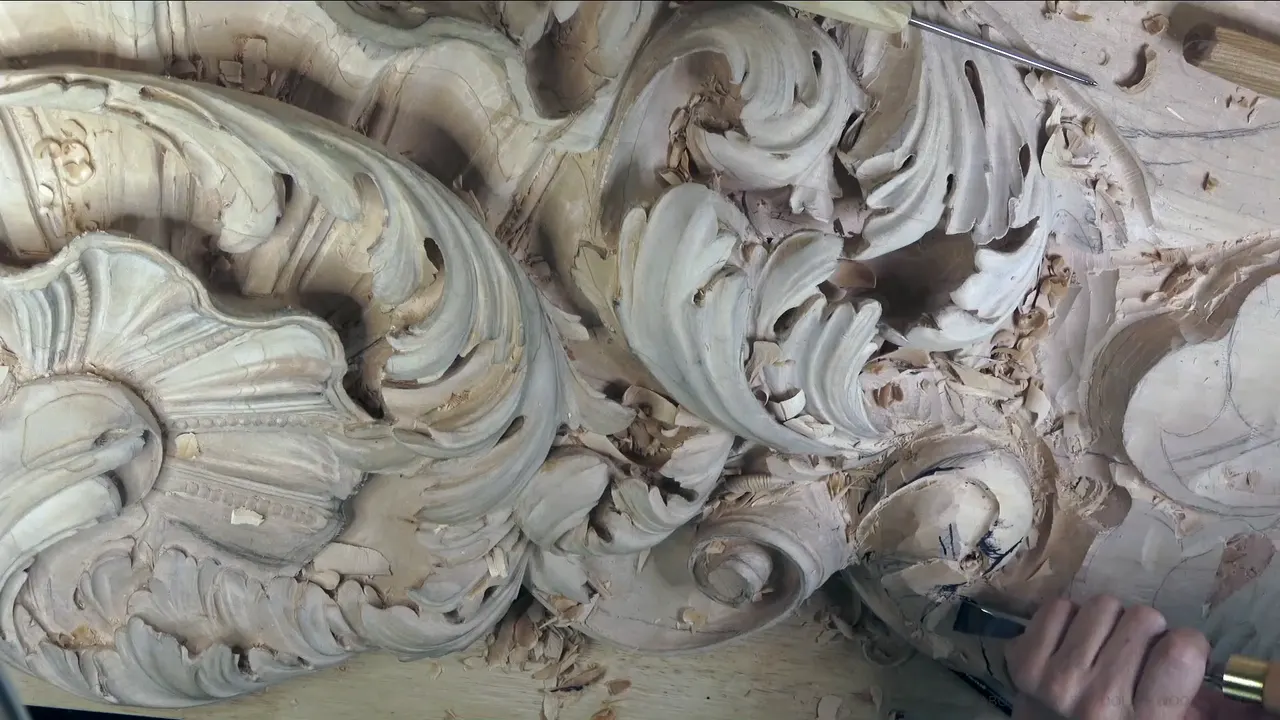

The if-you-wish tag is what I put after a name I chose loosely for a shape or an idea. My longer version says the rest, that you may call it that way. In part 8 of Venice Room workshop 48 it followed a smooth transition, on one side of the acanthus I was carving. The same three words also hand you a choice at your own bench, and that is the second half of this page about my wood carving terms.
Have you heard a carver call a hollow a bowl and then a sphere in the same breath? Did you wonder which of the two names to write down? Below are the names I tagged on camera, what each one pointed at on the wood, and the times the tag turned into a choice for you to make.
Part 8 holds the tag only once, so most of what follows comes from my other lessons. You get workshop 48 first. Then come a sphere, a hero and a pipe from other courses, and at the end, the times I said it about my own choices. In linguistics a small softening phrase like this has a name, a hedge.
Six things the tag tells you
- After a loose name, it marks the word as my own pick for that shape, like sphere for a bowl or hero for a flower.
- Workshop 48 has it once in part 8, after a smooth transition.
- Its fuller version asks if you'd call it that way, and once I asked straight out if sphere made a good name.
- Said to you, it hands you the call. Measure or reach for calipers, while I go by eye.
- Depth on a flower, or sandpaper, is yours to pick, though I liked the tool marks on the Hashemi flowers.
- About myself, on workshop 39, I added that I think I do wish.

Where did the tag land in part 8 of workshop 48?
A smooth transition, about four and a half minutes in, on one side of the leaf. Here is the run of the part around it, in the order I said things.
The part opens on one piece that needs rolling underneath another one. Now I can see little cleaner cuts, I said, and the next piece needed a better outline.
Then I called it. Just trying to catch the main shape, I said I was, and I think I did it, the way I look at it. I still had to do some eyes and divisions underneath and so on, but the main form was there.

And then I changed something. I got the marker so you would understand, and said I wouldn't rotate one part completely inward. I would bring it somewhere right here instead. Right underneath one movement, and I drew that. Some separations would go in there, and that way no empty spot would be left right there.

The tool came next, and I went back and forth out loud. A smaller tool, first. Or actually, I said, I don't have to, I could use the same 10 mm (about 3/8 in) number 11. On the other hand, I wanted a really nice transition there, so maybe even bigger, not smaller. Then 20 millimeters (about 0.8 in), let me do that.

Excavating underneath was part of the plan too, so that piece would go below the movement, and the movement could sit just slightly above it.
Then a small thing. I needed to lock my wheels on the workbench, I said, and then, it's okay. In workshop 49, part 6, I told you the bench I was using then was on wheels, a tool chest with drawers working as my bench.

Next I said I kind of worry how I want to do it right here, and because of that I need to knock down a little bit of this side. It has to have a nice and smooth transition, were my words, and the tag closed that line. My next thought was maybe an even bigger number 11, like maybe 30 millimeters (about 1.2 in).
I didn't say why that plain phrase got it. A sphere in another course gets the same treatment.

Something was kind of in my way after that, but at least I could see the movement, and I said that movement will be a really nice one. Let me use a spoon, I said, and that I could probably try a number eight spoon going that direction. That one was a little too big, and it wouldn't work. Let me think a little smaller, I said, and maybe number 11.

It will make sense, I said, twice. And it would look really nice.

Out came the marker again to show the movement, just like that, going all the way back. Up, and there'd be a point somewhere right there, then some divisions, and I said I think it's going to look much better that way.

The part ends on a plan. Go down and go up, and that high wasn't needed, I said, but as a first pass I can just outline it.

How does a name I pick change once it gets the tag?
It turns into one way to call the shape, and my longer version says just that. A few pieces show it well.
Carving the Byzantine acanthus, leaf 7, I said we were creating the bowl, upside down. Then came sphere, tag and all, and I asked whether it was a good name. Sphere, I said again, we are creating a sphere.
The next lines show what the bowl meant. On one side everything blends to the leaves like an arch, with no straight-down wall. The other side would roll underneath, and that would create like a bowl effect.
Over in workshop 49, part 6 had a spot that was all flat, and I said that's not good. It had to be like a dome shape or sphere, and the fuller version of the tag came after. A skew was one way. But I do have different tools, so just a big gouge.

Sometimes my pick was made up, and the real term followed it. During part 12 of workshop 41 I said an eye had to sit at six parts out of 10, so I needed to move it slightly. That would be more logical, I said, and then took it back. Not logical, but more goldish, rule-ish, plus the tag. Then the real name, more up to the golden ratio, 1.62, or 62 out of 100, or in simplified ways six of 10.
My hazelnuts got a name fixed partway through, in lesson 3. It's not the lobe, I said, it's a husk, a petal of the husk, and the tag went on that. Each of those was going to subdivide in three again. The hazelnut sits inside that husk.
A tool part got the same care once. My number 11 on the grape vase, lesson 2 has a U shape, and I could use just one of its sides, or wings, I said, the tag between. A little later I said only the edge of the tool was working, only one side, and took the word back at once. I shouldn't say edge, I said. I didn't want to confuse you.

Which wood carving terms got the tag on camera, and in which lessons?
Names for shapes and for roles in a design, plus one tool part. The table lists the ones on this page.
| Where | Shape | Word |
|---|---|---|
| This part, 48.8 | One side I needed to knock down | Smooth transition |
| Venice workshop 49 | A flat spot that had to roll | Dome, sphere |
| Same course, 41.12 | An eye meant to sit six of ten | Goldish, rule-ish |
| Byzantine leaf 7 | A bowl we were carving upside down | A sphere |
| Byzantine leaf 8 | A big pipe like the Italian style | Over-exaggerated pipe |
| Vase lesson 1 | A small leaf beside the main idea | An anti-hero |
| Furniture panel 21 | A flower I wanted popping more later | My hero |
| Venice workshop 54 | The shadow all around the main element | A frame |
| Greek acroterion lesson | A base part, the plinth, by hand | Or akroter |
| Hazelnuts, lesson 3 | One piece of a husk, not lobe | Husk petal |
Hero is one I use for design. On my grape vase, lesson 1, I planned to measure with the golden ratio calipers. Then I said if this is a main idea, a hero, I can make the small one like an antagonist, like an anti-hero. In a story the protagonist is the main character, and the antagonist is the one who works against them.
The hero on the furniture panel, lesson 21 was a flower. One part was going lower because I wanted to see that flower popping a little more later on. That flower would be my focal point, the main detail in that region, and so my hero, tagged as well. My plan for that spot was only about one millimeter (about 1/25 in) above the background.
For part 2 of workshop 54, a five millimeter tool (about 3/16 in) took over, since seven millimeters (about 9/32 in) had been too big. Then the shadow around the main element. It works like a frame, I told you, and the tag followed. Like a picture frame, it just frames the main movement. My light was hitting too hard for you to see it, I said, but in real life there would be a good shadow.

With the Greek acroterion, lesson 1, I could have gone the easier route, a router bit for the base part, a plinth, or akroter, tagged the long way. That would be faking it, I said, so everything was going to be done by hand. The acroterion article gives acroter as another name for that flat pedestal under the ornament, so both of my words hold.
Leaf 8 of the Byzantine acanthus tagged a name too, over-exaggerated pipe. I had just said that the most beautiful work in the Baroque style is Italian style, 16th century, and that is what they did, a big pipe. Really smooth and nice is how it has to be, and that pipe was to stay higher than the middle part.
One more from the grape vase, the second lesson. That is a scheme, I said, tagging it, as part 6 opened. For the concave I could use the same number seven, though it wouldn't give me a really nice movement near that point. So I needed to change my tool, and the one I like there is a number 11 veiner in 10 millimeters, three-eighths of an inch, like a U-shaped tool. With it I can exaggerate one side against the other and play with the shadows.

When is the choice yours?
When I aim the tag at you. Sometimes I also said which way I went, and you will see those below.
The Tray of Blessing, lesson 6, gave a rim figure of about three-eighths of an inch, maybe 10 or 11 millimeters. You can measure it, I said, I'll just eyeball it. And in case you don't know how, I use my middle finger, butted up against it as a guide.
The grape vase had the same pair. The center line of a leaf falls somewhere about 60 percent of the way, 62 percent to be exact. Calipers would work, I said, but I'll just eyeball it.
Sanding got the same answer on the Hashemi flowers, lesson 49. I planned no extreme cleaning there, and I wasn't going to use any sandpaper or anything. You may, I told you, but I really like the tool marks and the overall composition with all those facets. They create the shadow. Even the tiniest shadow casting will do a big difference.
Depth is yours too. Lesson 23 of the furniture panel is where I said you can go really deep, that I've done really deep flowers like that, and that they look gorgeous. It's all up to you how deep you go. The idea there was to raise the middle part and create a dome feel.

Part 11 of workshop 41 made the offer about tools. It's a really good idea, I said, to have low bevel and higher bevel tools if you can afford it, and of course if you're not doing it just for hobby. Even for hobby, if you want to work with species other than basswood and limewood, it's a good idea. Harder woods can't take too low a bevel. You're going to break it.
Does it change when I say it about myself?
With I in it, the choice is mine.
Back in workshop 39, part 7, I said I could develop details inside and go much deeper if I wish. And then I added, and I think I do wish.
Two parts after part 8, in 48.10, I could create more separations if I wish, I said, but let me excavate around this separation.
And in workshop 40, the eighth part, my plan was a back bent, sweep number five at half an inch (about 13 mm), on the ceiling part of my detail. I can actually create a beautiful dome, I said, and right after, that I would have to be mindful how much I excavate.
Where can you hear the tag for yourself?
Workshop 48's eighth part, in the Venice Room Part 4 course, has it once, and the wood carving lessons named above have the rest.
One more use says a lot about how I teach. In lesson 13 of the floral and molding panel, a detail on the left was the same as the one on the right, so there was no reason to show it again. That is not a vlog, I said, and tagged it. Just showing the process isn't what I want. My goal is to teach techniques, my way, and not necessarily the only way. Like I said many times, wood carving can go more than one way.
Want all those names, in order? Would it help to watch the marker go on before the gouge does? The tuition opens every workshop in this course, and for all of it in one place, start here.
How it's done
- Catch the main shape. That was all I was after, and I think I did it. Eyes and divisions underneath were still to come.
- Draw the change. With the marker I drew where one part would go instead, right underneath one movement, so no empty spot would be left there.
- Weigh the size. A smaller tool, then the same 10 mm (about 3/8 in) number 11, then maybe even bigger, 20 mm (about 0.8 in), for a really nice transition.
- Plan the dig underneath. I said I also need to excavate underneath, so that piece goes below the movement.
- Knock down one side. One spot worried me. A little of this side had to come down, and my thought was maybe a 30 mm (1.18 in) number 11.
- Size the spoon down. For that direction a number eight spoon was too big, so I thought smaller, maybe number 11.
- Outline it for now. No need for that height, so as a first pass I can just outline it.
Frequently asked questions
Does the tag mean a carving word is wrong?
Only that the name is my pick for the shape. I called a bowl a sphere on the Byzantine leaf, asked if the name was good, and kept using it. Edge was a word I took back on the grape vase, since I didn't want to confuse you.
What came right after the tag in workshop 48?
A plan for a bigger tool, maybe a number 11 of 30 millimeters (about 1 3/16 in). Just before, one spot had me worried, so a little bit of that side needed knocking down. That side had to have a smooth transition, as I put it.
Should you measure a carving or eyeball it?
Measure, if that suits you. My tray and my grape vase both got that offer, measure it or use calipers, and both times I went by eye myself. For the tray rim I butt my middle finger up against it and use that as a guide.
What to carve next