

Alexander Grabovetskiy, woodcarver, School of Woodcarving · Published 2020
What does a wood carver mean by "super heavy"?
Quick answer: In Venice Room workshop 79, part 1, I called a corbel about 42 inches (107 cm) long and about nine inches (23 cm) thick super heavy. I used it again about the block I had to flip over, and in other lessons about pieces on cookies, a piece my vise would not hold still and a bag of tools.
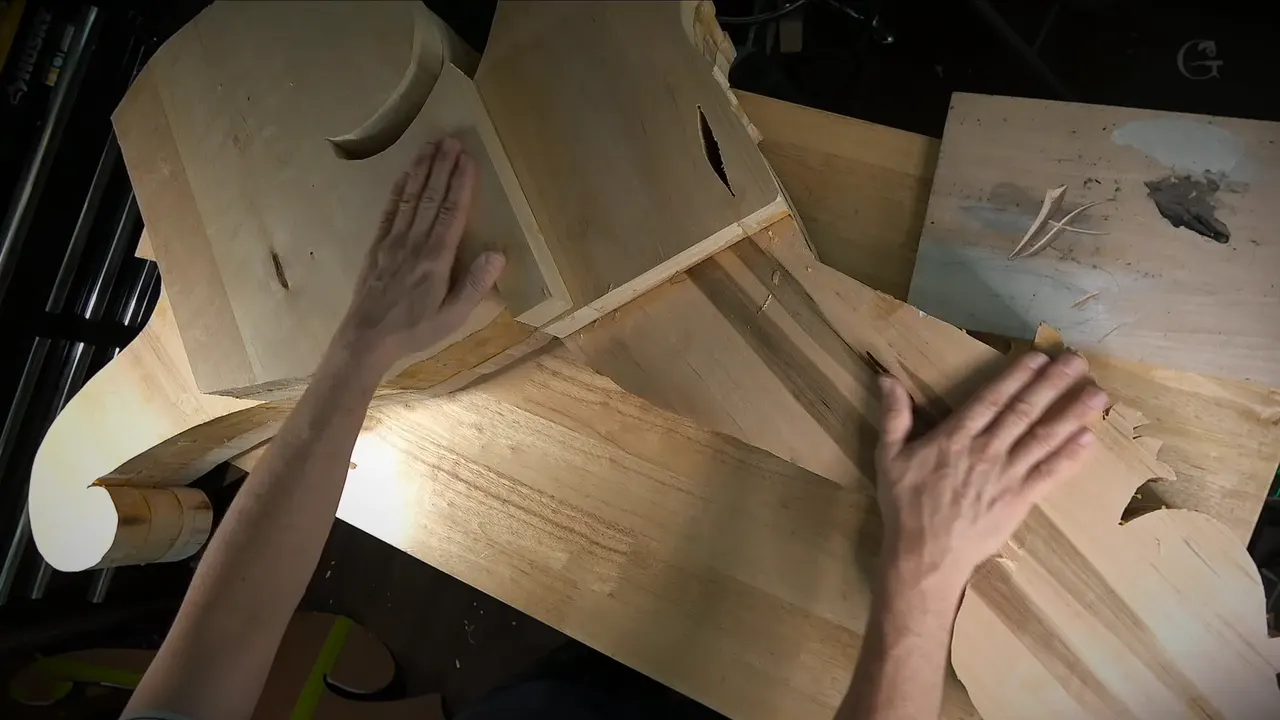

Super heavy is what I called a huge corbel in part 1 of workshop 79 of the Venice Room. I used the same words about that block when I had to turn it over, and in other lessons about a piece that would not hold still in a vise.
Is there a block in your shop that you cannot lift onto a saw? Does it shift on the bench when you push a gouge into it? Here are the places where I said the words, and what I did about each one.
What did I call super heavy in part 1?
The corbel stood in front of me when the part began. "I'm ready for the next stage of my project, and this is a huge corbel," I said. Then "So we're talking about huge." Next came "You don't see probably all of it, and that's super heavy."
Length first: "I know it's off-camera, but it's about 42 inches, and that's a really big piece." The thickness came after it, "Also, it's about nine inches thick." Two more lines followed, "I have to make two of them" and "It's a full 3D movement."

The bandsaw was not an option. "I wish I could take it to a bandsaw, but it's too huge." Then "So that is little too big for the bandsaw."
What kind of piece was the corbel?
Part 1 told you what the block was for. "It's a full 3D movement," I said, and "a leaning fold or drop, I should say, in this area." A template followed: "I made the full-size template."
The fold was not in my model: "this linen fold, which I did not indicate on my 3D model," and "I didn't have to."
The work itself: "I have to be really accurate with my measurements." And "I can always reference and measure," with "what I have to do, I have to just create a three-dimensional form, and that is one of the challenges."
Which gouges did I plan for the big chunks?
The plan was "to remove the big chunks of wood, same way what I've done before previously." The tools: "Probably just the big gouges, like number seven and three inches, and that's probably it." Three inches is about 7.6 cm. I closed the plan with "Okay, let me do that."
Where did the block have to sit?
The bench was the place, and I said how the block was held. "I need to place my piece right on the bench." Then the cookies, "right now, I'm using those cookies to hold it." Next, "Super heavy. Okay. So I want to make it flush with my workbench."

Position came next, "position it the right way. Something like that because I need to get the support on this end. Get the right support on this end." On a lamp: "And also don't want to knock my lights. I've done it before."
The shelf was "a piece of plywood with the supporting shelf, which I use just small pins, so really easy to remove and reuse it." And then "let me get approximate position."

The part ends on clamps, and the line for them was "I'm going to use probably couple clamps, quick release clamps." Then "Really handy to use and so on."
How did I measure a block I could not move?
The end of part 2 has it. "Now you know the way I work. And there is actually the other way to do that, too. But this is so heavy, I cannot move it around and so on. That's why I have to probably use multiple ways, okay?"
Ruled inches were one way. "I did exactly the same right here, okay?" Then, in the same breath, "I did the same one-inch increments." Calipers were another: "Another way what I could do or you could do, there is multiple ways to do, just use calipers."

templates came in too. "A few templates I made and glued that on about 3/16th, five-millimeter plywood, so that way I can just measure and so on."

What was my plan for turning the block over?
Part 3 opens with the marking done. "Okay, I marked everything, and yes, I had to actually do some grid work, like inch by inch. But I marked from all of the sides, and now I'm ready to carve it."

Look at the sides: "you can see on all the sides I got with the red marker." Next, "now I need to flip it upside down without breaking. It's super heavy." Then came "And I can start carving."

Cookies came next. "I'm going to place it on the cookies again." Then "That's what I like." Next, "That's stable." And a plan for the carving: "Let me place it the way I want to carve it."

For the first work I said "Nothing exciting," and "It's just the removal of the material." After that I said "just the straightforward cuts. No design, no nothing, just the roughing out."
On a saw, "I can probably do as fast with just the gouges without making any saw cuts." And then "it's not a big deal for me at all, so I can just take a gouge and just remove it."

How did I hold it down with nothing to grab?
The second part has a few tries, and the first line says "Somehow, I don't have anything to grab." Then "This is not going to work, but it's okay. That's fine." Next, "Maybe I'll just support it with the cookie."
A smaller clamp came to mind. "You know what? I could use a smaller clamp. I really don't have to use those." Screws followed: "I probably should just use a couple screws and screw right here. Maybe it's a good idea." Then "Maybe bottom, it's not going to be visible, and I can always remove those screws with no problem."

The length was "A couple inches long" (about 5 cm). About the wood: "waste anyway, so I'm safe."
Why did a heavy piece sit on cookies in other lessons?
Venice Room lesson 3 has a line about it. "Oh, by the way, you probably have a question how I fastened my piece on a work table, and I actually did not clamp anything. It's actually staying on my cookies."
Next came the rubber. "That's still just because it's a rubber, it prevents that from slipping. And so if the piece is heavy, it's a good idea." Then what would change: "Later on, it's going to become less heavy, and I probably have to fasten it." My plan was to fasten it from the backside, and "as of now, it works just fine."

In lesson 49, "there is no clamping system at all on this particular piece," I said, and "I did not clamp anything on it." Then "This piece is so heavy. It's really heavy. That's a solid block of wood. I glued the multiple pieces together, and that's super heavy."
It lay on the bench, and I said so: "that's just laying on my workbench." Under it, "I'm using those cookies, okay?" I said it's "called like a cookie," and "That's actually rubber on both sides, and that just prevents me from slipping. And just because this piece is so heavy, it's not moving anywhere."

Lesson 75 had me talking about raising a piece. "My blade going to hit the workbench, so that's no bueno." Then "I'll just use the cookies. Bench cookies. Get three of them underneath. And this is heavy." Next, "I think it's good enough," then "High enough, I should say."

What did a heavy piece do to my vise?
My carver's vice is the subject of lesson 25, and I said so plainly. "Unfortunately, I cannot use my carver's vice on this project. I really love to use a carver's vice, but I can't do it because it's really heavy."
Then "I'm able to use to a certain degree sometimes, those carvers vices. But like I said, to a certain degree only."

Wibbly is the word in lesson 81. "And if you would ask me why is it so wibbly, because that piece is super huge and super heavy, and I'm holding it only with the vice pretty much in the thickest part, which is really thick."
A stem held it. "And it's not so stable because it's only about a half an inch stem which holds" (about 13 mm). Then "But I have no problem with that whatsoever. I've done a lot of work with that." I named a downside in lesson 82: "That's the only downside of this system. Because it's so heavy, I cannot make it tight enough. It's not holding as stable."

Lesson 87 says it again, with an apology. "I apologize for that wiggling. And I can't make it tighter because the piece is super heavy, and there's just no vice on the market that can hold without wiggle." Then "Maybe there is one, but I couldn't find any."

Does a super heavy piece get lighter?
Workshop 85 starts with the weight. "Now, wow. It is heavy as of now." It would be much lighter once I remove a big chunk later on, I said.
The count: "in this position, you can see, so I've got five layers of two inches wood" (two inches is about 5 cm), and I called it "super heavy."

How heavy was the mallet I named?
My first tool in lesson 85 came with a line. "So the tool number one will be, I'll take probably just a number nine gouge and heavy mallet. Like about 30 ounces, I think it would be the best idea." (30 ounces is about 850 g.)
The head: "But still for work, I prefer use a rubber head because it protects my handles." The noise: "This one absorbs a lot of noise. I have that mallet for a long time, and it still works fine."
Venice Room lesson 1 has the same weight. "Let me take one of the big gouges." Then "three and one-eighth to be exactly 80 millimeters" and "a really heavy-duty mallet, which is 30 ounces." The rubber, in that lesson: "I want to protect the ends of my gouge."
About brass I said "I don't like to use a brass one on a heavy-duty work when I'm removing a lot of material."
The bevel lesson on hardwood has it in pounds. The line begins "on the hardwoods, you usually use really heavy mallets, okay?" Then "I've got really heavy mallet." The number: "a two pounds, 32 ounces, really heavy one." (Two pounds is about 907 g.)
What else did I call heavy?
In grape leaf vase lesson 1 a second piece was in my way. "And another piece is in my way. It's too heavy to move it out, so that's why it's actually laying right there, right on the bench. So kind of have to work around."

A bag counted too. In the Livestream of October 2020 I told how I got to a house the school has. "But to walk, it would take me about half an hour, which is okay, I guess." I had "the full bag of the tools," and called it "super heavy," with "another bag with my clothing and stuff like this." Then someone took me there.
The lines side by side
| Which lesson | What the heavy thing was in that lesson | A line |
|---|---|---|
| The corbel, workshop 79 | A huge block I had to make two of, partly off-camera | "You don't see probably all of it" |
| Turning it over, 79.3 | A marked block that I needed to flip upside down | "without breaking" |
| Glued block, lesson 49 | Several pieces glued into one solid block that sat on cookies, with no clamp at all | "a solid block of wood" |
| Cookies, lesson 3 | My piece on cookies, to be fastened from the backside later | "if the piece is heavy" |
| Carver's vice, lesson 25 | A project that a carver's vice could not take | "I can't do it" |
| Wibbly piece, lesson 81 | One piece held in the vise only at its thickest part | "super huge and super heavy" |
| Loose vise, lesson 82 | A vise that I could not tighten enough | "I cannot make it tight enough" |
| Wiggle, lesson 87 | A wiggle that no vise on the market took out | "no vice on the market" |
| Layers, lesson 85 | Layers of wood, lighter once a big chunk is gone | "five layers of two inches wood" |
| Grape vase, lesson 1 | A second piece that sat in my way on the bench | "too heavy to move it out" |
| Livestream, October 2020 | A bag of tools carried on the way to a house | "the full bag of the tools" |
For the words and tools on this page, Wikipedia has pages on corbels, workbenches, mallets and gouges. Others cover speed squares, calipers, right angles, volutes and band saws. The wood and the parts are under plywood, screws, vises and templates, and one gives the wide view of wood carving.
Where can you watch these lessons?
This part is in Venice Room 79, and Venice Room Part 7 holds workshops 74 to 85. A heavy block on your bench? Look at what it sits on before you pick up a gouge.
How it's done
- The size of it. Part 1 has the corbel as super heavy, with some of it off-camera.
- Cookies under the block. Cookies held it, I said, and I wanted it flush.
- Support for the piece. I needed the right support, and I did not want to knock my lights.
- Multiple ways to measure. Part 2 closes with ruled inches and calipers named as two of my ways to measure.
- A flip without breaking. Part 3 has me needing to turn it over without breaking, and calling it super heavy.
Frequently asked questions
How big was the super heavy corbel in part 1?
My figures were 42 inches (107 cm) long and nine inches (23 cm) thick, with two of them to make. Some of the length was off-camera, I told you, so the video shows only part of it.
What held the heavy block on the bench?
Cookies were holding it in part 1, and I wanted it flush. Part 3 has the plan to place it on the cookies again, and "That's stable."
Did the weight change how I measured?
Near the close of part 2 I said I could not move the piece around, so I would use several ways. Two of the ways I named were ruled inch marks and calipers.
What to carve next