

Alexander Grabovetskiy, woodcarver, School of Woodcarving · Published 2020
Is it okay to carve a detail only because it will look good, when nobody needs it?
Quick answer: An extra detail nobody needs is a hollow or line the piece could skip. Carving one is okay when the wood allows it and you think it adds to the look. In Venice room 17.7 I gave one reason, that it would look really nice, and said otherwise there was no need.
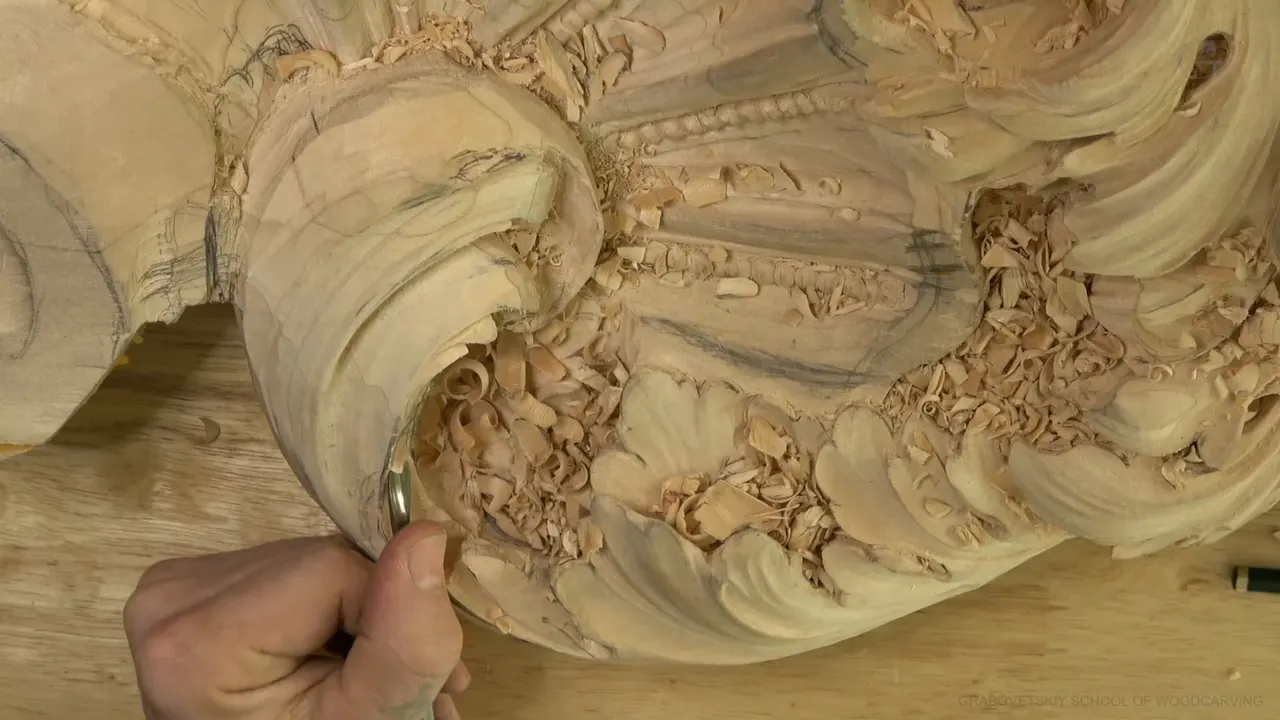
Carving an extra detail nobody needs is okay when the wood is there and you think it will look better. That is where I landed in Venice room 17.7, around 04:46: "I just think it's going to look really nice, okay? That's why I'm doing it."
Part 7 is short. So I went through my other courses and gathered the times I said the same about an extra step, and the times I held back. Every one comes from a public lesson, linked where I name it.
Ever looked at a hollow that already worked and wondered whether to go further? Was there wood left beside it? Then check the wood first, and ask what your reason is.

Five things I said about an extra detail
- A hollow inside a detail shows from below and adds extra dimension.
- I could dig really deep.
- Its end runs downhill, and the detail stops early.
- I did it for how it would look.
- A small separation came next.
Why did I carve a hollow under a detail that nobody needs?
Part 6 ends on an idea: another eye, with a movement going underneath and "just on top." The next video opens with my verdict: probably "a really good idea to do that way." Next came a number nine, and I said I would start excavating in.
My reason came right after. Seen from the bottom, I said, the detail on the inside would give "extra dimension." I pictured people looking at it and asking, "How in the world did you do that?"

Then I showed how the hollow runs. "See how it goes underneath?" Digging really deep was open to me, if I wished. "Which, in this case, I could."
Notice my wording: I could, not I must.
How deep did the hollow go, and where did it stop?
Around 01:56 I planned to fix the overall look a little and "get maybe number 11 and get even deeper inside." Maybe was the word. Seconds later I named a size. "Get even deeper with the number 11, and let me try five millimeters first." That is 5 mm, or 0.2 inch.

About half a minute went by with no words, and the next thing I said, at 02:46, was that four millimeters (5/32 in) would follow "inside."
The limit came next. "It's not going to go all the way, that detail." With a number seven I would "create the finish line of this movement somewhere right there," and from there it would "go also downhill, just like that."

Leftovers came after that. "And that is going to be all waste, which I have to remove somehow." I planned a number seven upside down, with "probably number nine" as the other choice, a quarter inch (about 6 mm). Both were plans. Then, to the camera: "I'm not sure if you see what I'm doing or not." Another half minute passed with no words.

Is it okay to carve a detail just because it will look good?
This is the line the page rests on. At 04:46 I said it, and moments later I added, "Otherwise, I don't have to do it." I called it beautiful, and again, "Really beautiful."
That hollow was my choice, and I said why. My answer is yes, and it comes with a reason: how I thought it would look. Wood helped too. In part 6 I looked at my material and asked, "Why not use it?"

Part 9 of this workshop gives another reason, one nobody else sees. A 1 mm tool (0.04 in) could "completely connect the concaves underneath," I said, which is "invisible to the naked eye." Then: "But I know what it is, and where is it. So that makes me happy when I'm doing it the right way."
In that same part I also kept a small extra detail, one I had just made. "I don't want to get rid of it because it just gives some really interesting movement." Then: "Why would I get rid of it?" A little later I called it "a good detail" and said I still needed to clean it.
What if the hollow alone still falls short?
At 05:12 I said it was "still not giving me the detail yet what I want to see." Getting it meant a new step: "I need to create another separation somewhere right here." By 05:27 I added, "if you look from above, you don't see that detail, but you will see that small detail right here."
I argued with myself out loud, maybe yes, maybe no. A few seconds on, I settled it with "Just a small separation," and added, "I can just relieve it." That's the first.

Number five was my pick "to clean that a little bit." At 06:31 I said, "That is not bad, except I still think a couple of ways I could attack this one." And then, "I don't know. Let me think."
The last thing I say in this part is a plan, not a finished carving. The words were "let me use, again, quarter inch number nine," then "double think," and maybe a concave cut on this side of my movement. Maybe is the word, and I leave it a maybe.

My extra steps in this video, side by side
| Time | Words | Plan |
|---|---|---|
| 00:15 | The inside shows from below | Number nine goes in first, to start the dig |
| 02:09 | Even deeper with the number 11 | Five millimeters, then four to follow (0.2 in and 0.16 in) |
| 03:12 | It stops early | A seven marks where the movement ends, running downhill |
| 03:51 | All waste, to remove somehow | A seven, or probably a nine, for the waste |
| 05:46 | Just a small separation | Number five to clean it a little |
| 06:57 | Maybe a concave cut on this side | Quarter inch number nine again, though still only a plan |
Where else did I call a step extra?
Many times, on many carvings. I start with the Lily Box.
In Lily Box workshop 3, part 3, I carved a small loop that goes "all the way down, loops back." "Really an extra step," I called it, and told you it could be skipped. My reason: "those small twists, small loops, they make a big difference."

Part 6 of that workshop has me undercutting deep. A shallower angle works too, I said: "just a slight angle with your cuts." For "a deeper exaggeration" I planned one millimeter (0.04 inch).
Workshop 8, part 10, wanted a flipping motion going inward, underneath the first layer. It would "look really cool," I said, and it was not required. But with the material and the ability, "Why not?"
Part 4 of Lily Box workshop 12 has the same shrug with more feeling. A flipping motion or a small undercut would give "really interesting movement." Not required, I said. "But I love carving flowers, and it's really fun to create those type of movements." I used a number eight, 3/32 in (about 2.4 mm).

On the floral and molding panel, workshop 10, part 3, it was an extra movement that "casts extra shadow." Not needed, I said. "But I like that stuff. Why not?" In the same breath I wavered between the 11 and a number nine of two millimeters (about 0.08 inch).
Workshop 110, part 2, comes close to my line in part 7. A 1 mm tool (0.04 in) could "exaggerate that separation," I said, and maybe a spoon. And my line was, "I really don't need to do that, but I think it's going to look better."
What did the Roman and Greek leaves say about the extra step?
On the Roman acanthus leaf, workshop 12, part 4, I could excavate "as deep as I wish," even to the background, for "an even more beautiful shadow." Nobody requires it, I said. "I just like to do that." The tool was a 2 mm (5/64 in) spoon gouge.

Workshop 16, part 4, has a deeper concave, more like a U channel. Without those tools, I said, skip it. "The only person who's going to know about it is probably you." But "those little things, they make huge difference."
Part 5 of that workshop has a number 11 veiner of half a millimeter (0.02 in). I called it an extra step. If you like extreme undercutting, I said, it's probably a good idea to get that tool. It gave "that extra pop," and I even doubted my own word, pop.

Greek acanthus, workshop 11, part 4, called for a V tool, number 15, 3 mm (about 1/8 in). "I am through, you can see." Skip it if you like, I said, though "I just like that extremism, I would say." What I like is when the light "actually penetrates and goes through."
When does an extra detail turn into a challenge?
In the grape onlay course, workshop 6, part 1, I told you honestly that you can skip it. Why bother? It was an "excellent idea to just push yourself." I drew some movements there too, and wanted that one "close to life."

Workshop 7, part 3, says it plainer. It is there, if you wish, to challenge yourself, I said. And then: "It's gonna look really good without it, but it's gonna be looking even better with that."
Over in workshop 5, part 3, I warned you: "For some of you, it doesn't even look good, maybe." Why do it anyway? "Once it's done, I think it's gonna look awesome actually." I used a number 11, four millimeters (about 0.16 inch).

The Gibbons class in Maine, lesson 13, part 3, had a letter S curve at an edge, going underneath and back. "That's gonna give me extra Shadow point." It was "some kind of challenge," and I like challenges "sometimes," I said. "Not always but you know once in a while."
In Hashemi flowers 48, part 6, I connected two sides and called that part optional. But it would give me "a lot more light and a shadow play."
When should you skip the extra detail?
A deeper detail is sometimes a mistake. Earlier in this room, in workshop 9, part 8, I went really deep to the background, since people would see it from below. Then I said you can skip that, and "that would be even a mistake sometimes."

The reason was the view. "If you look straight, you're not going to see sometimes too good." It is "just going to distract the view," I said, so keep in mind the direction it will be seen from.
Back in workshop 112, part 1, an eye and a pipe were possible, I said, and "there is no need because it's never going to be in the eye of any human person." Then: "So don't need that extra detail." I started a number 11 at 7 mm (9/32 in), wondered if it was too big, and grabbed 4 mm (0.16 in).

Hashemi 48, part 4, had a limit of its own. "I don't really think I want to create a big excavation," I said, and added that it need not be done everywhere. Next went a number 11 of 1 mm, a hair under 0.04 inches.
Workshop 43, part 3, puts it in one line. Going as deep as I wished was possible, I said, and "I love to give some depth." It "gives extra shadow, and I think it's nice." And this: "I don't have to do it everywhere, but sometimes I could."
Workshop 49, part 1, was about more eyes. They were optional, but "I think it makes sense." Workshop 47, part 8, had a downhill movement, and I said I did not need to go to an extreme. "I could." After that came "maybe a little deeper inside," using the number one back bend.
And back in part 6 of workshop 17, I wondered whether one more would be too many. "I need to make sure I'm not overdoing it."
What would you check first?
Which hollow on your own carving already works fine? Is there wood left beside it? Would the piece stand without the extra step? Then look at the wood, and give yourself one reason, the way I did in part 7.
What I described is one part of workshop 17, and the course page is Advanced Carving: Venice Room, Part 2. A little outside reading, since a shadow is what these steps are for. A shadow is a dark area where something blocks the light, and artists use chiaroscuro for strong contrasts of light and dark that give a sense of volume. In relief carving the shapes stay attached to a solid background of the same material. The acanthus is one of the most common plant forms in ornament that comes from Greece and Rome, and our eyes read distance through depth perception. More on wood carving, carving, woodworking, hand tools, the chisel, sculpture and ornament.
Which hollow on your carving will you look at first?
How it's done
- Check what the wood allows. Part 6 had me looking at my material and asking, why not use it. Part 7 had me saying I can excavate really deep, if I wish.
- Start the hollow. Excavating in with a number nine started the hollow, so the detail on the inside would show from the bottom.
- Go deeper with a smaller gouge. Number 11 was the plan, five millimeters first (a bit under 0.2 inches), then four millimeters (0.16 inch) inside.
- Set the finish line. Since it would stop early, a number seven would mark where the movement ends, running downhill.
- Plan for the waste. There would be waste I had to remove somehow, and a number seven turned upside down, or probably a number nine, was the plan.
- Add a small separation if the detail is still missing. The hollow was not giving me the detail yet. So I chose a small separation, and a number five to clean it a little.
Frequently asked questions
Is a detail nobody will see worth carving?
No. Part 7 gave one reason, how the detail would look, and added that otherwise there was no need. A Lily Box lesson says it again: with the material and the ability, why not. Part 9 added that a hidden detail makes me happy when I do it the right way.
How do I know when to stop adding details?
Whether one more would be too many came up in part 6, and I told myself to make sure I was not overdoing it. Hashemi lesson 48 adds a limit: no big excavation, since it need not be done everywhere.
Which gouge did I use to go deeper in part 7?
My first tool was a number nine, used to start excavating in. Later I had a number 11 in mind at five millimeters (0.2 in), followed by four (about 5/32 in). For the end of the movement, a number seven was on my list.
What to carve next