

Alexander Grabovetskiy, woodcarver, School of Woodcarving · Published 2020
Which size of spoon gouge cleans under a small carved detail, 3 mm or 2 mm?
Quick answer: A spoon gouge is a bent gouge that reaches under a detail, and the size that worked for mine was 2 mm (about 5/64 in). In Venice room 17.9 I started big. A smaller one was fine, and a 1 mm tool (about 1/25 in) was my idea for connecting the hollows underneath.
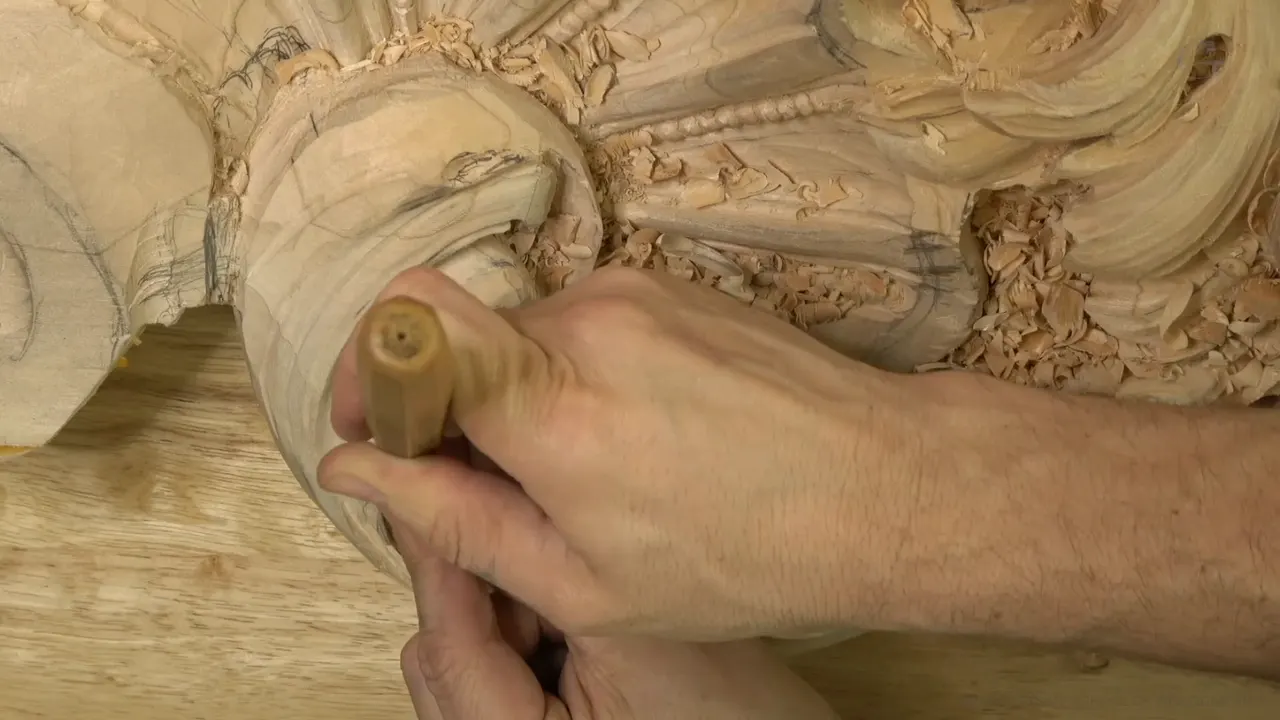
The spoon gouge that worked beneath my small detail in Venice room 17.9 was the 2 mm one (about 5/64 in). Near 02:46 I called the 3 millimeter size (roughly 1/8 in) too big, and said 2 millimeters is fine.
This video is short. So I went through my other courses for the places where I picked a spoon gouge size and told you why it worked or didn't. Each one sits in a lesson you can open, and I link them.
Ever pushed a gouge beneath a small detail and felt it jam against the wood beside it? Does the tool sit a hair too wide for the hollow? Then try a smaller gouge.

Which spoon gouge size fits under a small detail?
- I started with a big one, and I called 3 millimeters (0.118 in) too big.
- One size down worked, and the hollow went deeper beneath the detail.
- The smallest one was my idea for connecting the hollows underneath, out where nobody will see them.
- In other lessons a spoon gouge would not fit one spot and felt small in another.
- Where a straight tool could do the job, I used the straight one.

What did I carve before the spoon gouge came out?
A bit of rounding came first. By 00:44 I told you, "Okay, now it makes sense. Okay, now it looks good."
One thing was left to do. The detail was the job: at 00:51 I said I had to clean "this little detail I just created, an extra detail." I did not want to get rid of it, because it gave "some really interesting movement." One short question followed: "Why would I get rid of it?"
Next I picked a 3 mm number 11 (about 1/8 in) to clean a little better right there. The little thing needed a shape, I said at 01:36, "whatever you call it." Some thirty seconds on, I told you it gave a little extra movement, and I called it a good detail.

How did I choose the spoon gouge for the underside?
The detail still needed a little cleaning at 02:12, and so did the wood underneath it. By 02:27 the plan was probably a spoon, and I picked a big one first to see if I was able to use it.
Then the sizes came fast. "Maybe 2 millimeters will do." A few seconds later: "3 millimeters was too big, but 2 millimeters is fine." In inches, that is about 0.12 against 0.079. With the smaller tool, I said, I could take that concave a little deeper underneath.

What did the smallest tool do under the detail?
Taking 1 millimeter (about 0.04 in) to completely connect the concaves underneath came to mind at 03:07. They would be invisible to the naked eye. "But I know what it is, and where is it," I said, and close to 03:37, "that makes me happy when I'm doing it the right way."

The same small sizes come back in the next video, 17.10. Close to 02:58 I said maybe 1 millimeter, a number 11 (0.04 in), to get the excavation done a little cleaner, and that part would be invisible too. Later I used a number 11 of 1 mm again to attack two sides, and then said maybe 2 millimeters (0.08 in) to clean up.
How could I see what I was working with?
The mess came next, and I pointed at it around 03:45: "So much junk." I brushed some of it out, and by 04:19 I said, "Now you can probably see much better what I'm working with."

A number five was next, or a number seven, actually, which would work really good in this case for a nicer separation.
What sizes came before and after this video?
In 17.8 I said I still did not like how it looked, and that maybe I had to bring that concave all the way in, so it would blend much better. At 07:28 I said, "now I think it makes more sense."
In 17.8 my plan near 03:03 was a number 11 of 3 mm (0.118 in), to get a little deeper on one side. The next video called that size too big under the detail.
Over in 17.11 I said maybe even a micro tool, about one-eighth of an inch (3 mm), because it looked like a good spot to use one, to bring out a ridge. Soon it needed sharpening, and later I stopped, because I was creating an extra ridge, which I didn't want.
Video 17.10 adds a warning. Around 03:28 I picked a number three, I said, to make that eye a little more pronounced. The backside needed a check, because I did not want to overdo it and get all the way through. "I've done it too many times," I said, "especially when I carved flowers."

When did a spoon gouge turn out too big?
The closest case sits in workshop 47, part 8, which you can open. A deep pass had just come off a small number 11, and the plan was to clean with the 2 millimeter number 11 (about 1/12 in). Then I said a spoon would help me a little more. Around 05:13: "Oh, 2 millimeters was a little too big." Probably just 1 millimeter (about 1/25 in) would do, and hook out all that mess. A little later came my remark that there was no limit to how deep I wanted to go, but I did not really need to, because I had to be mindful.
The spoon veiner of workshop 62, part 9, shows it. Around 06:24: "That is a little too big, I guess. I need little smaller." Next up: 5 millimeters (about 3/16 in), a number 11 veiner, to excavate a little deeper. Soon after came the remark that I did not have to use a spoon for that pass, and could use just a normal one.

The excavation in workshop 45, part 4, was underneath. Maybe a spoon was a good idea, I said, and I tried a big one: "And no, that is too big." A smaller one came next in the plan, like 13 millimeters (0.51 in). The rest was not a big deal, I said. Number seven or number six could take care of it, and most of it was going to be hidden.
Hashemi flowers 16, part 3, shows the trial in two steps. I tried a spoon gouge of maybe seven millimeters (about 9/32 in), and said maybe it's too big. A 5 millimeter one (0.2 in) came next. "And it fits perfectly."
I met the same wall in workshop 9, part 11. The plan was 5 millimeters (roughly 3/16 in), a number 11 spoon. Maybe a smaller one now, I said. "I reached the point where I can't fit this tool in." That is why 4 millimeters (about 5/32 in) came next.
Floral and molding panel 10, part 3, has a reason to go smaller. I almost made a mistake, and I said, "So it creates too much pressure." Five millimeters (0.2 in) had been my pick, but I would switch, I said, and I settled on two millimeters (close to 1/12 in). A warning to myself followed: it is easy for me to break through to the other side, because the opposite side was already deep.
Over in workshop 20, part 1, a pass inside a pipe was not good enough, and I said that is why I should probably use a spoon. Maybe even a bigger one, I said, like a 10 millimeter number 11 (roughly 3/8 in), for a really nice, smooth pass, though I needed to sharpen it. I wondered whether this one was too large.
Fit was the whole question in workshop 18, part 10. Again a number 11 spoon gouge, I said, and "Let me think if number 11 and four millimeters (0.16 in) will fit," because I actually excavated some more. Working from underneath was possible, up to a certain point. My goal was not to touch the edge, which I called almost impossible.

When was a spoon gouge too small instead?
Going the other way, workshop 8, part 5, shows a size I doubted. I wanted some kind of undercutting in a really hard-to-get area, because everything was in my way, so I started with a 2 millimeter (0.079 in) spoon gouge. Out came "Maybe it's a little too small," and I used four millimeters (about 5/32 in).
A straight tool could not get in during workshop 23, part 3. "It's a little too small. I'll use the two millimeters," I said, which is 0.08 in. My reason came right after it, since I needed a smooth transition from the sides and also from the backside, because it was going to be visible from the bottom, and rough spots inside would have been a mistake.

How small can a spoon tool go beneath a detail?
Grape onlay 11, part 2, runs down to a single millimeter (0.039 in). It made more sense, I said, to use a smaller number 11, one millimeter, a spoon. Yes, it takes time, I said, but you can get deep, carefully, and excavate right underneath.
Smaller still is in lily box lesson 6, part 9. I wanted a really tiny one: half a millimeter (about 0.02 in), but a spoon. Next I saw I had actually connected, and I had a hole underneath. "But it's okay." I left it, because I didn't want to make it too weak.
Maybe I should already switch to a spoon, I said in workshop 32, part 1. I know it is deep and nobody sees it, I said, but it gives me so much depth on the inside. Five millimeters (0.197 in) went on the list, and it only had to be just deep enough. Then: "Let me use a four millimeters now. And excavate a little deeper." That is 0.16 in.

Hashemi flowers 13, part 2, named two sizes in one breath. I could use a small spoon gouge, like two millimeters (0.0787 in), or a really tiny gouge, even 1/8 of an inch or 3/32 of an inch (about 3 mm and 2.4 mm). My goal was an excavation deep enough to pierce through. At least I thought it would give a beautiful shadow.
The Roman acanthus lesson 16, part 2, has a small spoon gouge of 3 millimeters, an eighth of an inch. In some areas, I said, it would help me to get in with the smaller one.

Do you always need a spoon gouge beneath a detail?
A straight tool was an option in two lessons. In workshop 46, part 12, I said maybe I could use a straight one, not a spoon, not a bent one. Two millimeters (about 2/25 in) would get underneath, and go, and go, until I completely undercut underneath the detail. Workshop 62 left a spoon out of one pass.
Depth control matters more than size in workshop 92, part 11. My spoon gouge was a number seven of 10 millimeters (about 3/8 in), and I said I should probably switch to a number three, because it would give me better control of how deep I go. A number five followed, 6 millimeters, about a quarter inch. After that: "I cannot go deeper than that. That would be a mistake."

A short record of the sizes I called
Here are six moments, with what I tried and what I said about it.
| Lesson and part | What I carved with, in order | My words |
|---|---|---|
| This video, 02:46 | Big spoon gouge first, then smaller ones | It was too big |
| Workshop 47, 05:13 | Spoon gouge after a small veiner, then smaller | Too big, go smaller |
| Lesson 62, 06:24 | Spoon veiner first, then a smaller veiner | I need little smaller |
| Eighth workshop, 01:30 | A tiny spoon gouge first, then one size up | Too small, maybe |
| Lesson 45, 07:47 | Big spoon gouge for underneath, then a smaller one | No, that is too big |
| Hashemi 16, 08:02 | One spoon gouge, then one a size smaller | And it fits perfectly |

What would you try under your own detail?
Which detail on your carving needs its underside cleaned? Is there a gouge in your set that might be a hair too wide for it? Would you try a smaller gouge before you press harder?
The 2 mm tool worked in Venice 17.9. That same size ran big in workshop 47, and maybe small in workshop 8.
What I described is one part of workshop 17, and the course page is Advanced Carving: Venice Room, Part 2. Some background reading, if you want it: wood carving, woodworking, the gouge, the chisel, relief carving, the acanthus leaf, shadow, millimeters, sculpture, the Republic of Venice, hand tools and the Renaissance.
Which spoon gouge will you reach for first?
How it's done
- Clean the detail first. In 17.9 I said I would use a number 11 on the detail, and then that it still needed cleaning underneath.
- Try the big one first. At 02:27 I reached for a big spoon to see if I was able to use it.
- Drop a size. Near 02:46 I said a smaller size was fine.
- Deepen the hollow. The hollow could go a little deeper beneath the detail.
- Connect the hollows. Around 03:07 I said I could use the smallest tool to connect the concaves underneath, out of sight.
Frequently asked questions
How do I know a spoon gouge is too big for a hollow?
A 2 millimeter spoon (0.0787 in) came up too big in workshop 47, and I thought 1 millimeter (0.039 in) would do. A big one failed in workshop 45, and 13 millimeters (0.51 in) came next.
Can a spoon gouge turn out too small as well?
Workshop 8 had me wondering about it. A tiny one went first, and I said maybe it was too small, and went up a size. In workshop 23 I picked a small one for a smooth inside, since people will see it from below.
Why take the smallest tool under a detail at all?
In Venice 17.9 the idea was to join the hollows underneath, where nobody will see them. I know what it is and where it is, I said, and that makes me happy when I do it the right way.
What to carve next