

Alexander Grabovetskiy, woodcarver, School of Woodcarving · Published 2020
Does the concave beside a pipe next to an eye need to be deep?
Quick answer: A hollow carved on a pipe's side is what makes the ridge stand up. In Venice Room workshop 17, part 8, I said beside an eye a deep one isn't required, and named a number nine for it. A number 11 comes up in the same video too.
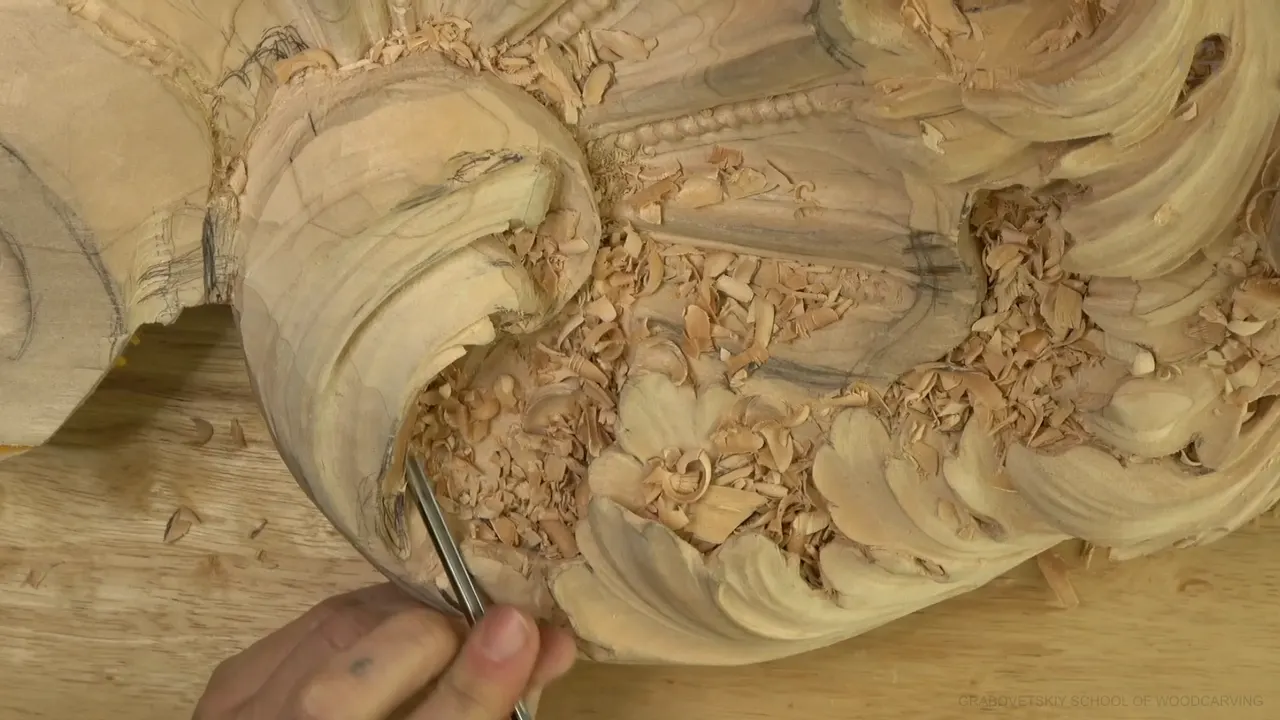
The concave beside a pipe is the hollow you carve along the pipe's side so the ridge stands up, and beside an eye it need not be deep. I said so myself in workshop 17, part 8, "it doesn't have to be deep concave," and I reached for a number nine to carve it.
Later in that video I planned a number 11 at 3 millimeters (1/8 in) to get a little deeper on one side. So the video holds a shallow word and a deeper plan, and I will show you where each one sits.
This part is short, so I went through my other lessons for the times I carved a pipe's side and said how deep it should go. Every one of them sits in a public lesson, and I link it.
Is there a hollow beside one of your pipes that looks deeper than the ridge needs? Would a lighter pass save the leaf's shape? Then watch where I held back, and where I went deeper.
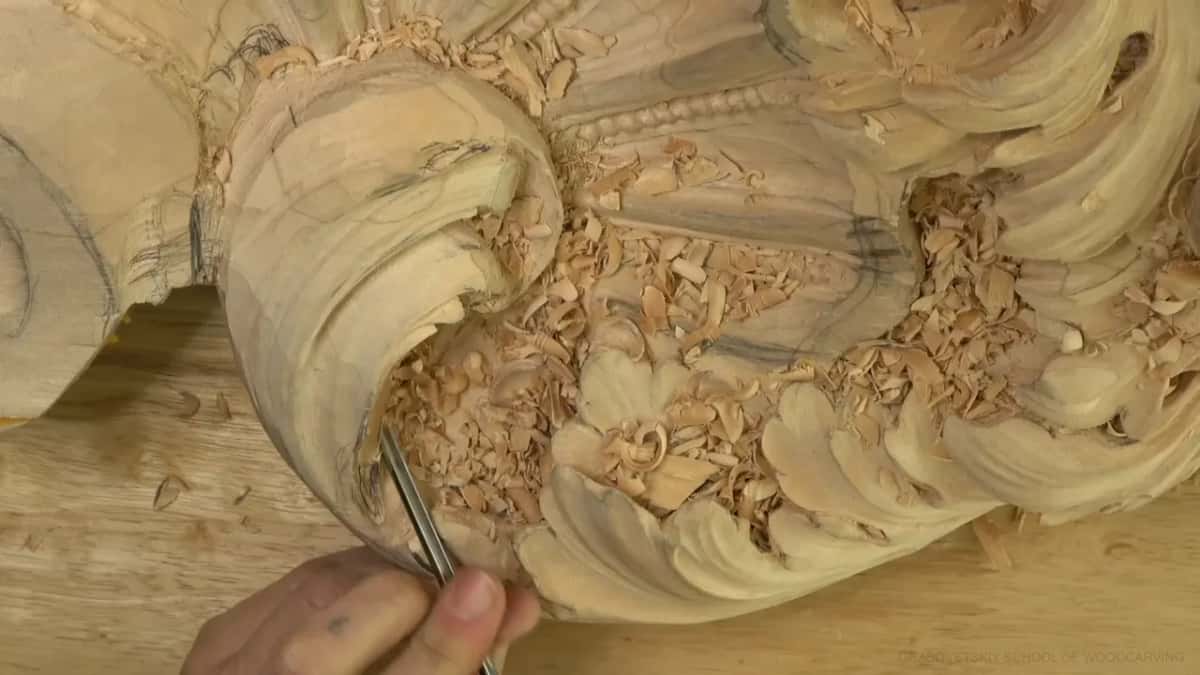
How deep should the hollow beside the pipe go?
Part 8 answers at 00:52. Because I have an eye, I said, I'm supposed to have a pipe, so I have to make a concave along its side. Then I told you plainly that a deep one wasn't required.
Next came the tool. "Let me use a number nine and carefully create that concave," I said at 01:11, and I said to go in like that and blend it. By 01:35 it did not look too good, I told you, and it had to go from underneath.
Near 00:07 I had floated the number 11, because as it stood it did not look too good. The goal was to make it beautiful and create a little deeper excavation.

Why did I leave a rough spot for later?
At 02:16 I told you I don't worry about it, since I still had to round it later on. What I needed then was a smooth transition from the opposite side toward this side, and the overall movement had to make sense.
Rounding on this side opens part 9, and by 00:46 comes "now it looks good."

Where did the deeper pass go?
Around 02:54 I asked for the number 11 again. "I'm going to use 3 millimeters and get a little deeper on the side right here," I said. The next words after that plan come at 04:04, nearly a minute later.
At 04:06 I said to make a cleaner pass now, and that I needed to remove underneath. Undercutting this way, I said, would create that shadow right there.
An eye comes up here too. I still had one to create near 04:36, and I still had to excavate more right there. Close to 05:12 came a short line, this has to go underneath right there.
How did I try to exaggerate the eye?
It didn't look like the right movement, I told you at 05:19, and I said it again at 05:27. "It has to go like that," came at 05:32. A little later I admitted you probably don't even see what I mean.

By 06:07 it made more sense, but I still needed another concave on the side to exaggerate that eye. Some blending followed. At 06:43 it looked too messy to me, and I still didn't like it.
Then I thought out loud. Maybe I have to bring that concave all the way in, I said around 06:55, and it would blend much better. That was a maybe. Twenty-five seconds without a word passed, and then, at 07:26: "now I think it makes more sense."
Near 07:33 the pipe still needed rounding, because as it stood it didn't look right. The last words of the part name a number five, upside down.

What did the eye need in part 10?
Back to the eye in part 10. Around 00:59 I said it needed a little more excavation in that area, but it wouldn't be visible from this side, so I really didn't need to. All I needed was the indication of that movement.
Near 03:28 a number 3 was named, to make that eye a little more pronounced. At 03:41 I said I had to check the backside, because I didn't want to overdo it and go all the way through.
Near 09:32 of the same part the pipe still didn't make sense if you look really close. I planned a quarter-inch number nine (about 6 mm) for a longer concave, starting from that point and going on.

When did I keep the hollow shallow?
On other panels the same words came back. Here they are, one by one, with the workshop and the minute. Where I named no tool, I name none now.
Back in workshop 16, part 6, at 07:34, I said I was going to create a concave right on the side of my future pipe. Not too deep, I added.
Workshop 22, part 1, put a pipe, an eye, another pipe and another eye in front of me. Logically, I said, the pipe's side gets a concave, but I wanted to hold on to the overall shape, so it had to be shallow. Eight came first, and I wasn't sure it would do. Deeper in one area was fine. A too deep one right there was not. Near the middle line a little more concave was probably right, I said, but not much. Closer to the other part I could probably go much deeper, and a number nine at 5 millimeters (3/16 in) was the next tool I named.

Over in workshop 25, part 6, I called it a less pronounced concave, probably with a number nine. Near 05:40 I said I really don't need to excavate too deep in this area.
Two clips come from workshop 26. In part 4, around 01:54, you probably don't see that concave clearly from the camera's position, I said, but once the piece is installed it will be seen from the bottom. A really deep one wasn't needed. Just a number five, I said, and I thought it was plenty.
Part 8 of that workshop, near 06:14, had me holding back from a too deep concave on that side. I saw it more shallow. Maybe a six at 10 millimeters (3/8 in) crossed my mind, then a spoon, then a seven. At 07:43 I said, that is enough of a concave, I think.

On workshop 29, part 3, I said deep concave was not what I wanted to see. For the next side, near 04:46, the same: not really deep at the beginning, almost no concave. Then, because from below I didn't see one part, I said I needed to knock it down until I could, and undercut it using a number 11. That was not the final undercut, I said, since we are going to go much deeper.
Six parts on, a number seven at 10 millimeters (3/8 in) was the tool I said I would use for the side of a pipe, and at that point, at least, I didn't need to go really deep.
Part 9 of workshop 38 gave me a clear view of my pipe, established right at the eye point. Really deep excavation at that detail wasn't needed, I said.

Then workshop 39, part 8, around 03:27: I planned a concave along the pipe, but not a deep one, because I really didn't want that. One direction could take a little more, though not much, just to give some indication of the pipe.
Part 5 of workshop 40 wanted almost no concave, but still a concave. It gave me a small ridge, and the overall roundness stayed, since I could blend it in. On the opposite side of the pipe I could do exactly the same, almost nothing. That small ridge was the whole goal.

In workshop 43, part 1, I wanted some kind of concave on the pipe, not deep. It looks big because of the shadow, I said near 02:26, but it's not really deep. Placing my hand there, I said, makes you see it much deeper, but it is not as deep as it looks.
In part 4 of workshop 72 I weighed a slope against a shallow concave, a number 3 being my plan. Not a really visible pipe, I said. A tool mark or ridge, though, and the light would still show it.

In workshop 144, part 1, I started small. Number 11, 7 millimeters (about 9/32 in), from almost nothing, using just the side of it. I planned to go deeper little by little, because I wanted a micro pipe going from this eye. More shallow at this point, I said, and more pronounced closer to the other side.
Part 2 of that workshop repeats the idea. Both concaves somewhat shallow at the beginning, more pronounced later. Opposite side, again almost from nothing. "I really want to see that pipe," I said, and said it twice.

When did I go deeper?
Part 4 of workshop 20: the light was going to hit from one direction, so I wanted one more hollow toward that side and the pipe a little raised. Deeper was the plan, I said, with a limit, because the movement could get lost. I already had a really deep one carved, and I wanted to keep it. Next I named a seven, upside down. Near 02:30 I thought of a slightly bigger concave on this side, because that transition was too sharp and I wasn't happy with it.
At 03:19 of workshop 40, part 10, a deeper concave to one side was possible, to a certain point, because I had a pipe and wanted it to stand out anyway. Slightly deeper, I said, and short of too deep. The tool I named was a number five, or something like that.

Workshop 62, part 7, opens on a pipe I called visible but not deep enough for my taste. I needed it deeper, because it's really important for me to cast some shadows, and it still didn't. A back bend set the preliminary depth. It was a number eight, three-eighths of an inch, 10 millimeters. Next I planned to continue around with a number 11 and a seven, the same as before, and excavate whatever depth I needed. Even wrecking earlier passes was okay, I said, because I was still establishing what's supposed to be good.
And workshop 83, part 8, near 04:29: it needn't be too deep in this area, I said, but I wanted to see that pipe just popping up. Deeper the closer I got to the end. I named a number 11, 7 millimeters (about 9/32 in), then maybe 4 or 5, and settled on 5 millimeters (3/16 in) right there. My plan then called for one more hollow that way, the 7 millimeters going that direction, and I said I could go a little deeper in that area.

A short record of depth and reason
Six moments, in my own words. A plan stays a plan, so the middle column says what I said about the depth.
| Where | What I said about depth | Why |
|---|---|---|
| Workshop 17.8 | A deep concave isn't required beside this eye | Because I have an eye |
| Part 1 of workshop 22 | A shallow one, a little deeper in one area | To keep the overall shape |
| Over in 26, part 4 | Not a really deep concave, just a number five | Visible once installed |
| Workshop 40, part 10 | A touch deeper to one side, short of too deep | To bring out the pipe |
| Then 62, part 7 | Not deep enough for my taste, so a little deeper | To cast shadows |
| And 83, part 8 | Shallow here, deeper the closer I get to the end | So the pipe pops up |
What decided the depth in each of these cases?
Shape came up three times. Workshop 22 kept the overall shape, workshop 40 kept the roundness because I could blend it in, and workshop 20 kept the movement.
The view came up twice. Workshop 26 counted on the view from below. Part 10 of workshop 17 had an eye that couldn't be seen from that side, so an indication was all I needed.
Shadow came up twice. Workshop 20 wanted to cast a shadow, and workshop 62 called shadows really important to me.
What did I leave for later in part 8? Rounding the pipe and creating one eye were left for later. Part 10 ends on the shell, with a lot more to do to it.

All twelve videos of workshop 17 sit in that lesson, and the whole course is Advanced Carving: Venice Room, Part 2. A relief is carved on a flat background.
Wood carving, a branch of woodworking, is the craft behind all of it. A gouge is a kind of chisel. My sizes are in millimeters and inches, and the room follows the style of Venice.
A hollow beside a ridge holds shadow, and the wider family of the craft is sculpture. A pencil line only marks where the next pass goes.
Which hollow beside your pipe would you keep shallow first?
How it's done
- Spot the eye that needs a pipe. Part 8 says early that an eye should have a pipe, so the hollow belongs along the pipe's side.
- Start the hollow shallow. Number nine went in first, and a deep hollow was not asked for.
- Leave the rounding for after. Smooth transitions and rounding were still ahead, so the overall movement came first.
- Add depth where the shadow needs it. My plan was the small number 11, for more depth on one side.
- Blend when the result looks messy. Bringing the hollow in was my maybe for a better blend.
Frequently asked questions
Does a concave next to a pipe have to be deep?
Depth followed the job each time. I kept the hollow shallow where the shape, the view from below or the roundness mattered, and went deeper where I wanted shadow or a pipe that stood out. The words about a deep one not being required sit in part 8 of workshop 17.
Which gouge did I name beside the eye in part 8?
A number nine first, then a number 11 at 3 millimeters (1/8 in) as my plan. The last tool named is a number five, upside down, right after I said to round up this pipe a little bit. Part 8 also has nearly a minute with no words right after that plan.
Is it okay to leave a rough spot while you judge the movement?
At 02:16 the rounding waited. I wanted a smooth transition from the other side, and I wanted the whole movement to make sense first. By 07:33 the pipe still wasn't round, so the rounding was still ahead of me at the end of that part.
What to carve next