

Alexander Grabovetskiy, woodcarver, School of Woodcarving · Published 2020
Is it worth carving a full rotation if the piece looks choppy from the front?
Quick answer: A full rotation carved into a movement is a choice for the view from below. In Venice room workshop 17, part 1, I say I normally wouldn't go all the way like that unless you look from down, and that straight on, it just looks a little choppy.
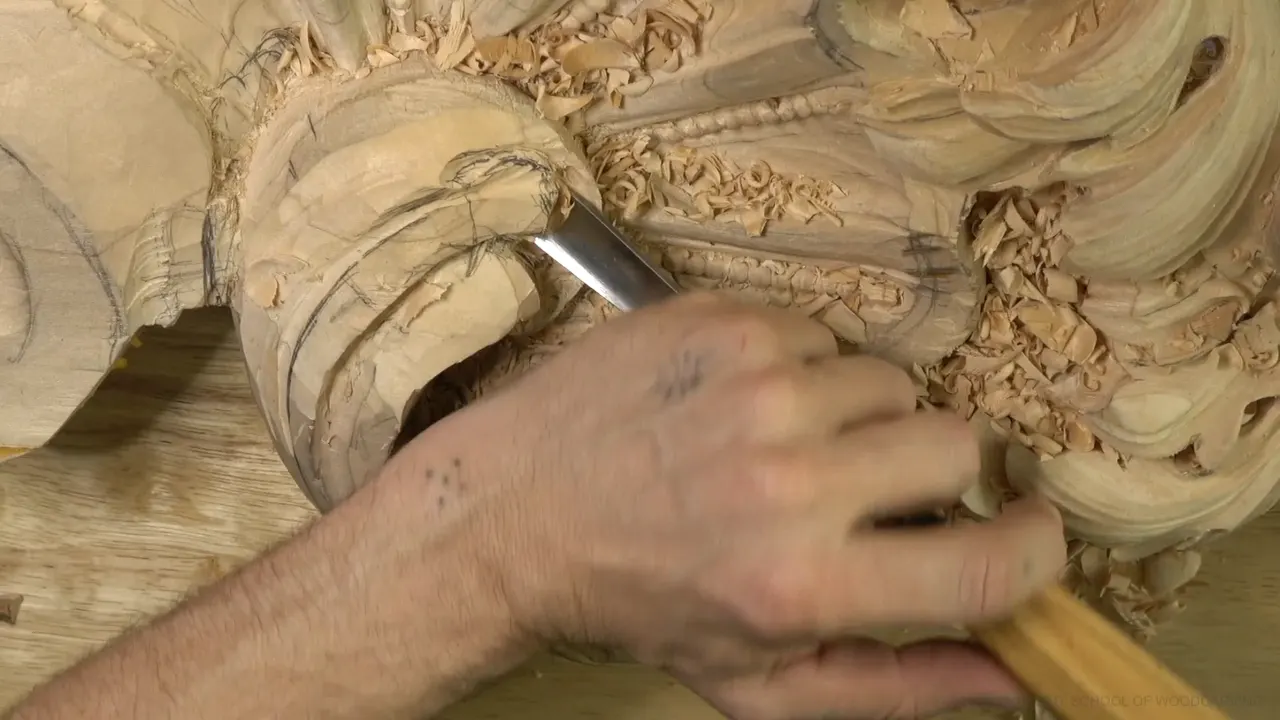
A full rotation carved into a movement looks choppy when you stand in front of it, and in Venice room workshop 17, part 1, I carve one anyway because the piece is viewed from below. The line sits at 06:20. "Normally you wouldn't want to go all the way like that unless if you look from down," I say. Fourteen seconds later I add that if you look straight, "it just looks a little choppy."
The part is short, so this page borrows from my other lessons for what I say about a choppy edge. Sometimes I leave it be. In other lessons I fix it on the spot. Each borrowed passage has its public lesson linked beside it, with the time in brackets.
Ever carved a curve that looked fine from where you stood and wrong from somewhere else? Does your piece hang above eye level? Then the spot where people look from decides how far you roll the carving.
What bugged me at the start of part 1?
The first caption is "It just bugs me, plainly" (00:05 to 00:09). Four seconds later I say it just doesn't look right (00:09 to 00:16). After that the captions go quiet until 00:27.

My first plan comes with a hedge. This is going to become part of that separation (00:43 to 00:51), so I can probably create the overall shape, maybe with the number six (00:51 to 00:56). A little later I tell you I don't really want to twist that in (01:09 to 01:13). By 01:25 I'm saying it just did not look right.
I'm careful here for a reason. "That is a focal point head of acanthus," I say, and that's why I really don't want to mess it up (02:07 to 02:19). There is no way of fixing it later (02:19 to 02:25). Then comes a hope, not a promise: I think I'm on the right track, and I hope I am (02:25 to 02:32).

I wasn't there yet. Today is the day of solving the problem I created myself, I tell you at 02:51. In my head I imagined something that would look really nice, "but it's not" (02:57 to 03:07).
Which tools did I pick up to fix it?
I say let me clean all that mess with a number 11, 4 millimeters (5/32 in) (02:32 to 02:36). Excavating really deep right here is possible too, I note at 03:18. The verdict comes soon after: "it is a little better, but still not there yet" (03:34 to 03:40).
Then I think out loud. Maybe I just use number seven, or I try number five first (03:43 to 03:54), and create the overall movement the right way (03:54 to 03:58). Those are hedges, not a recipe.

| Cue | Tool | What I say about it |
|---|---|---|
| At 02:32 | Number 11, 4 mm (5/32 in) | Clean all that mess, I say |
| 03:43 | Number seven | Or number five first, to make the overall movement the right way |
| 05:20 | Maybe a number seven, 14 mm (about 0.55 in) | Deeper excavation inside |
| 07:39 | Probably number 11, 5 mm first | Remove all that |
A word on the third row. I say "half an inch, 14 millimeters" at 05:20 to 05:28. Half an inch is 12.7 mm, and 14 mm is about 0.55 in, so my two figures sit a little apart. Both are printed the way I said them.
How did I check my work in part 1?
"Let me see from all the sides," I say at 04:12, and then it looks much better now (04:12 to 04:20). It makes more sense, I tell you, twice (04:20 to 04:30). I know I repeat myself in moments like that, I admit, but what can you do (04:33 to 04:42).

Next I think I can clean a little more underneath, and I think I do need to (04:56 to 05:10). My plan is a deeper excavation on the inside, maybe with that number seven (05:20 to 05:28).
At 05:49 comes the line that matters: I need to fix this movement now. The reason follows. "I don't see the full rotation downhill, and I really want to see it" (05:55 to 06:04). I probably need to sharpen my number seven a little better (06:04 to 06:08). Then the captions go quiet.
Why does a full rotation look choppy straight on?
The roll is for the view from below, nothing else. "That's the only reason I'm actually flipping like this," I say, and then: "Otherwise, it doesn't serve a purpose" (06:27 to 06:30). Straight on, I call it a little choppy and not the way to do it (06:34 to 06:43).

The test follows. "That is all about the point of view," I say, "how that piece is going to be seen, from what position, what angle" (06:43 to 06:53). Soon after I call this how you're supposed to make the decision (06:55 to 07:05). By 07:05 I think it is much better, and it just gave me so much worry (07:05 to 07:14).
The second part gives the reason from another side. The inside has to be smooth because people will see it from the bottom, I say, not necessarily from far, but get really close and it shows (part 2, 00:31 to 00:52). I also need to take care of how clean the transition looks inside (part 2, 00:52 to 01:06).

The first part ends on shadow. "Cut deep because I really need that shadow right there," I say, and I say it again a few seconds later (07:23 to 07:28). A number 11 comes next, probably, and I'll try 5 millimeters (about 0.2 in) first and remove all that (07:35 to 07:49). I'm cutting uphill, I tell you, for a really nice and smooth transition there (07:54 to 08:04).
What did parts 2 and 3 do with the rotation?
Part 2 brings in a rasp. I can probably use a big one for now, to give an overall shape (part 2, 01:19 to 01:41), and then a smaller one for the high spots (01:44 to 02:06). Right after that I admit I didn't expect to like it, and it's a good tool to have in my arsenal (02:06 to 02:13).

The flip comes at 03:45. I really wanted a flip upward just above this movement, I say, and it gave me such a hard time, but I still got it (part 2, 03:45 to 04:06). It makes me happy, I tell you, though it still needs to be developed and already looks decent (04:18 to 04:43).
Grain made trouble too. I could probably round a little more from this point, I say at 05:00, but "I have to be careful because the grain, it's not the biggest friend right here" (part 2, 05:00 to 05:26). Breaking my upper thing is what I want to avoid (05:50 to 05:56). Number seven might help, I say at 07:00, and then, maybe not, maybe a flatter gouge (07:00 to 07:18).
The third part opens with a payoff. "So now I get the effect I wanted to," I say, and this flips a little bit above that one while this goes all around (part 3, 00:05 to 00:18). The captions don't say whether this is the same roll as the one in part 1, so I leave it at my words.
When do I let a choppy edge stand?
I let one stand when it is a rough step I mean to clean later, and my other lessons show that again and again. The lily box has me going straight down with my gouge and say I know the edge looks choppy and doesn't look too good, "but believe me, it helps a lot" (3.8, 18:08 to 18:21). Next in the box is a number four, with a little angle (18:36 to 18:46). Open the first layer of the lily box.

Later in that box, part 13 of workshop 5, It's okay, I say, even if it looks a bit rough, and then let me clean the overall shape (5.13, 07:11 to 07:23). Find it in lily box workshop 5.

Venice room 93 has the loudest version. It looks really, really, really choppy, but it's okay, I say, and we'll fix it in just a moment (93.10, 03:32 to 03:56). I put in a number five, a quarter inch (6 mm), upside down to blend (04:00 to 04:07). See workshop 93.
In workshop 106 a plug jumps out about an eighth of an inch, about 3 millimeters, and I like that approach (106.3, 04:12 to 04:17). It's better than drilling, for me (04:27 to 04:34). The spot is a little choppy, I admit, and that's the way to do it, at least for me (04:50 to 05:04). To clean it I'll get a flatter tool, maybe a number three or four (05:08 to 05:14). Look in workshop 106.

Grain can be the cause. Hashemi 12.2 has me working across the grain and also against it, so it's kind of choppy, and I say it's okay (01:36 to 01:42). A smaller V tool comes next, a #15 at 3 millimeters (01:47 to 01:55). Look for it in Hashemi flowers 12.
Workshop 151 has the same trouble. I'm working against the grain there, because of the nature of the tool, with no supporting grain, so I stay a little away from the cut (151.1, 01:37 to 01:49). "You can see it's choppy, and this side is cleaner," I tell you (01:52 to 01:58). Walking around to attack it from the opposite side would waste my time, so I just have to be careful (01:59 to 02:07). It's in workshop 151.
When does a choppy line have to go right away?
It has to go when the surface is close to finished. In Venice room 137 a movement is pretty much laying right on top of the surface, and I have to watch how close I get (137.2, 03:24 to 03:35). "So I cannot do choppy work," I say, and I say let me take another tool, a flatter one (03:35 to 03:51). See workshop 137.

The lily box gives the best reason. Before undercutting, I want this surface really nice and flowing (Lily 4.10, 20:15 to 20:25). In the three-dimensional world you can see the ridge, I explain, and if it's choppy it's going to be really noticeable (20:40 to 20:48). It's a good idea sometimes to feel for the ridges with a finger and blend them (20:57 to 21:14). That one is in lily box workshop 4.
The furniture panel says it as a rule of flow. A curvature flows, but it also has to go downhill nicely, so it cannot be choppy (Furniture panel 21.9, 14:20 to 14:36). The middle detail has to move down gradually too (14:36 to 14:41). Open furniture panel 21 for that one. Earlier, in lesson 17 of the same panel, I don't want to see a choppy line, and although I'll have a chance to fix that later, it's better to do the first cut as nice as possible (Furniture panel 17.1, 12:43 to 13:00). Its page is furniture panel 17.

On the Corinthian leaf I stop at an edge. Right here you can see my edge is kind of choppy, I say, and I'll take number nine and carefully, really carefully, make my cleaning cut (Corinthian 5.1, 06:54 to 07:06). It's not the final step yet, I add (07:18 to 07:23). Look in Corinthian acanthus, lesson 5.
Back in the Venice room the verdicts come short. In 43, one area is a little too choppy, "it's no good," and I take care of it (43.3, 04:39 to 04:55). Workshop 102 wants a direction to blend nicely, and right now it's just a little choppy, so I'll probably take a number three gouge (102.3, 03:08 to 03:24). Then in 18, part 9, maybe I bring one piece in a little because it doesn't look right, and I can get a concave and break it down (18.9, 00:30 to 00:48). Those pages are workshop 43, workshop 102 and workshop 18, and workshop 24 has a spot where I did not want it to look sharp and choppy (24.1, 07:25 to 07:40).
Is choppy ever a choice?
For some carvers it is. The flower rosette has me saying some carvers just leave it like that, all choppy, and it also looks nice, it's just hand-carved (Rosette 6.4, 04:09 to 04:19). I know one guy who makes good profit with relief carvings and leaves the true knife marks, and it doesn't look bad at all (04:21 to 04:44). Then comes the other side and my lip (04:46 to 04:57). The course is flower rosette.

At the end of that rosette you can go back and refine it, I say, or leave it, even if it's a little choppy-looking rosette (Rosette 6.5, 11:07 to 11:20). For a smoother look sandpaper works, and there is nothing wrong with that (11:24 to 11:33).

Not every rough mark is welcome, though. On the cutting board the marks must be unified and nicely done, so it's not like choppy-looking ones (Cutting board 8.2, 08:30 to 08:34). I see some when I turn it, and it's not looking really good, so I'll clean that (08:38 to 08:48). It's in the curly cutting board.

The apron lesson puts the choice on you. Some carvers rely on speed, and I also rely on speed, but quality cannot suffer (Dining table apron 8, 08:31 to 08:35). It's up to you if you want to be Speedy Gonzalez and do choppy work, I say, or do really nice, unique pieces, still fairly quick, because you have to make money (08:42 to 09:04). See the dining table apron.
What does the point of view decide in the end?
It decides whether the roll earns its place. Rough steps passed in my lessons when I planned to clean them. Near the surface they had to go. Normally I wouldn't carry the roll that far unless the eye comes from below. That last case is the one the video in this lesson shows, at 06:20 to 06:53, and nothing else in these captions says how far to roll.

Artists call the way an angled shape appears shorter than it really is foreshortening. That word is not in the captions of these three parts, so I add it here.
The panel itself sits in Advanced Carving: Venice Room, Part 2. The workshop before this one is workshop 16, and workshop 18 comes after it.
Which curve on your bench looks wrong from another side? Shall we carve?
How it's done
- Name what is wrong. I tell the camera the piece bugs me and looks off.
- Float a first plan. I put the number six forward for the overall shape, as a maybe.
- Clear the clutter. A number 11 takes the leftover mess away.
- Look from every side. I stop to look at it from all the sides, and it reads better.
- Ask who will look, and from where. The question is the viewer's position and angle.
- Go deep for shade. A deep cut gives me the shadow I need in that spot.
Frequently asked questions
Why does a full rotation look choppy up front?
Straight on, I call the roll a little choppy. The only reason I flip it that way is a viewer standing below. Otherwise, I tell you, it doesn't serve a purpose.
What decides how far I roll a movement?
Where the viewer stands. I ask how the piece will be seen, from what position and at what angle, and I call that the way to make the decision. The captions give no size and no angle for the roll, so I won't invent one.
Do I fix every choppy spot at once?
My lessons say otherwise. A choppy lily box edge helps a lot, and a spot in workshop 93 gets blended a moment later. In workshop 137 the surface is that close, so I switch to a flatter tool because choppy work won't do.
What to carve next