

Alexander Grabovetskiy, woodcarver, School of Woodcarving · Published 2020
How do you exaggerate a shadow on a carved leaf with a 1 mm gouge after the hollow already looks good?
Quick answer: Exaggerating a shadow is a small extra pass in a hollow that already throws a good one. In Venice room workshop 17, part 4, I give the point of view as my reason: the piece will be seen from below. The caption says I can exaggerate the shadow using the 1 millimeter.
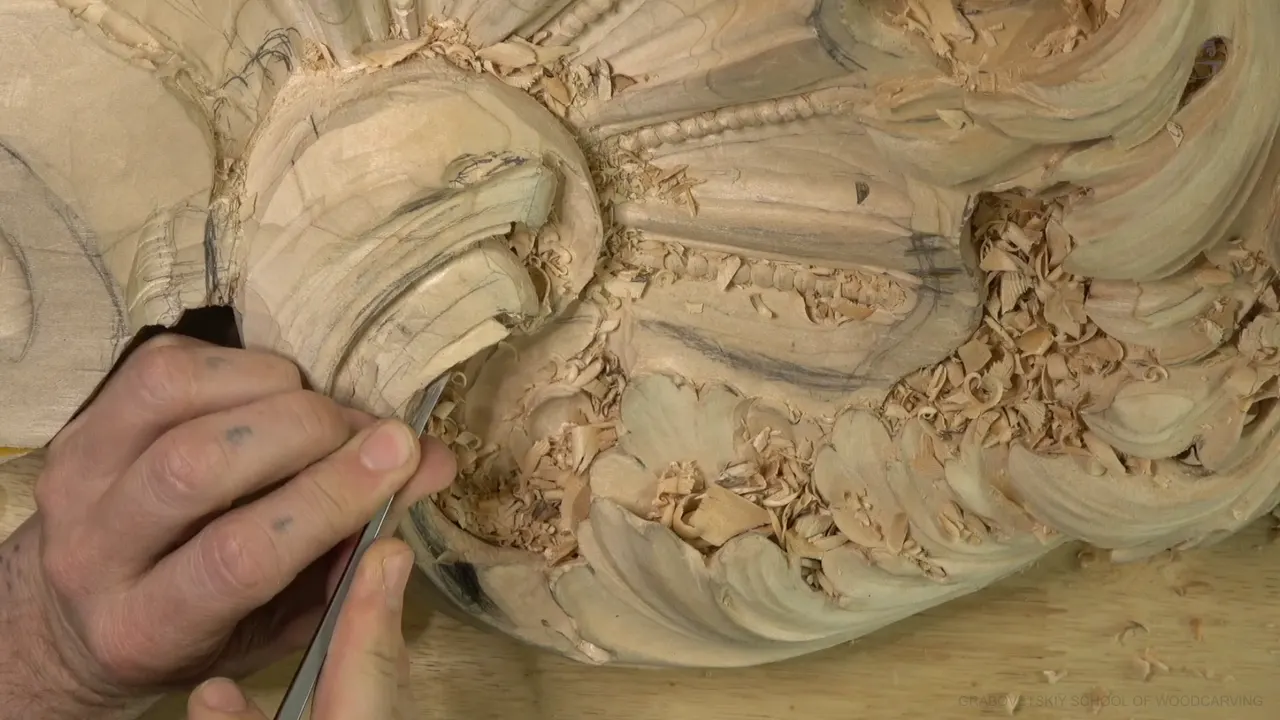
Exaggerating a shadow in wood carving is one more small pass at a hollow that already works, done for the view from below. The 1 millimeter has a reason in Venice room workshop 17, part 4: the piece is going to be visible from the bottom, and the light is going to hit at night from the top. The caption says "I can actually exaggerate that with the 1 millimeter" (04:50).
Does your hollow already look good, and you still wonder if one more pass is worth the risk? Would you like the shadow to read from below? Short as it is, the video has captions that end at 07:49, so I went through my other lessons to see where a 1 millimeter, or a tool near it, went into a hollow that looked good.

What did I carve in part 4 before the small gouge?
A concave came first. The end of part 3 has a number seven, quarter-inch, "Just on the side. From almost nothing" (08:26), and part 4 opens with "It's not even the line work, but still just one of the concaves, and it's already looking good" (00:14). Then I call a movement "really nice and smooth" (00:41).
I could probably fix one side slightly (00:48) and create a nicer curvature (01:06). I call it cheating, a cheat code, the way my children would say it when they played games on a computer (01:28). The cheat is a rasp to create that really nice curvature (01:40). The cost is named too: "I lost a moment right here, which is okay. We'll take care of it a little later" (02:02).

A separation comes next, begun with a preliminary cut, like a concave, from all the way right here (02:42), from almost nothing, an almost invisible concave (02:55). After that I'll go much deeper, until it's really deep (03:01). The part still has to look right overall, and I say so right after (03:29).

How does a flatter concave lead to the 1 millimeter?
The hollow comes before the small tool. "A couple ways I could develop this one," I tell you, and one way is a little concave (03:45). "Like a flatter concave," I add, and "It's not really concave" (04:09). I clean it a little bit (04:18). What follows is what this page is built on.
"That gave me a really good shadow, but I could actually exaggerate this shadow right here" (04:34). The reason follows in the same sentence: it will be visible from the bottom, and the light hits at night from the top (04:42). Last comes the 1 millimeter (04:50). Those are words of "could" and "can", a plan for the spot, so the next caption is the only thing I can quote: "That is good, except now I need to fix overall movement right here" (04:56).

Next comes a number three, to try to hit that edge (05:07). Another separation almost right there should look better, I think, because it should give me even better curliness (05:39). The same way again, exactly (05:43), is the plan, and I wonder if I could go from a farther point (06:10).

What did I do with the points and the last curl in part 4?
A sharp point gets rounded. I don't want to see really sharp points, because I want to be authentic (06:36), and one is a little too sharp, so I'm going to just round that little bit (06:45).
Next I think it may be a good idea to curl this one a little bit downhill (07:05). I don't have too much material, though (07:11), and a number seven is how I'll try if I have enough or not (07:18). "Makes sense from there," I say, and maybe it doesn't make too much sense from above, which you won't see (07:36).

Two more parts add a line each. A number 11 at 3 mm (0.12 in) is named in part 5 to clean inside (03:47). In part 6 I say I should create a much deeper excavation, because otherwise it's just too plain (05:47), and there is material to spend: "Why not use it?" (06:00).
Where else did I take a tiny gouge to a good hollow?
The 1 millimeter is named once in part 4. My other lessons are in the table, with the time where each line sits.
| Lesson | What my words say |
|---|---|
| Today's video, 17.4 | Here my plan for that shadow names the 1 millimeter, at 04:50. |
| First room course, 9.2 | A pass of 2 mm comes first, then, at 03:06, the 1 millimeter. |
| Tenth Venice course, 119.2 | The follow-up pass comes at 01:57, to get that thing even deeper. |
| Furniture panel, 20.8 | A 1 millimeter veiner, a number 11, is my plan at 10:56 for going deep. |
| Panel again, 21.1 | Extra depth could come from a 1 millimeter number 11, I say at 00:55. |
| Thirteenth Venice course, 146.3 | The smallest tool is in my plan at 05:28, ahead of the words really unnecessary. |
| Next door, 18.4 | A bigger start, 3 millimeters, opens the deeper shadow under a leaf, at 05:27. |
How deep did the 1 millimeter go in other lessons?
The plainest version sits in workshop 119. I am going to excavate underneath, carefully, and follow with the 1 millimeter and get that thing even deeper (01:57). "All for the shadow's sake," I tell you (02:05). Looking from above, I say, you can detect that darker spot, which is the goal (02:23). Blending a little bit is the next thing I can do (02:35).
My first Venice room course has a gentler version. In workshop 9, part 2, I say let me use 2 mm (0.08 in) to create that shadow, and I'm going to use 1 millimeter just to even exaggerate a little more (02:50). That is looking much better, in my opinion (03:24). A worry about the shape follows, which should not have sharp points if I want to be nearer the original look (03:30).

In furniture panel lesson 20 I say I could go really deep underneath with the same number 11 and 1 millimeter veiner (10:56). The part is already flipping, so logically I can create an even bigger, exaggerated shadow (11:12). "And that's probably enough," I say, and I can probably move on to the next detail (12:02).

Smaller tools show up in lesson 21. I try a number eight at 1.5 mm (0.06 in), with what I call extreme rotation motion, and it works fine (18:01). The extra depth would come from a number 11, 1 millimeter, to get extremely underneath and start undercutting right away pretty much (18:15), though not fully yet, because the overall movement still has to be established (18:30). It's already casting a beautiful shadow, I say (18:40).

What keeps a tiny gouge from breaking the edge?
Pressure does, and so does the number of sides I attack from. The undercut in workshop 18, part 4, opens on a number 11, 3 mm (0.12 in), under a leaf, wiggling a little bit side to side (05:54). I have to be careful not to press too much, because that pressure could break the edge (06:15). It's better for me to attack from two sides and go deep and deep, until it is almost impossible to get deeper (06:19).

The warning in lesson 20 is blunt: carefully, carefully, carefully, just go in, and make sure you're not cranking too much, because if you do, you will hit that edge (11:36). Another limit comes from lesson 22. Same tool, 1 millimeter, to undercut it and create that shadow (03:20). Half a millimeter (about 0.02 in) can exaggerate that step, I say, with a mallet (03:41). The warning is to be really careful not to dig inside of the background, because I don't want to mess up our overall depth (03:57).

Some lines name the floor. In lesson 21, part 4, "That's probably as deep as I can go without breaking anything," and it still gave me a really good shadow (00:48). I can probably grab just number one (00:57), for an even deeper undercut that is only 1/16 in (1.6 mm) (01:08). A tiny detail, I know, and I expect it to look really awesome (01:25).

How small can the tool get for a shadow?
Back in lesson 21, part 4, the plan is to grab half a millimeter (0.02 inch) again and undercut underneath that detail (01:51), and I can go as deep as I wish right there (02:19). An honest line follows: "I don't know if it's going to give me or not, but it should" (02:32).
Lesson 24 has a bigger tool first. I take a number seven, 4 mm (0.16 in), a little less than 3/16 in, to go in deep, because I really want to see shadow there (02:51). Then the words are "I'm going all the way, like 1/16 of an inch, millimeter and a half or so" (02:59), and even with a tool like that I'm not just pushing, I'm still creating slicing (03:19). Seeing it is almost impossible when the pass is done really quickly (03:50).

That pass in workshop 146, part 3, is going to create a really dark shadow, and then I correct the words: well, not really dark shadow, but still somewhat dark (05:23). I can actually even go with the half millimeter (0.02 inch) and exaggerate that, I say (05:28). Then comes "Really unnecessary. But that's okay" (05:52), and my attention goes to the convex.

Another number 11 shows up in the acanthus over moldings course, lesson 7, part 1. Maybe more exaggeration closer to the center part (20:05), I say, using a number 11, 2.5 mm (0.1 in). The concave goes in almost from nothing and gets really deep nearer the center, in my plan (20:50). Blending comes after.
Does the same pass work on a pipe or on a movement?
A pipe comes up in workshop 65, part 5. The rounding comes with a little more exaggeration on that side, maybe a little deeper right there too (04:20), to give some shadows, give some movement (04:30). A few lines later the captions name a number 11 at 3 millimeters, which is an eighth of an inch (04:50). Blending is next, I need to kind of blend (04:58).
A movement gets the same treatment in workshop 61, part 12. I have to follow the movement with my tool, and nothing stops me from exaggerating the shadows of those movements, so I can actually get deeper (03:15). My tool is a number 11, 5/8 in (15 mm) (03:56). Blending that in comes next, and the easiest way to take care of the ridge is a skew (04:17).
Does the light decide how far I exaggerate?
Light comes up more than once. A shadow casting concave in workshop 58, part 9, is to be more exaggerated than the other one, which gives me that shadow if lights hit from the ceiling (02:04). It has to look like a molding all the same (02:44). My tool there is still a number six, a smaller version, half an inch approximately, maybe 13 millimeters, maybe about 12 and a half (03:21).
In workshop 131, part 2, I lay out a plan: to exaggerate the shadow on this side using a number 11, let's say 30 mm (1.2 in), rotated to one side for a really, really slight undercutting (00:34). You don't see that shadow yet, I say, because there are light sources from all over, and it all depends how you place the light source (00:49).
Looking from above works too. Lesson 22 has me check from above, and the part does cast some shadow: "You don't really see it, but it does" (04:26). My hand is placed in lesson 21 so you can see that's really a beautiful shadow (18:46). The darker spot shows from above in workshop 119, too (02:23).
When did I leave the shadow alone?
Stopping gets its own lines. After the half millimeter, workshop 146 gives "Really unnecessary. But that's okay" (05:52). Workshop 10, part 4, has a line about stopping: there is some stopping point, I have to stop, because you always find some stuff which you don't like (03:45). But right there I could probably use a number 11, 3 mm (about 1/8 in), to exaggerate that pipe underneath, for an extra shadow (03:55).

A few lines later in that video I'm not too happy about this eye, but that's already more to the end of a project, and I have to just recheck everything (04:51). Painters have a word for light against dark, chiaroscuro.
Part 4 belongs to the Venice room, part 2 course, and workshop 17 holds all twelve parts of it, in the tuition with the rest of the room. The furniture panel course has the 1 millimeter in lessons 20, 21 and 22. Which hollow in your carving already works well enough to take one more small pass?
How it's done
- Carve the hollow first. Part 4 starts a separation barely deep at first, then goes much deeper, until it is really deep.
- Try a flatter concave. At 04:09 the words are a flatter concave, and it is not really a concave.
- Look at the shadow. At 04:34 the shadow already works, in my own words.
- Think about the view. At 04:40 I give my reason for going further: people will see the piece from below.
- Name the small tool. At 04:50 I name the 1 millimeter for use on that shadow.
- Ease the pressure. In Venice room 18.4 the plan is not to press too much on one side, and to approach from both sides.
- Check from above. Workshop 119, part 2, shows the darker spot when you look from above, and that is the goal.
Frequently asked questions
Which hollow do I carve ahead of the 1 mm pass?
A hollow comes first. In part 4 I start a separation as an almost invisible concave and go much deeper, then try a flatter concave. I clean that a little bit, and only after it does the 1 millimeter enter my words.
Why exaggerate a shadow that already looks good?
My answer in part 4 is the point of view. The piece will be seen from below, and the light comes from above at night. Workshop 58 gives lights on the ceiling as another reason for a more exaggerated concave.
Can a tool be smaller than 1 millimeter?
A half millimeter shows up in panel lesson 21, where I say I'll undercut underneath a detail, and in lesson 22, where I'll use a mallet with it. Lesson 24 mentions 1/16 in (1.6 mm), a millimeter and a half or so.
What to carve next