

Alexander Grabovetskiy, woodcarver, School of Woodcarving · Published 2020
Should you carve a much deeper excavation when a carving looks too plain and you still have wood?
Quick answer: Digging deeper is what I chose for a plain spot. In Venice room 17.6, near 05:40, I checked my material first, found plenty, and said to dig much deeper, because otherwise the spot would be too plain. The wood was there, and I put it to use.
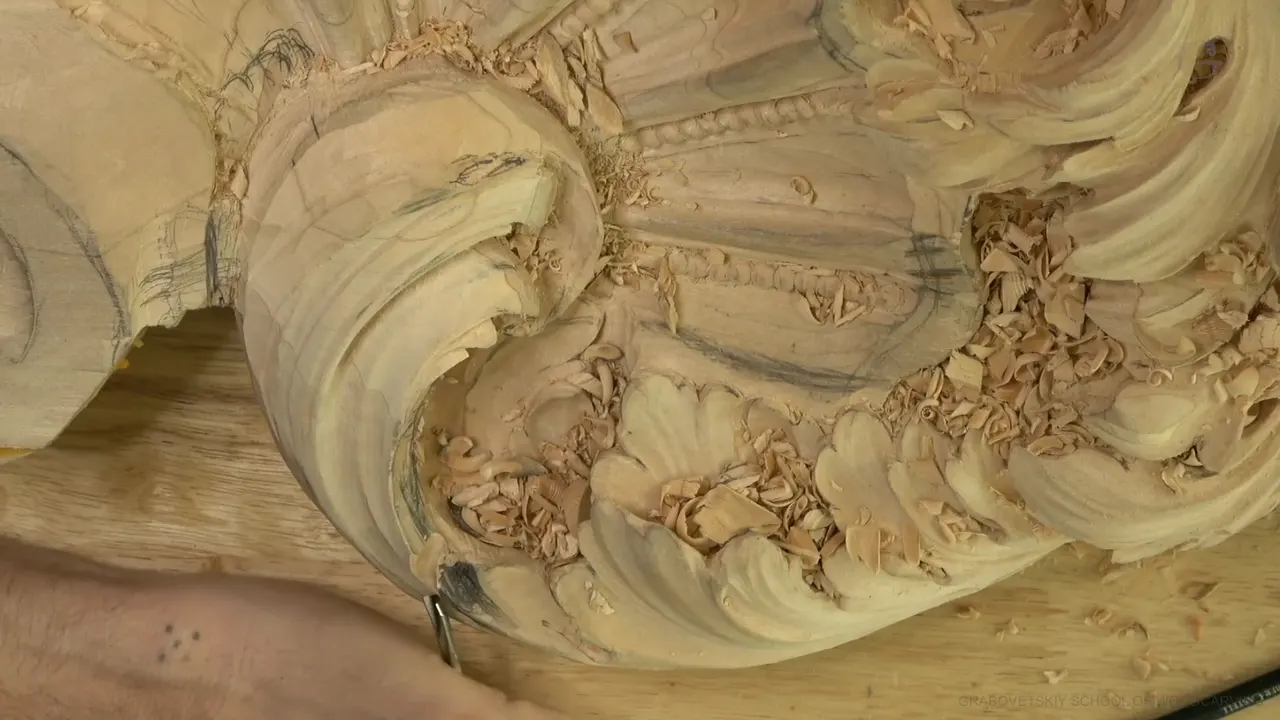
A deeper hollow was my call when a spot looked too plain, with wood still on hand. At 05:40 in Venice room 17.6 I took a look at my material, found I had plenty, and said I should dig much deeper.
This part is short. So I went through my other courses and pulled in the places where I made the same call, each one from a public lesson that I link.
Ever looked at a hollow you finished and felt it was too plain? Is there wood left right beside it? Then check the wood first.

When is a deeper hollow the right fix for a plain carving?
- Checking the wood came first.
- With material in hand, I called for a deeper dig around the plain spot.
- I undercut under a detail.
- Before adding more, I told myself not to overdo it, and I kept the next idea as a could.
- In other lessons I held back when the wood was thin or another job was coming.

What did I check before I dug deeper?
Around 05:40 I looked at my wood. "Let me see if I have plenty of the material," I said, and answered myself right away: "I do." How I checked isn't on camera, only that the check came first and the verdict second.
Next came the line this page is built on: "I should create a much deeper excavation right here, because otherwise it's just too plain." I repeated "Too plain" a few seconds later. And I added, "Especially, I do have material. Why not use it?"

The wood had been on my mind before that. At 02:03 I told you I had some material right there on the side, which I could use "and create something really nice right there too." So I already knew where my spare wood sat.
What had I done to this spot before it looked too plain?
Quite a bit. Part 6 opens with me asking whether to do this side or keep working right there, because I still had to finish that movement. At 00:20 I talked about the same effect going upward, and then "that should go downhill." Soon after, I said I'd go with a number nine, a quarter inch (about 6 mm). Lowering was on the list too. "I still have to lower down the whole thing right there," I told you at 01:25, and that was fine "as long as I'm not going to lose the details I just created."

One movement I did not want to lose. Near 02:00 I told you again: "I created that movement and I don't want to lose it." By 02:55 the area made no sense yet without its separations, and once I removed that, "you'll see much better what it's supposed to look like." Fifty seconds went by with no talking. Then, at 04:11: "That is good. That is good."
I wasn't done. Next came a deeper concave at 04:16, with "I'm still not happy about here" in the same breath, and I wasn't sure I should do it. Around 05:02 I talked about the pencil mess I had to clean, "still too much mess." A long concave followed at 05:15, "all the way, just like that."

So the plain verdict came after a lot of work on that spot: a movement I wanted to keep, separations, a concave I doubted, pencil mess, and a long concave.
How does the deeper dig go once you decide?
First I undercut under the detail. "I kind of undercut underneath that detail," I said near 06:16. My own verdict on how it looked: "I know it doesn't look nice. Looks scary a little bit. But that is okay."

Next pick: a number seven, to "kind of go in." Then came a quiet stretch, and at 07:07 I asked, "See?"
What keeps me from overdoing it?
By saying my doubt out loud. At 07:12 I told you I could, "and maybe I should, get another one, but I'm not sure if it's going to be too many or not." Then the check on myself: "So I need to make sure I'm not overdoing it."
Another idea came at 07:43. The thought was an eye and another movement going underneath, "just on top. So that will make sense." My word for it was could.

What did the next three videos do with the same hollow?
Part 7 begins on a number nine. Right away I said I'd start excavating in. The detail on the inside would be visible from the bottom, and "that's going to create extra dimension," I told you. A little later: "See how it goes underneath?" And then this: "I can excavate really deep if I wish. Which, in this case, I could."
Near 02:02 I said I'd get a number 11, "maybe," and go deeper inside. Five millimeters (about 3/16 in) first, then four (about 5/32 in).

Leftover wood came up too, at about 03:47: "all waste, which I have to remove somehow." For that I said I would turn a number seven upside down, though I could probably use a number nine in the quarter-inch size.
Why do it? I gave my reason at 04:46: "I just think it's going to look really nice, okay? That's why I'm doing it." Without that, I told you, there was no need to do it at all.
Part 8 opens with a goal. Right now it didn't look too good, I said, and the goal was "to make it beautiful and create a little deeper excavation." Because I had an eye, I was supposed to have a pipe, with a concave on its side. "But it doesn't have to be deep concave." Even there the depth varied. A number 11, 3 millimeters (about 1/8 in), was the plan to get "a little deeper on the side," and an undercut was coming "because I need to create that shadow right there."

When did I skip the deeper dig, even with wood to spare?
Workshop 63, part 3, has the clearest case: "I could do it even deeper excavation right here, but I don't have to." There was a reason. "There's going to be another development going on with the flower," I said, and some leaves would sit in that area, "and I have to keep that in mind."
Workshop 78, part 9, gave the same answer for a leaf that would grow from underneath. "Do I have to do it? No, I don't." I didn't have to excavate all the way deep there, I said. I planned a small leaf on the inside, hoped I had enough material, and named my first tool: a number 11, 2 millimeters (about 5/64 in).

For workshop 77, part 1, my plan was a number 7 at 14 millimeters (about 9/16 in), "little by little," toward a deeper hollow in those areas. "But I don't want to take too much," I added, because I did not want a "too plain looking" leaf. That one was another kind of leaf. "It's not acanthus and all."
How do I tell a plain spot from a flat one?
I have used both words on camera, and each led to its own fix. Workshop 72, part 9, has a carving that "just doesn't feel three-dimensional," and I called it "a little too flat for my taste." Main concaves and convexes were in. My aim was a deeper hollow on the side of a pipe, because that pipe was "not dimensional enough." I also told you it was good that I had not undercut underneath yet. "I do have enough thickness on inside."

Workshop 70, part 10, has the small version. Here the spot was too flat, and a skew would give "a little slope. Not much, but a little slope."
A plain flower asks for something else. In furniture panel lesson 13 I said, "I don't like how this flower looks, and I think I would like to add some more details to it," and called it "too plain compared to those." Petals from inside, I said.

Hashemi flowers 38 has it in one line. One part there was "just too plain right now." I'd "make some concave." In the next video of that lesson I wanted an extra leaf at the top. I wasn't sure it would help, but I was pretty sure of "nice movement." I could "take it away" if I didn't like it. I also had extra material and some thickness, with a V tool at the beginning.
Why would a hollow help a flat spot at all?
My reason is in furniture panel lesson 20. I said I'd use the heel side of a knife and go toward the center of a flower, and I said I could go deeper because there was "plenty of wood." I'd reach for a number eight, an eighth of an inch, 3 mm, and a concave "to give some movement, some curliness. Not much, but a little bit."

The reason sits in the grain. If you look really close at the grain, and the spot may end up too flat, "that grain strikes the eye, and the movement doesn't look right." With the right movements from the concaves, the eye is "drawn by the shadow it creates." Flat wood shows its grain, and a shadow pulls the eye.
Hashemi 49 goes deep: a number 11 "as deep as I can," and after that a half a millimeter (about 0.02 in), "even deeper excavation." Later I told you, "So I excavated really deep."

What if the wood runs short?
When it's thin, I say so, and the plan changes. Hashemi lesson 41, part 2, has me looking at something I called almost impossible. "Let me try," I said, and later "Maybe I shouldn't even try," with "not enough material left." After that came a call for a small gouge, about 1/8 of an inch, "actually, less. Maybe 3/32 of an inch" (about 2.4 mm). I thought it would look "much better with that small, tiny detail."
Part 3 of that lesson shows the other side. For some berries I'd take a quarter-inch number nine (about 6 mm), and I didn't want them too big. "That is actually a good thing that I have extra material right here, so I can create stuff like that."
Spare wood also covers a mistake. Workshop 84, part 3, has my first way "not the right way, I guess, of doing it, but it's okay. I still have plenty of material." Lowering the other side was my other option. In furniture lesson 21, part 13, I told you it happens when you look away. I had wood left right there. A flatter gouge would fix it, I said, and a number eight at five-eighths of an inch, 16 millimeters, was "going to work perfectly."
The same thought works as a bet. Workshop 63, part 8, had me about to try one change, with a way back if I didn't like it. Over in workshop 62, part 1, I said I was "able to use it to my advantage." My goal was "concave, convex, concave," and I would not touch the center line, "a spine."

A short record of what I said about my wood
Here are six moments, with what I did or planned right after.
| Where | Wood | Next |
|---|---|---|
| This video, Venice 17.6 | Plenty of material, by my own check | The dig went deeper |
| Part 3 of workshop 63 | Deeper was possible, but I did not need it | The flower stayed in mind |
| Workshop 78, part 9 | I hoped I had enough material right there | A 2 mm (about 5/64 in) number 11 was the first tool |
| Hashemi 41, part 2 | There was not enough material left | A smaller gouge |
| Hashemi 41, part 3 | Having extra material was a good thing, I said | For berries, a number nine |
| Furniture panel 20 | I could go deeper because of the wood | I planned one small concave |
What would you check on your bench first?
Which spot on your carving seems too plain? Is there wood beside it you did not plan to use? Would you look at the wood before the spot, the way I did at 05:40? Part 6 had the wood, and I dug deeper. Hashemi 41 had it thin, and I asked for a smaller gouge.
What I described is one part of workshop 17, and the course page is Advanced Carving: Venice Room, Part 2. Some background reading, if you want it: wood carving, woodworking, the gouge, the chisel, relief carving, the acanthus leaf, shadow, grain, sculpture, the Republic of Venice, hand tools and the Renaissance.
Which plain spot on your carving will you check first?
How it's done
- I looked at the plain spot. Near 05:40 of part 6 I judged one spot and said it needed more depth, since it was otherwise too plain.
- My material came first. I wondered whether the material was plentiful, and I answered that it was.
- I asked for a deeper dig. With the material there, I said to dig deeper there, and I asked why not use it.
- I undercut under the detail. At 06:16 I said I kind of undercut underneath that detail, though it looked scary.
- I went in with a number seven. Near 06:47 I planned a number seven to go in.
Frequently asked questions
How can I tell I have enough wood to dig deeper?
During part 6, my material got a look before I dug, and I told myself I had plenty. How I looked isn't shown on screen. Hashemi lesson 41 went the other way: the wood was short, so a smaller gouge came out.
Is a deeper hollow the only fix for a plain spot?
No. Workshop 70 had a spot too flat, and a skew would give it a little slope. Hashemi 38 had a spot I called too plain, and some concave was the plan. Part 6 of workshop 17 had wood to spare, so I dug deeper, and that was my call.
Is it okay if a deep hollow looks scary at first?
At 06:35 of part 6 I put it this way: it doesn't look nice, it looks a little scary, but that is okay. By 06:47 a number seven was my pick to go in.
What to carve next