

Alexander Grabovetskiy, woodcarver, School of Woodcarving · Published 2018
Do carvers have a favorite gouge?
Quick answer: A favorite gouge is, in my case, whatever I pick up most on one carving, and it changes with the project. On this Hashemi flower panel I used the number 5 a lot, and the number 16 V tool. The next project will bring a different tool.
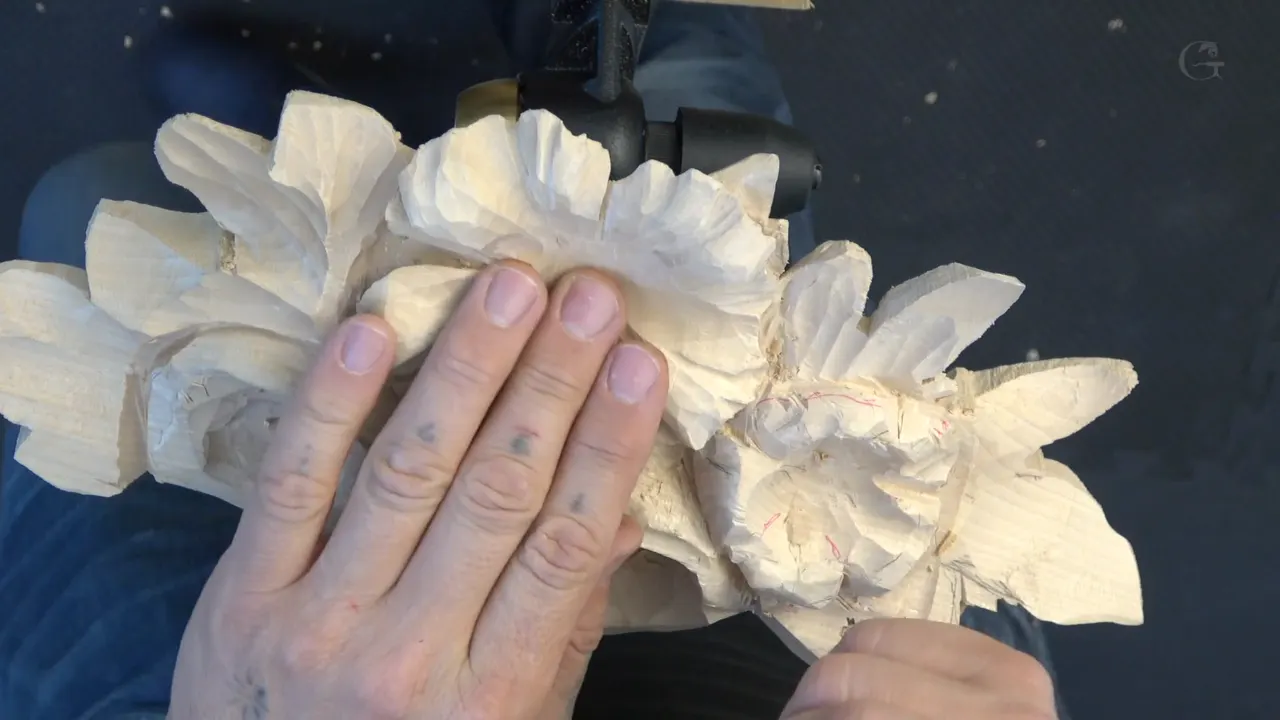
A favorite gouge, for me, is the tool I use a lot on one carving. On these flowers that was the number five. Some of you already think it's my favorite, I said in the second video, but it's not necessarily. On the next project it will be an absolutely different tool.
Have you watched a carver work, in a video or at a bench? Did one gouge keep coming back to his hand? Then you saw what people saw on this panel.
Lesson 33 of the Hashemi flowers panel is where I attack the rest of the flowers, right after the fishtail work in lesson 32. Below are the tools I reached for and what I said about each, then the ones I praised on other courses. They aren't all the same tools.

What this lesson shows about a favorite tool
My favorites for this project only were the number five and the number 16 V tool.
Why I grab a tool, I can't always explain. It comes naturally.
The type of spoon didn't matter for cleaning inside this flower.
Where the wood was thin I was careful, and where it was thick I could go deeper.
Resistance calls for multiple cuts, not force.
Every tool mark makes it look beautiful, in my opinion.
Is the number five my favorite gouge?
For this carving, yes. You already probably noticed that I'm using number five a lot here. It can become my favorite tool today, with this carving, and on the next project it will be an absolutely different tool that I'm going to use a lot more.
As of today I'm using it a lot, along with the number 16, a V tool. Like I said on camera, it's just for this project that those two are my favorites. Next time it may not be.

Both show up in the first video already. The number five, a quarter inch (6 mm), cleans inside the flower to make the excavation deeper, for even more shadow. The V tool is a quarter inch too. I could use a smaller one, I said, but the quarter inch looks like it works fine.
In the last video that same number five finds all of what I'm calling walls, and I take those walls off on the inside. One tool, two jobs in one lesson.

Why can't I always say why I grab a tool?
It comes naturally. I can't even sometimes explain why I'm grabbing this tool, I told you in the second video. The more I carve, the more I catch myself just grabbing the right tool for the job.
Just before that I had warned you. Sometimes what I'm doing doesn't make sense at this moment, so just wait, and you will see exactly why I'm doing what I'm doing.

The same thing happened on the Venice Room, workshop 40. I took a number nine of 6 mm (1/4 in) there, a special one, a fishtail with a really short head, and I called it one of my favorite number nines. The reason why I like it, I don't know. Any number nine will work, but this one feels really special.
Workshop 54 had a number nine of 6 mm with a really short end. It's a beautiful tool. This one is my favorite from quarter inches, I said, and I have multiple quarter inches, of course. But for some reason I like this one a lot.

Which tool came out first on this flower?
The V tool, the parting tool, right after I divided the flower in five. For the marks I said take a different pencil, and then that I could probably use just a marker.
With the V tool I outlined it a little bit, and with the same tool I made a preliminary undercut to establish my boundary for the flower. Then one part had to go downhill a little bit. Right now it was on my way, and it didn't look too nice, the leaf. It's going to be a future leaf, so a number seven at 10 mm (3/8 in) lowered it down, and at this moment I don't really worry how clean my cuts are.

| Tool and size | Its job on this flower | His words |
|---|---|---|
| V tool, number 16, a quarter inch | Outlined the flower first, then a preliminary undercut for the boundary | Works fine |
| Number seven at 10 mm (3/8 in) | Lowered a future leaf that was on my way and didn't look nice | Don't worry how clean |
| Quarter inch number five | Cleaned inside, so the excavation went deeper and gave even more shadow | More shadow |
| Spoon, number five, 8 mm (5/16 in) | Could do that same cleaning, as I mentioned then | Any type will do |
| Number nine, a quarter inch | Deep concaves in the second video, then big waves in the third | Some big waves |
| Number four | Made a smoother transition late in the third video | Smoother transition |

Bigger tools came in the third video. Maybe I need a bigger number seven, I said, and took 5/8 of an inch (16 mm), then caught myself. Oh, this is number nine. It made a big movement on that side.
A smaller number eight, about an eighth of an inch (3 mm), made more concaves going downhill. After it came a number seven of approximately three-quarter of an inch, about 19, 20 millimeters. I had also said I probably should use a smaller V tool in one spot, like three millimeters, and the fourth video brought a smaller V tool.

What makes one part of a flower weak?
Thin wood and the direction of the grain, together. While I lowered that leaf I said I have to keep an eye on it, because I don't have too much thickness. It looked like no more than maybe 3/16 of an inch (about 5 mm) was left. And again, it's a weak point. I can always break it, because the grain runs this direction.

Soon after came a different warning. Now, it's also important not to touch this piece. It became really kind of weak because I undercut some parts of it, and if I push it, I'm going to break this flower. I don't want to do that.
Then, that looks like it's enough, I said. Can't do more than that.

A little later the same board gave me the other answer. I have plenty of thickness right here, so I can actually go deeper if I wanted to. The warning came back in the second video, though. Have to keep an eye, because right now I've got already too thin.

What should you do when a cut fights back?
Don't force it. If you feel a little resistance, it's because you're working with the direction of the grain and against it. In this carving you can't always make all the cuts with the grain. So you must just fight and attack from different positions, and make multiple cuts. It's better.
And constantly check if your tool is sharp. Buff it if you need to, strop it if you need to, just do it.

The first video has it too. Let me turn that this direction, I said, and attack that from a different side.
Lesson 16 of my Roman acanthus leaf agrees. Please don't force it, and let the tool do the work.

Which petal goes under which?
On this flower I chose by the angle I was looking from. I decided in the second video to make this one go underneath of that one. And if you would ask me why, maybe just because from the angle of view I'm looking at, it looks more appealing to me on this side.
Then I made sure they don't all do the same thing. I don't want to make them all the same. They don't have to go the same direction, where this one goes under that one and that one goes under this one. I want some variety. So I flipped it and made this one lower than that one.

The flower types follow the same idea. There are many different types in nature, but on this carving I want just a few varieties, not too many. This new flower is a different type, and in my case its first ring is semi-similar. I would like to make it as wavy as possible.

What does a flip mean on a carved petal?
Going upward, downhill, and backward again. That is how I put it in the third video, and I took a number nine to create that movement. Earlier in that video I'd said maybe another flip, and what I mean flip is just going like this, which you have to watch to see.

The tool flips too. For undercutting I flip it upside down and continue to carve. When the fourth video got to undercutting, I said just be really careful. The technique is the same. Flip your tool upside down, slice it, and remove as much as possible from underneath.

The waves came from the number nine. Let's make some waviness, I said during the third video, and in the fourth I still wanted to create some waviness.

What other tools have I called my favorite?
Quite a few, on different courses. On lesson 19 of my furniture panel I said I love the V tool, and it's also one of my favorite tools. I'm making jokes sometimes that a V tool is the only tool I kiss when I walk inside my shop every morning. Good morning, V tool.

In lesson 17 of that panel my favorite was a knife. I used the number 12 and said this one is by far my favorite one. The reason is that I can hold it really low to the surface, so it's not digging as deep and it doesn't give me as much resistance. It's all about maneuverability.
For the Byzantine acanthus I brought a number 11 with me, a favorite of mine, and said I could get the job much quicker with it. That one is 30 millimeters (about 1 3/16 in).

With the Greek acroterion it was the mallet. The mallet is actually a favorite tool of mine in wood carving, I said, because I can easily control it and just take little by little. It drove a number eight, about 3/8 of an inch (10 mm).
My Roman acanthus leaf is where I compared a number 17 with my number 16, two tools I use for undercutting. A V tool leaves the point of the undercut looking kind of sharp. But the number 17 is kind of round a little bit on the inside, and it gives me a softer look. Well, I use both, and I shouldn't say I like this one better than number 16. Number 16 is actually also my favorite. But this number 17, I like it, in this case at least.

Does a favorite brand make every tool a favorite?
A long bend number 11 says otherwise. In workshop 64 of the Venice Room I said that one has thick walls. It's not my favorite, by the way, although the brand is my favorite. That's not the favorite number 11. So I took a slightly bent one, one-eighth of an inch (3 mm), and this one worked much better for me.

Earlier in that same workshop I used a gouge marked number eight that feels like number seven. That is right now my most favorite brand, I said, made in Russia.
In workshop 2 I said that after many years of using them, for some reason, Ashley Iles tools are my favorite tools. I just love them. That was a number five, three-eighths of an inch, 10 millimeters. And lesson 23 of this course came back to the tools and brands I like, where I still liked the tools by Ashley Iles the most.

Do you need the tool I use most?
Even my V tool isn't a must. On the Roman acanthus I said I really like the V tool and count it with my favorites, but it's not necessarily something you have to have. And I know in some countries, even today, wood carvers don't use a V tool at all.

I said the same about a measuring tool on the Chamomile and bow rosette. The pointing machine is a favorite of mine. I love it and I use it all the time. You don't really need it, though. It's not like a must-have tool, but it's a good idea to invest in that tool.

And in this lesson the spoon I named for cleaning inside was a number five of 8 mm, though I said any type will do. The full four videos of this lesson are behind tuition at the school.
How smooth should a carved flower be?
A little smoother in some spots, but not too smooth. To end the fourth video, a number seven made it smoother a little bit, in some spots. Like I said before, every tool mark makes it look beautiful, in my opinion.
Before that came the refining. I like the overall shape, I said. Now it's all about the refinement, and how extreme I want to go with that. A tiny number eight made multiple spots of really small concaves on this limewood panel, to give me a more three-dimensional look and more shadows. Then it was all about cleaning, cleaning, and refining.

The panel goes on in lesson 34.
How it's done
- Divide the flower and outline it. I divided this one in five, then outlined it a little bit with a parting tool.
- Make a preliminary undercut. Use the same V tool, a number 16 at a quarter inch, to undercut and establish the boundary for the flower.
- Lower what is in the way. My number seven of 10 mm took down a future leaf. It doesn't need to be clean yet, but watch the thickness.
- Clean inside for shadow. Go deeper inside with the quarter inch number five, or with a spoon.
- Decide which petal goes under which. Pick by the angle you look from, and make some variety so they don't all go the same direction.
- Shape with concaves and flips. Number nines and sevens make the concaves and the waves, and a flip goes upward, downhill, and backward again.
- Refine and take off the walls. Clean, clean, and refine. Remove the walls on the inside with the number five, and let a number seven smooth a few spots. Not too smooth.
Frequently asked questions
Is the number 5 gouge your favorite?
For this carving, it is. Some of you already think so, I said in the second video, since the number five gets used a lot on these flowers. The next project will have another tool, one I'll reach for more. As of today, yes, I'm using it a lot.
Do I need a V tool to carve flowers?
I really like my V tool, though you don't necessarily have to have one. Even today, in some countries, wood carvers don't use a V tool at all. Mine came out first anyway on this flower, a number 16 at a quarter inch, to outline the shape and set its boundary.
Does it matter which spoon gouge I use?
For cleaning inside this flower, not much. I named a number five spoon of 8 mm, a little over 5/16 of an inch, and said on camera that any type of spoon will do. Before the spoon, the number five had done that job.
What to carve next