

Alexander Grabovetskiy, woodcarver, School of Woodcarving · Published 2018
Where do you put a hollow when the detail is already carved?
Quick answer: Placing a hollow beside a carved detail is a call I made on camera in lesson 37 of my Hashemi flowers panel. One spot looked right for a concave, but carving it there would have taken that detail away. So the hollow went to the opposite side instead, and the detail stayed.
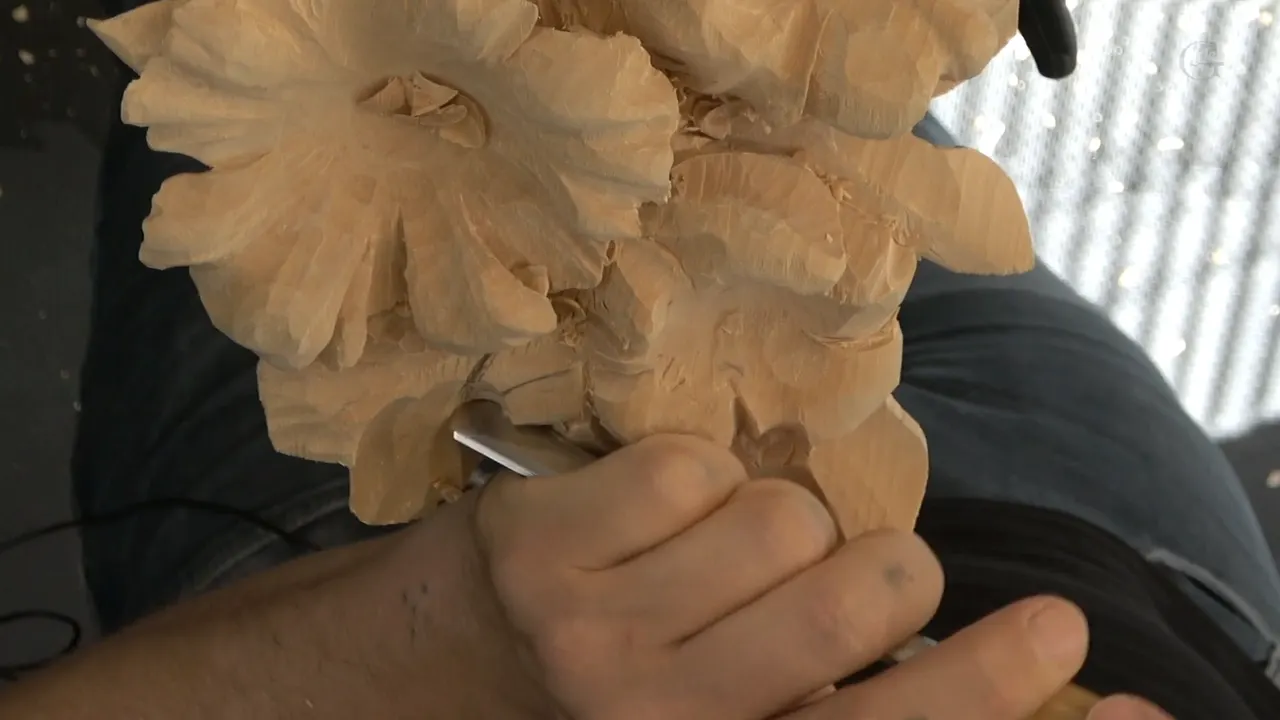
Placing a hollow next to a detail you already carved is a question I answered out loud in lesson 37 of Carving Hashemi Flowers. I had a spot for a really nice concave cut. Let me think, I said. If I'm going to create the concave cut, I'm going to lose the detail. So I did it on the opposite side.
Have you ever carved a small detail and then wanted a deep hollow running right through it? Would you like to keep both? Then follow my gouges across this limewood panel, one flower and one choice at a time, the way I carved it on camera.
The lesson is short, three parts. Where it runs out, I bring in what I said about losing a detail on other panels, and I name the place each time.

Lesson 37 at a glance
A concave I wanted would have taken a carved detail, so it went on the opposite side.
A chunk beside one flower turned into the start of a leaf.
The side of the V tool took extra wood off a future leaf, used like a chisel.
Five petals began with preliminary passes.
One side went the wrong way for the grain, and I said sharp tools made that fine.
One petal began to move.

Where do you put a hollow when the detail is already carved?
On the opposite side, the way I did it here. Part two was all about details, and about four minutes in I went to create a few different concaves and convexes, exactly the same as we had done before.
Let me decide where it's going to be, I said. One place looked right. The line about the detail came next, and the concave moved over to the other side of that shape.
Right after it I did another one, using a number nine of about half an inch (about 13 mm). That's good, I said, and maybe one more right here. After that the V tool came back for an undercut, I did the same on this side, and I said I can undercut under this detail.

That one sentence is the whole reason lesson 37 gives. On other panels I said a lot more about keeping what I had just carved, and those words follow.

Why keep a detail you already carved?
For the Venice Room panel, the design was built around one. I was chopping down a section that was a little too high in workshop 87 of the Venice Room, beside a volute. I don't want to lose the detail of my volute, I said, so I've got to be really careful.
Later in that part I gave the reason I was lowering a section there. The hero of this design is going to be that detail, that drop, and everything just goes around that drop.

In the middle of it I named the wrong tool. Number seven and 5 millimeters, 3/16 of an inch, I said, and then, oh, I'm sorry, number 11, veiner. I guess I was calling everything number seven by then. I did have a line there, so I knew exactly where it was supposed to end, and I can't go beyond that.
On workshop 18 of the Furniture Panel there was a detail and a corner to protect. I said I can probably just tap this section with the number one, 8 millimeters (5/16 in), because I really did not want that detail gone, and I wanted the corner really nice and sharp. A little bigger number one could follow, I said, like five-eighth of an inch (16 mm), used right there to catch the line.

How careful do you have to be beside a finished detail?
Careful enough to go little by little. I was working on the background of workshop 16 of that furniture panel and got a little too aggressive. I raised it a little and took it little by little, and even that was maybe still a little too aggressive, I said. The detail was still there, but I still had to be careful.
Venice Room workshop 17 had me lowering down the whole thing right there, next to a movement I had just made. That is absolutely okay, I said, as long as I'm not going to lose the details I just created, which I should not. I created that movement and I didn't want it gone. But on another hand, I had some material on the side, and I could use it to create something really nice there too.

Can the wood beside a flower become a leaf?
On this panel it did. In part three I said it's a good idea to clean around this flower, just remove a chunk of material right here. But on another hand, before I clean, I can create interesting movement with the leafage.
Those leaves can grow from the middle, I said, but I can also make another leaf growing from underneath this flower. I think it will make a beautiful look, in my opinion. The same idea came back, a small piece sticking out from underneath, a little bigger this time, but still from underneath.

A V tool made a separation cut, and then a preliminary undercut. A knife set up my main form on the next side, followed by a small number nine, 4 millimeters (5/32 in), and a number five for some cleaning cuts.
Lesson 31 has a leaf that was never in the drawing, and lesson 35 deals with wood left over between the petals.

Is it ever fine to lose details?
Early in a carving, yes. At the start of the second layer on the olive wood Lily Box, I said it straight to the camera. If you are afraid to lose the details, don't be. That is the process.
But if you set the first movements with the gouges, the way I do, they are easier to bring back. And I always keep my reference on my workbench, so I can recreate the details I lose along the way.

For those first passes I took a number nine of 20 millimeters, or three-quarter of an inch. It doesn't have to be that, I said. It could be half an inch, like 14 millimeters, or 6 mm, a quarter inch, if you feel more comfortable.
That wood was olive, from a really curly slab, and I said I didn't know how it was going to behave. Olive has an absolutely different property from limewood, or even from walnut. The main idea, I said, is to make sure you are slicing. Don't just push your tool. You start at one edge, then you make the rotation, and end on the other edge of the tool.
The Lily Box line came while I was still finding the main movements. In Hashemi 37 the overall shape was already established, and I was working on details.

How does a V tool work as a chisel?
Lay it over on one side. Part two started with an undercut from the V tool, just laying on one side. Then, on my way, I took some extra material from a future leaf, using the side of the V tool as a chisel.
In lesson 23 of this course I put it plainly. The V tool is actually pretty much a chisel, and a small gouge, and we call that bottom part the keel. A chisel, a chisel, and a keel part.

The Greek Acanthus Leaf got the same thing on an outside edge, cleaned with just the side of my V tool. I could see small lines there, and I call them marriage lines, where the grain meets. That leaf is an acanthus.
Workshop 38 of the Furniture Panel used a number 11 of two millimeters (about 1/16 in), not a V tool, and I gave clock positions for using its wings. With the flute up at 12 o'clock, I turned it to about two o'clock, or all the way to three, 2:30, I should say 2:45. I used just a side as a flat chisel to remove a little more, and the opposite side got exactly the same, with the flute turned the other way.

What does zigging under a petal look like?
Here it was the V tool, going in underneath the future petals in part two. All right, I said, and I start zigging underneath of those future petals. Or maybe I can use a mallet on this.
The corner of the tool matters there. In workshop 15 of the Furniture Panel I warned about zigging with the corner underneath a molding. It is okay when you plan to undercut it. If you're not, be careful, because you will make extra shadow, an extra tool mark, and you won't have a really nice wall.

I started somewhat zigging underneath my first leaf on The Tray of Blessing, a Cabernet Sauvignon grape design, and went round to outline it. Dig a little too deep somewhere and don't worry about it, I said, like I did right there. I can always take the tool I used before and clean that slightly.
Is carving against the grain ever okay?
With sharp tools, I said, it can be. Part three of lesson 37 had me working in a direction I'm not supposed to work, just because of the grain. But I'm okay with that. As long as my tools are sharp, I should be fine.

I had to work against the grain and go uphill in workshop 81 of the Venice Room, which you're not supposed to do. But with sharp tools, sometimes it's okay. And what is uphill and downhill right there? I started a downhill pass and then rose up, so it was not really one or the other.
Back on that furniture panel, in workshop 16, my reason for breaking the rule was plain. It was the position of my cameras. I don't really want to jump around and readjust them all the time and waste a lot of time. If I know my tools are sharp, I can get by sometimes. Keeping them that way is sharpening, and that is its own course.
How did the five petals start?
Subdivisions, made with the V tool. Near the end of part one I looked at a flower and counted. One petal right here, another one right here, a third one, number four, and number five.
Same idea as before, I said. My passes would be serious ones, multiple, and preliminary. The approach stayed the same after that, and the number seven came out, three-quarter of an inch, 20 millimeters. Let's rotate, I said, and attack that from a different position, from this side.

Part one opened on the leaves. I cleaned a little inside and took out a ridge with a number five, one inch (25 mm), and went all the way down. A separation cut came next, probably just with a knife. Now I can attack from the backside, I said, and remove that wall, and a smaller number five, a quarter inch (6 mm), took out the majority of the mess.
Which tools carved lesson 37?
| Tool | Its job | Part |
|---|---|---|
| Wide five, one inch (25 mm) | Took out a ridge | One |
| Knife | Made a separation cut, and in part three set up my main form | One |
| Quarter-inch five (6 mm) | Removed the mess | One |
| V tool, card #16, 6 mm (1/4 in) | Subdivisions, then undercuts | One |
| Seven at 20 mm (3/4 in) | The same approach on another flower, and later a couple of cleaning cuts | One |
| Nine, about 1/2 inch (13 mm) | Concaves | Two |
| Smaller nine, 6 mm on its card (1/4 in) | Interesting movements in a few different locations | Three |
| Four | Movement, after an undercut | Three |
Every size in that table is one I said, or one the card on screen showed, and the other unit in brackets is a conversion.
What happens when a petal starts to move?
It gets fragile, and on this flower I kept going. Close to the end of part three I needed to clean inside a little, took a number nine again and attacked from this side. You can see my petal is moving, I said. Like I said, it's really becoming fragile.

But I have to do that to make it look beautiful. That's the goal anyway, right? And I like the natural movement of this leaf, I said right at the end, going upward, then downhill, and back.
How thin a carved leaf can be gets a lesson of its own in this course.
Where lesson 37 leaves the panel
The overall shape was established when part two opened. Let's work on details, I said. Part three began on just the smaller details, where one side looked really rough, so a number five went in to make it smoother.
All 49 lessons of this course come with tuition at the school, and you can carve the same wood carving panel along with me.
How it's done
- Settle the overall shape. Details came in part two of lesson 37, after I had the shape settled.
- Decide where each concave goes. Before carving a few concaves and convexes, I took a moment to decide where each one would go.
- Take the hollow to the opposite side. The spot I liked would have cost the detail, so that concave went on the other side, and the next one followed, carved with a number nine.
- Undercut with the V tool laid on one side. Lay it on one side to undercut, and on the way use that same side like a chisel on the wood of a future leaf.
- Look at the chunk before you clean it. A piece of wood beside one flower became the start of a leaf growing from underneath it, made with a separation cut first, then a preliminary undercut.
- Keep sharp tools for the wrong way of the grain. One side went the wrong way for the grain, and I went ahead, since my tools were sharp.
Frequently asked questions
Can you put a concave right beside a carved detail?
On my Hashemi panel I chose another spot. One place looked right for a concave, but carving it there would have cost me the detail, so the hollow went to the opposite side. A little later in that same part, the V tool made an undercut under a detail.
What is the keel of a V tool?
We call the bottom part of a V tool the keel. In lesson 23 of the Hashemi course I described the tool as two chisels plus that small gouge part at the bottom. Either side can work as a flat chisel, and in lesson 37 one side did, on a future leaf.
Should you be afraid of losing details while roughing out?
In the olive wood Lily Box course I said don't be, because that is the process while the main movements are being found. Movements set with the gouges are easier to bring back later, and I keep my reference on the workbench to recreate whatever details go.
What to carve next