
Alexander Grabovetskiy, woodcarver, School of Woodcarving · Published 2026
What do you do when the gouge handle gets in the way of a deep cut?
Quick answer: A handle in the way is the limit I reached deep below a hazelnut husk, with my plug cut almost through. I said I needed a longer tool, then went on with a narrower number 9. The hole stays pretty much through for now, until one side gets more digging.
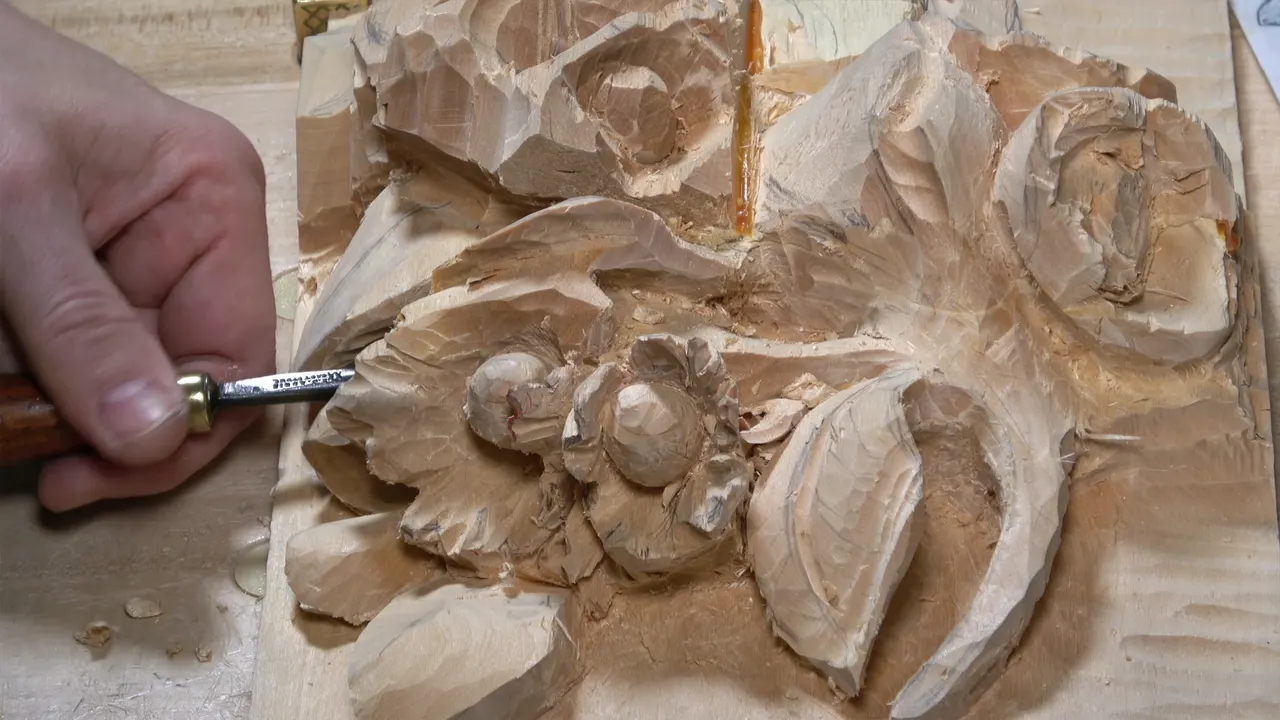
A gouge handle in the way is the point where the edge is deep in the wood and the handle won't let the tool go any farther. I hit that point in part 3 of lesson 8 of Carving Hazelnuts, deep under a husk, in the middle of a plug cut. This page is about how to use a carving gouge in that spot, told from what I did at the bench.
Ever reached into a jar for the last pickle? Did your knuckles stop before your fingers got there? Your gouge does the same thing deep inside a carving, and the edge is not the problem at all. I'll be honest with you about where I stopped, too.

Part 3 below the husk, the short version
- The spot was a deep cavity between leaves, below one husk of my basswood hazelnut panel.
- My number 9 by Addis started a plug there, and then another plug.
- I called that spot a danger zone for the tool.
- The hole grew from its sides, its top and its bottom, worked by feel.
- Then the handle became the limit.
- A narrower Ashley Iles, an eighth of an inch, carried on until the hole was nearly through.
Where was I when the handle got in the way?
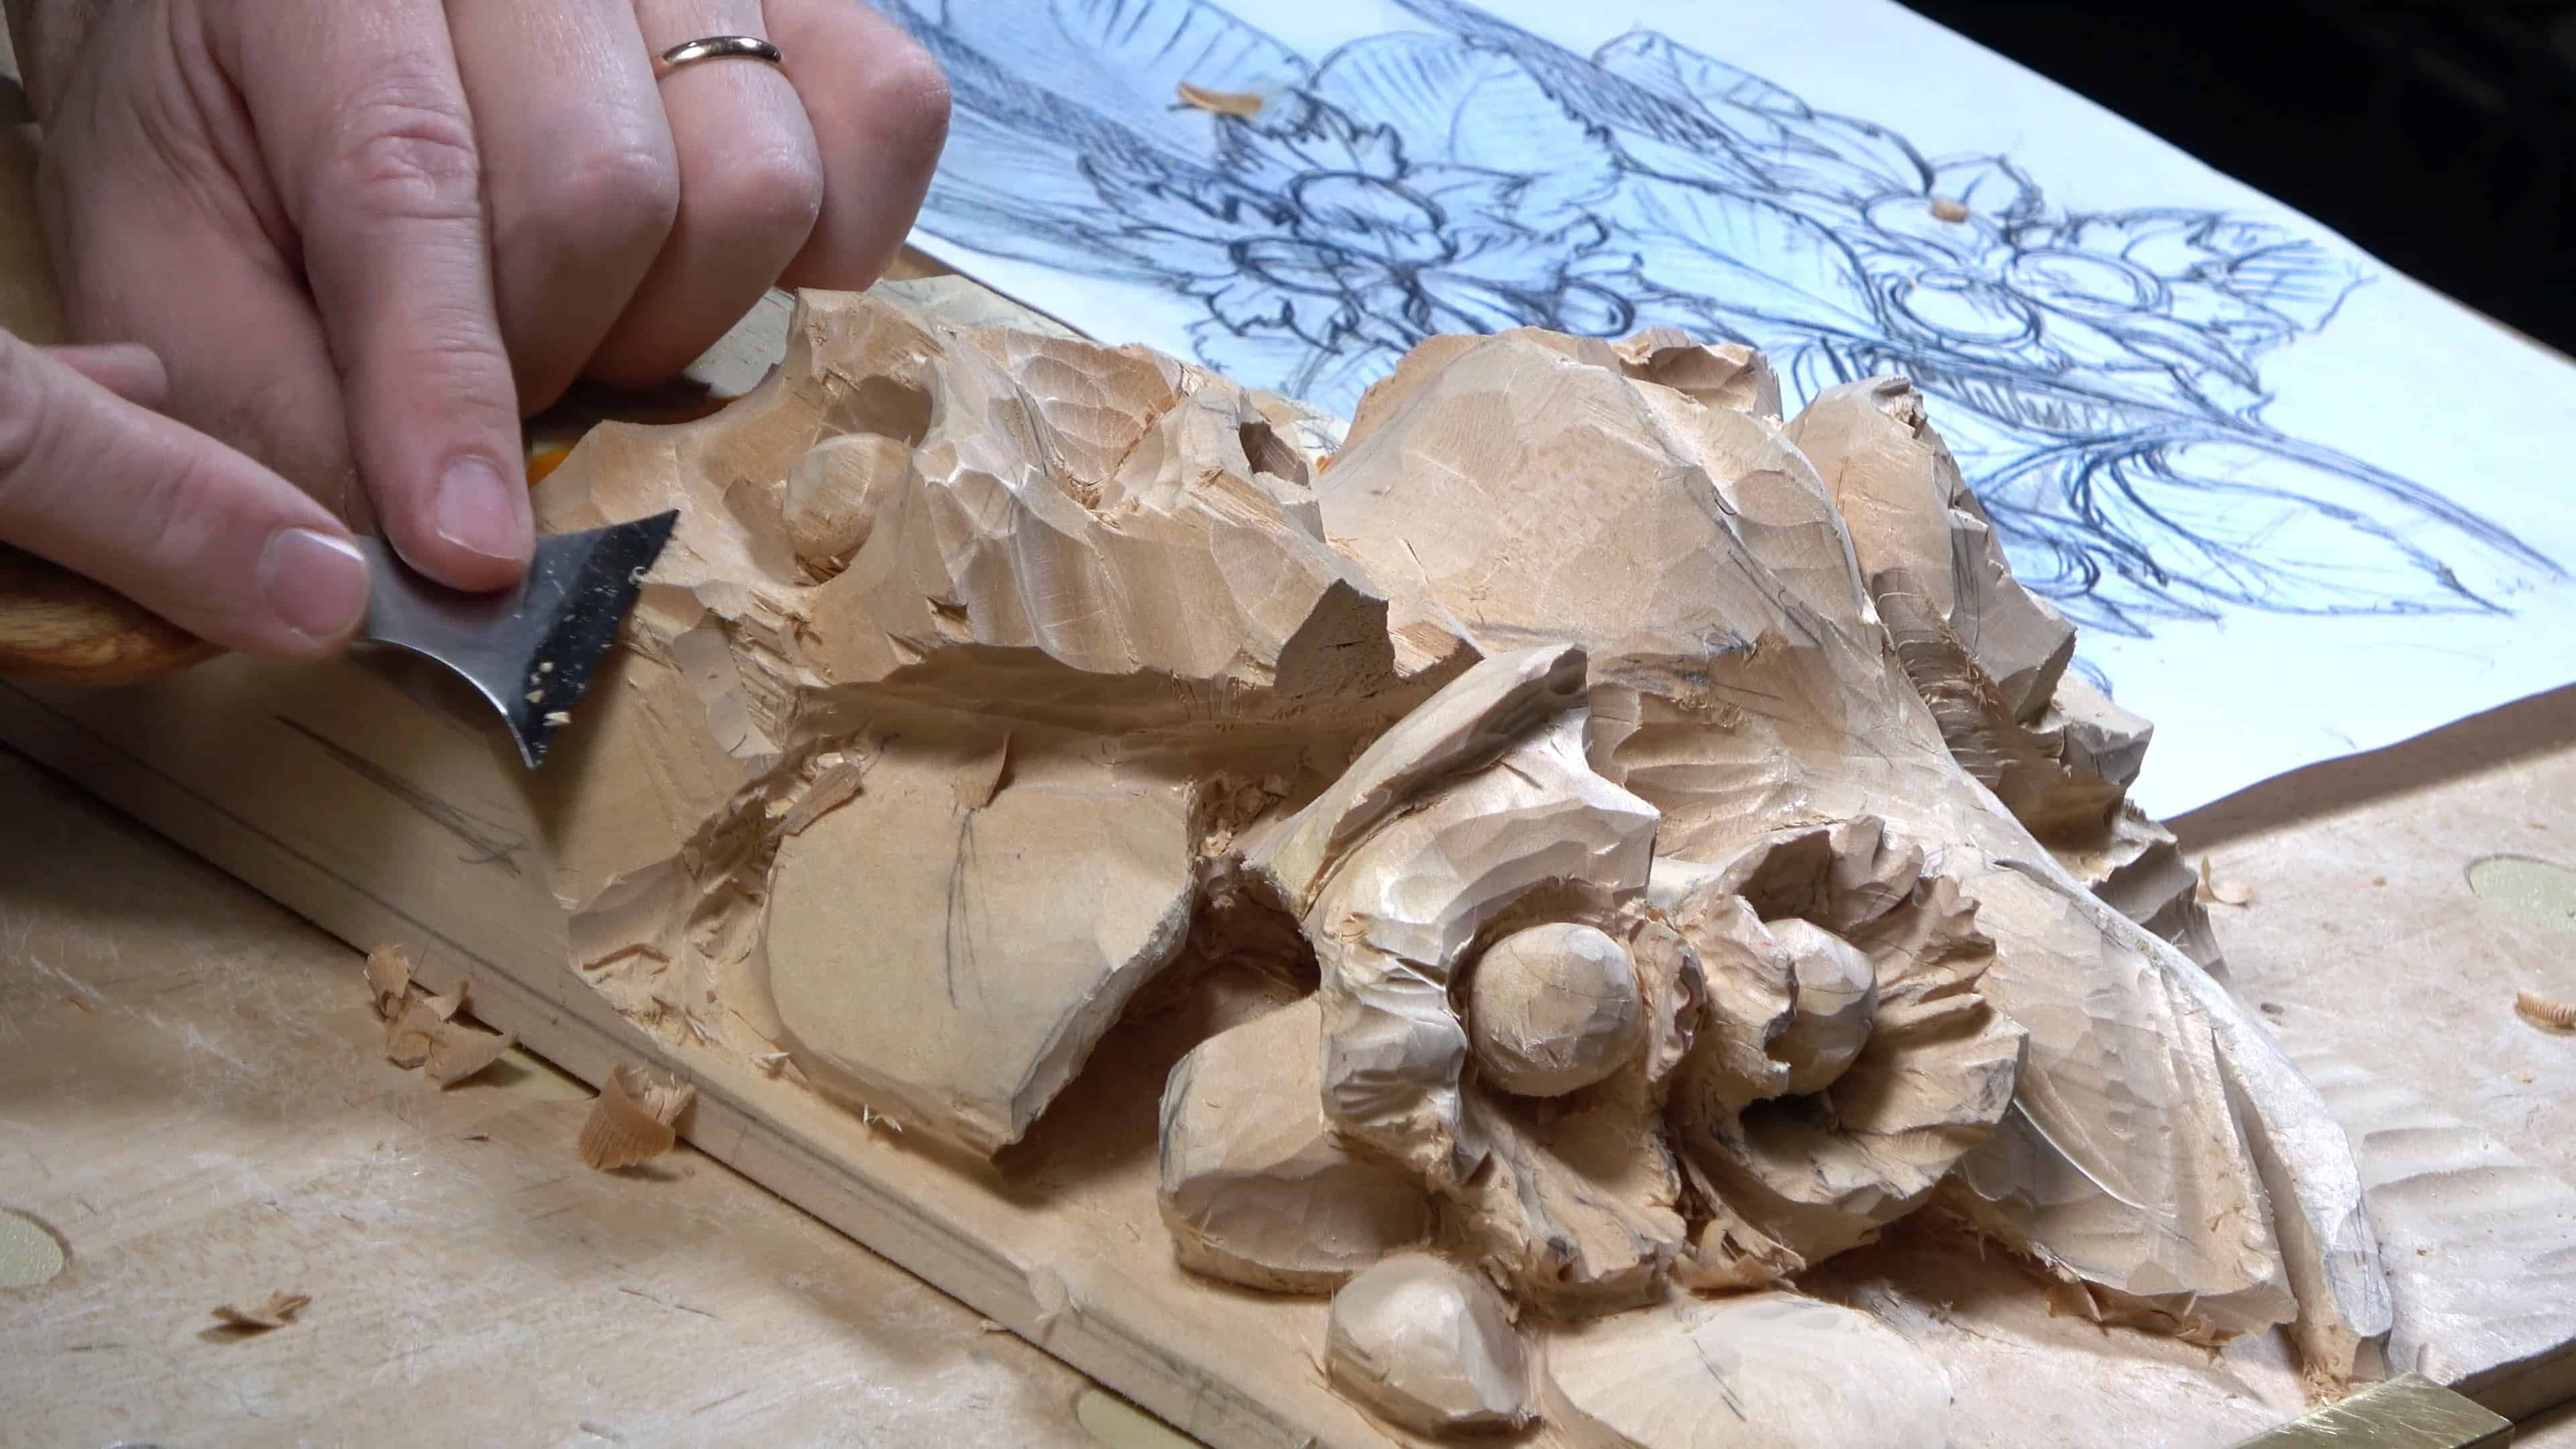
Deep in a cavity between leaves, below one husk, after a lot of digging. Part 2 ended with my plan to dig out a cavity between three leaves. This part opens with a 10 mm number 11 (about 3/8 inch), a Swiss made Pfeil, going in from the outside toward the center. It's always safer this way, and that way I can actually see what is going on. It didn't look too appealing to me yet, and a skew knife sloped it a little better. I didn't want any area too high. It's going to be really hard to clean up inside.

Next came a small number 11 (1/8 inch, about 3 mm) between two leaves. I didn't undercut the ends of those leaves yet, because I was still probably going to change some slopes. The right side of one leaf I liked a lot, with really good balance overall, so I wasn't going to change it much. I took off the pencil marks too. If I don't, they're going to bite me later. A knife took wood from the sides, bit by bit, until I had enough opening for a smaller tool. Near the leaves I twisted that tool to the right or to the left and started to undercut. My bites were small, no more than an eighth of an inch per bite.

After that I went right underneath one section, with the tool at about 8 o'clock. I wasn't just pushing it. I was still slicing. Next a number 8, about a quarter inch, and I said you could use a number 9 instead. On its side you could see how deep it went, about an inch and a half (about 38 mm) in from that point. That is what we are after. Just don't overdo it. I still left at least half an inch (about 13 mm) of thickness there, for later. Back and forth I went between the 11 and the 8. I dug as much as I could right on the side.

Then came a question. Could I connect this side and that side, beneath the husk, where another leaf will sit later? I told you I wasn't sure I'd be able to get to it, and that if not, that's okay too.
How to use a carving gouge for a plug cut under a husk
You set a number 9 into the wood and take small plugs out of it. Mine was a quarter inch Addis. I started from one side. "It's going to be a plug cut," I said, and right after that, that I didn't want to be too deep. The plugs came out a few at a time. Then another plug, same tool.

Yes, I know I was blocking some of the view. It's just the nature of it. What can I say?
In Venice Room workshop 111 you can hear where the name comes from. I pointed a number 9 inward, cranked it, and said that's why I call it plug. A mallet will help too, I said. After it came the rest of the recipe: just rotate, attack that from different positions, crank it and remove it. On that piece I planned the plug to go right through, and below the hazelnut husk I came at the hole from two sides.

Why is a plug cut this deep a danger zone?
A deep plug cut can break your gouge. "Just be careful," I said first, and then, "You're kind of in a danger zone right now. It's easy to break the tool with the plug cut."
I say it in other courses too. In that same workshop, deep in a plug, I told you that sound is kind of scary. Always be careful not to break my tools, I said. A smaller one came next, a quarter inch. In my course on the Corinthian acanthus leaf, in lesson 5, I was more blunt about undercuts. You can break your tools easily with an extreme undercut like I do. And I've done it. I broke some tools when I did the undercutting.

How do you make the hole bigger once the first plug is out?
You come back to the first opening from the sides, from the top and from the bottom. Here is how I put it while I worked. I create the initial excavation, not a hole yet. After it, I go to that same hole from each side, the top and the bottom, to remove the excess and make the opening a little bigger.
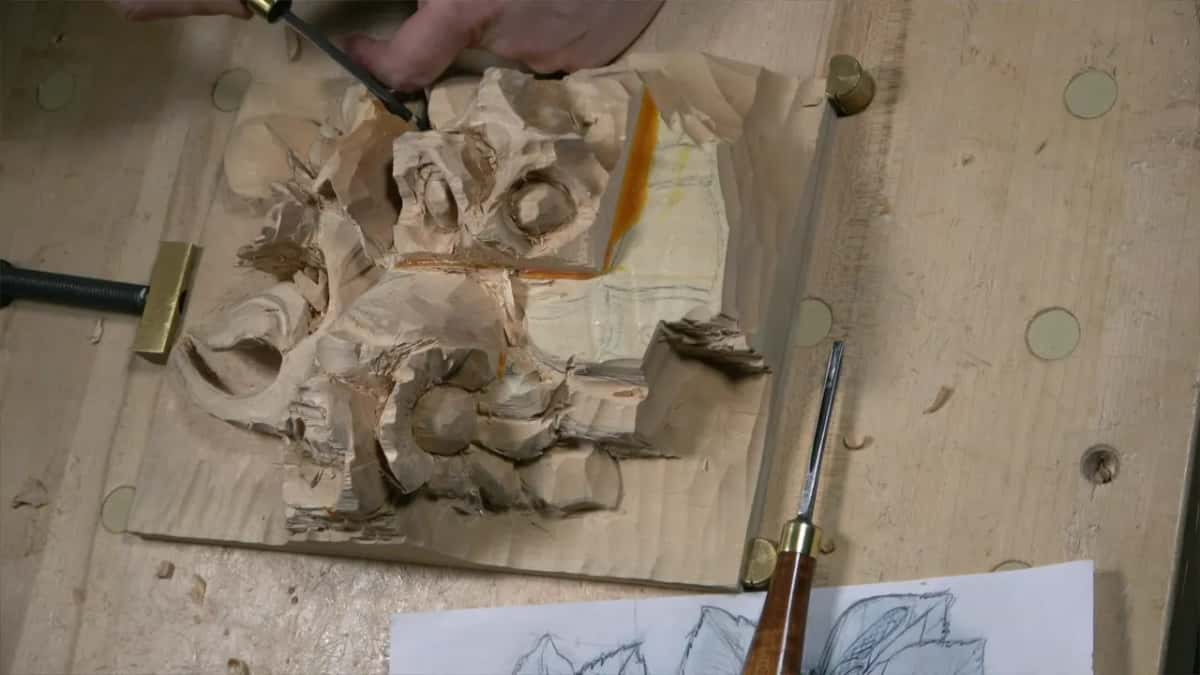
Again and again I came back to the background. Keep an eye on it. You really don't want to mess up the background. Earlier in this part I told you why going over the center worries me: you remove too much, and it's almost impossible to fix.
I worked the same way in workshop 158 of the Venice Room. I made the plug cut from one of the sides, then continued on the opposite side with the same tool, holding the right direction, toward that hole. That time I got through, and showed you.
What do you go by when you can't see the end of the tool?
You go by feel. "I can't even see myself," I said at the plug, "so you have to feel what you do and go by feel." Earlier in the part I said I couldn't stick my camera on one side, so you had to guess what I was doing.

I tried from that side again. It was a little tight, not enough space for me from there. I hoped we were close. Yeah, we were, actually. I was looking inside, and we were pretty close.
Feel came up in other courses too. In the Roman acanthus course I said that when you do an extreme undercutting like I do most of the time, you really have to control your tools and feel what you do. I gave the reason there too. Those mistakes, when the piece becomes really fragile, most of the time you can't fix.
In another lesson of that course I asked you to train your eyes the same way. Do a thing by feel, and then check if it's accurate or not. On more complicated pieces there are spots where there is absolutely no way to measure. On my Hashemi flowers I went as deep as possible, until I couldn't even see the end of it myself.

What did I do when the gouge handle got in the way?
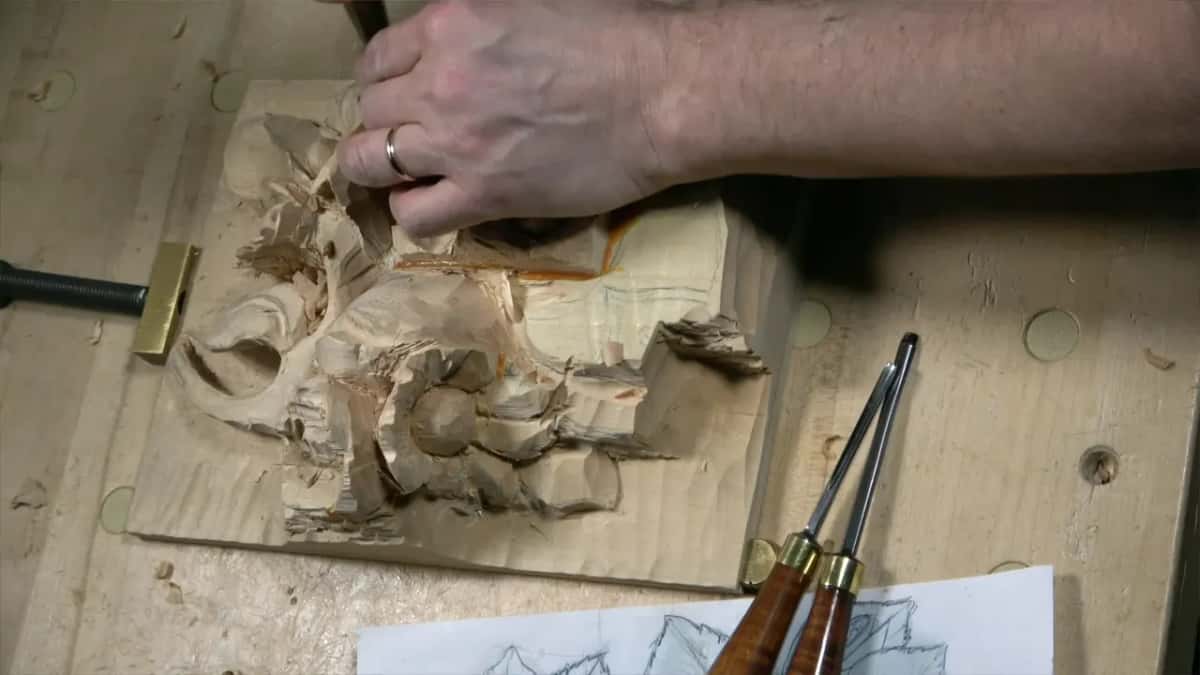
I said I needed a longer tool, and then I kept going with a smaller number 9. Here are my words at that moment: "In this case, the limitation is the handle is already on my way. It's not going to work all the way through with this tool. I need longer tool."
What I picked up next was a 1/8 inch number 9, an Ashley Iles, and I carried on with the excavation of the plug. Maybe it's a good idea for me to leave it like that, I said. For now, it is pretty deep. It goes from this point in that much.

So the honest answer to this page's question is not a clever tool. The handle won that round. I changed to a smaller gouge, kept going, and left the rest until one side gets more digging. To watch those few minutes yourself, open the full part in the course with Access.
Why leave the hole almost through for now?
One side needs more digging first. "So pretty much I'm all the way through," I said, "even if I don't see it, because I need to do more excavation on this side before I can connect the right way." But you get an idea.
Then I asked myself out loud why I'd do it at all. I don't know. It's kind of fun, you know, just to get the challenging areas. Earlier I had said that connecting both sides would be pretty cool and really advanced.
On the grape onlay I gave another reason to come at a spot from its other side. You can always get to that spot from the backside, so you don't have to break the tool, which is possible when you do an undercut. If you can get it from there, it's probably much safer.

Which tools reach deeper than a plain gouge?
In the Venice Room I showed two shapes that reach deep: a short fishtail with a small neck, and a small number 9 with its edge only at the end. In Venice Room workshop 56 it was the fishtail. A full-size tool without that small part wouldn't let me go directly underneath. Because it has a small neck, I can go in and continue carving as deep as I want, and rotate inside without breaking anything.
In workshop 52 it was the small number 9, still a full-size tool. It gets to the tiniest spots, and I can excavate really, really deep and make beautiful cavities. And the way I carve inside like that, I said, is a plug cut.
Back on the hazelnuts, later in part 3, I had a carving problem of the same kind beneath a leaf. My flute was upside down on a number 3, and I said it was probably a good idea to use a back bent, because I had limitations and hit the edge of the leaf. But it's okay, I said, since I still had plenty of material.
The tools in part 3, in the order they came out
| Tool | Job | Note |
|---|---|---|
| Pfeil number 11, 10 mm | Came in from the outside toward the center | Safer that way. |
| The skew knife on slopes | Sloped one side a little better than before | Not appealing yet. |
| Small number 11, eighth inch | Took wood out between two of the leaves | Leaf ends wait. |
| A number 8, quarter inch | Dug more, back and forth with the 11 | Number 9 works. |
| Addis number 9, quarter inch | Started one plug, then made another with it | Danger zone here. |
| Ashley Iles number 9, 1/8 | Carried on with the plug after the handle | Left for now. |
| Upside down number 3, 1/4 | Cleaned under the leaf, which looked too choppy | Too choppy before. |
| Bigger number 3, 3/8 inch | Cleaned more of the background, never toward center | Keeps background even. |
On the number 8 I said plainly that you could use a number 9.
What else happened in part 3?
I broke the end of a leaf near the start, and showed you right away. It's okay in this case, since I have plenty of material, but be careful. That is no good. Sometimes it happens, but what can I do?
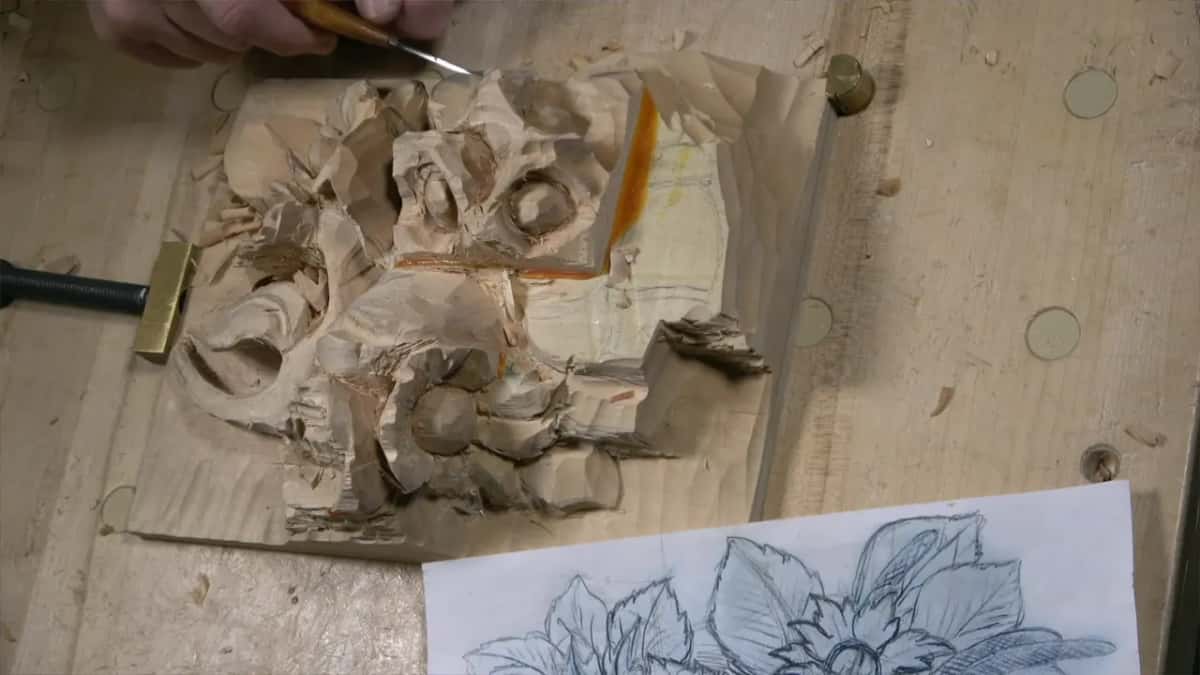
I also told you why I went to a smaller tool for the undercut. It removes little by little, not much material, and I can always clean it with a bigger tool later. Later I cleaned the side under one leaf with a number 3 upside down, a quarter inch, because it was just too choppy, even if you can't see that. And I showed you the deep spot. It goes on inside, a little messy, but you can see how we excavated it and defined the leaves. One leaf is wide and its neighbor narrow, about 60 and 40, following the golden ratio, and I said it matters for how the human eye reads it. It's messy, but little by little we are taking shape on this relief.
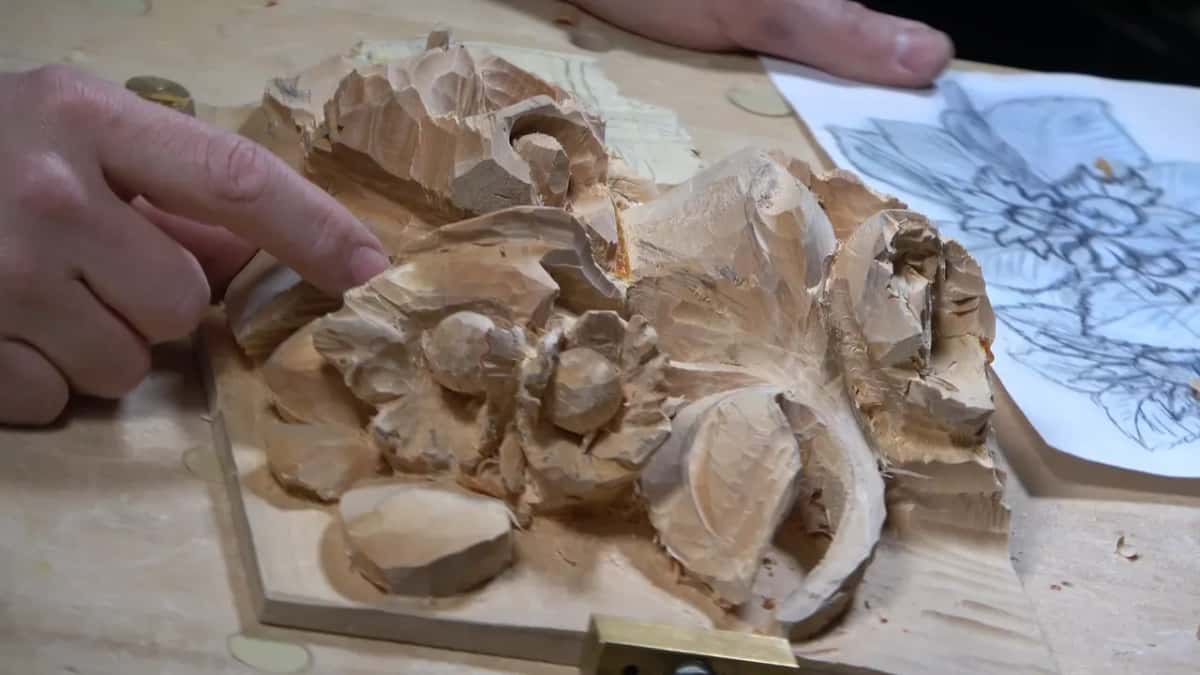
Ever had your hand run out of room before your fingers did? Ever stopped one step short of a job and come back to it the next day, once the other side was ready? In a deep hole, a gouge has the same trouble, and the full part is there for you to watch.
How it's done
- Start the plug. The Addis went in first, not too deep, and the plugs came out a bit at a time.
- Add a second plug. The same gouge went in again for another plug.
- Open the hole from every side. Go back toward the first opening from left, right, top and bottom, taking off the excess until it grows.
- Watch the background. Keep an eye on it, again and again.
- Work blind, then look. Where your eyes cannot follow, use your hands, then peer into the opening to check how close you are.
- Change gouges at the handle limit. My handle was already in the way. I switched to the narrower Ashley Iles and carried on.
- Leave it for now. Pretty much through is fine at this stage. One side needs more excavation before the two meet properly.
Frequently asked questions
Did a longer gouge finish the plug?
My words were "I need longer tool", yet the gouge I picked up was an eighth-inch Ashley Iles, a number 9. The excavation went on with it. My next words were that maybe it was a good idea to leave it as it is, for now.
Can a plug cut break a carving gouge?
Easily, in a spot that deep. Below the husk I called it a danger zone and said the tool breaks easily there. In my Corinthian acanthus course I told you I broke some tools when I did the undercutting. Right before the danger zone line, I said just be careful.
How do you tell you are almost through when the hole is hidden?
By feel first. I could not see the tip myself, so my hands had to tell me, and then I looked inside the opening. It was nearly through. At the plug I told you that you would not be able to see it, but you get an idea.
What to carve next