
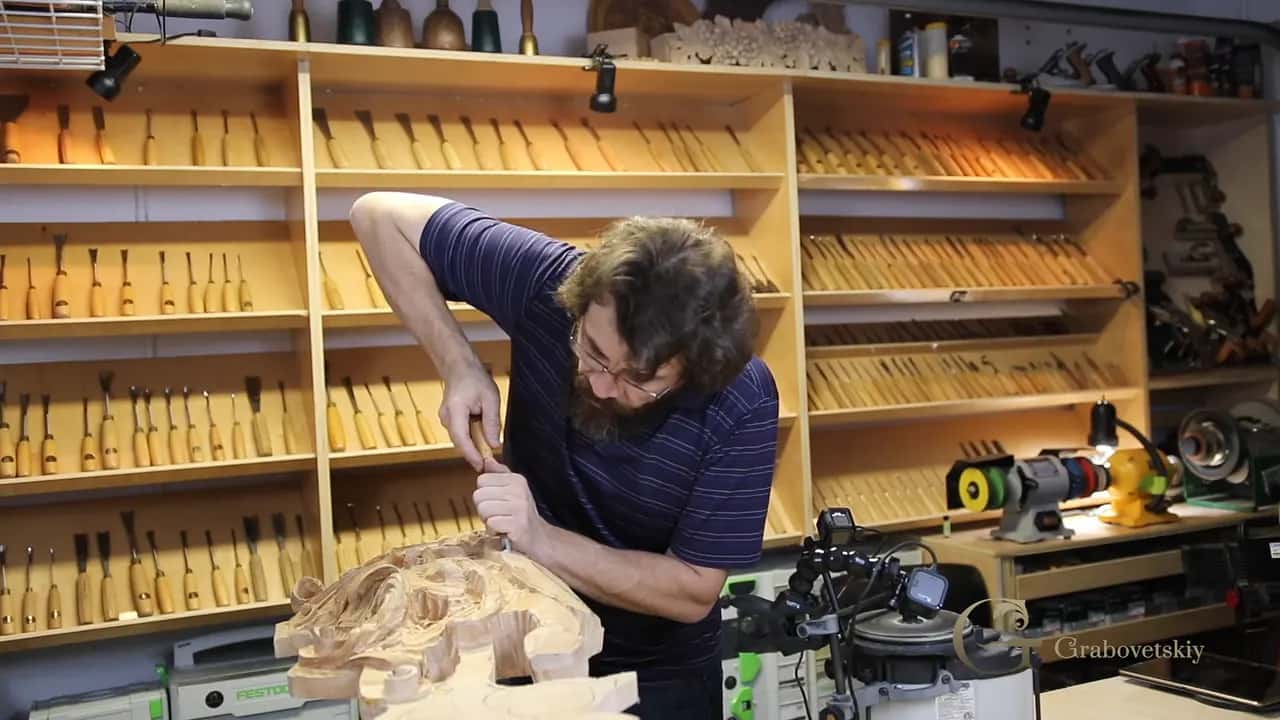
September 20, 2024 · Updated August 22, 2026
By Alexander Grabovetskiy — Master Woodcarver · Founder, School of Wood Carving · 20 min read
Why Does Wood Carving Take So Long for Beginners?
Slow carving for a beginner is a tooling and planning problem, not a talent problem. People ask me this all the time. Why does wood carving take so long when the master makes it look quick? Four things are eating your evening, and three of them you can fix this week.
Your evening ended with a board that looks nearly untouched. A little pile of chips. Maybe one groove you are not proud of. I have watched that face on plenty of students, and I would like to take the blame off your hands, because your hands are probably fine.

The plan goes onto the blank in marker before a single tool touches it. Red and blue patches mark what comes off and what stays.
Here is my promise. I will name the four causes, show which three you can kill this week, and tell you honestly that no hour figure exists for a first project. My grandfather put a chisel in my hand at six years old. I took it straight to a brick and ruined the tool. So a rough start gets sympathy from me.
- The blunt edge is the loudest thief in the room. Carve a spot once, then carve it again, and you have paid for it twice.
- Sharpening is the hour nobody counts. Grinding a tool to shape is the main work, and it makes no chips at all.
- Nobody can tell you how many hours a first project needs. I refuse to guess, and further down you will read exactly why the refusal is the honest answer.
- One day you carve one inch. Another day you finish a foot. So you really cannot go by foot and inch.
- Two of the four causes cost about five dollars and one pencil to put right.
Why does wood carving take so long when you are new?
You are slow for four reasons, and only one of them lives in your hand. The other three sit on the bench in front of you right now. An edge gone dull. A board sliding around under the tool. And a blank with no drawing on it whatsoever.
Carving is not easy like some people think, whatever a video suggests. Really, really not easy at all, especially when you work on an end grain side. Some folks also believe shallow means quicker. Absolutely not. A shallow relief eats an evening the same way a deep one does, because depth is not what is costing you.

One small scroll, and chips no bigger than a grain of rice. Everything else on that panel is still a drawing.
Look at the picture and count what got finished. One scroll. I have carved since I was sixteen and that is still how a session goes. For the long timeline, read how long it takes to learn to carve, hour by hour.
| What is slowing you down | What it costs you | Fixable this week |
|---|---|---|
| An edge gone dull | You carve the same spot twice, so the time doubles and the surface goes smooshy | Yes, five dollars of graded paper |
| Wood that is not held | One hand gets stuck working as a clamp, so the cut wanders | Yes |
| No plan drawn on the board | You stop after every chip to decide, and the deciding eats the evening | Yes, a pencil before the first chip |
| The hand has not built the movement yet | Every single slice needs your whole attention, the way cursive did when you were a child at school | No, this one is paid for in hours |
| A tool too small for the shape | The work still gets there, but I spent ten years on a piece I could have finished in a month | Yes, pick the widest tool that fits |
Four of those five rows say yes, which is the whole reason I wanted you reading this page instead of quitting.
Where did my evening actually go?
A big part of it went to sharpening, and sharpening produces nothing you can hold up at the end of it. I divide the work in three main parts, and the first one is the shape of the tool. Grinding comes first.

The bevel of a gouge held to a spinning wheel. This is the part of the day that produces no carving at all.
You have to know exactly how a tool is supposed to look. What angle of bevel it needs. Whether it carries two bevels, or a micro bevel and a main bevel, or neither one. And you have to grind that, and that is the main work, actually.
Nobody films this part, so nobody counts it. An old apprenticeship was measured in years, and a good share of those years went on standing at a stone. My own teacher started me on the paper before anything else.

Two more gouges lying beside the machine, waiting their turn. That queue beside the machine is the real hidden cost of any evening.
Buy them sharp and they still do not last. No if about it, only a when, because nothing in this craft stays sharp on its own. Sharpening matters, and nowadays it matters even more than design. When money is tight, start with the free sharpening lesson and see for yourself.
Does a blunt gouge really cost that much time?
A blunt gouge makes you pay for the same cut twice. Think about the arithmetic. You spend double when you carve a spot once and then have to carve it again. And what is the solution? Sharp tools.
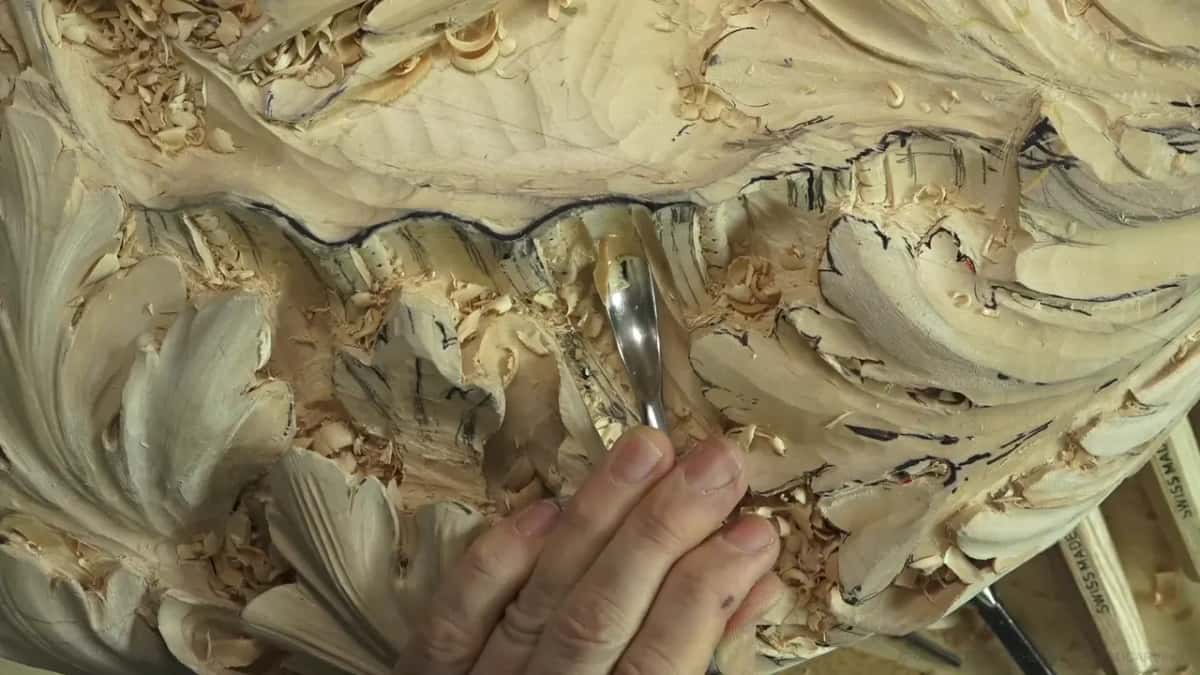
A gouge runs along a strip of beads on a deeply carved acanthus panel, with two more tools within reach.
Your tools must be really sharp. Otherwise you are not going to get good results, and everything is going to be all smooshy. You really have to do that type of work with really sharp tools. Try it with the dull ones and frustration arrives instead.

The same area once the dust is blown off. Every surface a sharp tool touched came off clean, with no fuzz that needs sanding.
Two frames off the same acanthus panel, minutes apart. One surface still wants a second pass and some paper before it is fit to look at. The other came off clean. The difference has nothing to do with skill, and the wood is not to blame either.
When I started to carve I came to my master one day and complained. Why did you give me that bad piece of wood? He said there is no such thing as a bad wood. Dull tools are the only problem. Sharp tools can do beautiful stuff, even on the worst of the worst pieces of wood.
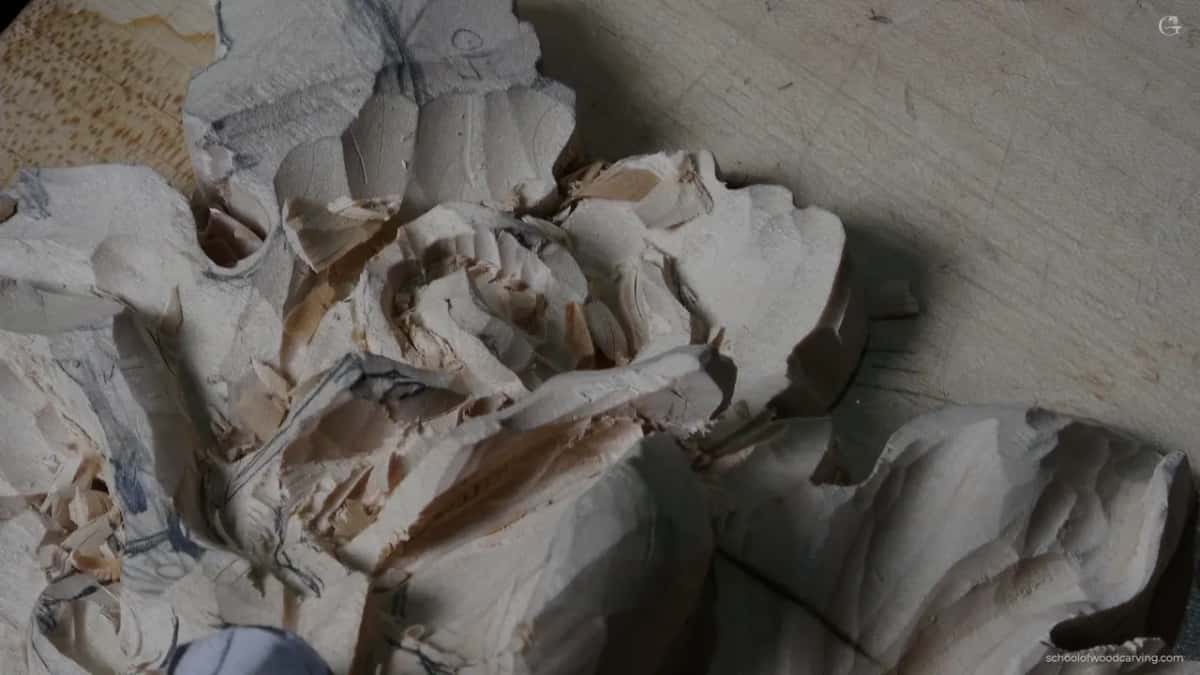
A grape onlay at the rough stage. The shapes are there, but the fibres are torn and the layout lines still show through.
My wood is not good, I would say to him. There is nothing to do with the wood, he would answer. Your tools. You have to sharpen your tools.
Now the cheap fix, and I want you using it tonight. Suppose you do not want to spend a lot of money on stones and a machine. Do it the old way. Go to Home Depot, buy different grit sandpaper for five dollars, use it on a bench, and sharpen with that. My master taught me it before anything else.

My wheel and its rest bar, set up on the bench beside the carving work. It sits there because the edge never lasts.
That wheel is my own setup after a lifetime of carving for a living, and I show it so you know what you are not missing. Graded paper on a flat board does the same job slower. Nobody starting out needs a machine, and our carving tool sharpening course opens with the hand methods. The first step in wood carving was never the first chip.
What happens when the board is not held?
An unheld board turns one of your two hands into a clamp. The picture below shows it. With the work held down, your free hand rides the blade instead of pinning the board.

Both hands are on one small tool over a sawn rosette. The arms of that piece are narrow enough that a single careless press ends the work.
Yes, hours of work can end in one press. If you make a mistake on the backside, you can break it. Do not press it, and keep your palm off it. Pressing, cranking, and levering are how a beginner destroys an area already paid for in time.

My hand grips the gouge on the steel itself, one inch behind the edge, so the tool can only move as far as the fingers allow.
See where my fingers sit. Not on the handle. On the steel, an inch from the edge, which means the gouge cannot run further than I let it. A student who holds the handle and shoves has no brake. Every slice becomes a small gamble.

The tool is held the way a pen is held, high up and light, following the drawn scroll rather than forcing through it.
So it just takes patience. And do not force it. A forced cut costs you the piece and sometimes the tool as well. The dangers a beginner runs into nearly all begin with a push that was too hard, and a shop full of wood dust deserves the same care.
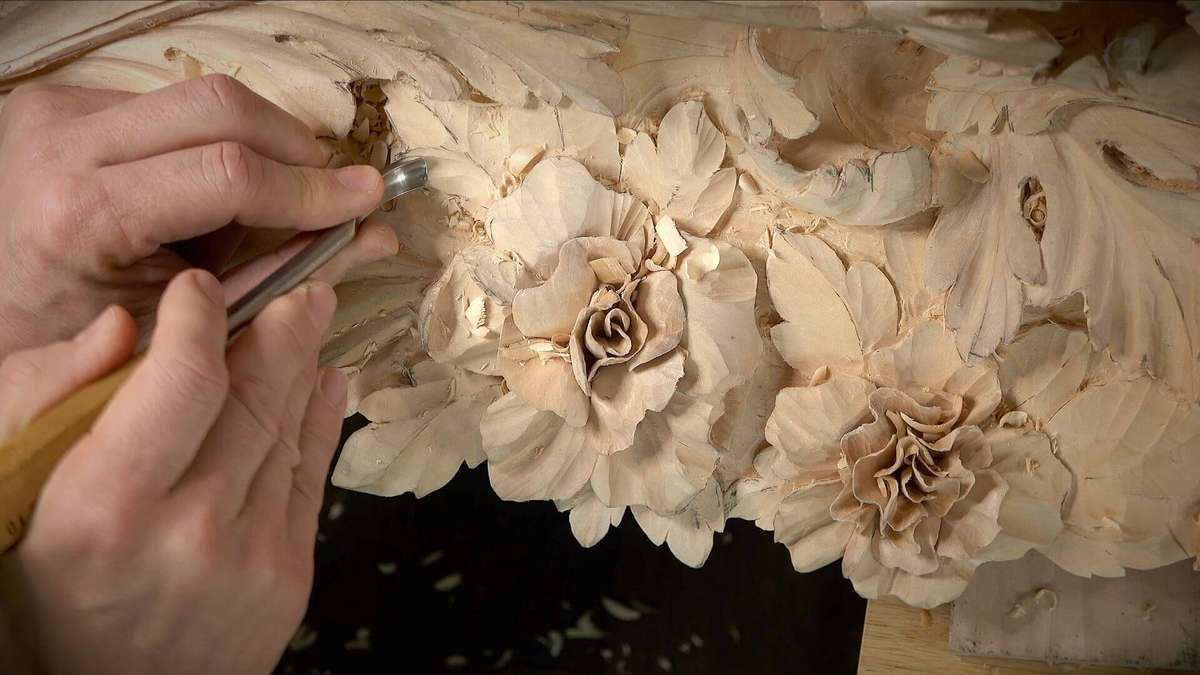
A rose garland thin enough to break, worked with the gouge gripped right at the ferrule.
Do I have to draw the design before I carve?
Put the plan on the wood, or you will pay for it in stops. The board in front of a beginner is usually blank, so every few chips bring another decision. Deciding is what burns the clock.

The whole design drawn on white primer, one corner carved, seven gouges laid out across the panel. The drawing came first.
Every line went onto that walnut panel before I removed one chip. White primer, then pencil, then work. With the drawing already there, an evening gets spent carving instead of standing still and thinking.
And sometimes you cannot picture the shape at all. Patience, friend. Patience is the most important thing in wood carving, I think. Sometimes you cannot visualize it, and I would highly suggest you just start carving, and that form is going to jump on you. You do not need drawing skills to start wood carving, so please stop using that as your excuse.

Two hands guide one knife along a pencil line on a kitchen board. Nothing there is carved yet except the line being followed.
Now watch what a plan does to the tool you reach for. With lines down, a whole background comes off under a router plane and you never wonder how deep to go.

A hand router plane takes the ground down on a walnut panel primed white.
Later the same panel needs only two tools in the frame, and the plane has done the heavy lifting. None of that is speed. One decision made once instead of over and over.

The same panel further along, with more ground taken away and the pencil still showing. Two tools, lying where they were set down.
A kitchen table with no shop makes this matter even more, and the details sit in how to practice woodcarving without a lot of space. Small board, drawn plan, three tools. Softwood helps, so read the best softwoods for practice and eastern white pine or the linden family.
How long before my hand knows the movement?
Longer than a week, and it arrives the same way handwriting did. You remember school. They said cursive writing to you, and you developed the skill while not crossing the borders.

A knife blade sitting down inside a pencil line, with one pale chip curling up beside the steel.
The upper border and the lower border. Later on you do not even need those lines, because you feel it naturally. You developed it. So more you work on that, more you go into the three dimensional world, and you can read the depth by your brains.
My fourth cause has no shortcut. Money cannot buy it. More you work, more you become a master. They calculate that to mastery you spend every day multiple hours. There are multiple books about this even in English, and one book by Malcolm talks about ten thousand hours. Some people get there a lot quicker, and some of them need twenty thousand hours.

Two carving knives held up side by side above a bird panel, while the design on the board is still nothing but pencil.
But there is a point. More you carve, more you see. That took me a long time to understand properly. Not just the scratching wood. Deeper you go, deeper you see. Which is why my own master handed me one knife and nothing else. He told me to master a knife before I would get to the gouge, and if I could not master the knife he was not going to give me a gouge.
One tool, for a long stretch, in one pair of hands. To work out which one, read about the one knife I put in a beginner's hand and what to look for in a tool set. Plenty of people teach themselves wood carving, and the ones who get somewhere stayed with one tool longest.
How many hours should a first project take?
I will not hand you that number, and the reason is not modesty. Somebody wrote to me who was interested in signing up for the school. They wanted to know what level they would reach in one month, in two months, and in a year.
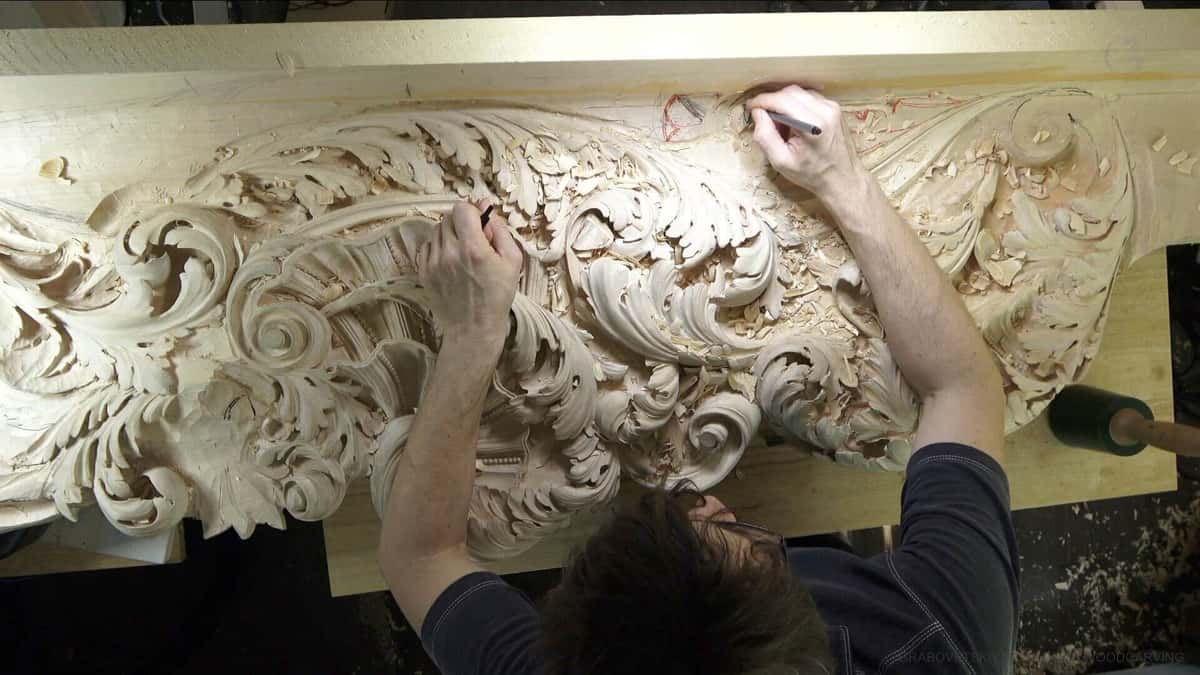
One frame, both ends of the job. Carved and finished on the left, still being marked out in red on the right hand side.
And that is hard to tell, because it is impossible to tell. It all depends on you and only you, and the progress only you do. I could hand you a number, and you would spend the whole time measuring yourself against a stranger, which helps nobody.
In my own lessons I do give a rough time for each stage. And when I give it, I say the same thing out loud. Do not look at me, because I do that every day, and mine is going to be much quicker. Try to stay inside the time frame I give you. But please do not get frustrated.
Now the part that stings a little. Young kids come to the gym and exercise for one day. They are pumping and pumping dumbbells, and they constantly walk to the mirror just to look at whatever grew on the biceps. That is impossible to grow in one day. Please do not be like a child.

One hand feels the inside of a hollowed tray on the bench. Each pass of the gouge is still readable as its own scallop, which is how you count the work.
Here is what I can give you instead of a number. Sometimes it is true, you spend a long stretch in just one small area. Literally one day, sometimes just one square inch. And you have to understand that in wood carving one day you carve only one inch, and another day you could finish one foot. So you really cannot go by foot and inch.

The background taken back to the pencil line, with bare walnut showing underneath. That new edge is still ragged and needs another pass.
Read the last sentence twice. When the inch is not a unit of time, any promise built on hours per project is a guess dressed up as a fact. Ask instead whether the piece got better today.
How do I carve faster this week without rushing?
Fix the three cheap causes in this order and your next evening changes. None of the five steps below asks you to move your hands faster. Speed at the bench comes from removing the stops.
Step 1, sharpen before you carve anything
Do the edge first, while you are fresh and patient. Five dollars of graded paper on a flat bench is plenty to begin with. When the tool starts fighting you halfway through the evening, go back to the paper. The lesson is not to overcomplicate anything. When it fights you, sharpen your tools, and skip the part where you sit asking what angle to attack from.

Nothing but fingertips on the last inch of a tiny gouge. At this size the hand supplies the pressure, and the shoulder stays out of it.
Step 2, draw the whole plan onto the wood
Every line, before the first chip. Pencil works, and marker on a sawn blank works better. Mark what comes off and what stays. Drawing first buys back all the time you would lose standing there deciding.
Step 3, hold the work still and grip the tool near the edge
Get the board held down so both hands are free. Then move your grip forward onto the steel, an inch from the edge. One hand drives while the other one brakes. Control comes out of that, and control is what makes a cut land right the first time.

The board turned on the diagonal, both hands on a small blade, and pale chips right across the bench.
Step 4, take a smaller cut than you want to
If you pry, you can break your tool. Take your time. Better to remove less in one cut than to break a really expensive tool. Check the grain and the direction you have to work in, and leave the big cuts alone. Little by little.
Step 5, practice on small pieces of wood
A lot of different techniques, chip carving among them, can be practiced just on small scraps. Even on an offcut that size, you still get a really good chance to build the ability to think in the three dimensional world. Nothing has to be finished this month.

A rosette blank on a pale board, one small tool in the hand and one gouge on the bench. Not a rack of thirty.
Work through those five in order and the evening stops leaking. My notes on how to improve your carving technique and the list of common mistakes beginners make pick up where this page stops. There is also a shorter list of mistakes to avoid at the bench.
What if I break the piece after hours of work?
A press is nearly always what does it, rather than a slice. Thin places are expensive places. An undercut gets more care from me than anything else.

A very thin gouge worked in under an overhanging edge marked out in black and red. This is the pass where a piece breaks.
Some rules for those minutes. Never lean on the work. Keep every bit of your weight off the piece. And when the grain runs the wrong way under a lip, expect the fibres to tear and plan a cleanup pass instead of forcing one perfect cut.

An open flower panel where the ribbons and stems are carved down to paper thickness. Nothing here would survive being pressed on.
A ribbon like that is hours of somebody's life, so I would rather lose a chip than lose the panel. The direction of the grain decides most of it, and handling different grain directions is worth more than any new gouge. Species matters as well. Read butternut against hard maple and white oak, treat the Janka hardness test as a rough hint, and see what Janka hardness means for a hand carver plus which woods are hard to carve.
Is slow the whole point of hand carving?
Slow is where the value comes from, and a machine number proves it. Carving on a CNC machine can take twenty hours, sometimes longer. The machine will run longer than twenty hours.
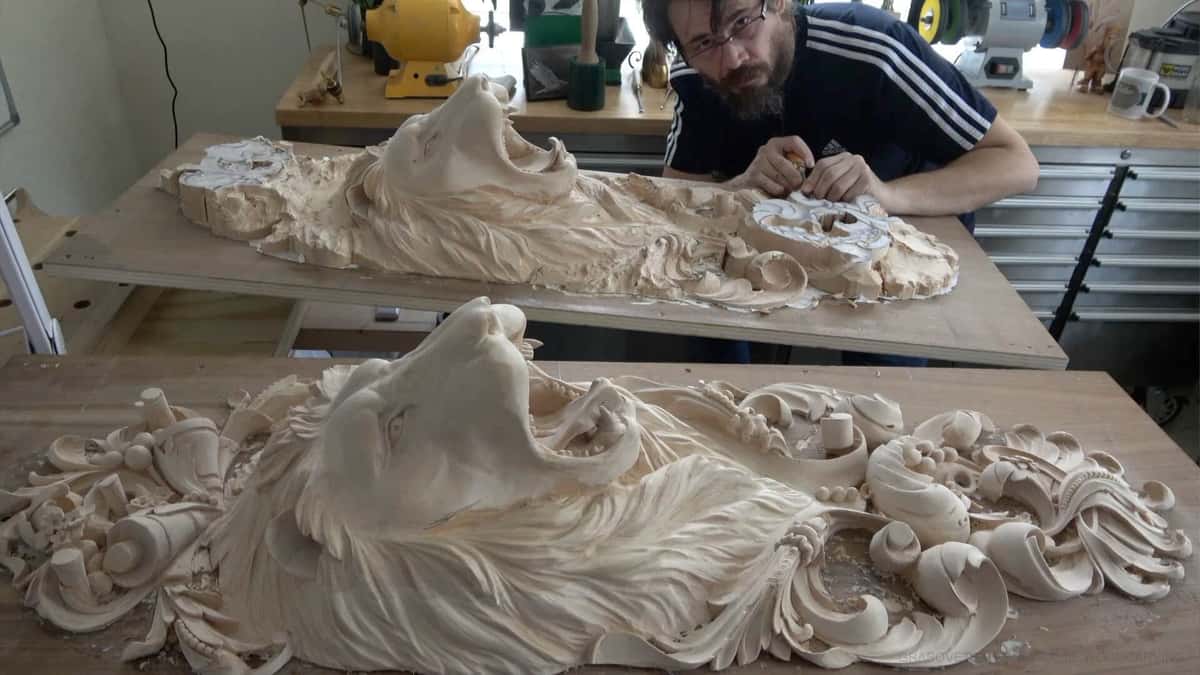
The finished lion head in front, and the same design still roughed out on the next bench behind it. The hours are visible in one photograph.
Exactly the same piece by hand is going to take you probably at least one month. And it is going to look a lot better. That gap is not waste, and the gap is why Grinling Gibbons still gets looked at three centuries on. Old wood carving outlives the men who paid for it.
When you see some imperfection, that is actually okay, because you are not a machine. You are not a CNC and you should not be. Make it like a human being did it, done by hand.
I know it takes time. But that is exactly what the old masters did. They took time, and only then does the work become really nice. You practice your patience, and there it is, the biggest secret in the whole craft. You can even find a red list of endangered crafts, and it is worth a look. For what patience produces, there is Fine Woodworking.
Once, a tool too small for the shape cost me ten years on one piece I could have finished in a month. Not because of the tool, to be fair. I had other projects sitting in front of it. Now I pick the widest gouge that the shape will take, every time. The Wood Handbook and its chapter on physical properties tell you what a board can survive.
Two more pages are worth your time. Whether wood carving is hard, and what the first year actually costs. Both start where basswood for carving starts.
The school is here when you want somebody at your shoulder while your hand learns the movement, and our First Cuts for Beginners course opens exactly where you are standing.
Frequently asked questions
Is it normal to spend a whole evening and finish almost nothing?
Completely normal. Some days go entirely on one small area. Literally one day, sometimes just one square inch. Judge the session by whether the surface got cleaner, never by how much ground you covered with a gouge. A cleaner surface beats a bigger one every time.
Which of the four causes should I attack first?
The edge, every time. Carving with a dull gouge means doing the same spot twice, which quietly doubles everything else you do. Fix it with graded sandpaper on a flat bench for about five dollars before buying a single new tool or a stone.
Will a shallow relief carving be quicker than a deep one?
People believe that, and shallow does not mean easier. A low relief still needs a drawn plan, a held board and a clean edge, so depth saves you almost no time at all. Shallow work can be harder, because a wobble has nowhere to hide.
Can anyone tell me the hours a beginner project needs?
Honestly, nobody can hand you that figure, and I will not pretend otherwise. Progress depends on you and only you. Ask me instead what your next hour should be spent on, and I can answer that one properly and in detail.
Do I need to buy a sharpening machine to keep up?
You do not need one. Different grit sandpaper from the hardware store, laid on a flat bench, was the very first thing my own master taught me. A powered wheel saves a working carver time each day, and it teaches you nothing paper cannot.
Does carving get faster, or do I just get used to slow?
Both, in a way. The stops disappear first, because a drawn plan and a sharp edge remove them. Then the movement turns automatic, the way handwriting stopped needing printed guide lines when you were small. Nobody arrives there in a week.
Filed under
- beginner carving project ideas
- beginner wood carving tools
- carving techniques for beginners
- choosing woods for easy carving
- how to choose the right wood
- how to improve wood carving speed
- how to stay safe while carving
- importance of practice in carving
- learning wood carving terminology
- patience in wood carving
- Safety tips for wood carving
- simple wood carving projects
- speeding up wood carving process
- types of wood for beginners
- understanding wood grain for carving
- what tools do beginner carvers need
- why is wood carving slow for beginners
- Wood Carving Basics
- wood carving for beginners guide
- wood carving mistakes to avoid