
September 6, 2024 · Updated August 19, 2026
By Alexander Grabovetskiy — Master Woodcarver · Founder, School of Wood Carving · 18 min read
How can I improve my wood carving technique?
Wood carving technique is three skills stacked in one order. Design first, then sharpening, then carving, and carving matters most. My teacher handed me paper and a pencil before he handed me a gouge. The US Forest Service prints the microbevel angle for a hand edge at about 25 degrees.

Look where this carver put his hands. Both are on the steel, an inch behind the edge, where a slip gets stopped early.
Your carving looks about the same as it did last spring. I know that feeling, and I know what most of us reach for first.
We buy something. A new gouge, a nicer board, a bench that does not rock. None of it moved me one step. What moved me was a master in Russia who sat me down with paper for a whole day before he let me near a leaf.
So this page carries his teaching, not tips. Three pillars in his order, real numbers, and one thing about basswood I still cannot explain after more than forty years.
- Pencil work comes before steel. Geometry is pillar one.
- An edge takes years to learn and there are no weekend shortcuts on offer, from me or from anybody else.
- Hours beat talent, so the third pillar is the biggest.
- Gibbons ornament turns every direction at once, which kills the beginner rule about grain.
- Leave it two days. Your eye recovers.
Why has my carving stopped getting better?
Time on the wood is the answer, and hardly anybody likes that answer. Everybody can be a master if you understand the process. Even seeing in 3D is a thing you build, and you build it by how long you spend on the work.
More you carve, more you see. Not just scratching wood. Deeper you go, deeper you see, and that never stops being true.

A whole class in one pair of gloved hands, and the thing that changed most was not the panel.
The famous hour count is a myth, though. You do not clock eight hours today and ten tomorrow, hit 9,999, and walk out a master. Robert Greene adds up an old apprenticeship in his book Mastery and lands past ten thousand hours. Reads tidy. Watch actual people, though, and some arrive a lot quicker while others need twenty thousand.
A second reason the work flattens has nothing to do with hours. You can learn a great deal on your own. It changes the day you set your piece beside your teacher's piece. He brought one of his carvings to me once and showed me what carving is supposed to look like, and I dropped my jaw. Until an eye has seen that, it carries no standard. I put down why the work takes so long at the start if that is the part biting you.
Which comes first, the drawing or the gouge?
Paper comes first, and my whole apprenticeship opened with a pencil. He started from just a piece of paper and a pencil, and he said, sit and draw something for carving. I spent all day long drawing acanthus movements, beautiful ones, in my opinion.
Design is not drawing on paper, though. It is the law of space. Rhythm, repetition, the way a curve carries your eye across a panel. He taught me to think like a tool.

No leaf in this frame at all. A box and a grid, and that grid already decides where every lobe will land.
Two spirals inside the ruled box. One line each, no thickness. I have drawn this exercise more times than I could count for you.
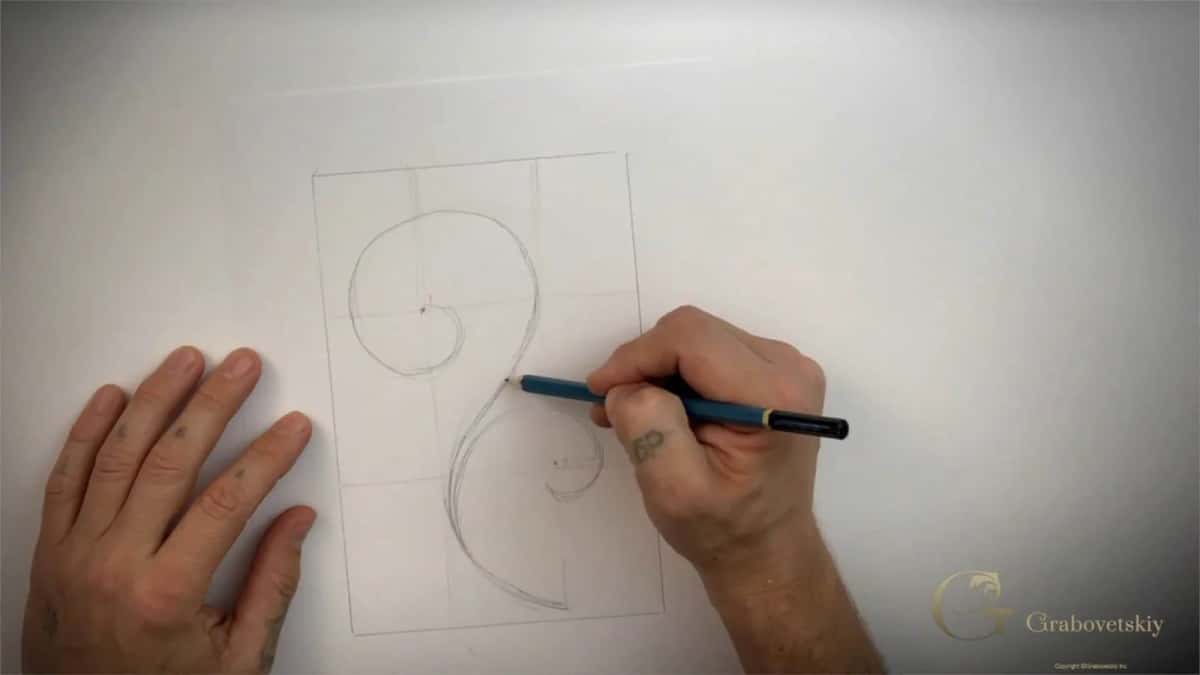
Those two curves are the spine of half the ornament in Europe.
Then the lobes go on, then the eye of the volute, then the ribs inside it. Same leaf, over and over. Because the drawing skills you need before you start are simpler than most people fear, I gave them their own page.

The grid still shows under this drawing, and I never erase it until the last minute.

Most students want to begin here. I am already half finished by this point in the work.
A class I taught at the Marc Adams school got a chalkboard instead of a handout. Rule of thirds down the left edge, movement written under it, and a grape cluster drawn inside its rectangle so everybody saw the geometry before anybody touched a board.

The board also carried the word Manganese and the number SVS-50.
How sharp does a gouge have to be?
Sharp enough that the edge reflects no light, and the US Forest Service prints that exact test in its own manual. Hold a honed edge up to a window. A dull one shows you a thin bright line where the steel rolled over.
For every complaint I brought him, my teacher had one answer. This wood is not good, I would tell him. It does not carve nice.
There is no such a thing as a bad wood, he would say. Only dull, not sharp tools. That is the whole problem.
He said it again years later, in a workshop where the wood was smushing under a gouge instead of coming off clean. Everybody blames the board in that moment. Nothing to do with the wood, he said. It is tools. You have to sharpen your tools.
Now the limit he put on his own line, which I keep because it is honest: of course some species are almost impossible to carve. He knew that. But if the complaint is about walnut or cherry or basswood and lime wood, the board is innocent and the tool is guilty.
Sharpening sits second and it is the hardest thing in this craft. It took me years. Anybody promising you a weekend is selling something.
Federal manuals put real numbers on edge geometry. The Forest Service sharpening guide grinds its double-bit ax to about 18 degrees on the clear-wood side, and up to 28 degrees on the side that goes through knots. A two-stage edge there runs about 18 degrees with a 25-degree microbevel. Different tool, same idea. Grinding the edge alone as it wears back destroys the profile behind it, that paper warns, and I have seen exactly that ruin good chisels.
The hand method in An Ax to Grind is worth copying at a carving bench. File both sides evenly until you feel a burr on the back. Work the other face until the burr goes back over. Hone with finer stones until the burr breaks off and the steel stops throwing light.

His stone lies next to the work instead of in a cupboard, and that one habit is why his facets stay clean.
One line in that manual says nothing about steel. Sharpening your own tool is mostly a matter of attitude, they write. Carvers who hand their gouges to somebody else never quite own them.

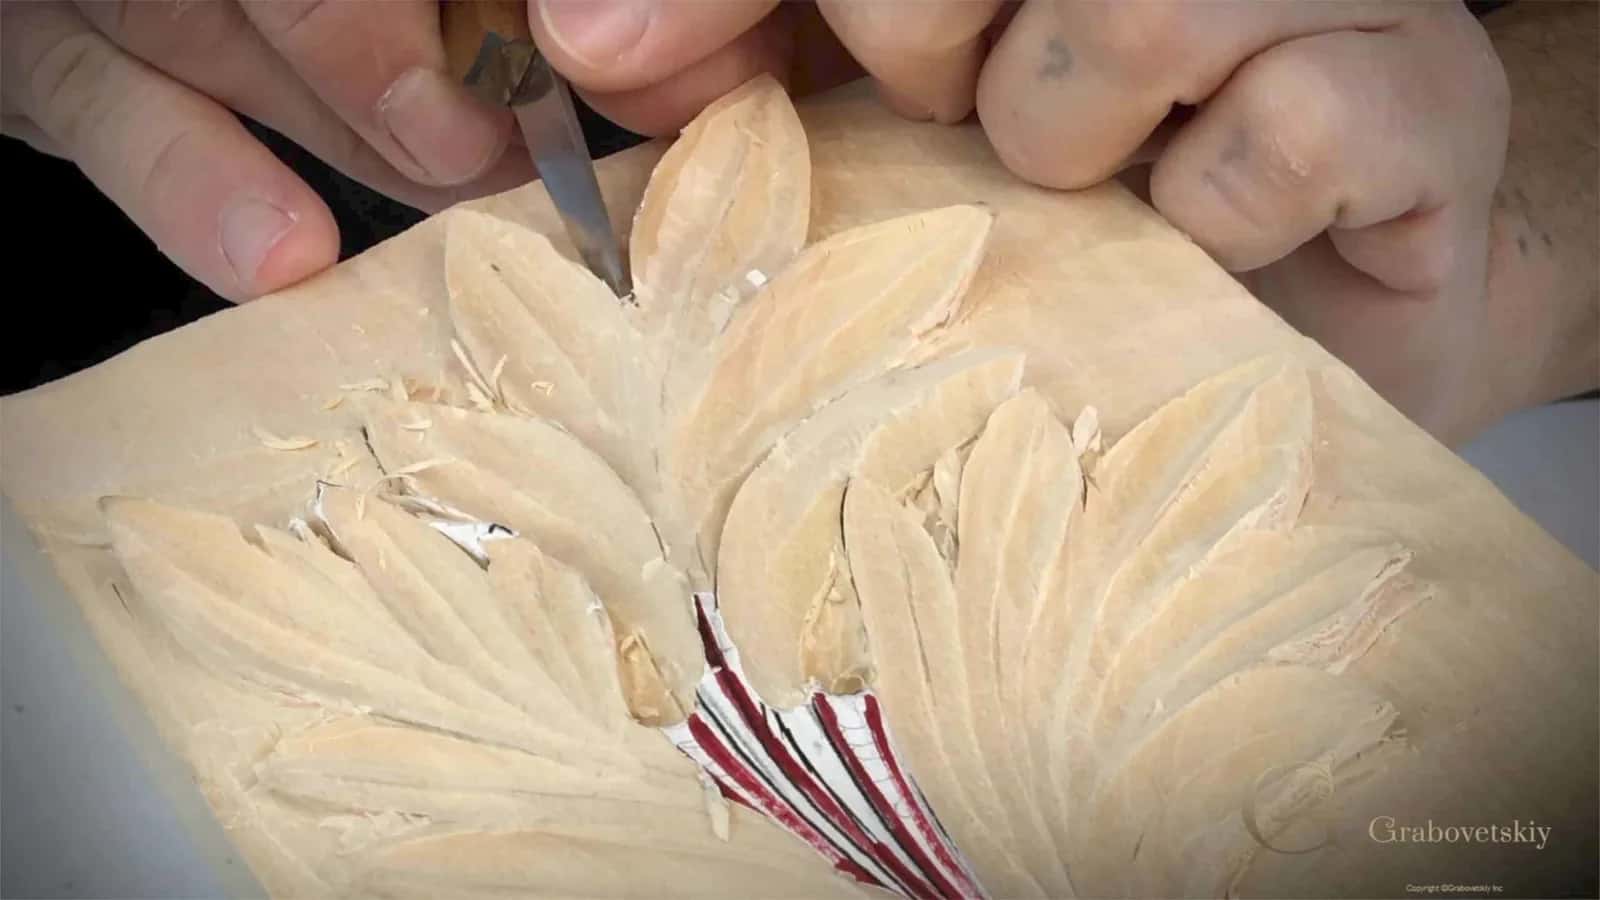
That shine on the lobe is not sanding. Nothing here has been sanded at all.
Here is the part I cannot explain, and I have stopped pretending otherwise. Teak carries up to 1.4 percent silica and blunts an edge hard because of it. Black locust at 48 pounds a cubic foot has its own moderate blunting effect, earned honestly by density. Basswood has none of that. Basswood reads 410 pounds of force on the Janka scale, smooth and clean under the tool, and the federal reference calls it soft, light and easy to work with tools. My gouges still go dull faster on basswood than on oak.

A riveted brown handle, running the channel between two lobes while shavings still hang on.
Do I have to carve with the grain?
In Grinling Gibbons work there is no such thing as carving with the grain. Absolutely not, and you have to attack from some angles.
Picture the leaf running one way, then turning, then turning again under your hand. How can anybody find the grain in that? Keep your tools sharp. Sharp is the only solution, and I mean the only one.

Every lobe on this leaf runs a different direction, which is exactly why the beginner rule breaks here.
All of that sounds reckless until you price what the grain actually charges you. A 2020 study in the journal Materials measured five species at a grain slope of just 15 degrees. Strength fell off a cliff. Ash lost 60 percent of it, hickory 56 percent, beech and maple around 45 percent each, elm 38 percent. Energy absorption dropped by more than half in every species tested.
So the grain still rules a board. What changes in ornament is that obedience is not available, since the leaf turns and the fibers refuse to turn with it. A sharp edge buys the pass instead. Two pages here cover the argument from both sides, one on carving in the direction of the grain and one on grain that changes direction under a gouge. They do not contradict each other.

One board, one leaf, and a batten holding it down while I work the outside edge.
What has to happen in one hour at the bench?
An hour needs a goal you can name, a way to see whether you hit it, and the same acanthus leaf waiting for you tomorrow. None of that is my opinion. People have measured it.
A 2021 paper in Frontiers in Sports and Active Living lists the conditions that make practice count: a clear goal you understand, work you can do alone, feedback right away telling you what to change. Add a task you can repeat, plus a teacher shaping the whole thing. Hold that list against a normal Tuesday evening in a home shop. Usually the feedback is the one missing.
| What somebody actually measured | The number they printed, straight off the page | Where the figure was published | What I actually changed at my own bench after I read it |
|---|---|---|---|
| Twenty minutes a day, three days running, on a small task needing both hands | The maze score moved from 0.65 to 0.81 | Frontiers in Human Neuroscience, 2024 | Short daily sittings beat one long Saturday, every single time |
| Practice run inside your head, no tool | The review itself puts that gain at an effect size of 0.43 | A systematic review in the journal BMC Medical Education | I walk the whole pass through in my head before the gouge lands |
| Feedback held back until the attempt is over | 0.94, the larger of the two effects this review put a number on | The same review, new task | Let the student finish the lobe, then say something |
| Any feedback at all against none | 10 of 13 studies, 76.9 percent of them, found that it worked | Reviewed across 23 studies | A photograph of your own panel counts as feedback, and it costs you nothing at all |
| One touch cue given during a repeated box lift | 5.6 degrees less spinal bend | The same 2021 Frontiers pilot, twenty adults each lifting a box of 7.5 kilograms | Touch beats talking |
Two of those rows are worth your evening. The review in BMC Medical Education found feedback held until an attempt ends, rather than shouted through it, carried the larger of its two measured effects. Random practice beat blocked practice there too. A separate review of 23 studies put feedback ahead of none in 10 papers out of 13, with the authors honest enough to add that most of those papers were weak. Three days of 20 minutes each moved a two-handed skill, and the clearest gain landed on day three.

An open notebook beside the work is the cheapest feedback loop a shop can have.
One warning about study, though. Read as many articles as you want. Watch the videos. Read the books with all the scientific approach in them, how to position your hands, what your legs are supposed to be doing. When I was young I spent almost every day on the river, and the way we learned to swim was simple enough: we jumped in the water and started doing it.
Most of an hour of me working through tools and technique while people ask questions, if you would rather watch somebody do it.

Reference on the right, wood in the middle, and his eyes going back and forth between them.
How do I practice the same leaf without going crazy?
Run it as a loop of five steps and change one thing each time around. This is close to what my teacher put me through, and it is what I set in front of a class.
Step 1, draw the leaf full size on paper
Box first, then the grid, then the spirals, then the lobes. Nothing gets scaled later. No amount of good carving will rescue a drawing that was wrong to begin with.
Step 2, rub the drawing down onto a scrap of basswood
Clip the sheet to the board and burnish the back of it. Scrap is the point here. You will carve this leaf again next week, so nothing about this board deserves to be precious.

Drawing and carving on one bench, which is the whole argument of this page in a single photograph.
Step 3, hone every tool you plan to touch it with
All of them, before the first pass, not when the wood starts smushing. Take the burr off. Hold each edge to the light and look for that bright line.

Both forearms in frame, one thumb pinning the sheet, a small burnisher doing the transfer.
Step 4, carve it in one sitting and stop when it stops going well
One sitting keeps the shape in your head. The moment your passes turn ugly, put the tool down. Tired hands teach your hands the wrong lesson, and unlearning it is expensive.

His eye is almost level with the board, and there is a nail on the bench among the pencils.
Step 5, shelve it for two days, then mark it up in pencil
Come back cold and circle everything wrong. Draw the leaf again. Start over. Five turns of that loop will do more for you than five different projects, and I would rather teach the fifth leaf than the first.

Six or eight tools within reach, three big Swiss ones in front, every one doing something a rotary bit cannot.
Does a mallet make my carving better or worse?
A mallet gives you control, which is the opposite of what most beginners assume. I did not use mine for a long time. Pushing seemed like enough.
Pushing forces your whole body into the tool. Momentum builds behind the edge, and that carving can slide on through and wreck the detail sitting next to it. Tiredness arrives much faster too. With a mallet I control a lot better.

Those grapes are still lumps at this stage, and the mallet stands in a bench hole waiting its turn.
Grip is where people hurt themselves. Never swing your whole body, or even your whole arm. Palm only. Using your palm keeps the stress out of your arm and your hand and your shoulder. All day long, that difference finds you. It gets to you. I am not gripping hard at all, and all I am really doing is letting the mallet do the work.

Colored tape on the handles so a hand finds the right tool without the eyes leaving the wood.
OSHA is blunt about the stakes. Hand tools cause severe injuries when they are used or maintained improperly, so a dull gouge is a safety problem too. Their list of what repetitive hand work does to people reads like a carver's complaint file: carpal tunnel syndrome, tendinitis, rotator cuff injuries, trigger finger, plain muscle strain. Every one preventable, they say. Worth reading beside the real dangers at a carving bench and the federal woodworking pages.

The hand that holds the work is doing as much thinking as the hand that carves.
When will my hands know the carving without me thinking?
Faster than you expect on one shape, and never on all of them. When I started carving as a trade, my teacher had me repeat one kind of carving many, many times.
One tool. Repetition with a single tool trains your hands and your brain together. Feeling how deep the knife goes takes time, especially on a straight-down carving. When you begin straight down and finish on the bevel, you have to build the feel inside yourself for the moment the movement turns. Not as easy as it looks.

Twenty tools in a row, and the point of laying them out that way is finding one without looking.
David Esterly, the carver who recarved a lost Grinling Gibbons overmantel at Hampton Court, put this into one line in his book The Lost Carving.
"You have to take the pulse of the chisel as it cuts."
Pulse is the right word for it. Fibers give way ahead of a sharp edge and you feel every one of them. Dull steel tells you nothing, and that is how the second pillar keeps eating the third. Still choosing tools? I put down what to look for in a first set of tools, and there is a longer pass through the tools themselves in the course library.

He knelt to get his eye level with the surface, which is how you catch a lump the light hides.
Will I ever be happy with a finished carving?
Probably not, and my teacher called that the good news. If you look at your work and you think it is done and you like it, he told me, you are not an artist anymore. A true artist still does not like what he sees in front of him.
Your work is never going to be finished. Never. Keep going and going and you will still find things to refine, art never ends, and a piece is finished at the moment you decide it is.
One free habit falls out of that. While you carve, your eye adjusts to what it keeps seeing. Put the piece down for a couple of days, work on a different carving, then come back to it. Every mistake your eye had smoothed over stands up and waves at you. People ask me why I leave some spots rough. Imperfections will still be waiting, and they surface faster after a few days away than by staring at the thing today. Coming back cold is also how the mistakes beginners make stop being permanent.

Those curved racks are signed by year, one from the summer of 1998. A class repeated until it turned into a place.
Have you ever set a gouge down because the wood tore instead of slicing? Do you own more tools than you can honestly keep honed? Would you rather have somebody stand behind you and show you the pass than guess at it for another year? Then take the three pillars in that order, and give the first hour to paper.
The whole path is built that way inside the course library, drawing through finished panel, with the sharpening workshops sitting where my teacher put them and the technique workshops after. Never carved anything yet? Then how to start learning is the shorter road in, and the honest reasons carving is difficult will not talk you out of it. The list of what you actually need is shorter than the internet says.
I would rather you carve one acanthus leaf twenty times than twenty projects once.
Frequently asked questions
How long does it take to improve a wood carving technique?
Quicker than most people fear on one shape. Three days of 20 minutes each moved a two-handed skill in a 2024 study, and the clearest gain came on day three. A whole leaf carved cleanly takes longer than that, and my honest answer there is months of short sittings.
What should I practice if I only have 20 minutes a day?
Draw for ten and carve for ten. Same acanthus leaf, same scrap of basswood, one change per session. Twenty focused minutes with a goal you can name will beat two unplanned hours, and the research on practice conditions says the same thing in duller language.
Do I need to sharpen before every carving session?
Hone before, and again during. My gouges go dull on basswood faster than on oak, which still makes no sense to me, so a stone lives on my bench rather than in a cupboard. Grind rarely. Hone constantly. Clean facets and fuzzy ones differ by about a minute of work.
Is basswood the best wood to practice technique on?
Basswood is where I send everybody first. The federal wood handbook calls it soft, light, fine in texture and easy to work with tools, and it reads only 410 pounds of force on the Janka hardness scale. Cherry and walnut hold fine detail better, but they punish a blunt edge.
How do I know my gouge is sharp enough to carve?
Turn the edge toward a window. A sharp one reflects no light at all, and that test comes out of the Forest Service sharpening manual. A dull edge answers with a thin bright line. Your ears help as well, since sharp steel slices quietly while blunt steel tears.
Can I learn carving technique from videos alone?
Partly, and then it stalls. Learning alone works well until you set your piece beside a real one, and then you see what your eye had no standard for. Feedback held until an attempt ends carried the larger of the two effects that review put a number on.