

Alexander Grabovetskiy, woodcarver, School of Woodcarving · Published 2020
What does eliminate mean when a wood carver says it?
Quick answer: In part 4 of Venice Room 41, I wanted a part of my carving to come in closer, so I could eliminate the voids I don't need. Other lessons of mine use the same word for a line in a design, for the facets a tool leaves, and for a sound from the tool.
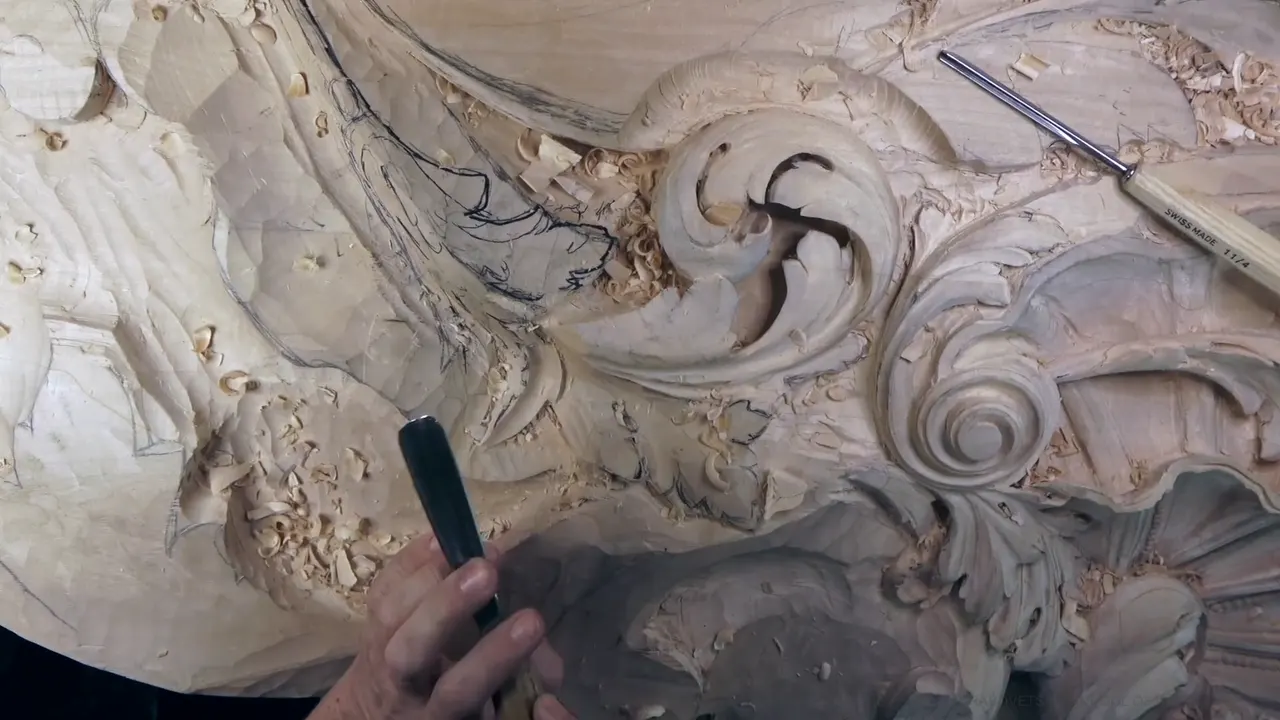

In part 4 of Venice Room 41, I said that a part of my carving could go even closer: "That way, I can eliminate voids which I don't need." That word turns up in other lessons of mine, for a line in a design, for the marks a tool leaves and for a sound. Below are the places.
Ever looked at a carving and found a spot that does nothing for the rest of it? Each place below shows a spot like that.
Which part did I plan to take out in part 4?
Part 4 starts at the strop. "I don't usually use a hand stropper because it's just longer." I just go to the machine, and with the machine I get a much quicker result. The edge is sharp again, and it doesn't leave any trails. Maybe a little. Then: "It's a beautiful and clean cut."
My plan was to jump on another side and develop the idea of what I want to see right there. Originally I had this one a little shorter. Maybe I should make it much longer, I said, and create something beautiful, which in this case is possible. Then came the line: "Maybe I going to eliminate this part, and I get just that."

One part would rotate, moving like a leaf where one of the parts rotates. It would be concave and go underneath of this. It also had to look organic with overall movement, and I think it does. Then a part of it can go even closer. "I can eliminate the voids, so this has to be gone, this has to be gone."

Let me outline first outside, I said. Then I apologized for talking a little slower when I'm in development mode. I'm just thinking, and I'm thinking out loud. Nobody is in my shop while I'm working, and the only people hearing me are you, on a camera. Please understand, you see the creation process.
What did taking it down give me?
A chance to create even more three-dimensional movement, which solved the problem of too many empty spots. I think it will give me the chance to create a beautiful moment.
Two lines sit close together in this part. "I do not want to lose this part, and it's going to go around like that." Then: "Just want to make sure I'm not taking what I don't have to take." Flipping a piece above, like that, is also in the plan. A little later came: "And that can be gone."

After the flip came a small plan: "Let me fix a little bit this part. Not fix, but just clean it." The reason followed: losing the idea is what I don't want. Further on: "That can go all the way."
Why did a long bevel make me swap tools in part 4?
When I push that down, sometimes it just stops, and you can hear that squeak. I called it a stopping point, and it was no squeak. On this tool I have a really long bevel, which pretty much creates it for straight passes. If I crank like that, it creates that effect. Force it too much and I can break the tool, because I have almost no metal at the end.

Some of my tools have a long bevel and some a higher bevel, and it all depends on the job I'm doing right now. A bevel this long I wouldn't use on a hardwood, because you can break the tool, and it's easy to break.
Next I said let me use a different number 7 with a little smaller bevel. "See, that's much better, and I don't have that same effect." It's still kind of long, but not as long. A shorter one would suit this job even better, I said, but it's okay.

Other parts of workshop 41 give sizes. Part 3 has a number 7 of approximately half an inch, 14 millimeters to be exact (0.55 in), and in part 5 a downhill pass starts with the bigger number 11, 18 millimeters, almost three-quarter of an inch (0.71 in). Almost all of my tools have a long bevel, as I explain in the Maine sharpening class.
Can you take a part out of a design on purpose?
A T-stop comes up in Furniture Panel 14. "Now I need to kind of eliminate my T-stop." I did not want a T-stop like this, because the movement is supposed to go like this. My movement needs to go like that. That is the main boundary.

Later in that lesson I said I have to take one piece down, to eliminate that line. "I'm going to eliminate that molding, but I still want to keep this line." Only that stretch of molding goes away. Then: "And now I need to fill that space." I kind of like the idea of a flipping backward acanthus there, going underneath.
A flower in Furniture Panel 20 gets the same treatment. With the pencil, I had not placed the final line. I planned to eliminate a line which belongs to this part of a flower. One way is a separation, or this part carries on and that part goes underneath, making crisscrossing, which is not what I want to do. That is going to be a part of this extension, and it goes to that flower. That's how I envision.
Venice Room 63 is the oddest case. My idea was to hide a chunk somehow. "Not really hide, but to eliminate that extra detail without eliminating it." Again, a number 11, 3 millimeters (0.12 in). I would carve like this. What happens now: I created that small eye, a small eye of acanthus. From every eye I need the pipe.

Rounding comes first in Venice Room 64: I round it, then "I can eliminate that middle." Get it somewhat clean, I said, and my pipe will go all the way to that moment. Later there is a wall: "So I need to eliminate that." I would use a number two back bent, six millimeters, quarter inch. I planned to carve in carefully. It's against the grain, but that's okay.

Flutes come up in Venice Room 79, most of them hidden. "I even don't know why I use those flutes. Maybe I should eliminate them." Then: "But I guess it's all right."
Over in Venice Room 99, I thought about eliminating one element completely and leaving two, so it's more or less like Fibonacci. "I added this one, and now I am removing it. That's called just a process." I wanted some open spot, open space, because otherwise it just doesn't look too good.

Venice Room 59 is challenging; I created that problem, I said, because I designed it that way. "I could eliminate that, but then it would be too easy, and I don't want to make it too easy." A limit sits in Venice Room 73. Pulling that piece toward the edge would eliminate that limitation. I passed on it: "Just too much movements."
How do I take marks and facets out of the wood?
A bigger number 5 comes out in Venice Room 58. My plan was to see if it would grab some of the stuff. A bigger tool, I said, is how I will eliminate the lots of carving marks, tool marks, facets. It gives me a really long, consistent pass, and a beautiful one.

Small passes come first, with the smaller tools, and then a bigger tool blends everything. With the bigger tool you can eliminate absolutely almost all of those tool marks, so you don't even need any sandpaper. It's almost there, I said, but I need to clean a little bit in that direction against the grain.
In Venice Room 67 I use a number 6 spoon, about 12 millimeters (0.47 in). "Later on, I'm going to attack that with a bigger tool, like one inch or so, to eliminate too many facets, tool marks." That bigger one is 25 mm. Cleaning this area was on the list too, I said, but it could be done a little later.
The Byzantine acanthus lesson: "Try the best to eliminate all the facets. Not all of it, but most of them." And if you can't, it's okay. Because of the limitation of the straight tool, it's going to dig in. For me, it's better to use the normal position and a movement like a rotation, with the slicing tool and the movement overall. Little by little, but much quicker, I'm taking out those facets.

Facets go slowly in the Grape onlay lesson. "I just eliminates it." One facet. Let me do another facet, I said. It takes a long time, at least for me, and I'm barely removing any material. I make a first pass and then a second pass, like micro, micro movements. By that technique you can make it look completely sanded. See right there, zero facets left.

A router plane leaves jump marks, I said in Furniture Panel 19. A vibration comes when the tool gives resistance, and that creates the marks. You have a couple of choices to eliminate them. My preferred way is a scraper, and I like a number nine Swiss-made chip carving knife for it, a really thick one. Don't overdo it, because even with a scraper you're still taking some material.

For marks on the background, see Furniture Panel 18. "Although there is a way to eliminate them, but some of them you really can't eliminate."
Which problems does a tool choice take away?
For softer woods, make sure your bevel is low enough and your knuckles almost touch the wood, I said in the Maine class. Then you're solving two problems. One problem: you're not going to get pain or get tired in your shoulder and elbow. "So you eliminate that problem, physical problem." Carving all day long is possible with the tools at a really low bevel. Bevel is a wedge, I said, and a high one causes lots of resistance.
A flat wheel takes away more. It eliminates the second problem, because it won't create any more of that curvature, and it eliminates the problem with overheating, because it's slow enough and safe. It takes one second to change the grit, and I can take it from 80 grit to 6,000 in a matter of minutes.

The stropping lesson has a micro arch that you create, "and that way, you are eliminating roundness." Inside bevels come up in Venice Room 61: "I want to eliminate that roundness." A ceramic stone was a little too big there, so I said I've got to use a leather.

A sound is the problem in Lily Box 11. You heard it at the beginning, like a cranking, because I was using the tool without any slicing motion. Start closer to the center, move outward while you carve, and "you should eliminate that sound." I'm okay with it at the beginning, if I need to remove a lot more.

Sharpness comes up in Floral and Molding 1. A lot of success, I said, depends on the sharpness of your tools, and also it will eliminate the frustration. A tool that grabs material and carves away leaves a really smooth surface, and it brings you joy. One that just rubs leaves a lot of marks and a lot of resistance.
Same tools all the time can get you bored, I said in Greek Acanthus 13. Working the same task with different tools trains you to use them, and "you just eliminate the boredom." One more tool, in lesson 19 of the Furniture Panel course: "The idea of this tool is actually to eliminate the need of multiple tools." A lot of operations are possible with it. It's almost like a knife.

Roman Acanthus 5 brings a question: can I eliminate the shakiness of the table? Probably, yes, with a really solid, unshakable workbench, and that would probably eliminate the problem. But for me it is not the problem at all, and I use this vise on all of my pieces, big and small.
Chipping is the worry in the Antique Style Rosette workshop 2. One section will be just chipping out, which I can't allow. To eliminate that, I said, I would use a small gouge, number nine, for a relief cut really close to the inner line. I can't go too deep, because I have to be consistent with my background, which is an eighth of an inch (3.2 mm).
Hazelnuts 3 has a problem I made myself. I cannot eliminate that problem I just created, I said, so I can probably excavate that part.

The Maine Gibbons class has this line: "I don't want to eliminate them completely because I still want to see some movement."

Where did I say it, and what did I want gone?
Here is that word, side by side, in the lessons I named.
| Lesson | What I wanted gone from the carving | My answer to it |
|---|---|---|
| Workshop 41 | Voids I did not need | A part pulled closer, and another part gone |
| Furniture panel 14 | A T-stop and a stretch of molding | A line carried on, and a flipping acanthus planned for the gap |
| Venice 63 | An extra detail | A 3 mm (0.12 in) number 11 and a small eye |
| Workshop 58 | Facets and tool marks | One tool bigger, to blend everything together |
| Furniture panel 19 | Jump marks from a router plane | A thick Swiss-made knife as a scraper |
| Maine sharpening class | Pain, and a tired shoulder and elbow | Bevel low enough for softer woods |
| Lily box 11 | A cranking sound | A slicing motion from the center out |
Where can you watch each of these lessons?
Each one sits inside a course of mine, and Venice Room Part 4 holds workshops 38 to 49. Every course is one click away if you start here.

How it's done
- Look at the voids. A part of the carving can go closer, and that takes the voids out.
- Name the part that goes. Further on in part 4, I named another part that could go.
- Clean, do not fix. Not fix, but just clean it, I said, so the idea stays.
- Blend with a bigger tool. Small passes come first with the smaller tools, and a bigger tool blends everything.
- Check the bevel. Swap to a tool with a little smaller bevel, as I did in part 4.
Frequently asked questions
Which part did I plan to remove in part 4?
Maybe this part, I said, and I get just that. Later I said a part of it can go closer, and the voids go with it. Another part could go too, I said.
How did I take tool marks out in Venice Room 58?
I reached for a larger tool, a number 5, to blend what the smaller ones left. My reason was the lots of carving marks, tool marks and facets, and I get a really long, consistent pass.
What did the Maine class say about a low bevel?
With softer woods, a low bevel and knuckles almost touching the wood mean no pain and no tired shoulder or elbow. I call that eliminating a physical problem, and carving all day long becomes possible.
What to carve next